


前提:需要有springSecurity,mybatis-plus,vue,redis等知识,对springSecurity执行流程有点了解
需要代码可评论获取
首先先创建vue项目,创建好之后,下载axios,element-ui,将其目录使用idea打开,在项目里创建springboot工程,创建目录vue,把前端有关的全部放入目录vue中。效果如下:

先写前端登录页面(具体代码需要的可私信我),效果如下

现在编写后端,首先引入需要的依赖
<?xml version="1.0" encoding="UTF-8"?>
<project xmlns="http://maven.apache.org/POM/4.0.0" xmlns:xsi="http://www.w3.org/2001/XMLSchema-instance"
         xsi:schemaLocation="http://maven.apache.org/POM/4.0.0 https://maven.apache.org/xsd/maven-4.0.0.xsd">
  <modelVersion>4.0.0</modelVersion>
  <parent>
    <groupId>org.springframework.boot</groupId>
    <artifactId>spring-boot-starter-parent</artifactId>
    <version>2.5.0</version>
    <relativePath/> <!-- lookup parent from repository -->
  </parent>
  <groupId>com.security</groupId>
  <artifactId>security</artifactId>
  <version>0.0.1-SNAPSHOT</version>
  <name>security</name>
  <description>Demo project for Spring Boot</description>
  <properties>
    <java.version>1.8</java.version>
  </properties>
  <dependencies>
<!--    springSecurity依赖-->
    <dependency>
      <groupId>org.springframework.boot</groupId>
      <artifactId>spring-boot-starter-security</artifactId>
    </dependency>
<!--   web -->
    <dependency>
      <groupId>org.springframework.boot</groupId>
      <artifactId>spring-boot-starter-web</artifactId>
    </dependency>
    <dependency>
      <groupId>org.springframework.boot</groupId>
      <artifactId>spring-boot-devtools</artifactId>
      <scope>runtime</scope>
      <optional>true</optional>
    </dependency>
    <dependency>
      <groupId>mysql</groupId>
      <artifactId>mysql-connector-java</artifactId>
      <scope>runtime</scope>
    </dependency>
    <dependency>
      <groupId>org.springframework.boot</groupId>
      <artifactId>spring-boot-configuration-processor</artifactId>
      <optional>true</optional>
    </dependency>
    <dependency>
      <groupId>org.projectlombok</groupId>
      <artifactId>lombok</artifactId>
      <optional>true</optional>
    </dependency>
    <dependency>
      <groupId>org.springframework.boot</groupId>
      <artifactId>spring-boot-starter-test</artifactId>
      <scope>test</scope>
    </dependency>
    <dependency>
      <groupId>org.springframework.security</groupId>
      <artifactId>spring-security-test</artifactId>
      <scope>test</scope>
    </dependency>
    <!--        redis依赖-->
    <dependency>
      <groupId>org.springframework.boot</groupId>
      <artifactId>spring-boot-starter-data-redis</artifactId>
    </dependency>
    <!--        fastjson依赖-->
    <dependency>
      <groupId>com.alibaba</groupId>
      <artifactId>fastjson</artifactId>
      <version>1.2.60</version>
    </dependency>
    <!--        jwt依赖-->
    <dependency>
      <groupId>io.jsonwebtoken</groupId>
      <artifactId>jjwt</artifactId>
      <version>0.9.0</version>
    </dependency>
    <!--     	引入MybatisPuls依赖-->
    <dependency>
      <groupId>com.baomidou</groupId>
      <artifactId>mybatis-plus-boot-starter</artifactId>
      <version>3.5.2</version>
    </dependency>
    <!--   mybatis-plus自动代码生成器1      -->
    <dependency>
      <groupId>com.baomidou</groupId>
      <artifactId>mybatis-plus-generator</artifactId>
      <version>3.5.1</version>
    </dependency>
    <!--   mybatis-plus自动代码生成器2      -->
    <dependency>
      <groupId>org.freemarker</groupId>
      <artifactId>freemarker</artifactId>
      <version>2.3.31</version>
    </dependency>
  </dependencies>

  <build>
    <plugins>
      <plugin>
        <groupId>org.springframework.boot</groupId>
        <artifactId>spring-boot-maven-plugin</artifactId>
        <configuration>
          <excludes>
            <exclude>
              <groupId>org.projectlombok</groupId>
              <artifactId>lombok</artifactId>
            </exclude>
          </excludes>
        </configuration>
      </plugin>
    </plugins>
  </build>

</project>
在数据库中简单写个user表

在测试类中编写mybatis-plus一键生成策略(生成对应的mapper,entity,service,controller,记得在mapper文件上注解@Mapper 【具体实现看我写的mybatis-plus一键生成。。。】)
 public static void main(String[] args) {
        FastAutoGenerator.create("jdbc:mysql://localhost:3306/security_vue?serverTimezone=GMT%2B8", "root", "root")
                .globalConfig(builder -> {
                    builder.author("黄隆") // 设置作者
                            //.enableSwagger() // 开启 swagger 模式
//                            .fileOverride() // 覆盖已生成文件
                            .outputDir("D:\\springSecurity\\springSecurity-vue\\security_vue\\security\\src\\main\\java"); // 指定输出目录
                })
                .packageConfig(builder -> {
                    builder.parent("com.security") // 设置父包名
                            .moduleName("") // 设置父包模块名
                            .pathInfo(Collections.singletonMap(OutputFile.mapperXml, "D:\\springSecurity\\springSecurity-vue\\security_vue\\security\\src\\main\\resources\\mapper")); // 设置mapperXml生成路径
                })
                .strategyConfig(builder -> {
                    builder.addInclude("sv_user") // 设置需要生成的表名
                            .addTablePrefix("sv_"); // 设置过滤表前缀
                })
                .templateEngine(new FreemarkerTemplateEngine()) // 使用Freemarker引擎模板,默认的是Velocity引擎模板
                .execute();
    }
需要几个封装类和redis解决乱码和序列化类 跨域配置
WebUtil
package com.security.utils;

import javax.servlet.http.HttpServletResponse;
import java.io.IOException;

/**
 * 封装响应
 */
public class WebUtil {
    /**
     * 将字符串渲染到客户端
     *
     * @param response 渲染对象
     * @param string 待渲染的字符串
     * @return null
     */
    public static String renderString(HttpServletResponse response, String string) {
        try
        {
            response.setStatus(200);
            response.setContentType("application/json");
            response.setCharacterEncoding("utf-8");
            response.getWriter().print(string);
        }
        catch (IOException e)
        {
            e.printStackTrace();
        }
        return null;
    }
}
redisUtil
package com.security.utils;


import org.springframework.beans.factory.annotation.Autowired;
import org.springframework.data.redis.core.BoundSetOperations;
import org.springframework.data.redis.core.HashOperations;
import org.springframework.data.redis.core.RedisTemplate;
import org.springframework.data.redis.core.ValueOperations;
import org.springframework.stereotype.Component;

import java.util.*;
import java.util.concurrent.TimeUnit;

@Component
public class RedisUtil {
    @Autowired
    public RedisTemplate redisTemplate;

    /**
     * 缓存基本的对象,Integer、String、实体类等
     *
     * @param key 缓存的键值
     * @param value 缓存的值
     */
    public <T> void setCacheObject(final String key, final T value)
    {
        redisTemplate.opsForValue().set(key, value);
    }

    /**
     * 缓存基本的对象,Integer、String、实体类等
     *
     * @param key 缓存的键值
     * @param value 缓存的值
     * @param timeout 时间
     * @param timeUnit 时间颗粒度
     */
    public <T> void setCacheObject(final String key, final T value, final Integer timeout, final TimeUnit timeUnit)
    {
        redisTemplate.opsForValue().set(key, value, timeout, timeUnit);
    }

    /**
     * 设置有效时间
     *
     * @param key Redis键
     * @param timeout 超时时间
     * @return true=设置成功;false=设置失败
     */
    public boolean expire(final String key, final long timeout)
    {
        return expire(key, timeout, TimeUnit.SECONDS);
    }

    /**
     * 设置有效时间
     *
     * @param key Redis键
     * @param timeout 超时时间
     * @param unit 时间单位
     * @return true=设置成功;false=设置失败
     */
    public boolean expire(final String key, final long timeout, final TimeUnit unit)
    {
        return redisTemplate.expire(key, timeout, unit);
    }

    /**
     * 获得缓存的基本对象。
     *
     * @param key 缓存键值
     * @return 缓存键值对应的数据
     */
    public <T> T getCacheObject(final String key)
    {
        ValueOperations<String, T> operation = redisTemplate.opsForValue();
        return operation.get(key);
    }

    /**
     * 删除单个对象
     *
     * @param key
     */
    public boolean deleteObject(final String key)
    {
        return redisTemplate.delete(key);
    }

    /**
     * 删除集合对象
     *
     * @param collection 多个对象
     * @return
     */
    public long deleteObject(final Collection collection)
    {
        return redisTemplate.delete(collection);
    }

    /**
     * 缓存List数据
     *
     * @param key 缓存的键值
     * @param dataList 待缓存的List数据
     * @return 缓存的对象
     */
    public <T> long setCacheList(final String key, final List<T> dataList)
    {
        Long count = redisTemplate.opsForList().rightPushAll(key, dataList);
        return count == null ? 0 : count;
    }

    /**
     * 获得缓存的list对象
     *
     * @param key 缓存的键值
     * @return 缓存键值对应的数据
     */
    public <T> List<T> getCacheList(final String key)
    {
        return redisTemplate.opsForList().range(key, 0, -1);
    }

    /**
     * 缓存Set
     *
     * @param key 缓存键值
     * @param dataSet 缓存的数据
     * @return 缓存数据的对象
     */
    public <T> BoundSetOperations<String, T> setCacheSet(final String key, final Set<T> dataSet)
    {
        BoundSetOperations<String, T> setOperation = redisTemplate.boundSetOps(key);
        Iterator<T> it = dataSet.iterator();
        while (it.hasNext())
        {
            setOperation.add(it.next());
        }
        return setOperation;
    }

    /**
     * 获得缓存的set
     *
     * @param key
     * @return
     */
    public <T> Set<T> getCacheSet(final String key)
    {
        return redisTemplate.opsForSet().members(key);
    }

    /**
     * 缓存Map
     *
     * @param key
     * @param dataMap
     */
    public <T> void setCacheMap(final String key, final Map<String, T> dataMap)
    {
        if (dataMap != null) {
            redisTemplate.opsForHash().putAll(key, dataMap);
        }
    }

    /**
     * 获得缓存的Map
     *
     * @param key
     * @return
     */
    public <T> Map<String, T> getCacheMap(final String key)
    {
        return redisTemplate.opsForHash().entries(key);
    }

    /**
     * 往Hash中存入数据
     *
     * @param key Redis键
     * @param hKey Hash键
     * @param value 值
     */
    public <T> void setCacheMapValue(final String key, final String hKey, final T value)
    {
        redisTemplate.opsForHash().put(key, hKey, value);
    }

    /**
     * 获取Hash中的数据
     *
     * @param key Redis键
     * @param hKey Hash键
     * @return Hash中的对象
     */
    public <T> T getCacheMapValue(final String key, final String hKey)
    {
        HashOperations<String, String, T> opsForHash = redisTemplate.opsForHash();
        return opsForHash.get(key, hKey);
    }

    /**
     * 删除Hash中的数据
     *
     * @param key
     * @param hkey
     */
    public void delCacheMapValue(final String key, final String hkey)
    {
        HashOperations hashOperations = redisTemplate.opsForHash();
        hashOperations.delete(key, hkey);
    }

    /**
     * 获取多个Hash中的数据
     *
     * @param key Redis键
     * @param hKeys Hash键集合
     * @return Hash对象集合
     */
    public <T> List<T> getMultiCacheMapValue(final String key, final Collection<Object> hKeys)
    {
        return redisTemplate.opsForHash().multiGet(key, hKeys);
    }

    /**
     * 获得缓存的基本对象列表
     *
     * @param pattern 字符串前缀
     * @return 对象列表
     */
    public Collection<String> keys(final String pattern)
    {
        return redisTemplate.keys(pattern);
    }
}
JwtUtil
package com.security.utils;


import io.jsonwebtoken.Claims;
import io.jsonwebtoken.JwtBuilder;
import io.jsonwebtoken.Jwts;
import io.jsonwebtoken.SignatureAlgorithm;

import javax.crypto.SecretKey;
import javax.crypto.spec.SecretKeySpec;
import java.util.Base64;
import java.util.Date;
import java.util.UUID;

/**
 * JWT工具类
 */
public class JwtUtil {

    //有效期为
    public static final Long JWT_TTL = 24*60 * 60 *1000L;// 24*60 * 60 *1000  一天
    //设置秘钥明文
    public static final String JWT_KEY = "huanglong";

    public static String getUUID(){
        String token = UUID.randomUUID().toString().replaceAll("-", "");
        return token;
    }

    /**
     * 生成jtw
     * @param subject token中要存放的数据(json格式)
     * @return
     */
    public static String createJWT(String subject) {
        JwtBuilder builder = getJwtBuilder(subject, null, getUUID());// 设置过期时间
        return builder.compact();
    }

    /**
     * 生成jtw
     * @param subject token中要存放的数据(json格式)
     * @param ttlMillis token超时时间
     * @return
     */
    public static String createJWT(String subject, Long ttlMillis) {
        JwtBuilder builder = getJwtBuilder(subject, ttlMillis, getUUID());// 设置过期时间
        return builder.compact();
    }

    private static JwtBuilder getJwtBuilder(String subject, Long ttlMillis, String uuid) {
        SignatureAlgorithm signatureAlgorithm = SignatureAlgorithm.HS256;
        SecretKey secretKey = generalKey();
        long nowMillis = System.currentTimeMillis();
        Date now = new Date(nowMillis);
        if(ttlMillis==null){
            ttlMillis= JwtUtil.JWT_TTL;
        }
        long expMillis = nowMillis + ttlMillis;
        Date expDate = new Date(expMillis);
        return Jwts.builder()
                .setId(uuid)              //唯一的ID
                .setSubject(subject)   // 主题  可以是JSON数据
                .setIssuer("huanglong")     // 签发者
                .setIssuedAt(now)      // 签发时间
                .signWith(signatureAlgorithm, secretKey) //使用HS256对称加密算法签名, 第二个参数为秘钥
                .setExpiration(expDate);
    }

    /**
     * 创建token
     * @param id
     * @param subject
     * @param ttlMillis
     * @return
     */
    public static String createJWT(String id, String subject, Long ttlMillis) {
        JwtBuilder builder = getJwtBuilder(subject, ttlMillis, id);// 设置过期时间
        return builder.compact();
    }

    public static void main(String[] args) throws Exception {
      //生成 jwt
        String jwt = createJWT("1234");
                //对jwt进行转换
//        Claims claims = JwtUtil.parseJWT(jwt);
//        String subject = claims.getSubject();
//        System.out.println(subject);
        System.out.println(jwt);
    }

    /**
     * 生成加密后的秘钥 secretKey
     * @return
     */
    public static SecretKey generalKey() {
        byte[] encodedKey = Base64.getDecoder().decode(JwtUtil.JWT_KEY);
        SecretKey key = new SecretKeySpec(encodedKey, 0, encodedKey.length, "AES");
        return key;
    }

    /**
     * 解析
     *
     * @param jwt
     * @return
     * @throws Exception
     */
    public static Claims parseJWT(String jwt) throws Exception {
        SecretKey secretKey = generalKey();
        return Jwts.parser()
                .setSigningKey(secretKey)
                .parseClaimsJws(jwt)
                .getBody();
    }


}
Message
package com.security.utils;

import lombok.AllArgsConstructor;
import lombok.Data;
import lombok.NoArgsConstructor;
import org.springframework.ui.ConcurrentModel;
import org.springframework.ui.Model;

@Data
@AllArgsConstructor
@NoArgsConstructor
public class Message {
    private Integer code;
    private String message;
    Model model=new ConcurrentModel();

    public static Message success(){
        Message message=new Message();
        message.setCode(100);
        message.setMessage("处理成功");
        return message;
    }
    public static Message fail(){
        Message message=new Message();
        message.setCode(200);
        message.setMessage("处理失败");
        return message;
    }
    public  Message add(String key,Object value){
        this.getModel().addAttribute(key,value);
        return this;
    }

}
跨域配置
package com.security.config;

import org.springframework.context.annotation.Configuration;
import org.springframework.web.bind.annotation.CrossOrigin;
import org.springframework.web.servlet.config.annotation.CorsRegistry;
import org.springframework.web.servlet.config.annotation.WebMvcConfigurer;

@Configuration
public class CorsConfig implements WebMvcConfigurer {
    @Override
    public void addCorsMappings(CorsRegistry registry) {
        // 设置允许跨域的路径
        registry.addMapping("/**")
                // 设置允许跨域请求的域名
                .allowedOriginPatterns("*")
                // 是否允许cookie
                .allowCredentials(true)
                // 设置允许的请求方式
                .allowedMethods("GET", "POST", "DELETE", "PUT")
                // 设置允许的header属性
                .allowedHeaders("*")
                // 跨域允许时间
                .maxAge(3600);
    }
}
redis解决序列化和乱码
package com.security.config;
import com.fasterxml.jackson.annotation.JsonAutoDetect;
import com.fasterxml.jackson.annotation.PropertyAccessor;
import com.fasterxml.jackson.databind.ObjectMapper;
import org.springframework.cache.CacheManager;
import org.springframework.cache.annotation.CachingConfigurerSupport;
import org.springframework.cache.annotation.EnableCaching;
import org.springframework.context.annotation.Bean;
import org.springframework.context.annotation.Configuration;
import org.springframework.data.redis.cache.RedisCacheConfiguration;
import org.springframework.data.redis.cache.RedisCacheManager;
import org.springframework.data.redis.connection.RedisConnectionFactory;
import org.springframework.data.redis.core.RedisTemplate;
import org.springframework.data.redis.serializer.Jackson2JsonRedisSerializer;
import org.springframework.data.redis.serializer.RedisSerializationContext;
import org.springframework.data.redis.serializer.RedisSerializer;
import org.springframework.data.redis.serializer.StringRedisSerializer;

import java.time.Duration;

/**
 * 解决序列化问题
 */

@EnableCaching
@Configuration
public class RedisConfig extends CachingConfigurerSupport {
    @Bean
    public RedisTemplate<String, Object> redisTemplate(RedisConnectionFactory factory) {
        RedisTemplate<String, Object> template = new RedisTemplate<>();
        RedisSerializer<String> redisSerializer = new StringRedisSerializer();
        Jackson2JsonRedisSerializer jackson2JsonRedisSerializer = new Jackson2JsonRedisSerializer(Object.class);
        ObjectMapper om = new ObjectMapper();
        om.setVisibility(PropertyAccessor.ALL, JsonAutoDetect.Visibility.ANY);
        om.enableDefaultTyping(ObjectMapper.DefaultTyping.NON_FINAL);
        jackson2JsonRedisSerializer.setObjectMapper(om);
        template.setConnectionFactory(factory);
//key序列化方式
        template.setKeySerializer(redisSerializer);
//value序列化
        template.setValueSerializer(jackson2JsonRedisSerializer);
//value hashmap序列化
        template.setHashValueSerializer(jackson2JsonRedisSerializer);
        return template;
    }

    @Bean
    public CacheManager cacheManager(RedisConnectionFactory factory) {
        RedisSerializer<String> redisSerializer = new StringRedisSerializer();
        Jackson2JsonRedisSerializer jackson2JsonRedisSerializer = new Jackson2JsonRedisSerializer(Object.class);
//解决查询缓存转换异常的问题
        ObjectMapper om = new ObjectMapper();
        om.setVisibility(PropertyAccessor.ALL, JsonAutoDetect.Visibility.ANY);
        om.enableDefaultTyping(ObjectMapper.DefaultTyping.NON_FINAL);
        jackson2JsonRedisSerializer.setObjectMapper(om);
// 配置序列化(解决乱码的问题),过期时间600秒
        RedisCacheConfiguration config = RedisCacheConfiguration.defaultCacheConfig()
                .entryTtl(Duration.ofSeconds(600))
                .serializeKeysWith(RedisSerializationContext.SerializationPair.fromSerializer(redisSerializer))
                .serializeValuesWith(RedisSerializationContext.SerializationPair.fromSerializer(jackson2JsonRedisSerializer))
                .disableCachingNullValues();
        RedisCacheManager cacheManager = RedisCacheManager.builder(factory)
                .cacheDefaults(config)
                .build();
        return cacheManager;
    }
}
准备工作完成
在yml配置文件中配置数据源 redis连接 以及mybatis-plus相关配置
server:
  port: 8099
spring:
  datasource:
    driver-class-name: com.mysql.cj.jdbc.Driver
    username: root
    password: root
    url: jdbc:mysql://localhost:3306/security_vue?serverTimezone=GMT%2B8
  redis:
    host: 192.168.43.226
    port: 6379


mybatis-plus:
  configuration:
    log-impl: org.apache.ibatis.logging.stdout.StdOutImpl
  mapper-locations: classpath*:/mapper/**/*.xml
编写LoginUser,实现UserDetails,并重写其方法,将User作为变量,并提供getset,无参有参构造,其他方法中编写如下。
package com.security.utils;

import com.alibaba.fastjson.annotation.JSONField;
import com.security.entity.User;
import lombok.AllArgsConstructor;
import lombok.Data;
import lombok.NoArgsConstructor;
import org.springframework.security.core.GrantedAuthority;
import org.springframework.security.core.authority.SimpleGrantedAuthority;
import org.springframework.security.core.userdetails.UserDetails;

import java.util.Collection;
import java.util.List;
import java.util.stream.Collectors;
/**
 * 实现UserDetails 作为封装类
 *
 因为UserDetailsService方法的返回值是UserDetails类型
 ,所以需要定义一个类,实现该接口,把用户信息封装在其中。
 */
@Data
@AllArgsConstructor
@NoArgsConstructor
public class LoginUser implements UserDetails {
    private User user;
    /**返回权限信息的*/
    @Override
    public Collection<? extends GrantedAuthority> getAuthorities() {
      return null;
    }
    /**用来获取密码*/
    @Override
    public String getPassword() {

        System.out.println("是否获取密码"+user.getPassword());

        return user.getPassword();
    }

    @Override
    public String getUsername() {
        System.out.println("是否获取姓名");
        return user.getUserName();
    }
/**判断是否没过期的*/
    @Override
    public boolean isAccountNonExpired() {
        return true;
    }
    /**判断是否过期的*/
    @Override
    public boolean isAccountNonLocked() {
        return true;
    }
/** 凭证没过期*/
    @Override
    public boolean isCredentialsNonExpired() {
        return true;
    }
    /**判断是否可用*/
    @Override
    public boolean isEnabled() {
        return true;
    }
}
编写loginImpl,实现 UserDetailsService,重写 loadUserByUsername方法,(注意它的返回值类型),在其方法中通过参数username查询这条数据,之后进行判断null还是” “,之后new LoginUser(),参数值就是这条查询到的数据(上一步LoginUser实现了UserDetails所以将其返回即可)
package com.security.service.impl;

import com.baomidou.mybatisplus.core.conditions.query.LambdaQueryWrapper;
import com.baomidou.mybatisplus.core.toolkit.StringUtils;
import com.security.entity.User;
import com.security.mapper.UserMapper;
import com.security.utils.LoginUser;
import org.springframework.beans.factory.annotation.Autowired;
import org.springframework.security.core.userdetails.UserDetails;
import org.springframework.security.core.userdetails.UserDetailsService;
import org.springframework.security.core.userdetails.UsernameNotFoundException;
import org.springframework.stereotype.Service;

import java.util.List;

@Service
public class LoginImpl implements UserDetailsService {
    @Autowired
    private UserMapper userMapper;
    @Override
    public UserDetails loadUserByUsername(String username) throws UsernameNotFoundException {
        LambdaQueryWrapper<User> lambdaQueryWrapper=new LambdaQueryWrapper<>();
        lambdaQueryWrapper.eq(User::getUserName,username);
        User getUser = userMapper.selectOne(lambdaQueryWrapper);
        System.out.println(getUser);
        if (StringUtils.isNotBlank(username)){
            UserDetails loginUser = new LoginUser(getUser);
            return loginUser;
        }else {
            throw  new RuntimeException("用户名或者密码错误!!!!");
        }
    }
}
创建统一认证和授权异常处理器(我项目没有设计授权,所以授权处理器可以不要,写了也没影响)主要目的是认证失败或是授权失败能有信息响应到浏览器
授权处理器
package com.security.handler;

import com.alibaba.fastjson.JSON;
import com.security.utils.Message;
import com.security.utils.WebUtil;
import org.springframework.security.access.AccessDeniedException;
import org.springframework.security.web.access.AccessDeniedHandler;
import org.springframework.stereotype.Component;

import javax.servlet.ServletException;
import javax.servlet.http.HttpServletRequest;
import javax.servlet.http.HttpServletResponse;
import java.io.IOException;

@Component
public class AccessDeniedHandlerImpl implements AccessDeniedHandler {
    @Override
    public void handle(HttpServletRequest httpServletRequest, HttpServletResponse httpServletResponse, AccessDeniedException e) throws IOException, ServletException {
        Message message = Message.fail().add("message", "统一管理--授权失败");
        String messages = JSON.toJSONString(message);
        WebUtil.renderString(httpServletResponse,messages);

    }
}
认证处理器
package com.security.handler;

import com.alibaba.fastjson.JSON;
import com.security.utils.Message;
import com.security.utils.WebUtil;
import org.springframework.security.access.AccessDeniedException;
import org.springframework.security.core.AuthenticationException;
import org.springframework.security.web.AuthenticationEntryPoint;
import org.springframework.stereotype.Component;

import javax.servlet.ServletException;
import javax.servlet.http.HttpServletRequest;
import javax.servlet.http.HttpServletResponse;
import java.io.IOException;

@Component
public class AuthenticationEntryPointImpl implements AuthenticationEntryPoint {
    @Override
    public void commence(HttpServletRequest httpServletRequest, HttpServletResponse httpServletResponse, AuthenticationException e) throws IOException, ServletException {
            Message message = Message.fail().add("message", "统一管理--认证失败");
            String messages = JSON.toJSONString(message);
            WebUtil.renderString(httpServletResponse,messages);

        }
    }
创建过滤器,通过获取token,将其解析获取id,通过id在redis中获取值,(其值就是登录用户的信息,下面会进行讲解),将值封装到SecurityContextHolder中
package com.security.filter;

import com.alibaba.fastjson.JSON;
import com.security.utils.JwtUtil;
import com.security.utils.LoginUser;
import com.security.utils.RedisUtil;
import io.jsonwebtoken.Claims;
import org.springframework.beans.factory.annotation.Autowired;
import org.springframework.security.authentication.UsernamePasswordAuthenticationToken;
import org.springframework.security.core.context.SecurityContextHolder;
import org.springframework.stereotype.Component;
import org.springframework.web.filter.OncePerRequestFilter;

import javax.servlet.FilterChain;
import javax.servlet.ServletException;
import javax.servlet.http.HttpServletRequest;
import javax.servlet.http.HttpServletResponse;
import java.io.IOException;
import java.util.Objects;

@Component
public class JwtAuthenticationTokenFilter extends OncePerRequestFilter {
    @Autowired
    RedisUtil redisUtil;
    @Override
    protected void doFilterInternal(HttpServletRequest httpServletRequest, HttpServletResponse httpServletResponse, FilterChain filterChain) throws ServletException, IOException {
        String token = httpServletRequest.getHeader("token");
        System.out.println("JwtAuthenticationTokenFilter检查totken:"+token);
        if (Objects.isNull(token)){
            filterChain.doFilter(httpServletRequest,httpServletResponse);
            return;
        }
        String userId;
        try{
            Claims claims = JwtUtil.parseJWT(token);
            userId = claims.getSubject();
        }catch (Exception e){
            e.printStackTrace();
            throw new RuntimeException("token非法");
        }
        LoginUser loginUser = JSON.parseObject(redisUtil.getCacheObject("sv_id:" + userId), LoginUser.class);

        UsernamePasswordAuthenticationToken authenticationToken=
                new UsernamePasswordAuthenticationToken(loginUser,null,null);
        SecurityContextHolder.getContext().setAuthentication(authenticationToken);

        filterChain.doFilter(httpServletRequest,httpServletResponse);

    }
}
创建SecurityConfig配置类,具体功能都有一定介绍,注意接口(/user/login /user/register)
package com.security.config;

import com.security.filter.JwtAuthenticationTokenFilter;
import org.springframework.beans.factory.annotation.Autowired;
import org.springframework.context.annotation.Bean;
import org.springframework.context.annotation.Configuration;
import org.springframework.security.authentication.AuthenticationManager;
import org.springframework.security.config.annotation.web.builders.HttpSecurity;
import org.springframework.security.config.annotation.web.configuration.WebSecurityConfigurerAdapter;
import org.springframework.security.config.http.SessionCreationPolicy;
import org.springframework.security.crypto.bcrypt.BCryptPasswordEncoder;
import org.springframework.security.crypto.password.PasswordEncoder;
import org.springframework.security.web.AuthenticationEntryPoint;
import org.springframework.security.web.access.AccessDeniedHandler;
import org.springframework.security.web.authentication.UsernamePasswordAuthenticationFilter;

@Configuration
public class SecurityConfig extends WebSecurityConfigurerAdapter {
    @Autowired
    private JwtAuthenticationTokenFilter jwtAuthenticationTokenFilter;
    @Autowired
    private AccessDeniedHandler accessDeniedHandler;
    @Autowired
    private AuthenticationEntryPoint authenticationEntryPoint;

    /*生成密文配置*/
    @Bean
    public PasswordEncoder passwordEncoder(){
        return new BCryptPasswordEncoder();
    }
    /*认证管理*/
    @Bean
    @Override
    protected AuthenticationManager authenticationManager() throws Exception {
        return super.authenticationManager();
    }
    @Override
    public void configure(HttpSecurity http) throws Exception {
        http
                //关闭csrf
                .csrf().disable()
                //不通过Session获取SecurityContext
                .sessionManagement().sessionCreationPolicy(SessionCreationPolicy.STATELESS)
                //and()方法表示返回值类型为HttpSecurity
                .and()
                .authorizeRequests()
                // 对于登录接口 允许匿名访问  如果携带有认证信息则不通过
                .antMatchers("/user/login").anonymous()
                //注册接口不需要携带token就能访问
                .antMatchers("/user/register").permitAll()
                // 除上面外的所有请求全部需要鉴权认证
                .anyRequest().authenticated();

        //过滤器注入配置
         http.addFilterBefore(jwtAuthenticationTokenFilter, UsernamePasswordAuthenticationFilter.class);
         //认证和授权处理器配置
         http.exceptionHandling().authenticationEntryPoint(authenticationEntryPoint).
                accessDeniedHandler(accessDeniedHandler);
         //跨域配置
        http.cors();

    }
}
在UserController中写登录接口
@Autowired
    private AuthenticationManager authenticationManager;
    @Autowired
    private RedisUtil redisUtil;

    @Autowired
    private IUserService userService;
    @Autowired
    private PasswordEncoder passwordEncoder;

    @PostMapping("/user/login")
    public Message login(@RequestBody User user){//前端一般是json格式传递,使用请求体接收
    /** 通过authenticationManager.authenticate()进行认证,
     * 其底层会调用UserDetailsService接口的loadUserByUsername方法,通过传入的user.getUserName(),user.getPassword()
     *与UserDetails接口的  String getPassword() String getUsername(); 方法其实现类LoginUser的返回值进行对比
     * 将UserDetails接口实现类进行封装到 Authentication接口中
     *  */
    UsernamePasswordAuthenticationToken authenticationToken=
            new UsernamePasswordAuthenticationToken(user.getUserName(),user.getPassword());
        Authentication authenticate = authenticationManager.authenticate(authenticationToken);

        /** 如果为null 则上一步认证不成功*/
        if (Objects.isNull(authenticate)){
            throw  new RuntimeException("登录失败");
        }
        /**认证成功则获取其封装的LoginUser 注意这个LoginUser的getUser就是登录用户的完整信息 不懂的看LoginImpl中*/
        LoginUser getUser = (LoginUser) authenticate.getPrincipal();
        /*获取登录用户的id*/
        String id = getUser.getUser().getId().toString();
        /*使用JWT生成token*/
        String token = JwtUtil.createJWT(id);
        /*将登录的用户信息转为json格式存入redis中*/
        String redisUser = JSON.toJSONString(getUser);
        redisUtil.setCacheObject("sv_id:"+id,redisUser);
        /*携带token响应到浏览器*/
        return Message.success().add("token",token);
    }
现在可以进行登录测试 使用PostMan,先在数据库中添加一条数据,这个密码是使用的密文,所以先在测试类中使用明文生成一条密文, 添加到表中的password字段 ,设置userName后保存信息


使用postMan测试,启动springboot项目,开启redis,postMan使用json格式发送,结果如下,看来请求成功,redis中也有对应数据(我之前使用过,所以id自增现在是31了)


现在进行前后端交互
在vue下的src下新建utils包,在其包下创建request.js文件,文件代码如下
import axios from 'axios'
import {getToken} from "./auth";

// axios.defaults.withCredentials=true

const request = axios.create({
  //这个就是前后端交互时,请求路径前缀
  baseURL: 'http://localhost:8099',
  timeout: 5000
})

// request 拦截器
// 可以自请求发送前对请求做一些处理
// 比如统一加token,对请求参数统一加密
request.interceptors.request.use(config => {
  config.headers['Content-Type'] = 'application/json;charset=utf-8';
// 设置请求头 重要的一步,不设置后端排除之外的接口不会携带请求头
  //有token才携带到后端  不然登录注册携带token会报错
 if (getToken()){
   config.headers['token'] = getToken();
 }


  return config
}, error => {
  return Promise.reject(error)
});

// response 拦截器cnpm install --save vue-axios
// 可以在接口响应后统一处理结果
request.interceptors.response.use(
  response => {
    let res = response.data;
    // 如果是返回的文件
    if (response.config.responseType === 'blob') {
      return res
    }
    // 兼容服务端返回的字符串数据
    if (typeof res === 'string') {
      res = res ? JSON.parse(res) : res
    }
    return res;
  },
  error => {
    console.log('err' + error) // for debug
    return Promise.reject(error)
  }
)


export default request
再创建auth.js 用于对token的操作
const TokenKey = 'token'

export function getToken () {
  return localStorage.getItem(TokenKey)
}

export function setToken (token) {
  return localStorage.setItem(TokenKey, token)
}

export function removeToken () {
  return localStorage.removeItem(TokenKey)
}
在登录vue中,点击登录时,接口代码如下(一定要先清除token,因为后端SecurityConfig的config方法中设置了这个请求路径为匿名访问) ,开启vue项目

现在Local Storage里没有token
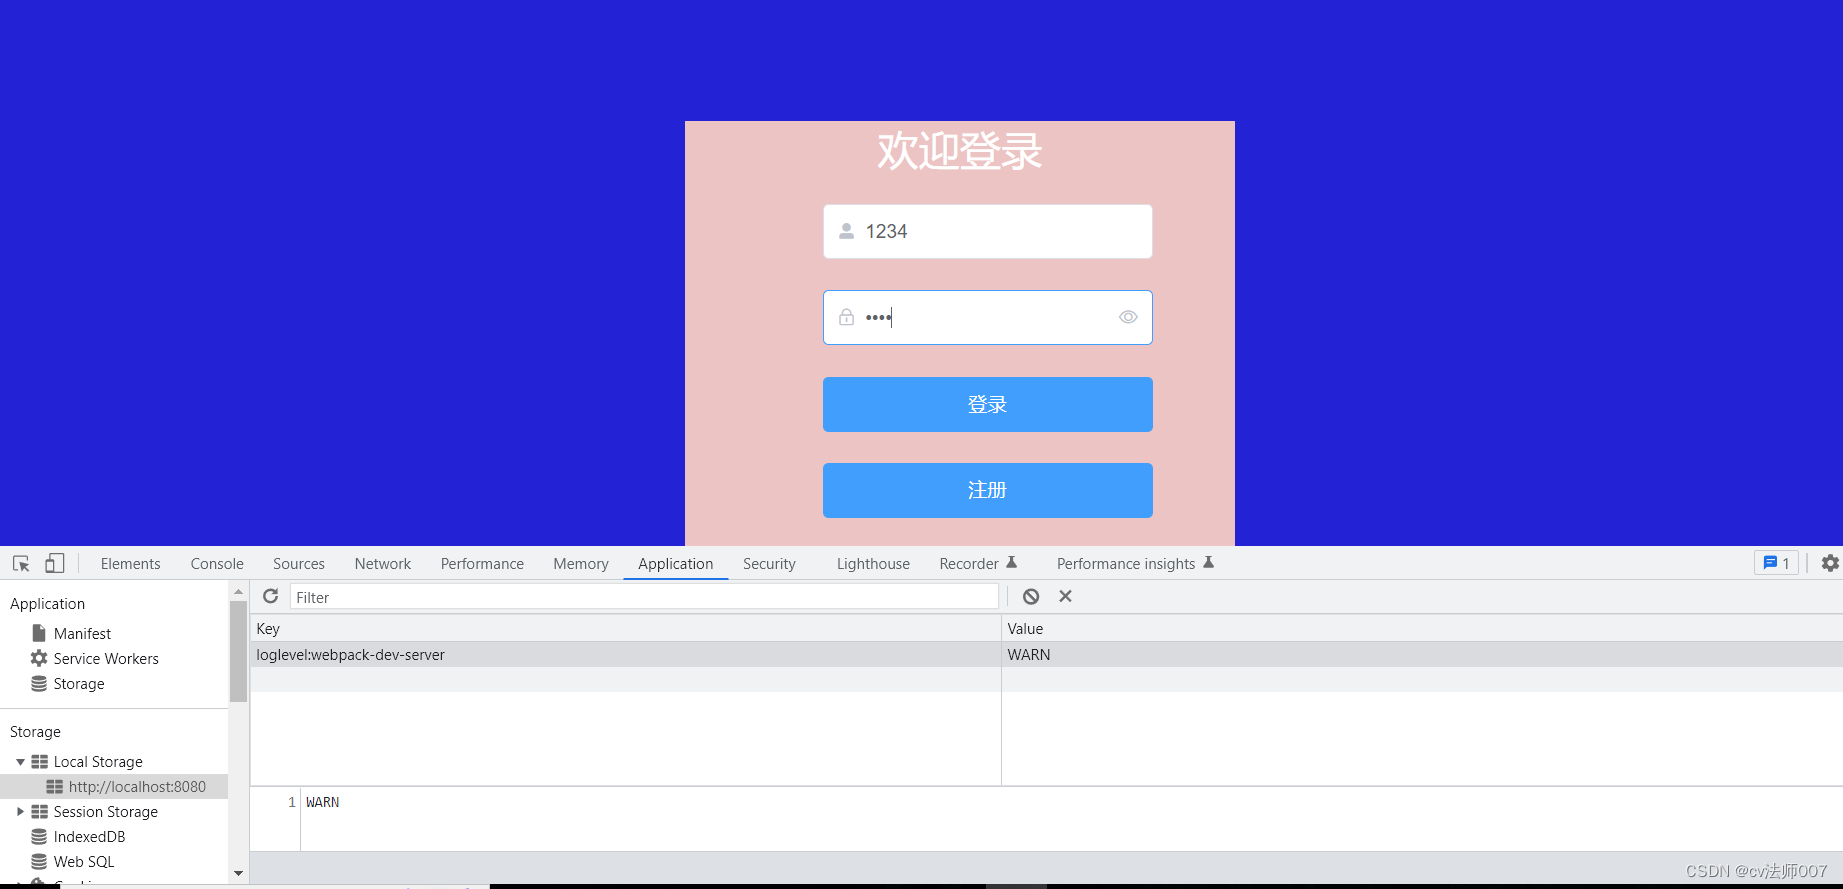
登录成功后,有token了,reids中也有对应的数据

对于退出,即删除存储在redis中对应的信息
后端退出代码如下, (你也可以通过获取token,使用JWT找到对应id)
    @DeleteMapping("/user/exit")
    public Message exit()  {
/**在过滤器中把登录用户的信息封装到SecurityContextHolder中,现在可以对其进行获取 */
        Authentication authentication = SecurityContextHolder.getContext().getAuthentication();
        LoginUser loginUser = (LoginUser) authentication.getPrincipal();
        Integer userId = loginUser.getUser().getId();
          /** 通过键删除*/
        redisUtil.deleteObject("sv_id:"+userId);
        return Message.success();
    }
前端接口如下,退出成功后也要清除token

注册后端如下,只是密码需要使用passwordEncoding进行加密
    @PostMapping("/user/register")
    public Message register(@RequestBody User user){
        String encoderPassword = passwordEncoder.encode(user.getPassword());
        user.setPassword(encoderPassword);
       userService.save(user);
        return Message.success();
    }
前端接口如下


 726
726


 被折叠的 条评论
为什么被折叠?
被折叠的 条评论
为什么被折叠?
 到【灌水乐园】发言


