


看了网上很多文章,都是清一色的说,优先加载bootstrap配置文件,然后加载application配置文件,bootstrap配置文件不能被覆盖。
今天实际验证一下,配置文件真实的加载情况。
项目就是简单的springboot项目,加入springcloud相关依赖。
项目结构如下:

pom文件如下:
<?xml version="1.0" encoding="UTF-8"?>
<project xmlns="http://maven.apache.org/POM/4.0.0" xmlns:xsi="http://www.w3.org/2001/XMLSchema-instance"
         xsi:schemaLocation="http://maven.apache.org/POM/4.0.0 https://maven.apache.org/xsd/maven-4.0.0.xsd">
    <modelVersion>4.0.0</modelVersion>
    <parent>
        <groupId>org.springframework.boot</groupId>
        <artifactId>spring-boot-starter-parent</artifactId>
        <version>2.2.5.RELEASE</version>
        <relativePath/> <!-- lookup parent from repository -->
    </parent>
    <groupId>com.example</groupId>
    <artifactId>demo</artifactId>
    <version>0.0.1-SNAPSHOT</version>
    <name>demo</name>
    <description>Demo project for Spring Boot</description>
    <properties>
        <java.version>1.8</java.version>
        <spring-cloud.version>Hoxton.SR3</spring-cloud.version>
    </properties>

    <dependencyManagement>
        <dependencies>
            <dependency>
                <groupId>org.springframework.cloud</groupId>
                <artifactId>spring-cloud-dependencies</artifactId>
                <version>${spring-cloud.version}</version>
                <type>pom</type>
                <scope>import</scope>
            </dependency>
            <!--  Spring Cloud Alibaba 依赖  -->
            <dependency>
                <groupId>com.alibaba.cloud</groupId>
                <artifactId>spring-cloud-alibaba-dependencies</artifactId>
                <version>2.2.1.RELEASE</version>
                <type>pom</type>
                <scope>import</scope>
            </dependency>
        </dependencies>
    </dependencyManagement>

    <dependencies>
        <dependency>
            <groupId>org.springframework.boot</groupId>
            <artifactId>spring-boot-starter-web</artifactId>
        </dependency>
        <dependency>
            <groupId>org.springframework.boot</groupId>
            <artifactId>spring-boot-starter-test</artifactId>
            <scope>test</scope>
        </dependency>

        <dependency>
            <groupId>org.springframework.cloud</groupId>
            <artifactId>spring-cloud-starter-bootstrap</artifactId>
            <version>3.0.3</version>
        </dependency>
    </dependencies>

    <build>
        <plugins>
            <plugin>
                <groupId>org.springframework.boot</groupId>
                <artifactId>spring-boot-maven-plugin</artifactId>
                <configuration>
                    <excludes>
                        <exclude>
                            <groupId>org.projectlombok</groupId>
                            <artifactId>lombok</artifactId>
                        </exclude>
                    </excludes>
                </configuration>
            </plugin>
        </plugins>
    </build>

</project>
下面是各个配置文件:
application.properties
server.port=8081
hello1=hello1aaa
hello= application.properties
spring.application.name= test.application.properties
application.yml
server:
  port: 8083
hello2: hello2bbb
hello: application.yml
spring:
  application:
    name: test.application.yml
bootstrap.properties
server.port = 8082
hello3=hello bp
hello=bootstrap.properties
spring.application.name=test.bootstrap.properties
bootstrap.yml
server:
  port: 8086
hello4: hello by
hello: bootstrap.yml
spring:
  application:
    name: test.bootstrap.yml
启动类就不放了,直接看测试类
@RestController
public class TestController {

    @Value("${hello}")
    private String hello;
    @Value("${hello1}")
    private String hello1;
    @Value("${hello2}")
    private String hello2;
    @Value("${hello3}")
    private String hello3;
    @Value("${hello4}")
    private String hello4;

    @Value("${spring.application.name}")
    private String applicationName;

    @GetMapping("/testAll")
    public String testAll(){
        return hello1 + " === " + hello2
                + " === " + hello3 + " === " + hello4;
    }

    @GetMapping("/test")
    public String test(){
        return hello + " ====== " + applicationName;
    }
}
按照网上大部分文章,启动的端口应该是bootstrap配置当中的,要么是8082,要么是8086. 下面看一下启动日志:

有人可能会怀疑,是不是bootstrap配置文件没有加载,现在看一下testAll接口,能否获取到每个配置文件中配置的变量:
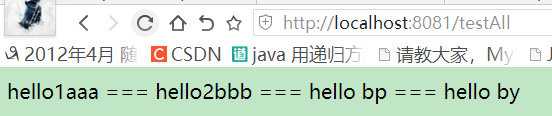
说明所有配置文件都是加载过的.
看一下test接口,可以看到,变量都是从application.properties文件中获取的:

下面分析一下原因:
spring官网的说明

我开始也是,光看到了这个描述忽略了前面的前提,那就是bootstrap context. 只有在bootstrap阶段用到的属性,在bootstrap配置中被加载了,才是优先级最高。
继续看spring官网的说明:

非bootstrap阶段的属性,bootstrap配置优先级最低。
简单的理解一下bootstrap阶段,就是SpringConfig或者nacos用作配置中心的时候,读取配置文件信息,就是bootstrap阶段。
普通的springboot项目,读取配置文件,是非bootstrap阶段,因此bootstrap配置优先级最低,优先加载application配置文件。
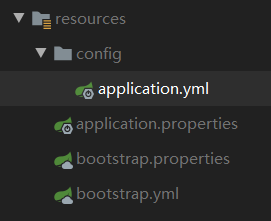
下面再测试一下,将两个application文件顺序进行调整,在resource目录下,新建config目录,将application.yml文件移到该文件夹中:
看一下日志:

可以看出来,端口已经换成yml文件中的配置。
看一下接口:
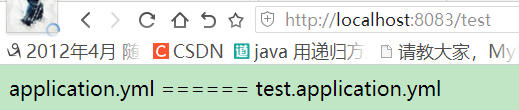
下面试一下bootstrap优先级问题,将bootstrap的一个配置移动到config目录下
修改application.yml配置:

同时修改application.properties配置文件,去掉hello参数:

再次启动项目:


启动的接口用的是application.properties文件中的,虽然bootstrap.properties加载的顺序可能靠前,但是优先级比application配置文件要低。
下面来看接口调用接口:
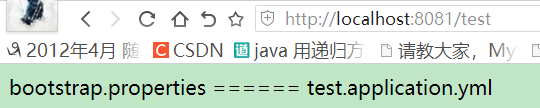
可以看到,hello参数是bootstrap.properties文件中的配置,而applicationName参数,是application.yml配置文件中的,证明了所有的配置文件都会加载,以及加载的优先级,确实在非bootstrap阶段,bootstrap文件优先级最低,其他的配置会按照application配置文件的加载顺序,取优先加载的配置文件中的配置。


 580
580


 被折叠的 条评论
为什么被折叠?
被折叠的 条评论
为什么被折叠?
 到【灌水乐园】发言


