原文地址:http://blog.csdn.net/black__lotus/article/details/50805389
发现这篇文章写的不错。效果我在项目中已经使用了。。但是具体没深入研究。所以转载来。等不忙好好看看。
相信大家一定都使用过手机QQ和微信之类的软件,当我们使用时不难发现其界面的切换不仅可以通过点击页标签来实现,还可以通过左右滑动来实现的,耗子君刚开始学Android时就觉得这样的滑动十分酷炫,十分想要自己来实现它。相信大家也和耗子君一样,想要迫不期待的学习怎样实现了吧,OK,下面我来详细的讲一下如何实现这个功能。
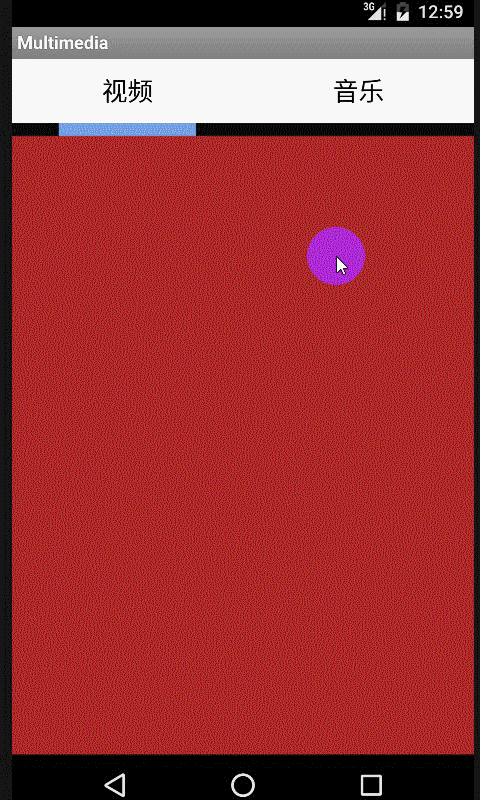
效果图
先来欣赏一下效果图吧:
ViewPager是Android SDk中自带的一个附加包android-support-v4.jar中的一个类,可以用来实现屏幕间的切换。android-support-v4.jar可以在网上搜索最新的版本,下载好它后,我们需要把它添加到项目中去。
XML布局
首先来看一下activity的布局,这个布局相信大家都能看得懂,第一行为只有两个TextView的页标,至于名字大家就不用在意了,哈哈,第二行为滑动界面时的滚动条,图片自己要选择并添加到drawable中,长度不要太长哦,第三行即为我们要实现的界面切换用的ViewPager:
<RelativeLayout xmlns:android="http://schemas.android.com/apk/res/android"
xmlns:tools="http://schemas.android.com/tools" android:layout_width="match_parent"
android:layout_height="match_parent" tools:context=".MediaPlayerActivity">
<LinearLayout
android:id="@+id/linearLayout"
android:layout_width="match_parent"
android:layout_height="50.0dip"
android:background="#FFFFFF"
>
<TextView
android:id="@+id/videoLayout"
android:layout_width="match_parent"
android:layout_height="match_parent"
android:layout_weight="1.0"
android:gravity="center"
android:text="视频"
android:textColor="#000000"
android:textSize="20dip"
android:background="@drawable/selector"/>
<TextView
android:id="@+id/musicLayout"
android:layout_width="match_parent"
android:layout_height="match_parent"
android:layout_weight="1.0"
android:gravity="center"
android:text="音乐"
android:textColor="#000000"
android:textSize="20dip"
android:background="@drawable/selector"/>
</LinearLayout>
<ImageView
android:layout_width="match_parent"
android:layout_height="10dp"
android:layout_below="@id/linearLayout"
android:id="@+id/scrollbar"
android:scaleType="matrix"
android:src="@drawable/scrollbar"/>
<android.support.v4.view.ViewPager
android:id="@+id/viewPager"
android:layout_width="match_parent"
android:layout_height="wrap_content"
android:layout_below="@id/scrollbar">
</android.support.v4.view.ViewPager>
</RelativeLayout>
- 1
- 2
- 3
- 4
- 5
- 6
- 7
- 8
- 9
- 10
- 11
- 12
- 13
- 14
- 15
- 16
- 17
- 18
- 19
- 20
- 21
- 22
- 23
- 24
- 25
- 26
- 27
- 28
- 29
- 30
- 31
- 32
- 33
- 34
- 35
- 36
- 37
- 38
- 39
- 40
- 41
- 42
- 43
- 44
- 45
- 46
- 47
- 48
- 49
- 50
- 51
- 52
布局中TextView的background属性是我先设置好的,可以实现在按压其时,可以使得其背景颜色得到变换,并在松开时恢复颜色。方法为在drawable中新建一个selector.xml文件,写下如下代码;
selector.xml:
<?xml version="1.0" encoding="utf-8"?>
<selector xmlns:android="http://schemas.android.com/apk/res/android">
    <item
        android:state_pressed="true"
        android:drawable="@color/press" />
</selector>
当然,首先要在values文件夹下新建好colors.xml文件,配置好press的颜色:
colors.xml:
<?xml version="1.0" encoding="utf-8"?>
<resources>
    <color name="press">#25fa55</color>
</resources>
看完了activity的布局,我们再来看看想要切换的界面的布局,这两个布局文件只需在layout文件中新建就好,不需要新建activity,为了简单,这里就只设置了背景颜色,能够在测试时看到效果即可:
video_player.xml:
<?xml version="1.0" encoding="utf-8"?>
<RelativeLayout xmlns:android="http://schemas.android.com/apk/res/android"
    android:orientation="vertical" android:layout_width="match_parent"
    android:layout_height="match_parent"
    android:background="#ad2929">
</RelativeLayout>
media_player.xml:
<?xml version="1.0" encoding="utf-8"?>
<RelativeLayout xmlns:android="http://schemas.android.com/apk/res/android"
    android:orientation="vertical" android:layout_width="match_parent"
    android:layout_height="match_parent"
    android:background="#acbbcf">
</RelativeLayout>
Java代码
package com.example.blacklotus.multimedia;
import android.app.Activity;
import android.graphics.BitmapFactory;
import android.graphics.Matrix;
import android.os.Bundle;
import android.support.v4.view.PagerAdapter;
import android.support.v4.view.ViewPager;
import android.view.LayoutInflater;
import android.view.View;
import android.view.animation.Animation;
import android.view.animation.TranslateAnimation;
import android.widget.Button;
import android.widget.ImageView;
import android.widget.LinearLayout;
import android.widget.TextView;
import android.widget.VideoView;
import java.util.ArrayList;
public class MediaPlayerActivity extends Activity implements View.OnClickListener{
private ViewPager viewPager;
private ArrayList<View> pageview;
private TextView videoLayout;
private TextView musicLayout;
private ImageView scrollbar;
private int offset = 0;
private int currIndex = 0;
private int bmpW;
private int one;
@Override
protected void onCreate(Bundle savedInstanceState) {
super.onCreate(savedInstanceState);
setContentView(R.layout.activity_media_player);
viewPager = (ViewPager) findViewById(R.id.viewPager);
LayoutInflater inflater =getLayoutInflater();
View view1 = inflater.inflate(R.layout.video_player, null);
View view2 = inflater.inflate(R.layout.media_player, null);
videoLayout = (TextView)findViewById(R.id.videoLayout);
musicLayout = (TextView)findViewById(R.id.musicLayout);
scrollbar = (ImageView)findViewById(R.id.scrollbar);
videoLayout.setOnClickListener(this);
musicLayout.setOnClickListener(this);
pageview =new ArrayList<View>();
pageview.add(view1);
pageview.add(view2);
PagerAdapter mPagerAdapter = new PagerAdapter(){
@Override
public int getCount() {
return pageview.size();
}
@Override
public boolean isViewFromObject(View arg0, Object arg1) {
return arg0==arg1;
}
public void destroyItem(View arg0, int arg1, Object arg2) {
((ViewPager) arg0).removeView(pageview.get(arg1));
}
public Object instantiateItem(View arg0, int arg1){
((ViewPager)arg0).addView(pageview.get(arg1));
return pageview.get(arg1);
}
};
viewPager.setAdapter(mPagerAdapter);
viewPager.setCurrentItem(0);
viewPager.addOnPageChangeListener(new MyOnPageChangeListener());
bmpW = BitmapFactory.decodeResource(getResources(), R.drawable.scrollbar).getWidth();
DisplayMetrics displayMetrics = new DisplayMetrics();
getWindowManager().getDefaultDisplay().getMetrics(displayMetrics);
int screenW = displayMetrics.widthPixels;
offset = (screenW / 2 - bmpW) / 2;
one = offset * 2 + bmpW;
Matrix matrix = new Matrix();
matrix.postTranslate(offset, 0);
scrollbar.setImageMatrix(matrix);
}
public class MyOnPageChangeListener implements ViewPager.OnPageChangeListener {
@Override
public void onPageSelected(int arg0) {
Animation animation = null;
switch (arg0) {
case 0:
/**
* TranslateAnimation的四个属性分别为
* float fromXDelta 动画开始的点离当前View X坐标上的差值
* float toXDelta 动画结束的点离当前View X坐标上的差值
* float fromYDelta 动画开始的点离当前View Y坐标上的差值
* float toYDelta 动画开始的点离当前View Y坐标上的差值
**/
animation = new TranslateAnimation(one, 0, 0, 0);
break;
case 1:
animation = new TranslateAnimation(offset, one, 0, 0);
break;
}
currIndex = arg0;
animation.setFillAfter(true);
animation.setDuration(200);
scrollbar.startAnimation(animation);
}
@Override
public void onPageScrolled(int arg0, float arg1, int arg2) {
}
@Override
public void onPageScrollStateChanged(int arg0) {
}
}
@Override
public void onClick(View view){
switch (view.getId()){
case R.id.videoLayout:
viewPager.setCurrentItem(0);
break;
case R.id.musicLayout:
viewPager.setCurrentItem(1);
break;
}
}
}
- 1
- 2
- 3
- 4
- 5
- 6
- 7
- 8
- 9
- 10
- 11
- 12
- 13
- 14
- 15
- 16
- 17
- 18
- 19
- 20
- 21
- 22
- 23
- 24
- 25
- 26
- 27
- 28
- 29
- 30
- 31
- 32
- 33
- 34
- 35
- 36
- 37
- 38
- 39
- 40
- 41
- 42
- 43
- 44
- 45
- 46
- 47
- 48
- 49
- 50
- 51
- 52
- 53
- 54
- 55
- 56
- 57
- 58
- 59
- 60
- 61
- 62
- 63
- 64
- 65
- 66
- 67
- 68
- 69
- 70
- 71
- 72
- 73
- 74
- 75
- 76
- 77
- 78
- 79
- 80
- 81
- 82
- 83
- 84
- 85
- 86
- 87
- 88
- 89
- 90
- 91
- 92
- 93
- 94
- 95
- 96
- 97
- 98
- 99
- 100
- 101
- 102
- 103
- 104
- 105
- 106
- 107
- 108
- 109
- 110
- 111
- 112
- 113
- 114
- 115
- 116
- 117
- 118
- 119
- 120
- 121
- 122
- 123
- 124
- 125
- 126
- 127
- 128
- 129
- 130
- 131
- 132
- 133
- 134
- 135
- 136
- 137
- 138
- 139
- 140
- 141
- 142
- 143
- 144
- 145
- 146
- 147
- 148
- 149
- 150
- 151
- 152
- 153
- 154
- 155
- 156
- 157
- 158
- 159
OK,以上便是所有的代码,耗子君已经在代码中注释的非常详细了,相信大家都能够理解,是不是觉得很简单呢,这么“酷炫”的效果就这样实现出来了,哈哈。大家要是想要多建几个页也可以,不过要把滑动距离什么处理好。若大家还有疑问,可以随时问耗子君;以上若有错误的地方,还请指正,大家一起学习进步!


 1435
1435

 被折叠的 条评论
为什么被折叠?
被折叠的 条评论
为什么被折叠?
 到【灌水乐园】发言


