


这一节我们看一下Topic模式下的消息发布是如何处理的。
applicationContext-ActiveMQ.xml配置:
<?xml version="1.0" encoding="UTF-8"?>
<beans xmlns="http://www.springframework.org/schema/beans"
       xmlns:xsi="http://www.w3.org/2001/XMLSchema-instance"
       xmlns:amq="http://activemq.apache.org/schema/core"
       xmlns:context="http://www.springframework.org/schema/context"
       xmlns:mvc="http://www.springframework.org/schema/mvc"
       xsi:schemaLocation="
http://www.springframework.org/schema/beans
http://www.springframework.org/schema/beans/spring-beans-4.1.xsd
http://www.springframework.org/schema/context
http://www.springframework.org/schema/context/spring-context-4.1.xsd
http://www.springframework.org/schema/mvc
http://www.springframework.org/schema/mvc/spring-mvc-4.1.xsd
http://activemq.apache.org/schema/core
http://activemq.apache.org/schema/core/activemq-core-5.12.1.xsd">

    <context:component-scan base-package="cn.edu.hust.activemq" />
    <mvc:annotation-driven />

    <amq:connectionFactory id="amqConnectionFactory"
                           brokerURL="tcp://127.0.0.1:61616"
                           userName="admin"
                           password="admin" />

    <!-- 配置JMS连接工厂 -->
    <bean id="connectionFactory"
          class="org.springframework.jms.connection.CachingConnectionFactory">
        <constructor-arg ref="amqConnectionFactory" />
        <property name="sessionCacheSize" value="100" />
    </bean>

    <!-- 定义消息队列(topic) -->
    <bean id="demoTopicDestination" class="org.apache.activemq.command.ActiveMQTopic">
        <!-- 设置消息队列的名字 -->
        <constructor-arg>
            <value>first-queue</value>
        </constructor-arg>
    </bean>

    <!-- 配置JMS模板(topic),Spring提供的JMS工具类,它发送、接收消息。 -->
    <bean id="jmsTemplate" class="org.springframework.jms.core.JmsTemplate">
        <property name="connectionFactory" ref="connectionFactory" />
        <property name="defaultDestination" ref="demoTopicDestination" />
        <property name="receiveTimeout" value="10000" />
        <property name="pubSubDomain" value="true" />
    </bean>

    <!-- 配置消息队列监听者(topic) -->
    <bean id="topicMessageListener" class="cn.edu.hust.activemq.filter.QueueMessageListener" />
    <bean id="topicMessageListener1" class="cn.edu.hust.activemq.filter.QueueMessageListener1" />

    <!-- 显示注入消息监听容器(topic),配置连接工厂,监听的目标是demoQueueDestination,监听器是上面定义的监听器 -->
    <bean id="queueListenerContainer"
          class="org.springframework.jms.listener.DefaultMessageListenerContainer">
        <property name="connectionFactory" ref="connectionFactory" />
        <property name="destination" ref="demoTopicDestination" />
        <property name="messageListener" ref="topicMessageListener" />
        <!--消息接收超时 -->
        <property name="receiveTimeout" value="10000" />

    </bean>


    <bean id="queueListenerContainerB"
          class="org.springframework.jms.listener.DefaultMessageListenerContainer">
        <property name="connectionFactory" ref="connectionFactory" />
        <property name="destination" ref="demoTopicDestination" />
        <property name="messageListener" ref="topicMessageListener1" />
        <!--消息接收超时 -->
        <property name="receiveTimeout" value="10000" />
    </bean>
</beans>
这里与queue模式不一样的地方在于订阅者有一个或是多个,有几个订阅者就需要配置监听器。
applicationContext.xml
<?xml version="1.0" encoding="UTF-8"?>
<!-- 查找最新的schemaLocation 访问 http://www.springframework.org/schema/ -->
<beans xmlns="http://www.springframework.org/schema/beans"
       xmlns:context="http://www.springframework.org/schema/context"
       xmlns:mvc="http://www.springframework.org/schema/mvc"
       xmlns:xsi="http://www.w3.org/2001/XMLSchema-instance"
       xsi:schemaLocation="http://www.springframework.org/schema/aop
http://www.springframework.org/schema/aop/spring-aop-4.0.xsd
http://www.springframework.org/schema/beans
http://www.springframework.org/schema/beans/spring-beans-4.0.xsd
http://www.springframework.org/schema/context
http://www.springframework.org/schema/context/spring-context-4.0.xsd
http://www.springframework.org/schema/mvc
http://www.springframework.org/schema/mvc/spring-mvc-4.0.xsd">

    <!-- 指定Sping组件扫描的基本包路径 -->
    <context:component-scan base-package="cn.edu.hust.activemq" >
        <!-- 这里只扫描Controller,不可重复加载Service -->
        <context:include-filter type="annotation" expression="org.springframework.stereotype.Controller"/>
    </context:component-scan>
    <!-- 启用MVC注解 -->
    <mvc:annotation-driven />

    <!-- JSP视图解析器-->
    <bean class="org.springframework.web.servlet.view.InternalResourceViewResolver">
        <property name="prefix" value="/" />
        <property name="suffix" value=".jsp" />
        <!--  定义其解析视图的order顺序为1 -->
        <property name="order" value="1" />
    </bean>
</beans>
web.xml
<?xml version="1.0" encoding="UTF-8"?>
<web-app xmlns="http://java.sun.com/xml/ns/javaee"
         xmlns:xsi="http://www.w3.org/2001/XMLSchema-instance"
         xsi:schemaLocation="http://java.sun.com/xml/ns/javaee
          http://java.sun.com/xml/ns/javaee/web-app_3_0.xsd"
         version="3.0">
<display-name>Archetype Created Web Application</display-name>
    <context-param>
        <param-name>contextConfigLocation</param-name>
        <param-value>classpath:applicationContext-ActiveMQ.xml</param-value>
    </context-param>

    <listener>
        <listener-class>org.springframework.web.context.ContextLoaderListener</listener-class>
    </listener>

    <servlet>
        <servlet-name>springMVC</servlet-name>
        <servlet-class>org.springframework.web.servlet.DispatcherServlet</servlet-class>
        <init-param>
            <param-name>contextConfigLocation</param-name>
            <param-value>classpath:applicationContext.xml</param-value>
        </init-param>
        <load-on-startup>1</load-on-startup>
    </servlet>
    <servlet-mapping>
        <servlet-name>springMVC</servlet-name>
        <url-pattern>/</url-pattern>
    </servlet-mapping>

    <!-- 处理编码格式 -->
    <filter>
        <filter-name>characterEncodingFilter</filter-name>
        <filter-class>org.springframework.web.filter.CharacterEncodingFilter</filter-class>
        <init-param>
            <param-name>encoding</param-name>
            <param-value>UTF-8</param-value>
        </init-param>
        <init-param>
            <param-name>forceEncoding</param-name>
            <param-value>true</param-value>
        </init-param>
    </filter>
    <filter-mapping>
        <filter-name>characterEncodingFilter</filter-name>
        <url-pattern>/*</url-pattern>
    </filter-mapping>

</web-app>
其余部分与queue模式代码一样,只是需要多配置一个监听器,目录结构如下:

ProducerService.java
import javax.jms.Destination;


/**
 * Created by Administrator on 2017/5/3.
 */
public interface ProducerService {

    void sendMessage(Destination destination,final String msg);

    void sendMessage(final String msg);
}
ProducerServiceImpl.java
import cn.edu.hust.activemq.service.ProducerService;
import org.springframework.jms.core.JmsTemplate;
import org.springframework.jms.core.MessageCreator;
import org.springframework.stereotype.Service;

import javax.annotation.Resource;
import javax.jms.Destination;
import javax.jms.JMSException;
import javax.jms.Message;
import javax.jms.Session;

/**
 * Created by Administrator on 2017/5/3.
 */
@Service
public class ProducerServiceImpl implements ProducerService {

    @Resource(name="jmsTemplate")
    private JmsTemplate jmsTemplate;

    @Override
    public void sendMessage(Destination destination, final String msg) {
        System.out.println(Thread.currentThread().getName()+" 向队列"+destination.toString()+"发送消息--------->"+msg);
        jmsTemplate.send(destination, new MessageCreator() {
            public Message createMessage(Session session) throws JMSException {
                return session.createTextMessage(msg);
            }
        });
    }

    @Override
    public void sendMessage(final String msg) {
        String destination = jmsTemplate.getDefaultDestinationName();
        System.out.println(Thread.currentThread().getName()+" 向队列"+destination+"发送消息-------->"+msg);
        jmsTemplate.send(new MessageCreator() {
            public Message createMessage(Session session) throws JMSException {
                return session.createTextMessage(msg);
            }
        });
    }
}
ConsumerService.java
import javax.jms.Destination;
import javax.jms.TextMessage;
/**
 * Created by Administrator on 2017/5/3.
 */
public interface ConsumerService {

    TextMessage receive(Destination destination);
}
ConsumerServiceImpl.java
import cn.edu.hust.activemq.service.ConsumerService;

import javax.jms.Destination;
import javax.jms.TextMessage;
import org.springframework.jms.core.JmsTemplate;
import org.springframework.stereotype.Service;

import javax.annotation.Resource;
import javax.jms.JMSException;

/**
 * Created by Administrator on 2017/5/3.
 */
@Service
public class ConsumerServiceImpl implements ConsumerService {
    @Resource(name="jmsTemplate")
    private JmsTemplate jmsTemplate;

    @Override
    public TextMessage receive(Destination destination){
        TextMessage textMessage = (TextMessage) jmsTemplate.receive(destination);
        try{
            System.out.println("从队列" + destination.toString() + "收到了消息:\t"
                    + textMessage.getText());
        } catch (JMSException e) {
            e.printStackTrace();
        }
        return textMessage;
    }
}
QueueMessageListener.java
import javax.jms.JMSException;
import javax.jms.Message;
import javax.jms.MessageListener;
import javax.jms.TextMessage;

/**
 * Created by Administrator on 2017/5/3.
 */
public class QueueMessageListener implements MessageListener {
    public void onMessage(Message message) {
        TextMessage tm = (TextMessage) message;
        try {
            System.out.println("topicMessageListener监听到了文本消息:\t"
                    + tm.getText());
            //do something ...
        } catch (JMSException e) {
            e.printStackTrace();
        }
    }
}
QueueMessageListener1.java
import javax.jms.JMSException;
import javax.jms.Message;
import javax.jms.MessageListener;
import javax.jms.TextMessage;

/**
 * Created by Administrator on 2017/5/3.
 */
public class QueueMessageListener1 implements MessageListener {
    public void onMessage(Message message) {
        TextMessage tm = (TextMessage) message;
        try {
            System.out.println("topicMessageListener1监听到了文本消息:\t"
                    + tm.getText());
            //do something ...
        } catch (JMSException e) {
            e.printStackTrace();
        }
    }
}
接下来是controller:
import cn.edu.hust.activemq.service.ConsumerService;
import cn.edu.hust.activemq.service.ProducerService;
import org.slf4j.Logger;
import org.slf4j.LoggerFactory;
import org.springframework.stereotype.Controller;
import org.springframework.web.bind.annotation.RequestMapping;
import org.springframework.web.bind.annotation.RequestMethod;
import org.springframework.web.bind.annotation.ResponseBody;

import javax.annotation.Resource;
import javax.jms.Destination;
import javax.jms.TextMessage;

/**
 * Created by Administrator on 2017/5/3.
 */
@Controller
public class MessageController {
    private Logger logger = LoggerFactory.getLogger(MessageController.class);
    @Resource(name = "demoQueueDestination")
    private Destination destination;

    //队列消息生产者
    @Resource
    private ProducerService producer;

    //队列消息消费者
    @Resource
    private ConsumerService consumer;

    @RequestMapping(value = "/SendMessage", method = RequestMethod.GET)
    @ResponseBody
    public void send(String msg) {
        logger.info(Thread.currentThread().getName()+"------------开始发送消息");
        producer.sendMessage(msg);
        logger.info(Thread.currentThread().getName()+"------------发送完毕");
    }

    @RequestMapping(value= "/ReceiveMessage",method = RequestMethod.GET)
    @ResponseBody
    public Object receive(){
        logger.info(Thread.currentThread().getName()+"------------开始接受消息");
        TextMessage tm = consumer.receive(destination);
        logger.info(Thread.currentThread().getName()+"------------接受完毕");
        return tm;
    }
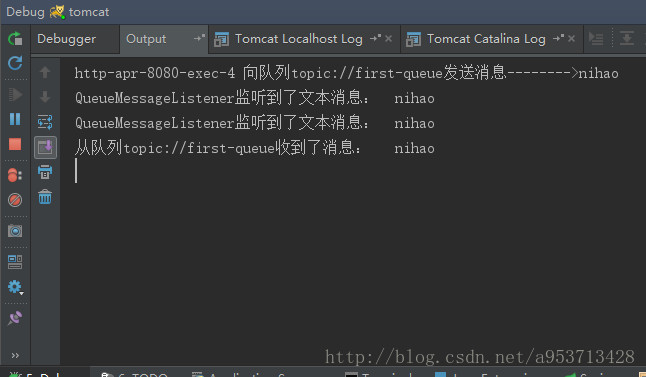
}我们启动工程,在地址栏中输入:http://localhost:8080/SendMessage?msg=nihao,
代码很简单我就没有写前台页面啦,msg部分你可以随便写。回车之后我们去看一下控制台两个订阅者都接收到消息。


 174
174

 被折叠的 条评论
为什么被折叠?
被折叠的 条评论
为什么被折叠?
 到【灌水乐园】发言


