


暑假第一周 ZARA的仿写
写在前面
暑假第一周留校学习,对于ZARA进行了仿写,在仿写的过程之中,还是遇到了一些问题,此文章就是对在仿写过程之中遇到问题及其解决方案的总结,并且对自己仿写的内容进行展示。
viewDidLoad 之中的优先级
先是在布局我的主页面的时候。使用自动布局去布局scrollView,我发现scrollView似乎进行布局之后并不会把scrollview给布局到主页面的时候,当时遇到这个问题,找不到问题发生的原因,以为是scrollView无法进行自动布局,所以直接使用frame对布局进行赋值,也算是将问题解决了。
但是在编写第二个菜单页面的时候,将scrollView和segementView结合的时候,又是遇到这个问题了,但是这次就找到了问题所在的地方。
在程序之中 viewDidLoad 我将所有控件都进行布局,包括对scrollView之中的图片进行添加,代码如下:
#import "JCFourth.h"

@interface JCFourth ()<UIScrollViewDelegate>

@property (nonatomic, strong) UISegmentedControl *segmentedControl;
@property (nonatomic, strong) UIScrollView *scrollView;
@property (nonatomic, strong) NSArray *titles;
@property (nonatomic, strong) NSMutableArray *imageViews;
@property (nonatomic, assign) NSInteger currentIndex;
@property (nonatomic, strong) UIView *lineView;

@end

@implementation JCFourth

- (void)viewDidLoad {
    [super viewDidLoad];

    self.titles = @[@"女士", @"男士", @"儿童", @"HOME", @"香水"];
    self.currentIndex = 0;
    self.imageViews = [NSMutableArray array];

    [self setUpSegmentedControl];
    [self setUpScrollView];
    [self setUpLine];
    [self configureImages];
}


- (void)setUpLine {
    self.lineView = [[UIView alloc] initWithFrame:CGRectZero];
    self.lineView.backgroundColor = [UIColor blackColor];
    self.lineView.translatesAutoresizingMaskIntoConstraints = NO;
    [self.view addSubview:self.lineView];

    [NSLayoutConstraint activateConstraints:@[
        [self.lineView.leadingAnchor constraintEqualToAnchor:self.view.leadingAnchor],
        [self.lineView.trailingAnchor constraintEqualToAnchor:self.view.trailingAnchor],
        [self.lineView.topAnchor constraintEqualToAnchor:self.segmentedControl.bottomAnchor],
        [self.lineView.heightAnchor constraintEqualToConstant:1]
    ]];
}

- (void)setUpSegmentedControl {
    self.segmentedControl = [[UISegmentedControl alloc] initWithItems:self.titles];
    self.segmentedControl.translatesAutoresizingMaskIntoConstraints = NO;
    self.segmentedControl.selectedSegmentIndex = 0;
    [self.segmentedControl addTarget:self action:@selector(segmentChanged:) forControlEvents:UIControlEventValueChanged];
    [self.view addSubview:self.segmentedControl];


    // 设置背景图像为透明图像
    UIImage *transparentImage = [[UIImage alloc] init];
    [self.segmentedControl setBackgroundImage:transparentImage forState:UIControlStateNormal barMetrics:UIBarMetricsDefault];
    [self.segmentedControl setBackgroundImage:transparentImage forState:UIControlStateSelected barMetrics:UIBarMetricsDefault];

    [NSLayoutConstraint activateConstraints:@[
        [self.segmentedControl.leadingAnchor constraintEqualToAnchor:self.view.leadingAnchor],
        [self.segmentedControl.trailingAnchor constraintEqualToAnchor:self.view.trailingAnchor],
        [self.segmentedControl.topAnchor constraintEqualToAnchor:self.view.topAnchor constant:100],
        [self.segmentedControl.heightAnchor constraintEqualToConstant:40]
    ]];


}

- (void)setUpScrollView {
    self.scrollView = [[UIScrollView alloc] init];
    self.scrollView.pagingEnabled = YES;
    self.scrollView.translatesAutoresizingMaskIntoConstraints = NO;
    self.scrollView.showsHorizontalScrollIndicator = NO;
    self.scrollView.showsVerticalScrollIndicator = NO;
    self.scrollView.delegate = self;
    [self.view addSubview:self.scrollView];

    [NSLayoutConstraint activateConstraints:@[
        [self.scrollView.leadingAnchor constraintEqualToAnchor:self.view.leadingAnchor],
        [self.scrollView.trailingAnchor constraintEqualToAnchor:self.view.trailingAnchor],
        [self.scrollView.topAnchor constraintEqualToAnchor:self.segmentedControl.topAnchor],
        [self.scrollView.bottomAnchor constraintEqualToAnchor:self.view.bottomAnchor constant:-75]
    ]];
}
- (void)configureImages {

    for (int i = 0; i < self.titles.count + 2; i++) {
        NSString *imageName;
        UIImageView *imageView = [[UIImageView alloc] initWithFrame:CGRectMake(self.scrollView.frame.size.width * i, 0, self.scrollView.frame.size.width, self.scrollView.frame.size.height)];
        if (i == 0) {
            imageName = @"香水1.jpg";
        } else if (i == self.titles.count + 1) {
            imageName = @"女士1.jpg";
        } else {
            imageName = [NSString stringWithFormat:@"%@1.jpg", self.titles[i - 1]];
        }
        UIImage *image = [UIImage imageNamed:imageName];
        if (image) {
            imageView.image = image;
        } else {
            NSLog(@"Image not found: %@", imageName);
        }
        imageView.contentMode = UIViewContentModeScaleAspectFill;
        imageView.clipsToBounds = YES; // 确保裁剪内容
        [self.scrollView addSubview:imageView];
        [self.imageViews addObject:imageView];
    }
    self.scrollView.contentSize = CGSizeMake(self.scrollView.frame.size.width * (self.titles.count + 2), self.scrollView.frame.size.height);

    CGPoint contentOffset = CGPointMake(self.scrollView.frame.size.width, 0);
    [self.scrollView setContentOffset:contentOffset animated:NO];
}

- (void)segmentChanged:(UISegmentedControl *)sender {
    NSInteger index = sender.selectedSegmentIndex;
    [self.scrollView setContentOffset:CGPointMake(self.view.frame.size.width * (index + 1), 0) animated:YES];
}

- (void)scrollViewDidEndDecelerating:(UIScrollView *)scrollView {
    CGFloat offsetX = scrollView.contentOffset.x;
    CGFloat pageWidth = scrollView.frame.size.width;

    int index = (int)(offsetX / pageWidth + 0.5) % ((int)self.imageViews.count + 2);
    if (index == 0) {
        self.segmentedControl.selectedSegmentIndex = 4;
    } else if (index == 6) {
        self.segmentedControl.selectedSegmentIndex = 0;
    } else {
        self.segmentedControl.selectedSegmentIndex = index - 1;
    }
}

- (void)scrollViewDidScroll:(UIScrollView *)scrollView {
    CGFloat offsetX = scrollView.contentOffset.x;
    CGFloat pageWidth = scrollView.frame.size.width;

    if (offsetX >= pageWidth * 6) {
        // 滚动到假的最后一页,瞬间跳到实际第一页
        [self.scrollView setContentOffset:CGPointMake(pageWidth, 0) animated:NO];
    } else if (offsetX <= 0) {
        // 滚动到假的第一页,瞬间跳到实际最后一页
        [self.scrollView setContentOffset:CGPointMake(pageWidth * 5, 0) animated:NO];
    }


}

@end
scrollView之中的图片内容是空白的,我们得到的界面是这样的:
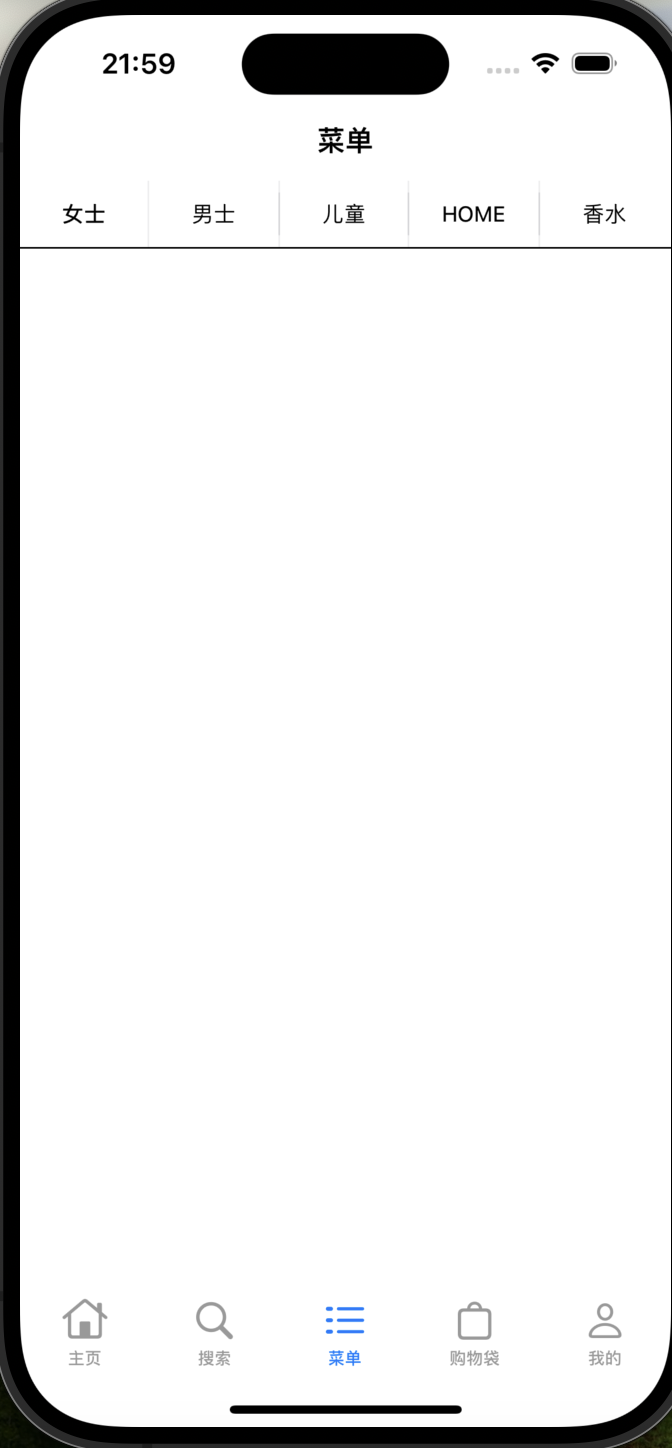
其实在 viewDidLoad ,scrollView是已经布局在了界面之上,但是为什么没有画面呢?是因为在自动布局的过程之中分为几个阶段:
viewDidLoad阶段:在viewDidLoad方法中,我们在其中创建和配置视图的约束,但实际的布局计算和应用尚未发生。viewWillAppear:阶段:在视图控制器即将显示之前,自动布局系统会进行一次布局计算和应用。在这个阶段,系统会根据视图的约束来计算视图的大小和位置,并应用于屏幕上的实际视图。viewDidLayoutSubviews阶段:在视图控制器视图的布局发生变化时,例如设备旋转、状态栏变化或者视图控制器自身布局发生变化时,自动布局系统会再次进行布局计算和应用。这个阶段是在视图完成布局后调用的,所以对于scrollView之中的图片内容,应该是在自动布局计算结束之后,可以在viewDidLayoutSubviews方法中进行进一步的布局调整或更新。
因此,虽然我们在 viewDidLoad 方法中创建和配置视图的约束,但实际的布局计算和应用发生在稍后的阶段,主要是在 viewWillAppear: 和 viewDidLayoutSubviews 阶段。由于在 viewDidLoad 方法中实际的布局计算和应用尚未发生,所以在 viewDidLoad 方法中尝试设置图片视图的位置或大小,无法得到预期的结果。
那解决方法其实很简单,我们只要将将 configureImages 方法放在 viewDidLayoutSubviews 方法中以确保在正确的时机设置图片视图的尺寸。
而在 viewDidLayoutSubviews 方法中,视图层次结构已经完成布局,并且子视图的大小和位置已经确定。这是因为 viewDidLayoutSubviews 方法在每次视图布局发生变化时都会被调用,包括视图控制器的初始布局以及后续的布局更改,例如设备旋转、状态栏变化或者视图控制器自身布局发生变化。
因此,将 configureImages 方法放在 viewDidLayoutSubviews 方法中,可以确保在正确的时机设置图片视图的尺寸,以适应当前的布局状态。这样,无论是初始布局还是后续的布局更改,都能够正确地显示图片在 UIScrollView 中。
总结起来,将 configureImages 方法放在 viewDidLayoutSubviews 方法中是为了确保在视图布局完成后再设置图片视图的尺寸,以适应当前的布局状态。这样可以解决图片在 UIScrollView 中无法正确显示的问题。
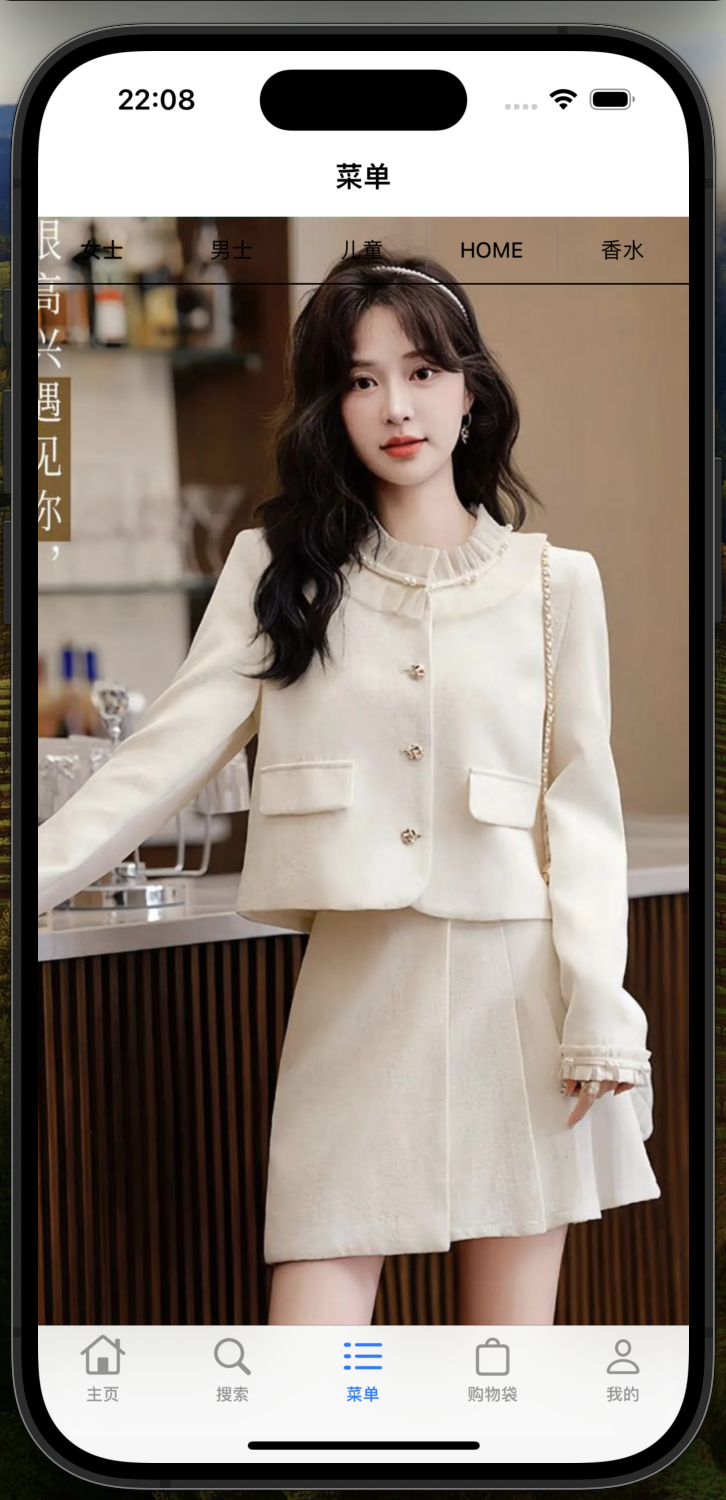
最后结果如上图。
添加自定义字体
在仿写NARA的过程之中,我发现自带的字体和logo本身的差距较大,于是想着自己找个更美观的艺术字来进行使用,于是学习了如何添加字体。
下载想要的字体
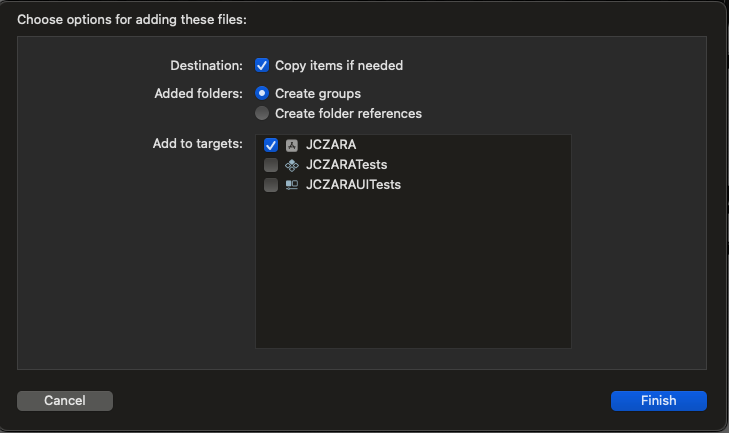
在网上查找相关的字体下载网站,下载后缀为.ttf 或者为 .otf的文件,与添加图片类似,直接将文件拖拽至项目之中,记得勾选add to target
添加至info之中
然后打开info文件,在Imformation property List的目录下添加 “Fonts provided by application”的文件

最后添加文件的全称(加上后缀),添加到这个文件夹之下

找到字体名字并应用
因为可能存在字体本身的名字和我们添加的.ttf的文件上的名字不同,那么我们就要找出所属的字体名字。我们可以用上这个程序:
    for(NSString *familyname in [UIFont familyNames]){
          NSLog(@"family: %@",familyname);
          for(NSString *fontName in [UIFont fontNamesForFamilyName:familyname]){
              NSLog(@"----font: %@",fontName);
          }
          NSLog(@"--------------");
    }
这段代码的意思就是,是打印出所有非系统字体的类以及具体的字体名字,这是一个很直接的方法,但由于xcode也有自带的非系统字体,那么如果字体原先的名字和我们使用的.ttf文件的差别很大的话,我们要将他们找出来的话还是很麻烦的,不过一般情况下字体自身的名字是会和我们添加的.ttf文件名字相等的。
找到字体名字之后我们可以使用+ (nullable UIFont *)fontWithName:(NSString *)fontName size:(CGFloat)fontSize; 的方法对字体进行运用
UILabel *titleLabel = [[UILabel alloc] initWithFrame:CGRectZero];
    titleLabel.text = @"ZARA";
    titleLabel.font = [UIFont fontWithName:@"TimesNewRomanPS-BoldItalicMT" size:60];
    titleLabel.textAlignment = NSTextAlignmentLeft;
经过以上的操作我们就可以使用自定义的字体啦
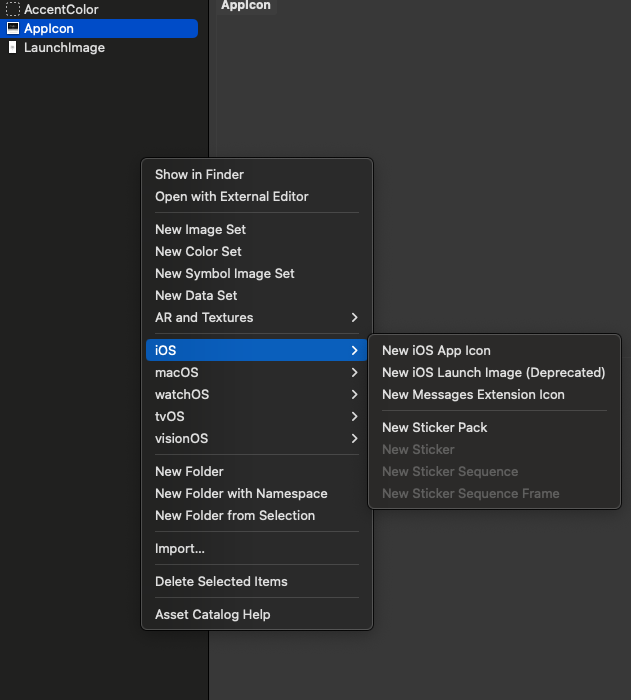
添加应用图标和启动页面
应用图标和启动页面又被称作app icon和launch image
对于应用图标的使用其实很简单
我们在左侧菜单栏找到Assets,点进去后右键在iOS选项之中点击添加New iOS App icon,然后将自己想要的图片放入即可。(注:要求的图片应该是1024✖️1024 pt)
那么对于启动页面,我们可以在左侧菜单栏的Launch Screen之中将相应的图片界面给手动添加进去,如下图所示
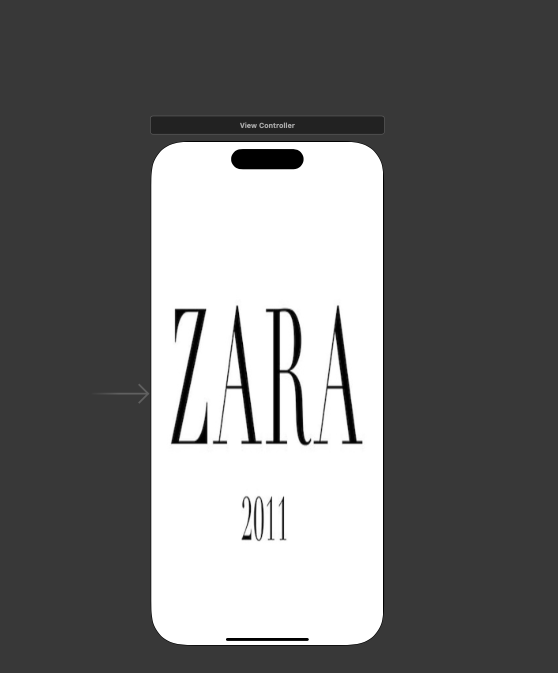
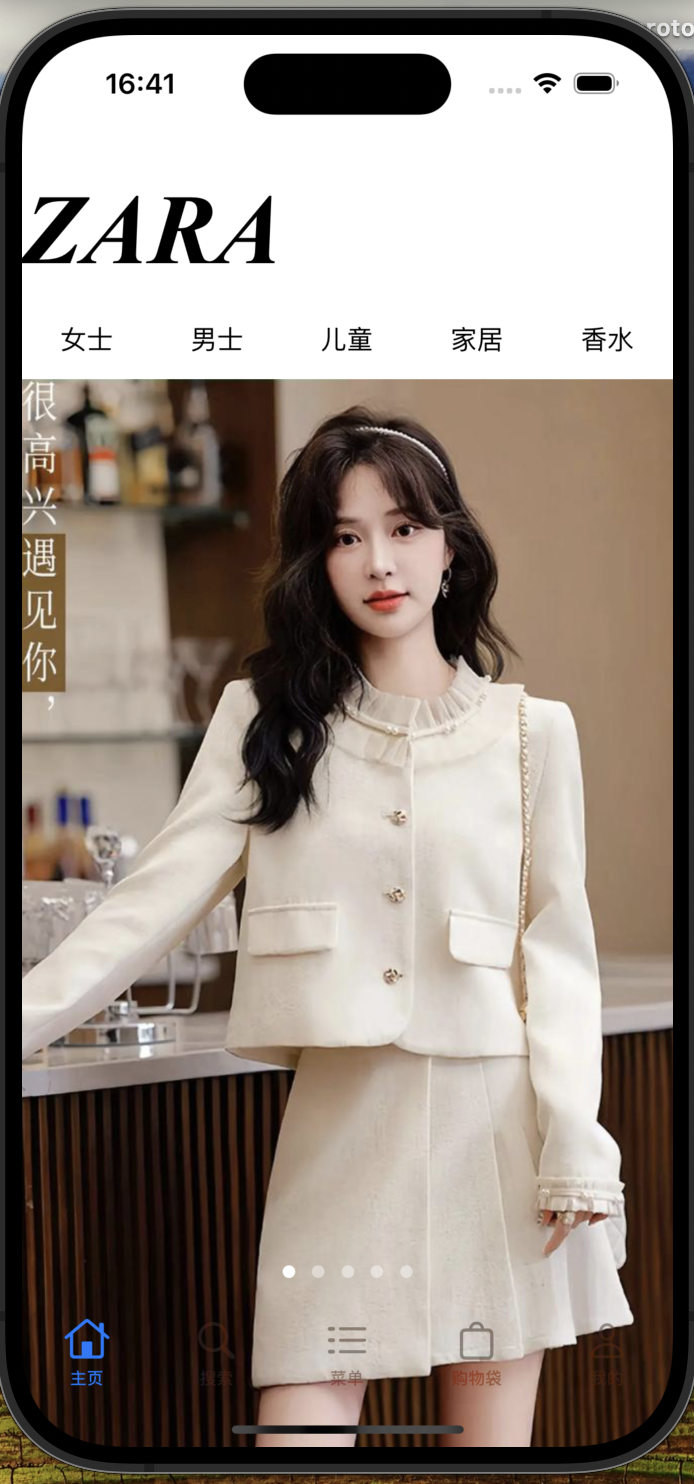
将以上的内容综合一下,我们就得到了具备应用图标和启动页面,看起来有点像模像样的ZARA啦


 被折叠的 条评论
为什么被折叠?
被折叠的 条评论
为什么被折叠?
 到【灌水乐园】发言


