


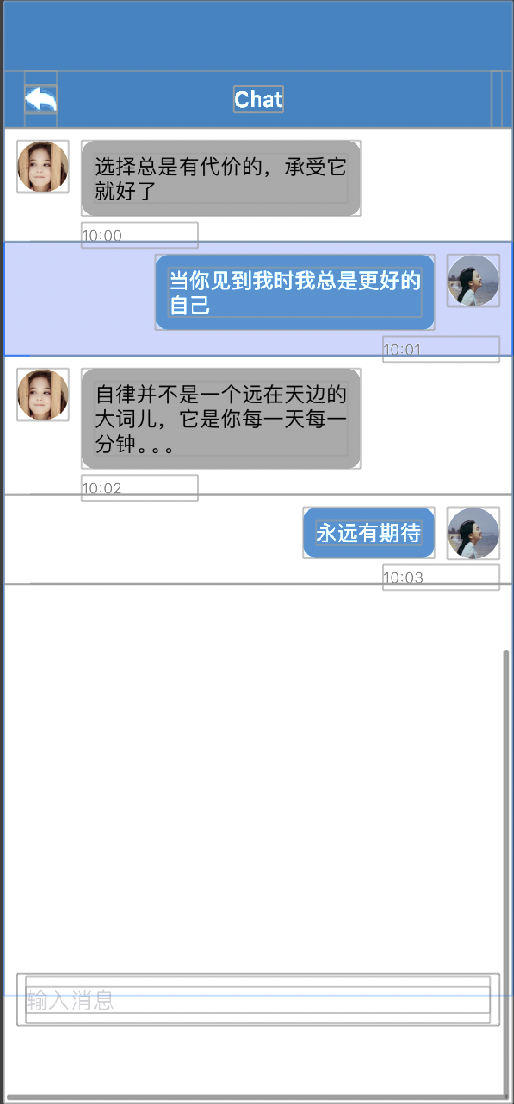
OC实现简单的聊天室界面
在3Gshared之中的设置界面,我的信息之中需要写一个类似QQ的聊天界面,于是学习了聊天室是如何编写的,特此进行记录
创建消息的类
首先我们先对消息类进行一个创建,消息的内容我设置为消息的文本,发布的时间,消息的发送方(即对象/自己),还有聊天的头像。在这里消息的发送方我使用一个枚举值来代表不同的消息发送方,代码如下
#import <Foundation/Foundation.h>

typedef NS_ENUM(NSUInteger, MessageType) {
    MessageTypeSent,
    MessageTypeReceived
};

@interface Message : NSObject

@property (nonatomic, copy) NSString *text;
@property (nonatomic, copy) NSString *time;
@property (nonatomic, copy) NSString *avatar;
@property (nonatomic, assign) MessageType type;

- (instancetype)initWithText:(NSString *)text time:(NSString *)time avatar:(NSString *)avatar type:(MessageType)type;

@end
我们还要在对应的.m对Message类进行init方法对重写
#import "Message.h"
@implementation Message

- (instancetype)initWithText:(NSString *)text time:(NSString *)time avatar:(NSString *)avatar type:(MessageType)type {
    self = [super init];
    if (self) {
        _text = text;
        _time = time;
        _avatar = avatar;
        _type = type;
    }
    return self;
}

@end
聊天自定义cell的编写
对于每个聊天气泡,其实本质上就是一个特殊的自定义cell,由消息文本,时间文本,头像,和消息的发送方来显示的,所以在cell之中我们添加以下的属性
@property (nonatomic, strong) UIImageView *avatarImageView;
@property (nonatomic, strong) UILabel *messageLabel;
@property (nonatomic, strong) UILabel *timeLabel;
@property (nonatomic, strong) UIView *bubbleView;
接下来是对控件的布局,首先是需要我们进行对主要文本的布局,对于UILabel来说实现的一个难点就是在于如何根据文本的多少而规划出相应的位置,我对于聊天室是中的气泡大小设置如下
CGSize maxSize = CGSizeMake(200, CGFLOAT_MAX);
    CGRect textRect = [self.messageLabel.text boundingRectWithSize:maxSize options:NSStringDrawingUsesLineFragmentOrigin attributes:@{NSFontAttributeName: self.messageLabel.font} context:nil];
    textRect.size.width += 20;
    textRect.size.height += 20;
第一个maxSize的设定意义在于,设置气泡的最大宽度,即为200个像素点,boundingRectWithSize:maxSize:这个函数是根据文本字符串在对应的条件下,所占的矩形区域,NSStringDrawingUsesLineFragmentOrigin这个枚举类型指的是我们将每行的文本从左侧开始绘制,它的意义大概在于如果我们上一行打了一整行的字,下一行剩下一点字就会从左开始对齐而不是居中。attributes:这个属性其实是一个字典,设置了这个文本绘制的文字相关属性,包括大小,字体,颜色等。textRect.size.width += 20; textRect.size.height += 20; 这两行等主要目的是在于将气泡的背景的大小保证盖住文本。
接下来其实就是根据发送方的不同进行相应的布局,由于是一个一个的cell,所以我们其实不用太担心视图的布局是否要根据它的大小加上偏移量,只要将内容全部布局至cell的contentView之中,关于cell高度的控制后文会有。那么根据发送者的不同,头像被设置在两边,我们根据之前设置的枚举常量使用if else 进行相关判断,即可完成对不同发送者消息的区分。
具体代码如下
if (message.type == MessageTypeSent) {
        self.bubbleView.backgroundColor = [UIColor colorWithRed:69 / 255.0f green:148 / 255.0f blue:213 /255.0f alpha:1.0];
        self.messageLabel.textColor = [UIColor whiteColor];
        self.avatarImageView.image = [UIImage imageNamed:@"sixin_img1.png"];
        self.avatarImageView.frame = CGRectMake(self.contentView.frame.size.width - 50, 10, 40, 40);
        self.bubbleView.frame = CGRectMake(self.contentView.frame.size.width - 60 - textRect.size.width, 10, textRect.size.width, textRect.size.height);
        self.messageLabel.frame = CGRectMake(10, 10, textRect.size.width - 20, textRect.size.height - 20);
        self.timeLabel.frame = CGRectMake(self.contentView.frame.size.width - 100, CGRectGetMaxY(self.bubbleView.frame) + 5, 90, 20);
    } else {
        self.avatarImageView.image = [UIImage imageNamed:@"sixin_img2.png"];
        self.bubbleView.backgroundColor = [UIColor lightGrayColor];
        self.messageLabel.textColor = [UIColor blackColor];

        self.avatarImageView.frame = CGRectMake(10, 10, 40, 40);
        self.bubbleView.frame = CGRectMake(60, 10, textRect.size.width, textRect.size.height);
        self.messageLabel.frame = CGRectMake(10, 10, textRect.size.width - 20, textRect.size.height - 20);
        self.timeLabel.frame = CGRectMake(60, CGRectGetMaxY(self.bubbleView.frame) + 5, 90, 20);
    }
视图控制器的编写
cell高度的控制
对于视图控制器,我们需要创建一个可变的数组去存储每一个message类的相关信息,然后根据可变数组的数量来创建cell的单元格的个数,其次就是创建tableView,对于每一个cell的高度,我们仍然使用[message.text boundingRectWithSize:maxSize options:NSStringDrawingUsesLineFragmentOrigin attributes:@{NSFontAttributeName: [UIFont systemFontOfSize:16]} context:nil];去转化出cell的高度,在此高度上在添加一点,使得cell稍微居中一些。
- (CGFloat)tableView:(UITableView *)tableView heightForRowAtIndexPath:(NSIndexPath *)indexPath {
    Message *message = self.messages[indexPath.row];
    CGSize maxSize = CGSizeMake(200, CGFLOAT_MAX);
    CGRect textRect = [message.text boundingRectWithSize:maxSize options:NSStringDrawingUsesLineFragmentOrigin attributes:@{NSFontAttributeName: [UIFont systemFontOfSize:16]} context:nil];
    return textRect.size.height + 50;
}
文本框协议的完成
接下来就是实现文本框的协议,当我们按下文本框的回车键之后,将文本框的文本赋值给message类之中的text,由于组内要求时每一条信息互为间隔,所以我使用了一个全局变量count,当count为奇数就是对面的消息类型,count为双数就是自己的消息类型。
- (BOOL)textFieldShouldReturn:(UITextField *)textField这个方法就是监听了文本框按回车之后的实现的方法
- (BOOL)textFieldShouldReturn:(UITextField *)textField {
    static int count = 0;
    if (textField.text.length > 0) {
        if ( count % 2 == 0){
            Message *message = [[Message alloc] initWithText:textField.text time:@"10:05" avatar:@"sixin_img1.png" type:MessageTypeSent];
            [self.messages addObject:message];
            [self.tableView reloadData];
            [self scrollToBottom];
            textField.text = @"";
        } else {
            Message *message = [[Message alloc] initWithText:textField.text time:@"10:05" avatar:@"sixin_img2.png" type:MessageTypeReceived];
            [self.messages addObject:message];
            [self.tableView reloadData];
            [self scrollToBottom];
            textField.text = @"";
        }
        count++;
    }
    return YES;
}
监听键盘弹出和收回的事件
我们现在一个合适的地方放置通知中心,监听键盘的事件,一般都是在viewDidLoad之中,其中UIKeyboardWillShowNotification,为一个特殊的枚举值,专门带指键盘弹出的事件,UIKeyboardWillHideNotification为键盘消失的事件
[[NSNotificationCenter defaultCenter] addObserver:self selector:@selector(keyboardWillShow:) name:UIKeyboardWillShowNotification object:nil];
    [[NSNotificationCenter defaultCenter] addObserver:self selector:@selector(keyboardWillHide:) name:UIKeyboardWillHideNotification object:nil];
设置监听之后实现的方法:
当监听到键盘弹出的时候,视图使用transform属性对视图进行平移一个键盘的高度,方便进行打字操作,当监听到键盘消失的事件时就进行将视图本身平移回去。
- (void)keyboardWillShow:(NSNotification *)notification {

    NSDictionary *userInfo = [notification userInfo];
    CGRect keyboardFrame = [[userInfo objectForKey:UIKeyboardFrameEndUserInfoKey] CGRectValue];

    CGFloat offset = keyboardFrame.size.height;

    [UIView animateWithDuration:0.2 animations:^{
        self.view.transform = CGAffineTransformMakeTranslation(0, -offset);
    }];
}

- (void)keyboardWillHide:(NSNotification *)notification {

    NSDictionary *userInfo = [notification userInfo];
    CGFloat duration = [[userInfo objectForKey:UIKeyboardAnimationDurationUserInfoKey] floatValue];

    [UIView animateWithDuration:duration animations:^{
        self.view.transform = CGAffineTransformIdentity;
    }];
}
一个细节
当我们输入信息输入的相对较多时,我们要实现tableview的自动滚动,即当消息发送之后仍然滚动视图仍然处于最底部,因此我们还需要进一定的修改,即当每次我们输入消息时,都将视图滚动至最底部
- (void)scrollToBottom {
    if (self.messages.count > 0) {
        NSIndexPath *indexPath = [NSIndexPath indexPathForRow:self.messages.count - 1 inSection:0];
        [self.tableView scrollToRowAtIndexPath:indexPath atScrollPosition:UITableViewScrollPositionBottom animated:YES];
    }
}
这个函数我们在可变数组每次添加新的消息之后对tableView进行reload的时候调用,就可以时刻保持着处在滚动视图底部了。


 215
215

 被折叠的 条评论
为什么被折叠?
被折叠的 条评论
为什么被折叠?
 到【灌水乐园】发言


