


Spring Boot 监听器是Spring框架中一个重要的组成部分,它允许你在Spring应用程序的生命周期中的特定时刻执行某些操作。在Spring Boot中,监听器主要用于响应应用程序中发生的事件。这些事件可以是应用程序的启动、关闭,或者是Spring上下文中的bean的创建和销毁等。
1. 监听器实现方式
Spring Boot提供了多种方式来实现监听器:
1.1 实现ApplicationListener接口
通过实现ApplicationListener接口来创建一个监听器。这个接口要求你实现一个onApplicationEvent方法,该方法会在事件发生时被调用。
import org.springframework.context.ApplicationListener;
import org.springframework.context.event.ContextRefreshedEvent;
import org.springframework.stereotype.Component;

@Component
public class MyApplicationListener implements ApplicationListener<ContextRefreshedEvent> {
    @Override
    public void onApplicationEvent(ContextRefreshedEvent event) {
        // 你的逻辑
    }
}
1.2 使用@EventListener注解
在方法上使用@EventListener注解来创建一个监听器,这种方法比实现接口更加简洁。
import org.springframework.context.event.EventListener;
import org.springframework.stereotype.Component;

@Component
public class MyEventListener {

    @EventListener
    public void handleContextRefreshedEvent(ContextRefreshedEvent event) {
        // 你的逻辑
    }
}
2. SpringBoot 默认监听器
| 监听器名称 | 监听的事件 | 描述 |
|---|---|---|
| ApplicationStartingListener | ApplicationStartingEvent | 在应用程序启动初期,用于日志和注册监听器。 |
| ConfigurationPropertyBindingListener | ApplicationEnvironmentPreparedEvent | 在环境准备完成后,绑定配置属性。 |
| ConfigFileApplicationListener | ApplicationEnvironmentPreparedEvent, ApplicationPreparedEvent | 加载配置文件并设置环境属性。 |
| AnsiOutputApplicationListener | ApplicationStartingEvent, ApplicationEnvironmentPreparedEvent | 根据环境配置ANSI输出。 |
| LoggingApplicationListener | ApplicationStartingEvent, ApplicationEnvironmentPreparedEvent, ApplicationPreparedEvent, ApplicationFailedEvent | 配置日志系统。 |
| ClasspathLoggingApplicationListener | ApplicationStartingEvent, ApplicationEnvironmentPreparedEvent | 记录类路径下的资源。 |
| FileEncodingApplicationListener | ApplicationEnvironmentPreparedEvent | 检查文件编码。 |
| DelegatingApplicationListener | ApplicationEvent | 将事件委托给其他监听器。 |
| ContextIdApplicationContextInitializer | ApplicationPreparedEvent | 设置ApplicationContext的ID。 |
| SharedMetadataReaderFactoryContextInitializer | ApplicationPreparedEvent | 初始化共享的元数据读取工厂。 |
| ServerPortInfoApplicationContextInitializer | ApplicationPreparedEvent | 记录服务端口信息。 |
| ConditionEvaluationReportLoggingListener | ApplicationPreparedEvent, ApplicationFailedEvent | 记录条件评估报告。 |
| ResetMocksApplicationListener | BeforeTestClassEvent, AfterTestClassEvent | 测试相关,重置Mock对象。 |
| ParentContextCloserApplicationListener | ApplicationEvent | 确保父级上下文在子级上下文之后关闭。 |
| ClearCachesApplicationListener | ContextClosedEvent | 清理缓存。 |
| FileWatcherConfigurationApplicationListener | ApplicationEvent | 监控配置文件的变化。 |
3. 原理解析
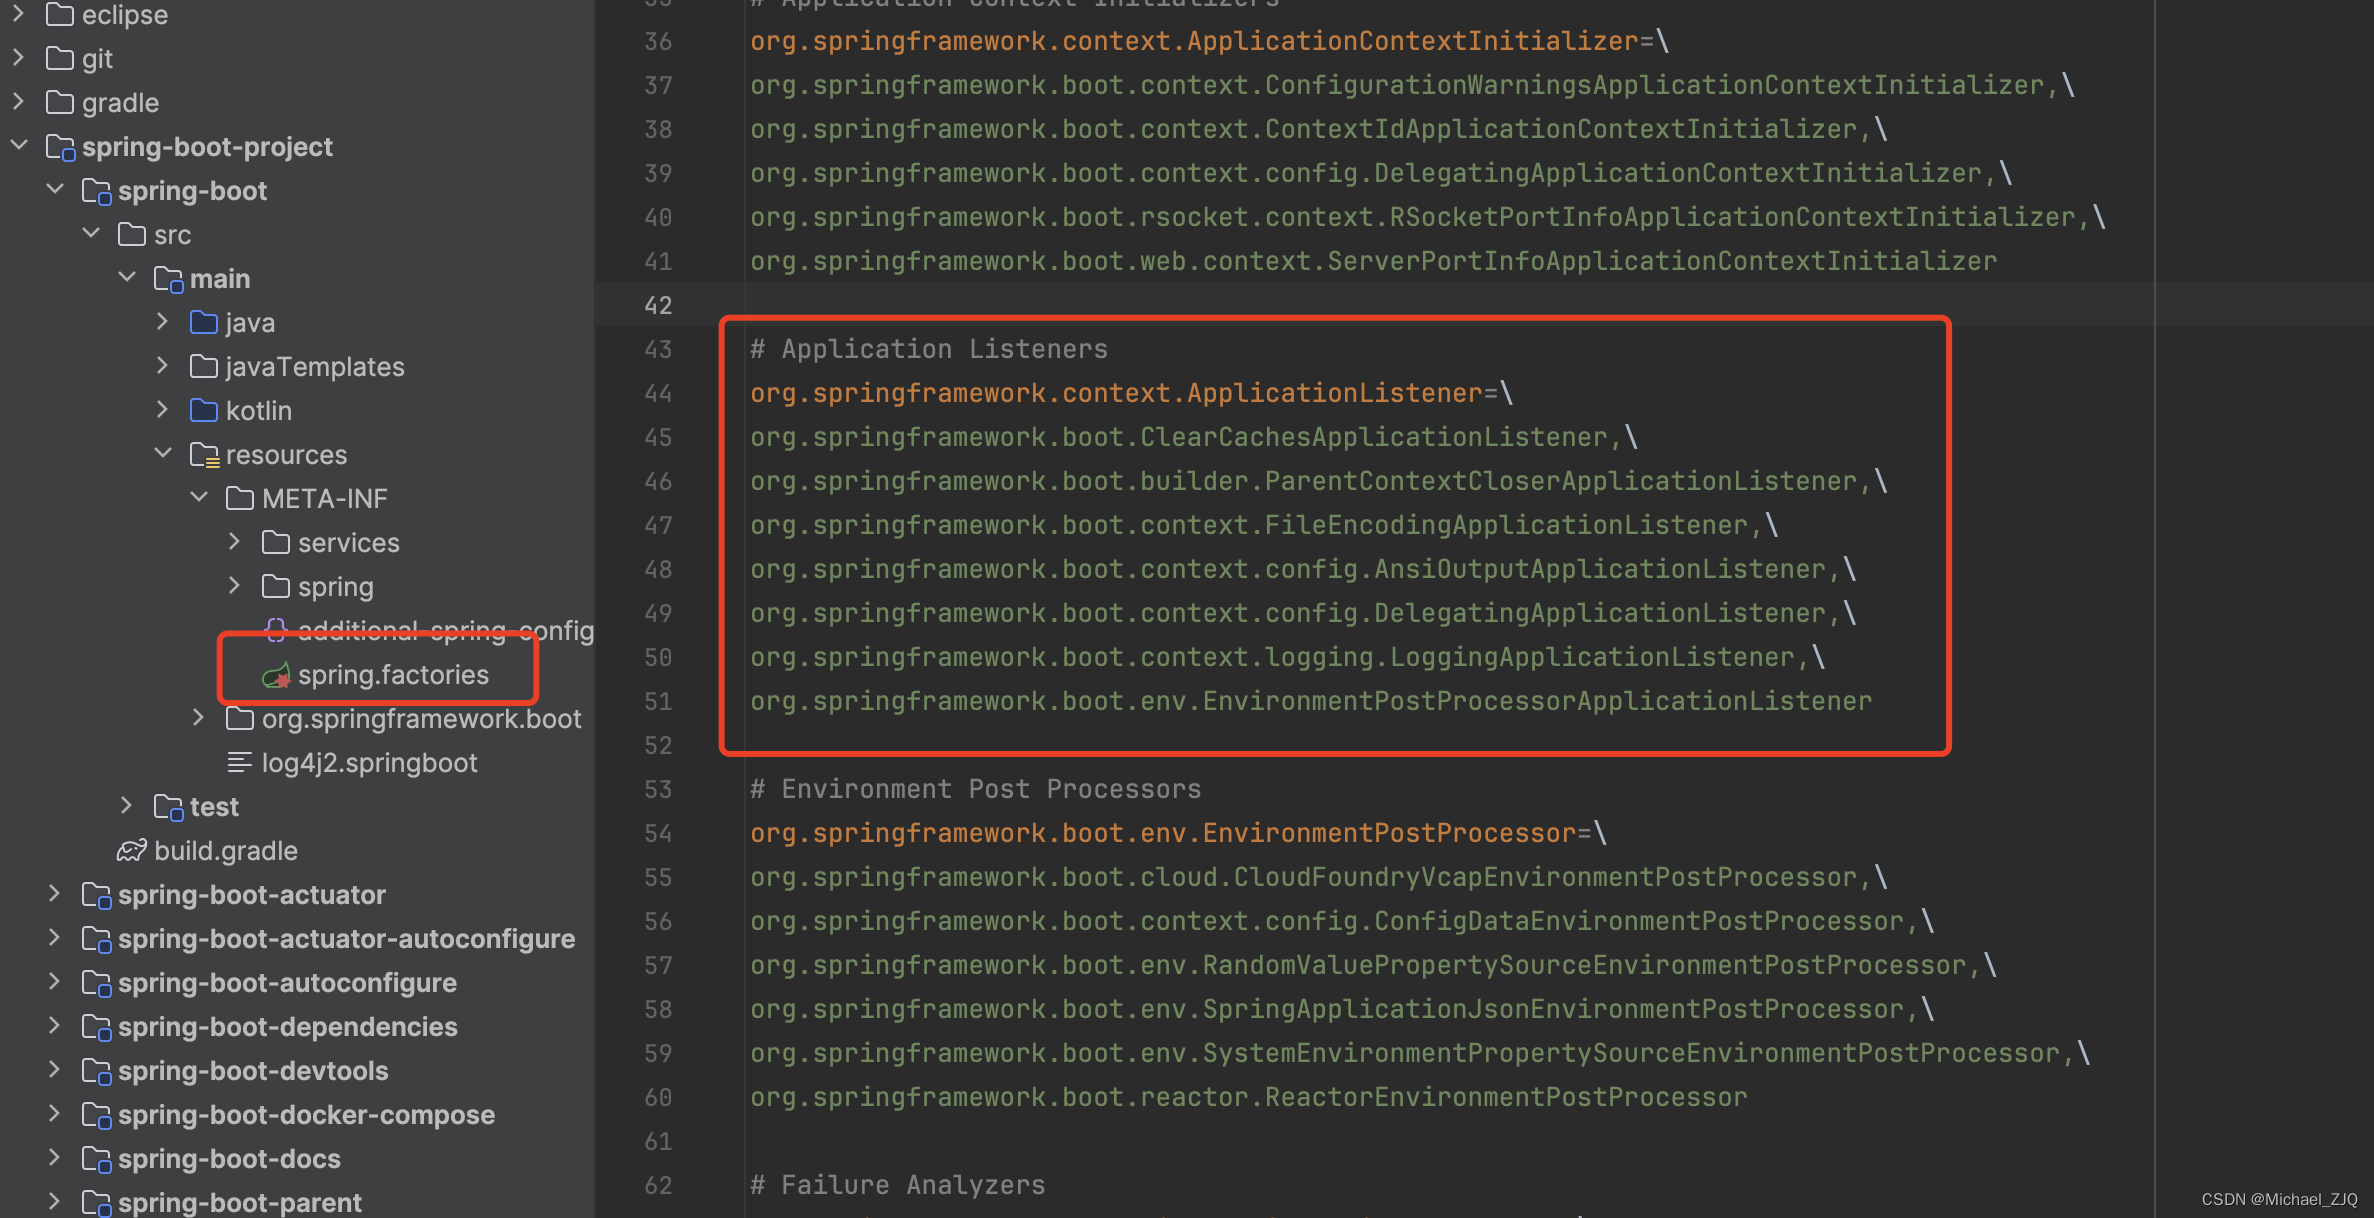
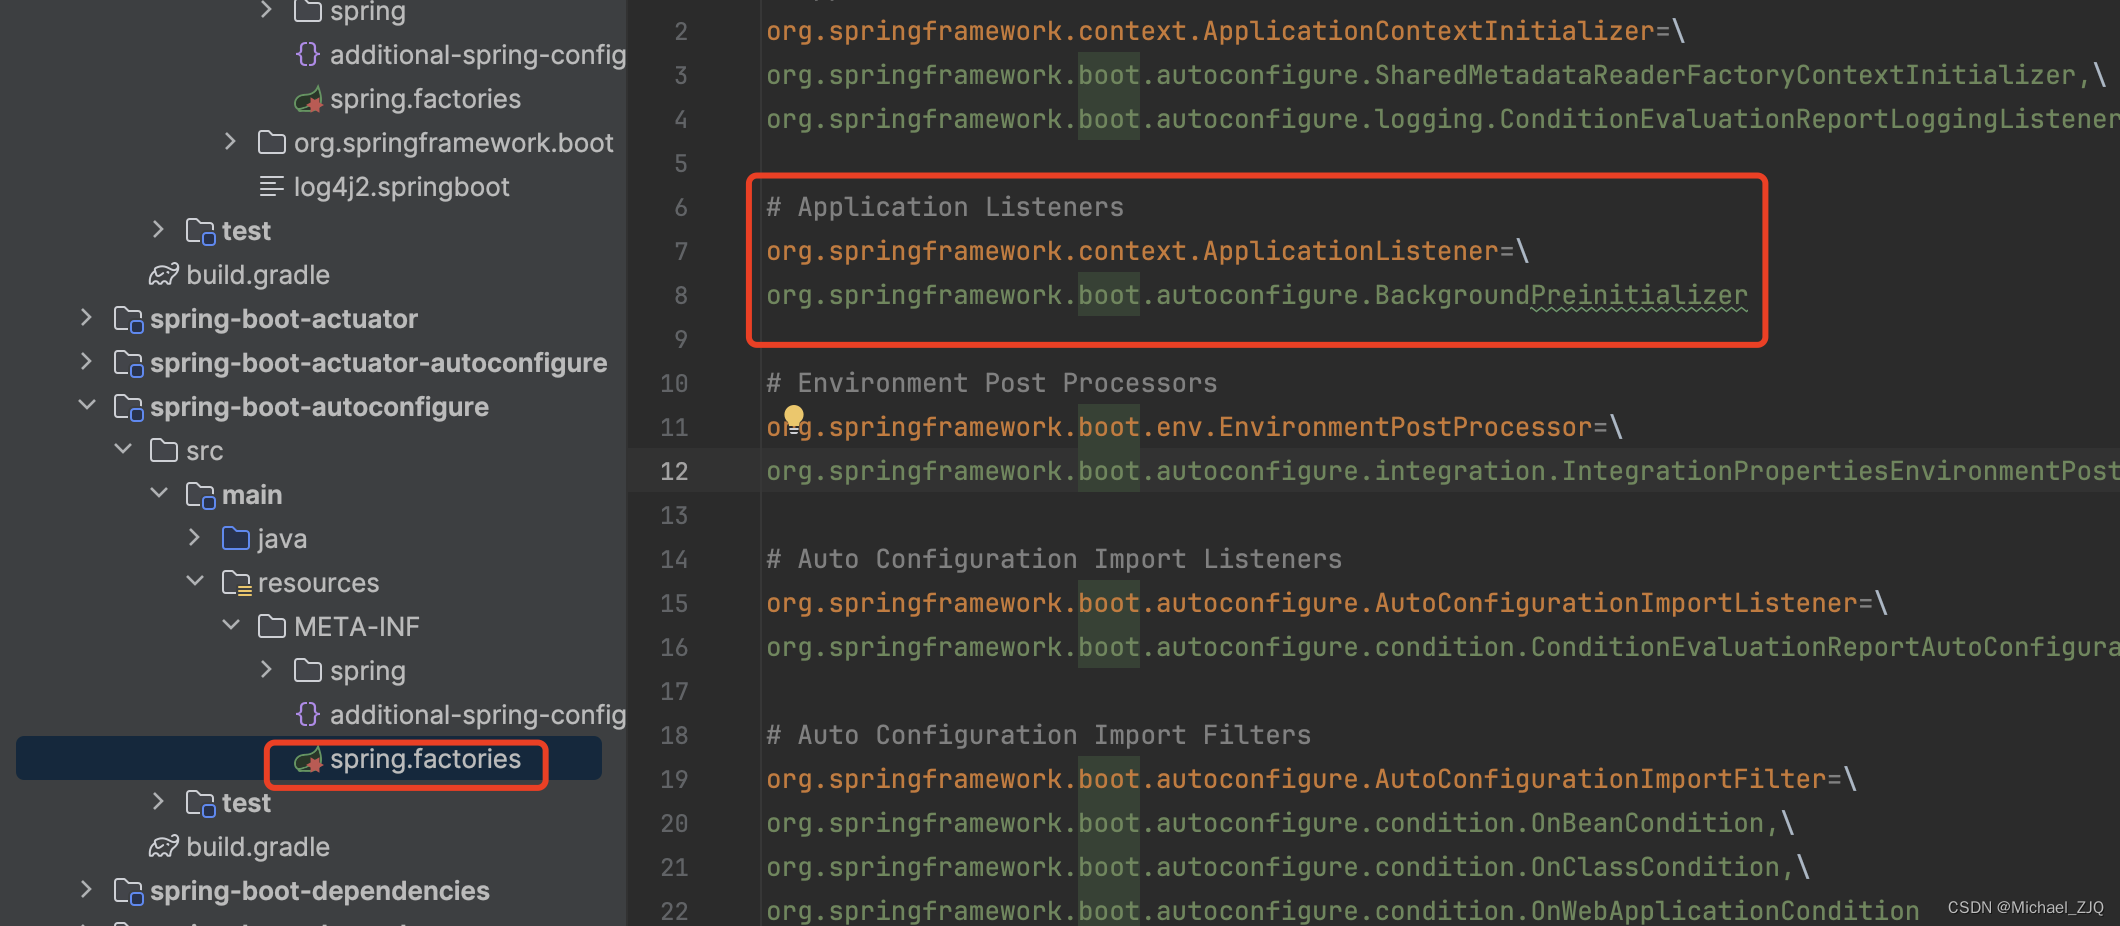
SpringApplication的构造方法中会加载所有声明在spring.factories中的监听器。
3.1 初始化监听器
在 SpringApplication 类的构造方法中,初始化了所有的监听器。
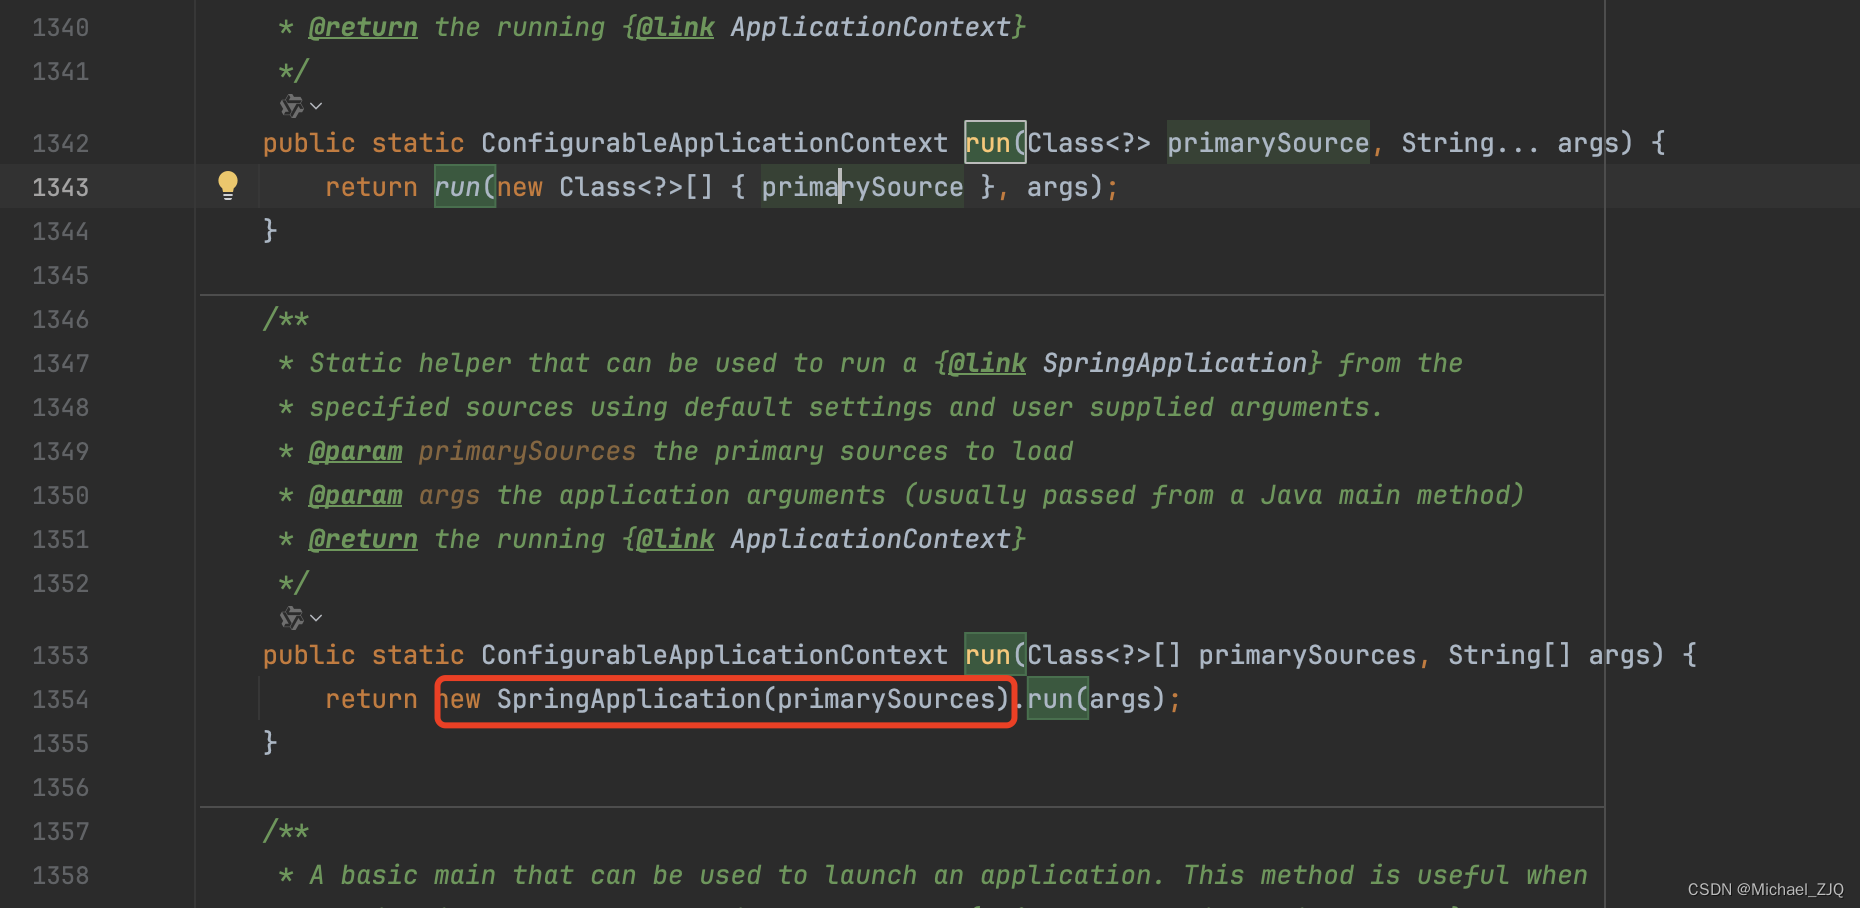
SpringBoot 的启动类调用 SpringApplication 的 run 方法,run 方法中new 了一个 SpringApplication 对象,我们看看在 SpringApplication 的构造方法中都处理了上面逻辑


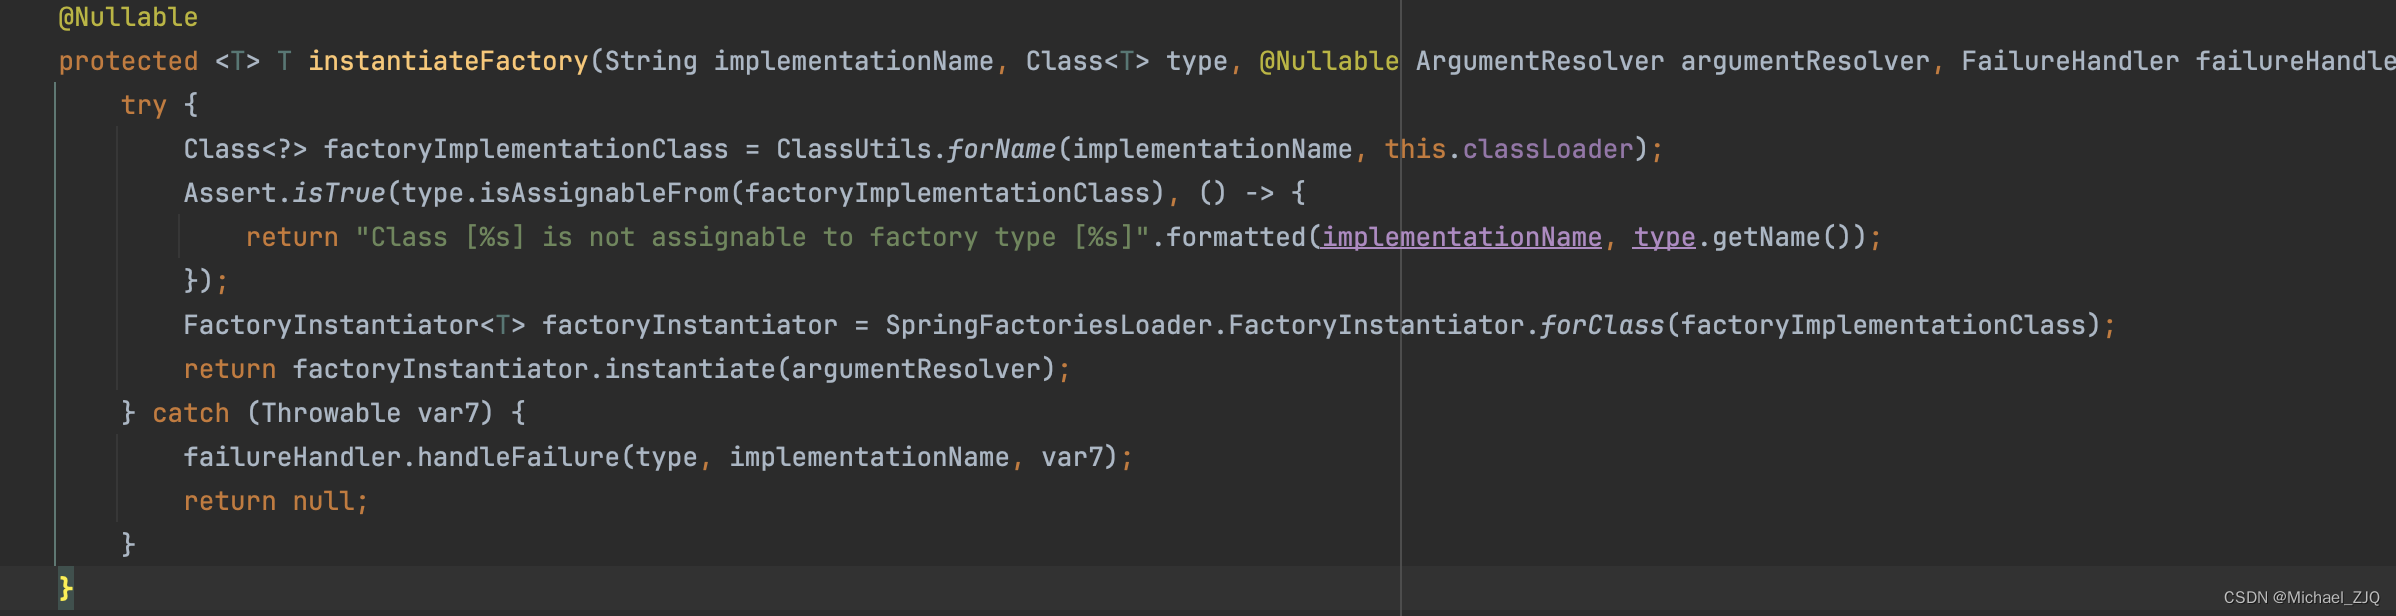
3.2 实例化监听器
在这段代码中,前面SpringFactoriesLoader.forDefaultResourceLocation(getClassLoader())是加载 spring.factories 中的监听器,而后面的 load 方法则是实例化加载的监听器了。

3.3 发布事件
在 SpringApplication 的 run 方法中,我们可以看到很多的事件发布
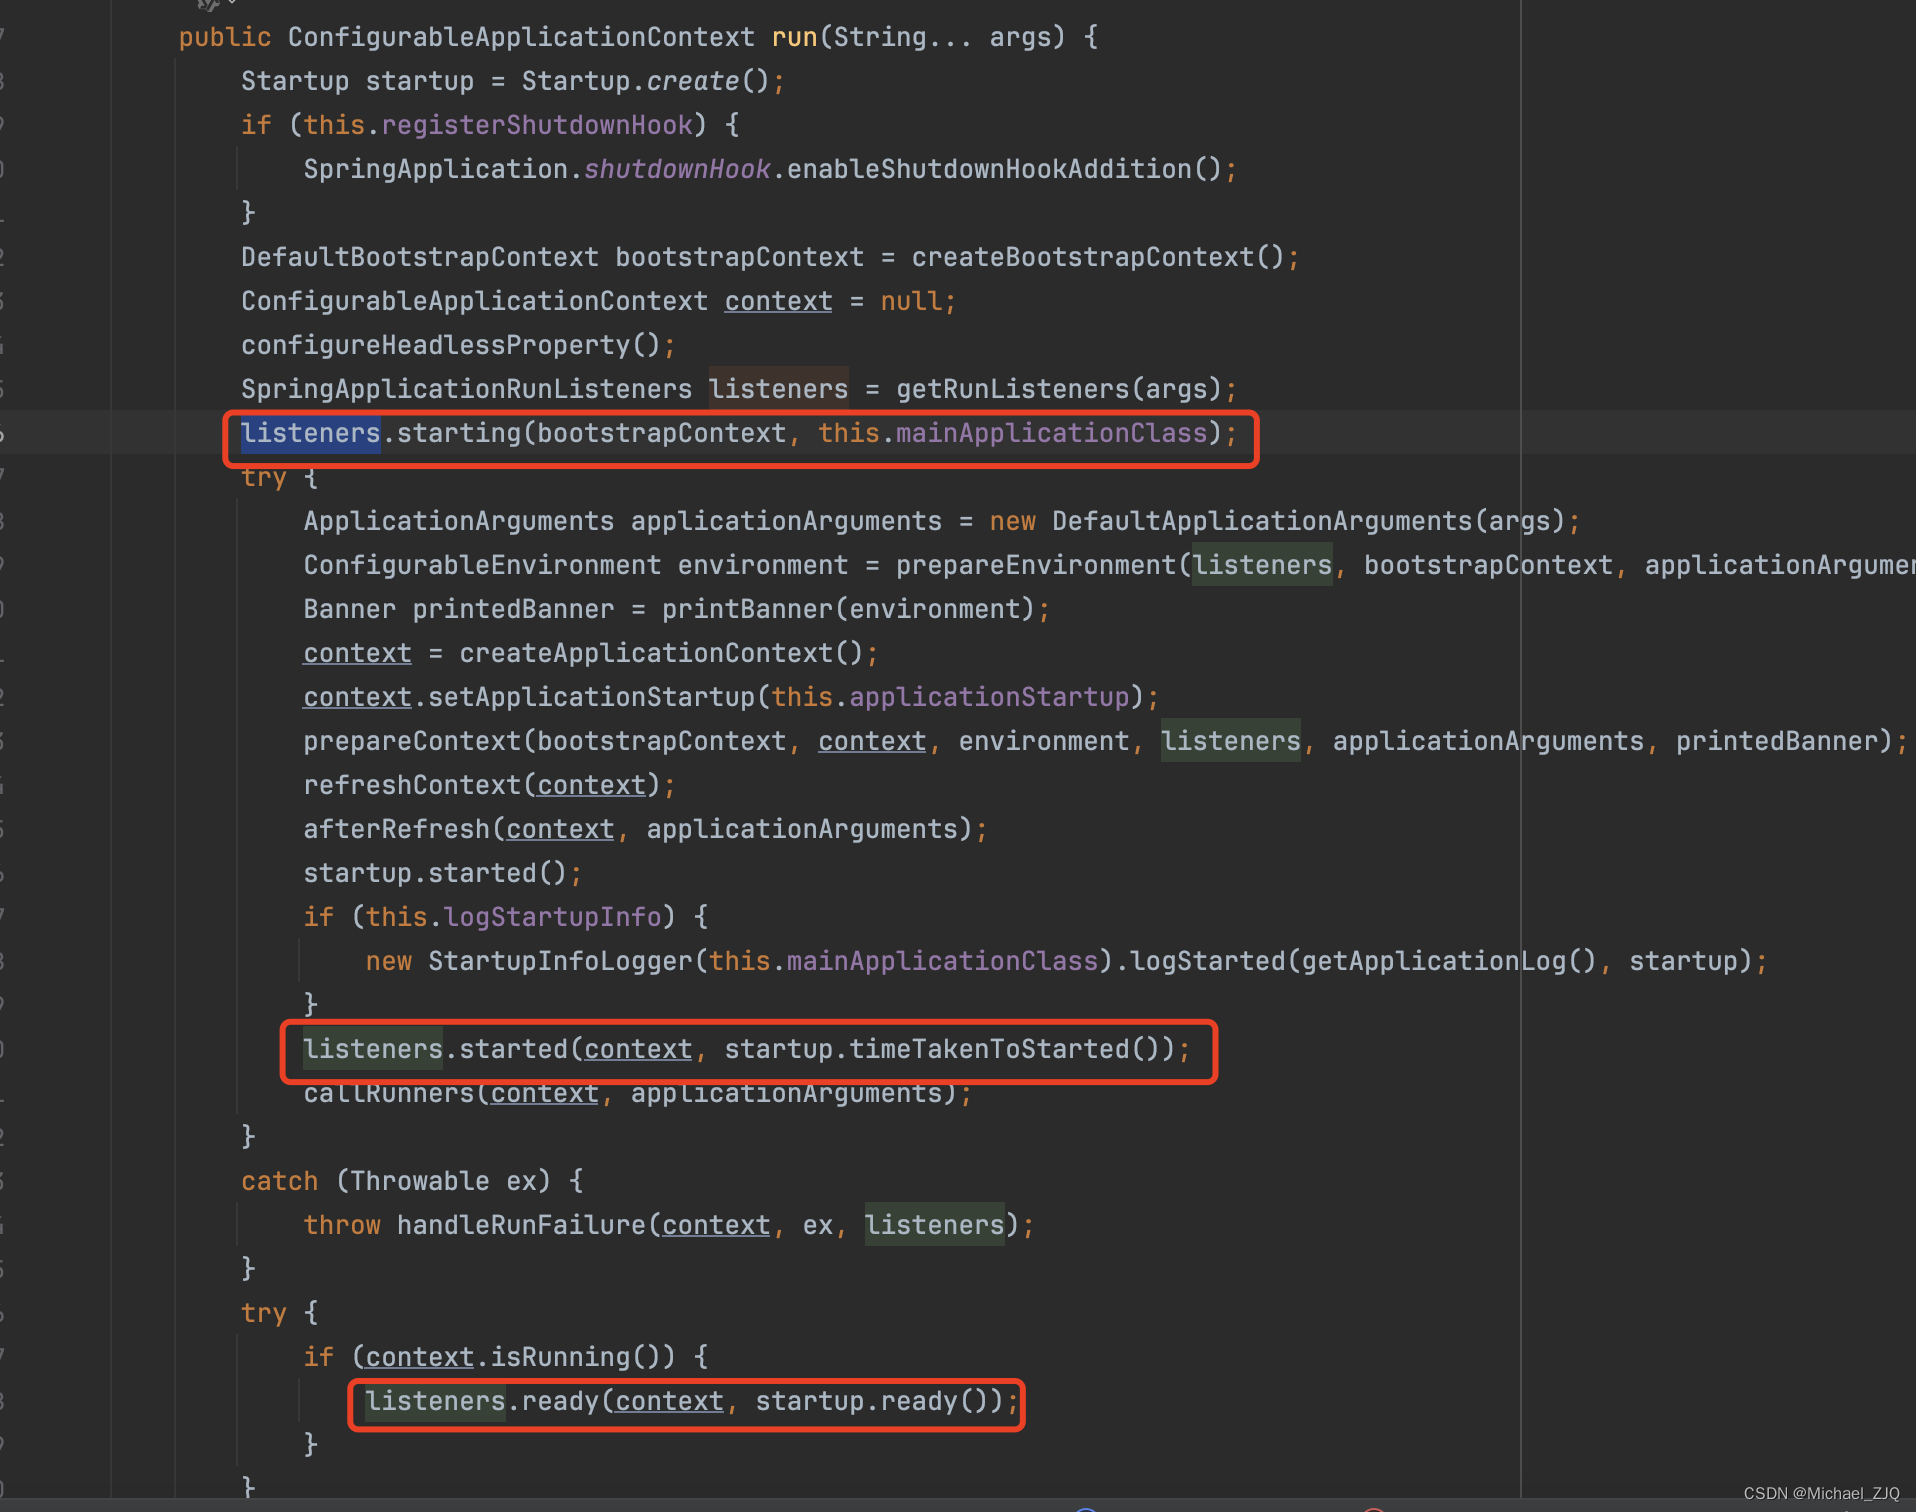
我们随便看个,其他的都类似,比如我们看服务启动监听器:

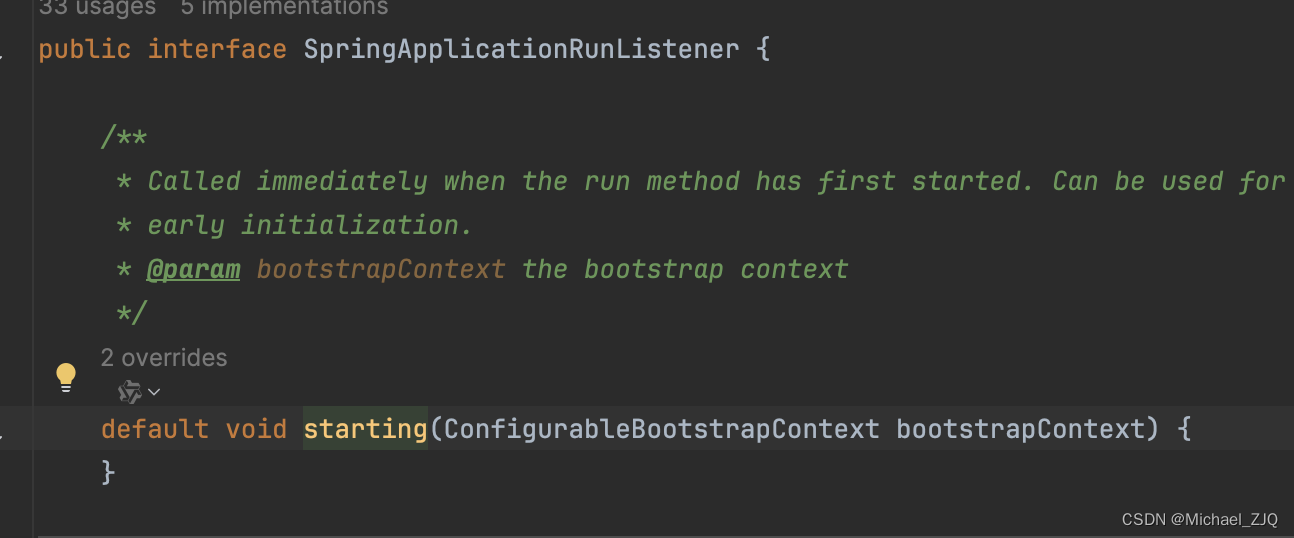


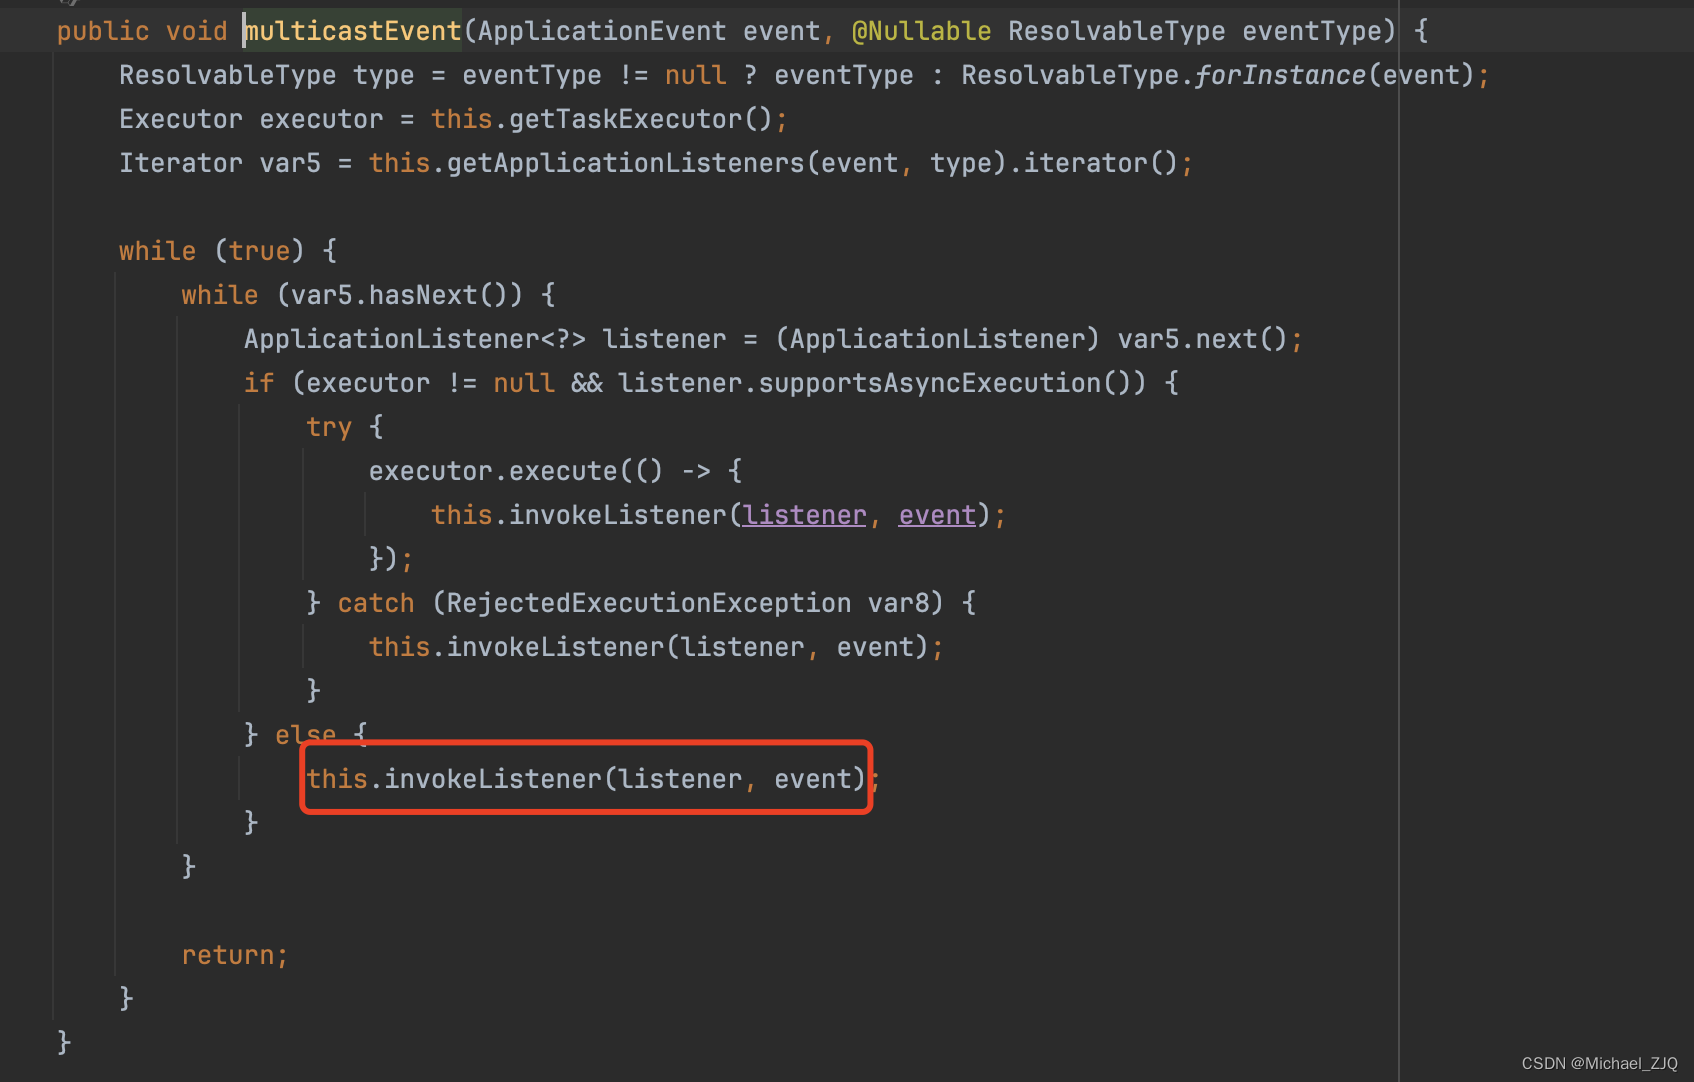

由此我们可以看到,其实最后就是调用到了,监听器的onApplicationEvent方法。
4. 自定义事件
理论的学完了,我们看下在日常开发过程中,如何使用事件呢?
可以从三个角度来看:监听所有事件、监听特定事件、自定义监听事件
4.1 监听所有事件
- 实现ApplicationListener接口,在泛型中指定要监听的事件。若指定的是ApplicationEvent则监听所有的事件
- 要在 spring.facotries 中导入自定义的事件监听器
public class MyApplicationAllEventListener implements ApplicationListener<ApplicationEvent> {
@Override
public void onApplicationEvent(ApplicationEvent event) {
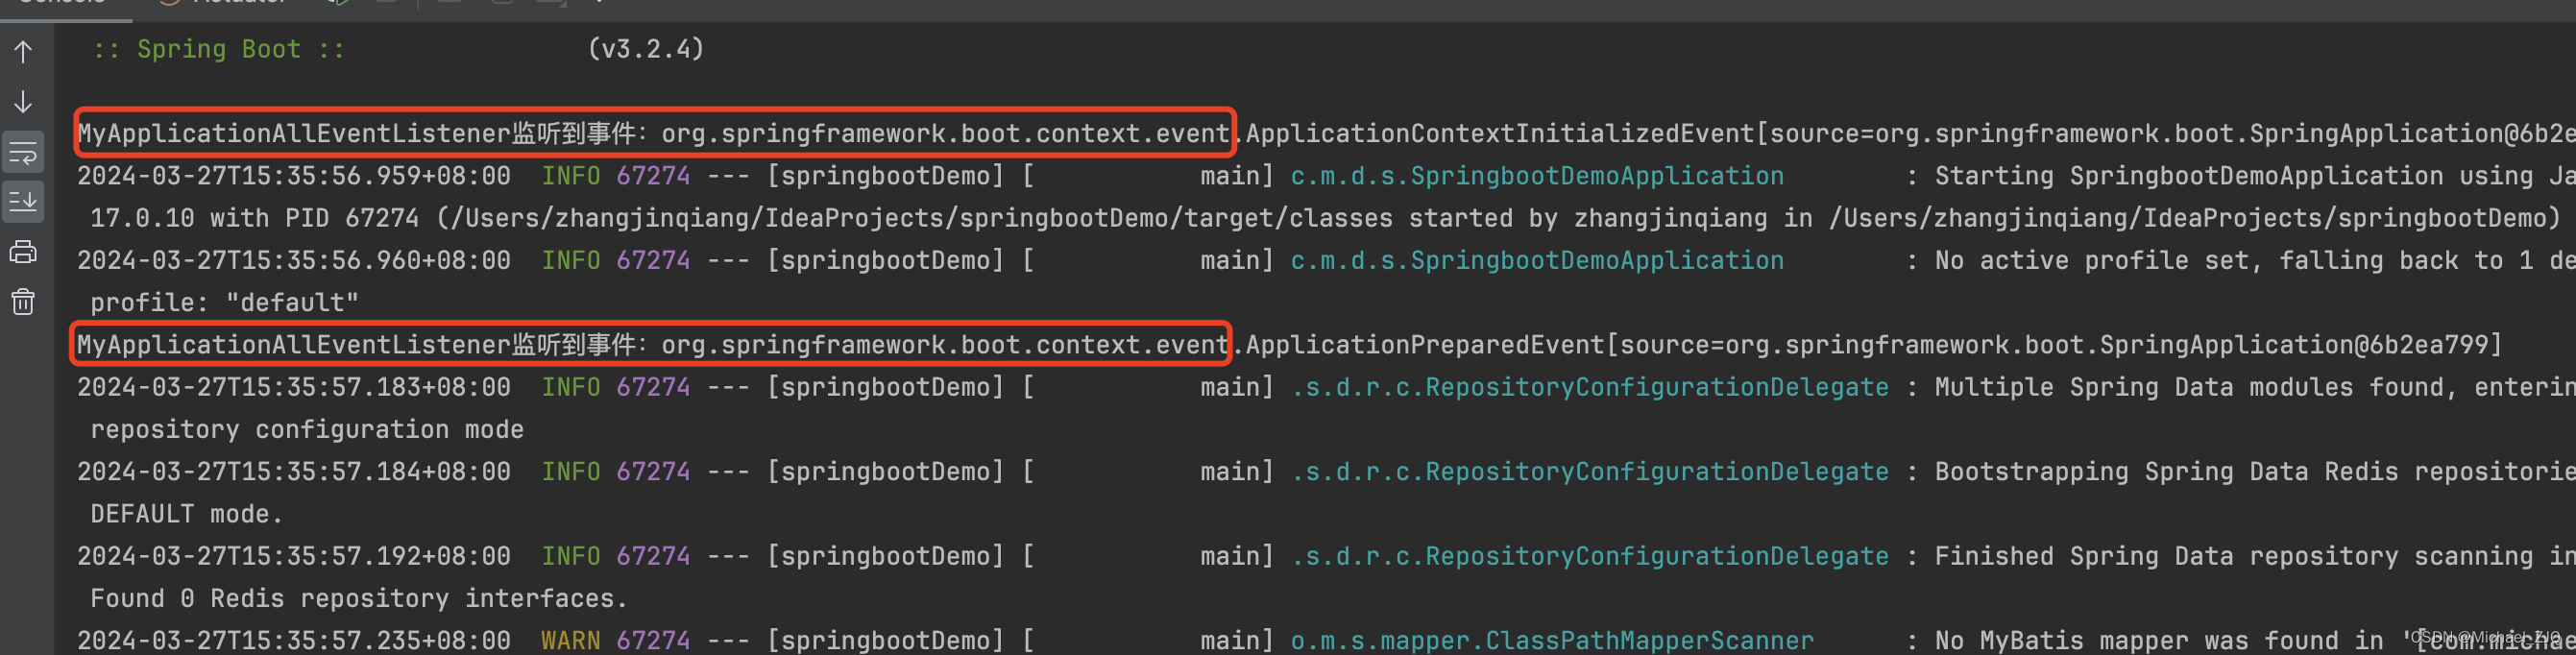
System.out.println("MyApplicationAllEventListener监听到事件:" + event);
}
}
org.springframework.context.ApplicationListener=\
com.michael.demo.event.MyApplicationAllEventListener
结果:
4.2 监听特定事件
监听特定事件同监听所有事件,只需要将泛型指定为具体的事件即可
如监听容器启动事件
public class MyApplicationAllEventListener implements ApplicationListener<ApplicationStartingEvent> {
    @Override
    public void onApplicationEvent(ApplicationStartingEvent event) {
        System.out.println("MyApplicationAllEventListener监听到事件:" + event);
    }

}
4.3 自定义监听事件
接下来我们使用自定义的监听器监听自定义的事件
首先我们定义一个事件,需要继承ApplicationEvent
public class MyEvent extends ApplicationEvent {
    public MyEvent(Object source) {
        super(source);
    }
}
然后定义自定义监听器
public class MyApplicationAllEventListener implements ApplicationListener<MyEvent> {
    @Override
    public void onApplicationEvent(MyEvent event) {
        System.out.println("MyApplicationAllEventListener监听到事件:" + event);
    }

}
最后也是需要在 spring.factories 中注册的。
发布自定义事件
事件的发布可以使用ApplicationContext类中的publishEvent 方法
@Resource
private ApplicationContext ac;

public void publishEvent(){
	ac.publishEvent(new MyEvent(new Object));
}
到此为止,我们搞清楚了 SpringBoot 中的事件和监听器,并且可以自定义事件和监听器了,后续项目中在合适的场景下就可以使用了!!!


 8021
8021


 被折叠的 条评论
为什么被折叠?
被折叠的 条评论
为什么被折叠?
 到【灌水乐园】发言


