


原文连接:http://www.duozhi.online/2023/10/20/centos7%e4%b8%ades%e5%ae%89%e8%a3%85/
1.节点信息
192.168.0.215
192.168.0.216
192.168.0.217
ansible上的hosts配置
[root@MES-203 ansible]# cat hosts
[k8s]
192.168.0.203 ansible_ssh_user=root ansible_ssh_pass=admin
192.168.0.204 ansible_ssh_user=root ansible_ssh_pass=admin
[pg]
192.168.0.205 ansible_ssh_user=root ansible_ssh_pass=admin
192.168.0.206 ansible_ssh_user=root ansible_ssh_pass=admin
[redis]
192.168.0.208 ansible_ssh_user=root ansible_ssh_pass=admin
192.168.0.209 ansible_ssh_user=root ansible_ssh_pass=admin
[es]
192.168.0.215 ansible_ssh_user=root ansible_ssh_pass=admin
192.168.0.216 ansible_ssh_user=root ansible_ssh_pass=admin
192.168.0.217 ansible_ssh_user=root ansible_ssh_pass=admin
2.关闭防火墙
我是通过203上的ansible操作的
[root@MES-203 ansible]# ansible es -m shell -a "systemctl disable firewalld&&systemctl stop firewalld&&systemctl daemon-reload"
3.yum 源配置
[root@MES-203 ansible]# ansible es -m shell -a "mv /etc/yum.repos.d/CentOS-Base.repo /etc/yum.repos.d/CentOS-Base.repo.bak"

[root@MES-203 ansible]# ansible es -m shell -a "cd /etc/yum.repos.d&&wget -O CentOS-Base.repo http://mirrors.aliyun.com/repo/Centos-7.repo"

[root@MES-203 ansible]# ansible es -m shell -a "wget -O /etc/yum.repos.d/epel.repo http://mirrors.aliyun.com/repo/epel-7.repo"
4.时间同步
[root@MES-203 ansible]# ansible es -m shell -a "yum install chrony -y"

[root@MES-203 ansible]# ansible es -m shell -a "systemctl enable chronyd&&systemctl start chronyd&&chronyc sources"
5.安装es
5.1修改服务器文件描述符(三个节点都操作)
[root@sjyt-node-1 src]#vim /etc/security/limits.conf
底部添加如下两项
* soft nofile 65535
* hard nofile 65535
5.2修改max_map_count值(三个节点都操作)
sysctl -w vm.max_map_count=655360
echo 'vm.max_map_count=655360' >> /etc/sysctl.conf
sysctl -p
5.3下载安装包
ansible es -m shell -a "cd /home/es&& curl -O https://mirrors.tuna.tsinghua.edu.cn/elasticstack/7.x/yum/7.10.1/elasticsearch-7.10.1-x86_64.rpm"
5.4安装
ansible es -m shell -a " cd /home/es&&rpm -ivh elasticsearch-7.10.1-x86_64.rpm"
5.5生成证书(因为我这里配置es登陆需要密码)
创建目录
ansible es -m shell -a " mkdir /etc/elasticsearch/cert.d "
在215上操作如下
生成证书
/usr/share/elasticsearch/bin/elasticsearch-certutil cert -out /etc/elasticsearch/cert.d/elastic-certificates.p12 -pass ""

复制到其他两个节点
scp  /etc/elasticsearch/cert.d/elastic-certificates.p12 root@192.168.0.216:/etc/elasticsearch/cert.d/
scp  /etc/elasticsearch/cert.d/elastic-certificates.p12 root@192.168.0.216:/etc/elasticsearch/cert.d/
5.6修改目录权限
ansible es -m shell -a "chown -Rf elasticsearch:elasticsearch /etc/elasticsearch/cert.d/"
5.7创建数据目录并修改权限
ansible es -m shell -a " mkdir -p /home/es/data"
ansible es -m shell -a " chown -Rf elasticsearch:elasticsearch /home/es"
5.8修改各个节点的配置
215
[root@SEARCH-215 elasticsearch]# cat /etc/hosts
127.0.0.1   localhost localhost.localdomain localhost4 localhost4.localdomain4
::1         localhost localhost.localdomain localhost6 localhost6.localdomain6
192.168.0.215 SEARCH-215
192.168.0.216 SEARCH-216
192.168.0.217 SEARCH-217
[root@SEARCH-215 elasticsearch]# cat /etc/elasticsearch/elasticsearch.yml grep -v '#'grep -v '^$'
cluster.name: my-application
node.name: SEARCH-215
path.data: /home/es/data
path.logs: /var/log/elasticsearch
network.host: 0.0.0.0
http.port: 9200
discovery.seed_hosts: ["192.168.0.215", "192.168.0.216", "192.168.0.217"]
cluster.initial_master_nodes: ["SEARCH-215", "SEARCH-216", "SEARCH-217"]
http.cors.enabled: true
xpack.security.enabled: true
xpack.license.self_generated.type: basic
xpack.security.transport.ssl.enabled: true
xpack.security.transport.ssl.verification_mode: certificate
xpack.security.transport.ssl.keystore.path: /etc/elasticsearch/cert.d/elastic-certificates.p12
xpack.security.transport.ssl.truststore.path: /etc/elasticsearch/cert.d/elastic-certificates.p12
216
[root@SEARCH-215 elasticsearch]# cat /etc/hosts
127.0.0.1   localhost localhost.localdomain localhost4 localhost4.localdomain4
::1         localhost localhost.localdomain localhost6 localhost6.localdomain6
192.168.0.215 SEARCH-215
192.168.0.216 SEARCH-216
192.168.0.217 SEARCH-217
[root@SEARCH-216 cert.d]# cat /etc/elasticsearch/elasticsearch.yml grep -v '#'grep -v '^$'
cluster.name: my-application
node.name: SEARCH-216
path.data: /home/es/data
path.logs: /var/log/elasticsearch
network.host: 0.0.0.0
http.port: 9200
discovery.seed_hosts: ["192.168.0.215", "192.168.0.216", "192.168.0.217"]
cluster.initial_master_nodes: ["SEARCH-215", "SEARCH-216", "SEARCH-217"]
http.cors.enabled: true
xpack.security.enabled: true
xpack.license.self_generated.type: basic
xpack.security.transport.ssl.enabled: true
xpack.security.transport.ssl.verification_mode: certificate
xpack.security.transport.ssl.keystore.path: /etc/elasticsearch/cert.d/elastic-certificates.p12
xpack.security.transport.ssl.truststore.path: /etc/elasticsearch/cert.d/elastic-certificates.p12
217
[root@SEARCH-215 elasticsearch]# cat /etc/hosts
127.0.0.1   localhost localhost.localdomain localhost4 localhost4.localdomain4
::1         localhost localhost.localdomain localhost6 localhost6.localdomain6
192.168.0.215 SEARCH-215
192.168.0.216 SEARCH-216
192.168.0.217 SEARCH-217
[root@SEARCH-217 cert.d]# cat /etc/elasticsearch/elasticsearch.yml grep -v '#'grep -v '^$'
cluster.name: my-application
node.name: SEARCH-217
path.data: /home/es/data
path.logs: /var/log/elasticsearch
network.host: 0.0.0.0
http.port: 9200
discovery.seed_hosts: ["192.168.0.215", "192.168.0.216", "192.168.0.217"]
cluster.initial_master_nodes: ["SEARCH-215", "SEARCH-216", "SEARCH-217"]
http.cors.enabled: true
xpack.security.enabled: true
xpack.license.self_generated.type: basic
xpack.security.transport.ssl.enabled: true
xpack.security.transport.ssl.verification_mode: certificate
xpack.security.transport.ssl.keystore.path: /etc/elasticsearch/cert.d/elastic-certificates.p12
xpack.security.transport.ssl.truststore.path: /etc/elasticsearch/cert.d/elastic-certificates.p12
5.9启动es并设置开机启动
ansible es -m shell -a " systemctl enable elasticsearch.service&&systemctl start elasticsearch.service"
5.10生成密码,后面kibana要用
215上操作即可
[root@SEARCH-215 elasticsearch]# /usr/share/elasticsearch/bin/elasticsearch-setup-passwords auto
Initiating the setup of passwords for reserved users elastic,apm_system,kibana,kibana_system,logstash_system,beats_system,remote_monitoring_user.
The passwords will be randomly generated and printed to the console.
Please confirm that you would like to continue [y/N]y


Changed password for user apm_system
PASSWORD apm_system = zBPaGISyN9m6qUCoGsFp

Changed password for user kibana_system
PASSWORD kibana_system = EnsrtwPFPaOnCARPVzBT

Changed password for user kibana
PASSWORD kibana = EnsrtwPFPaOnCARPVzBT

Changed password for user logstash_system
PASSWORD logstash_system = If45EppAecsAopUUl46F

Changed password for user beats_system
PASSWORD beats_system = mkVyjNqrp4zrXZIzvqQG

Changed password for user remote_monitoring_user
PASSWORD remote_monitoring_user = 2sTPKEvwHI2v5Gjr9z1s

Changed password for user elastic
PASSWORD elastic = tPtXYtJu3NJJSX5lenaq

[root@SEARCH-215 elasticsearch]#
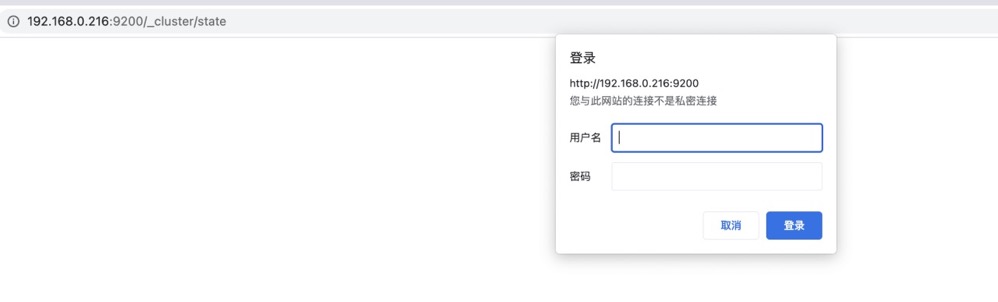
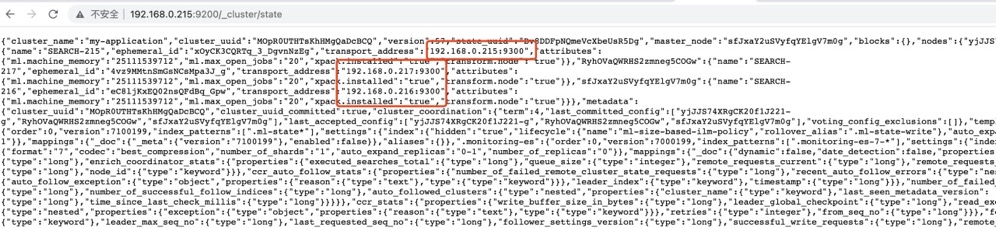
5.11验证
6.关键目录
[root@SEARCH-215 elasticsearch]# find / -type d -name elasticsearch
/run/elasticsearch
/etc/elasticsearch
/var/lib/elasticsearch
/var/log/elasticsearch
/usr/share/elasticsearch


 183
183


 被折叠的 条评论
为什么被折叠?
被折叠的 条评论
为什么被折叠?
 到【灌水乐园】发言


