


系列文章目录
学习新版本,菜鸟一枚
会持续更新的
文章目录
前言
求其上者得其中,求其中者得其下,求其吓着无所得。
想着系统的学习一下SpringCloud alibaba项目,做个记录。
一、搭建项目
1.1、创建git仓库
1.1.1、登录gitee,新建仓库
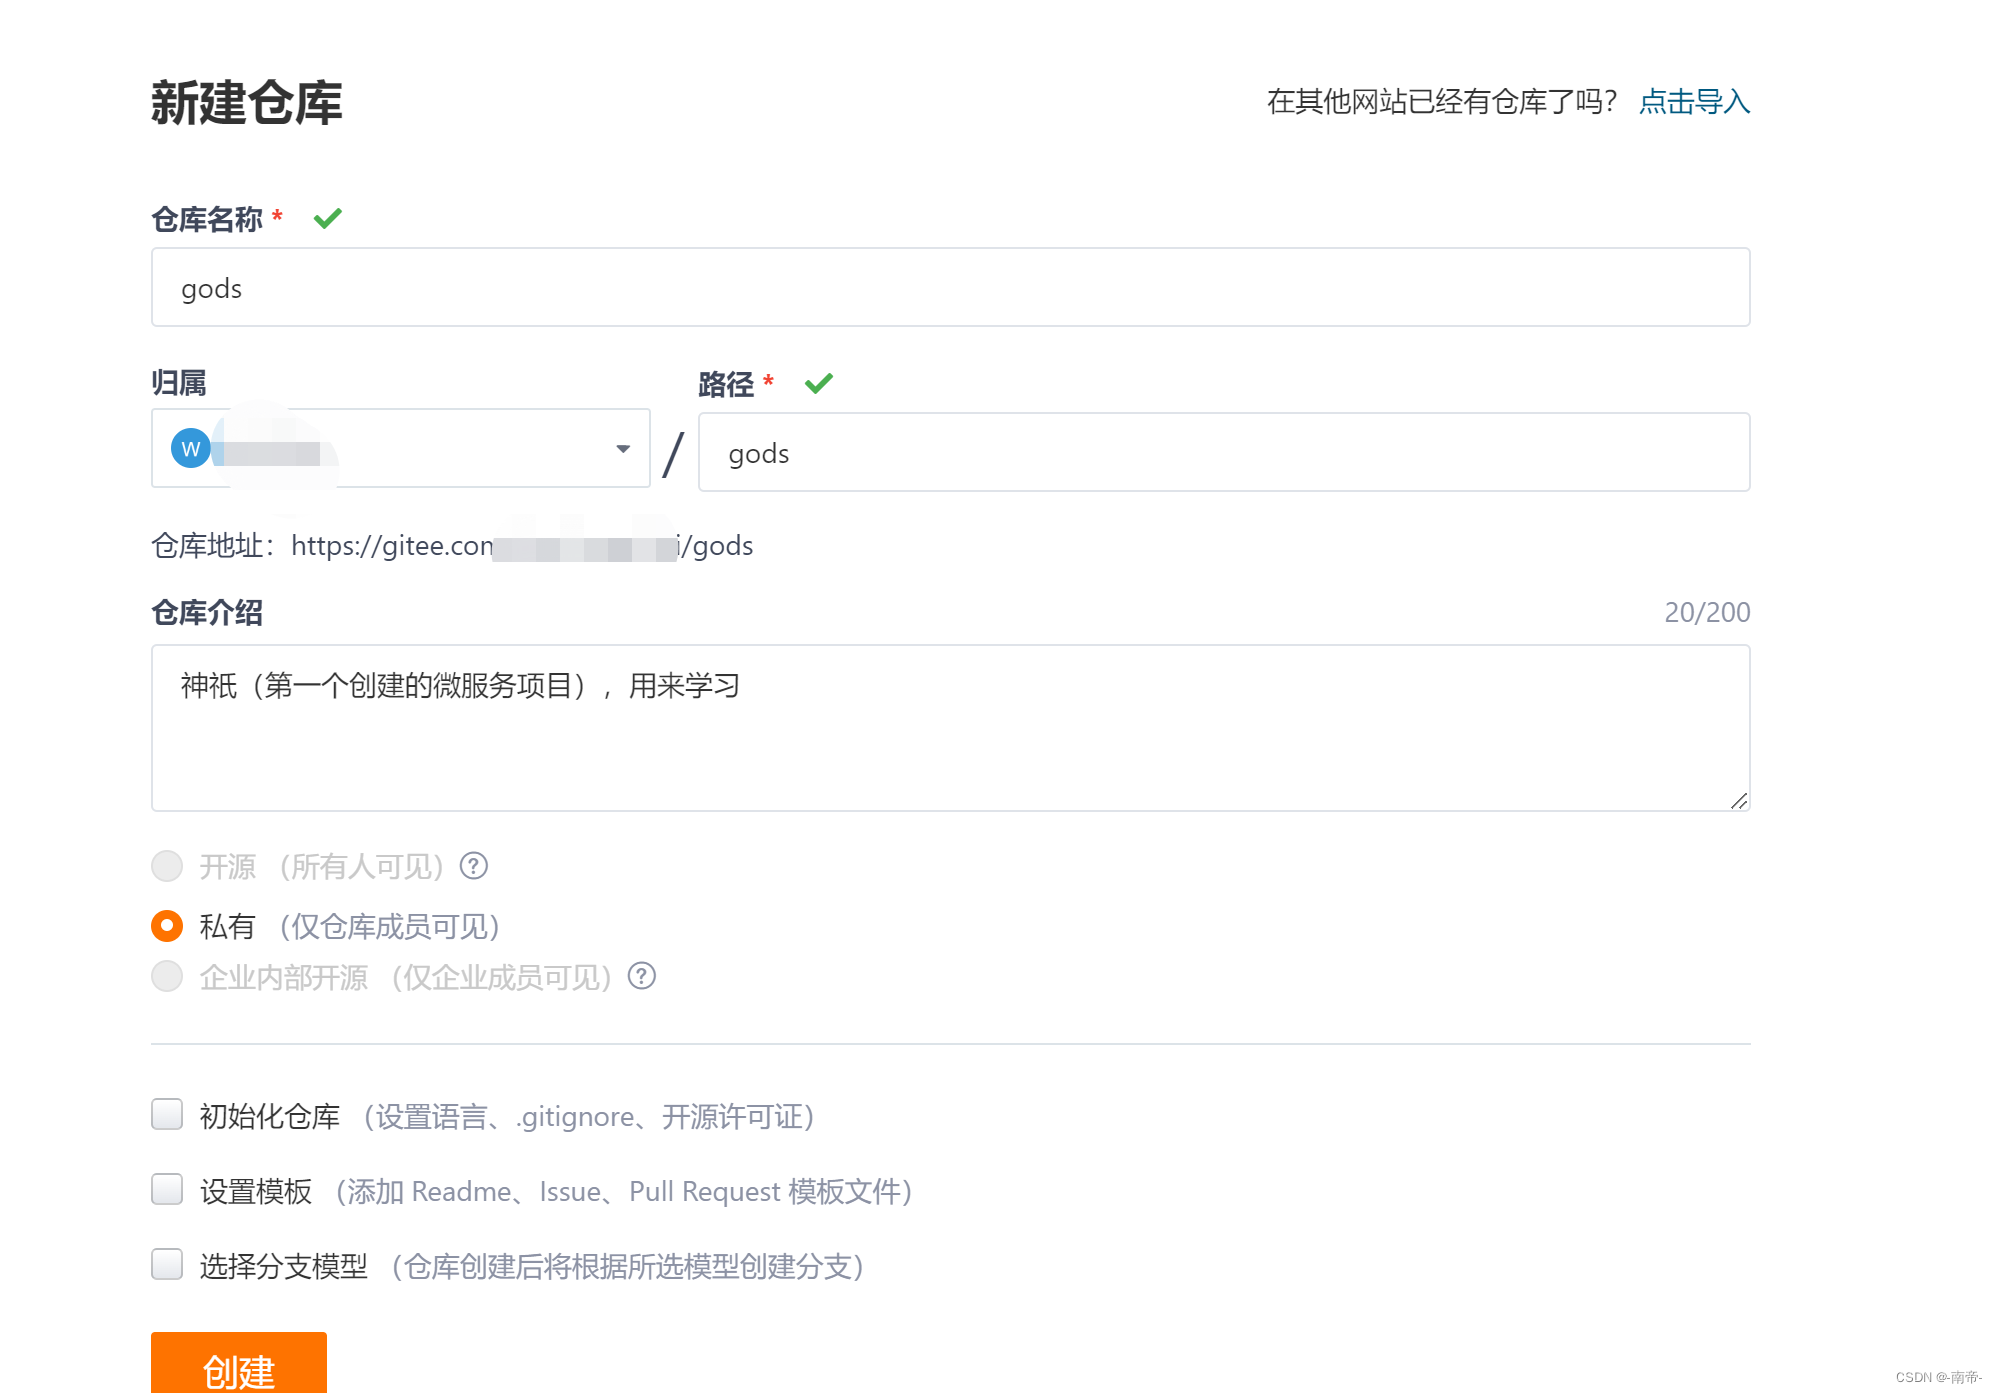
1.1.2、得到如下命令(新建仓库使用创建git仓库 即可)
简易的命令行入门教程:
Git 全局设置:

git config --global user.name "xxx"
git config --global user.email "xxxx@126.com"
创建 git 仓库:

mkdir gods
cd gods
git init
touch README.md
git add README.md
git commit -m "first commit"
git remote add origin https://gitee.com/xxxxxxxx/gods.git
git push -u origin "master"
已有仓库?

cd existing_git_repo
git remote add origin https://gitee.com/xxxxxxx/gods.git
git push -u origin "master"
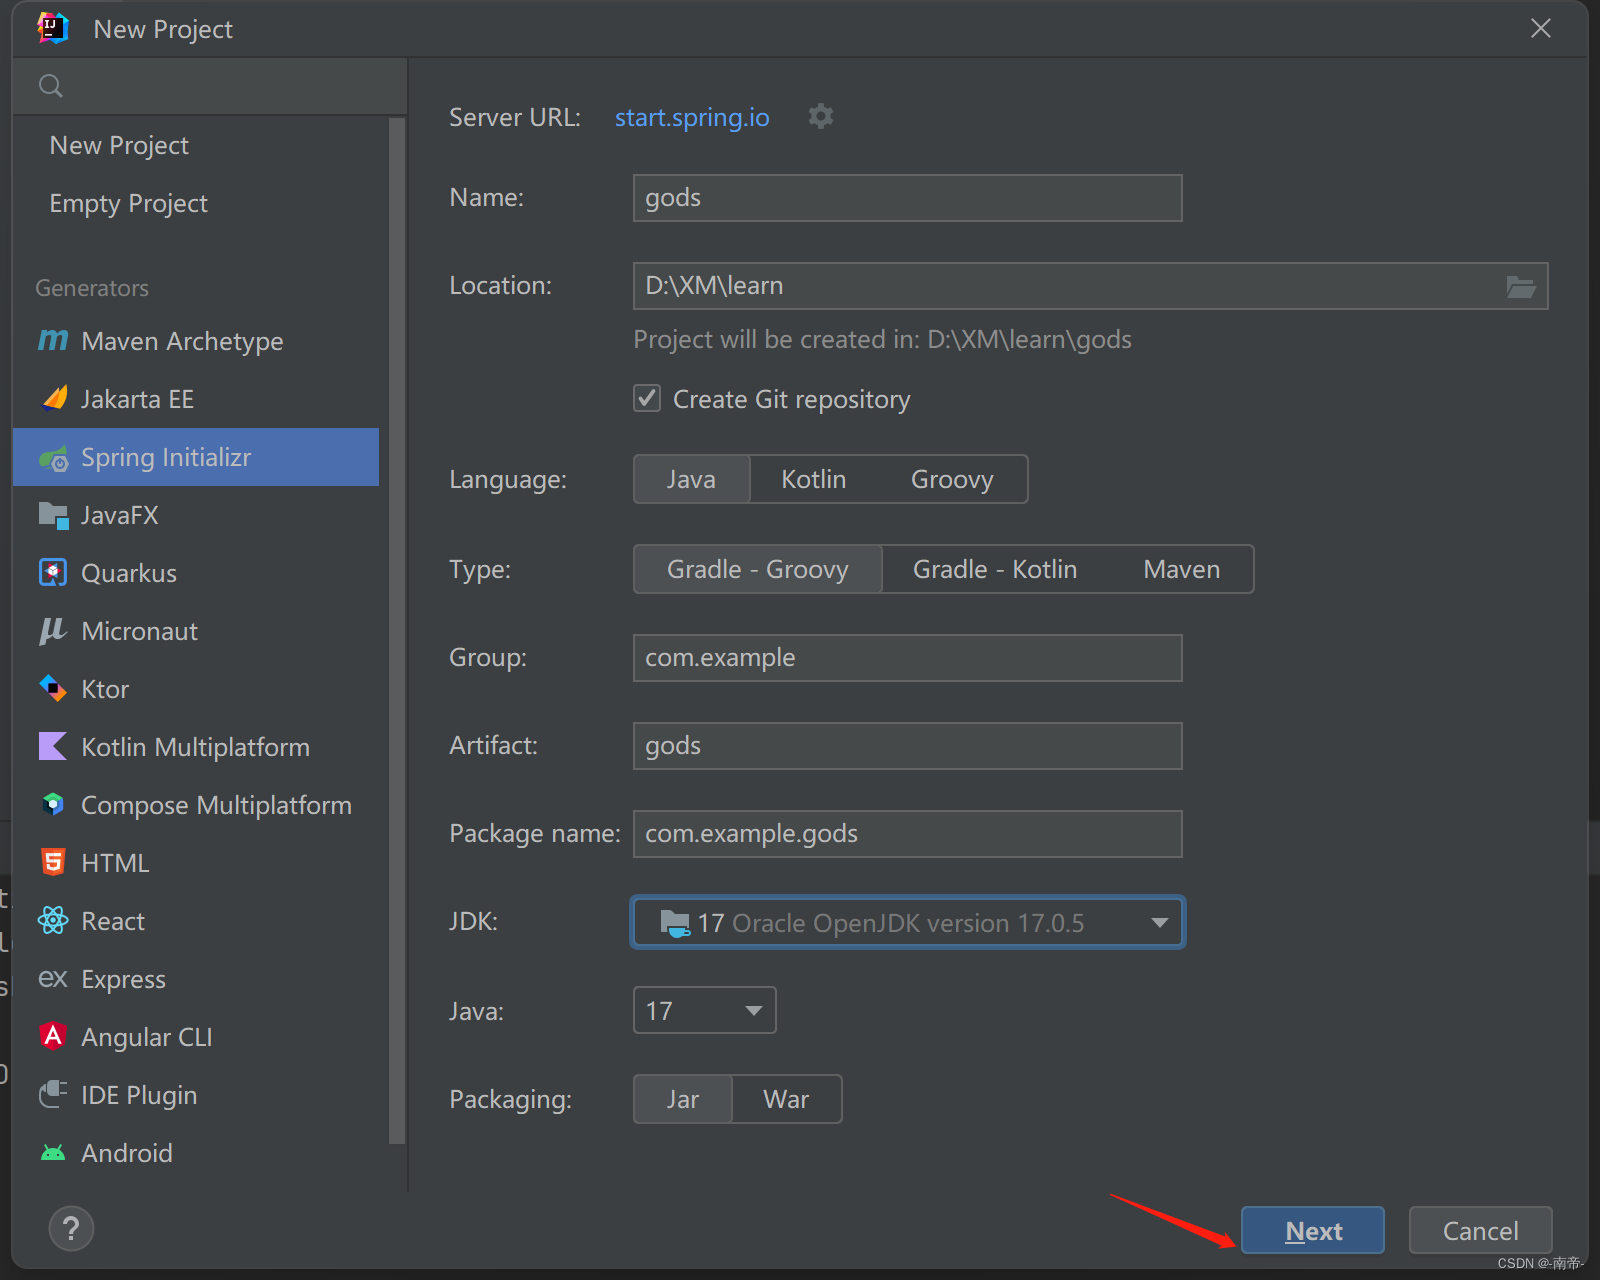
现在去打开IDEA去创建项目,记住 项目名称要跟本地的一致哦
1.2、使用IDEA创建项目
1.2.1、开发工具
| 工具 | 版本 | 官网 |
|---|---|---|
| IDEA | 2022.2.4 | https://www.jetbrains.com/idea/download |
| Gradle | 7.6 | https://gradle.org/releases/ |
| Java | 17 | https://www.oracle.com/java/technologies/downloads/#jdk17-windows |
| MySQL | 8.0.32 |
1.2.2、后端技术
| 技术 | 版本 | 官网 |
|---|---|---|
| SpringBoot | 3.1.0-M1 | https://spring.io/projects/spring-boot |
| SpringCloudAlibaba | 2022.0.0.0-RC1 | https://spring.io/projects/spring-cloud-alibaba |
| SpringCloud | 2022.0.2 | https://spring.io/projects/spring-cloud |
| Mybatis-Plus | 3.5.3.1 | https://mybatis.plus/ |
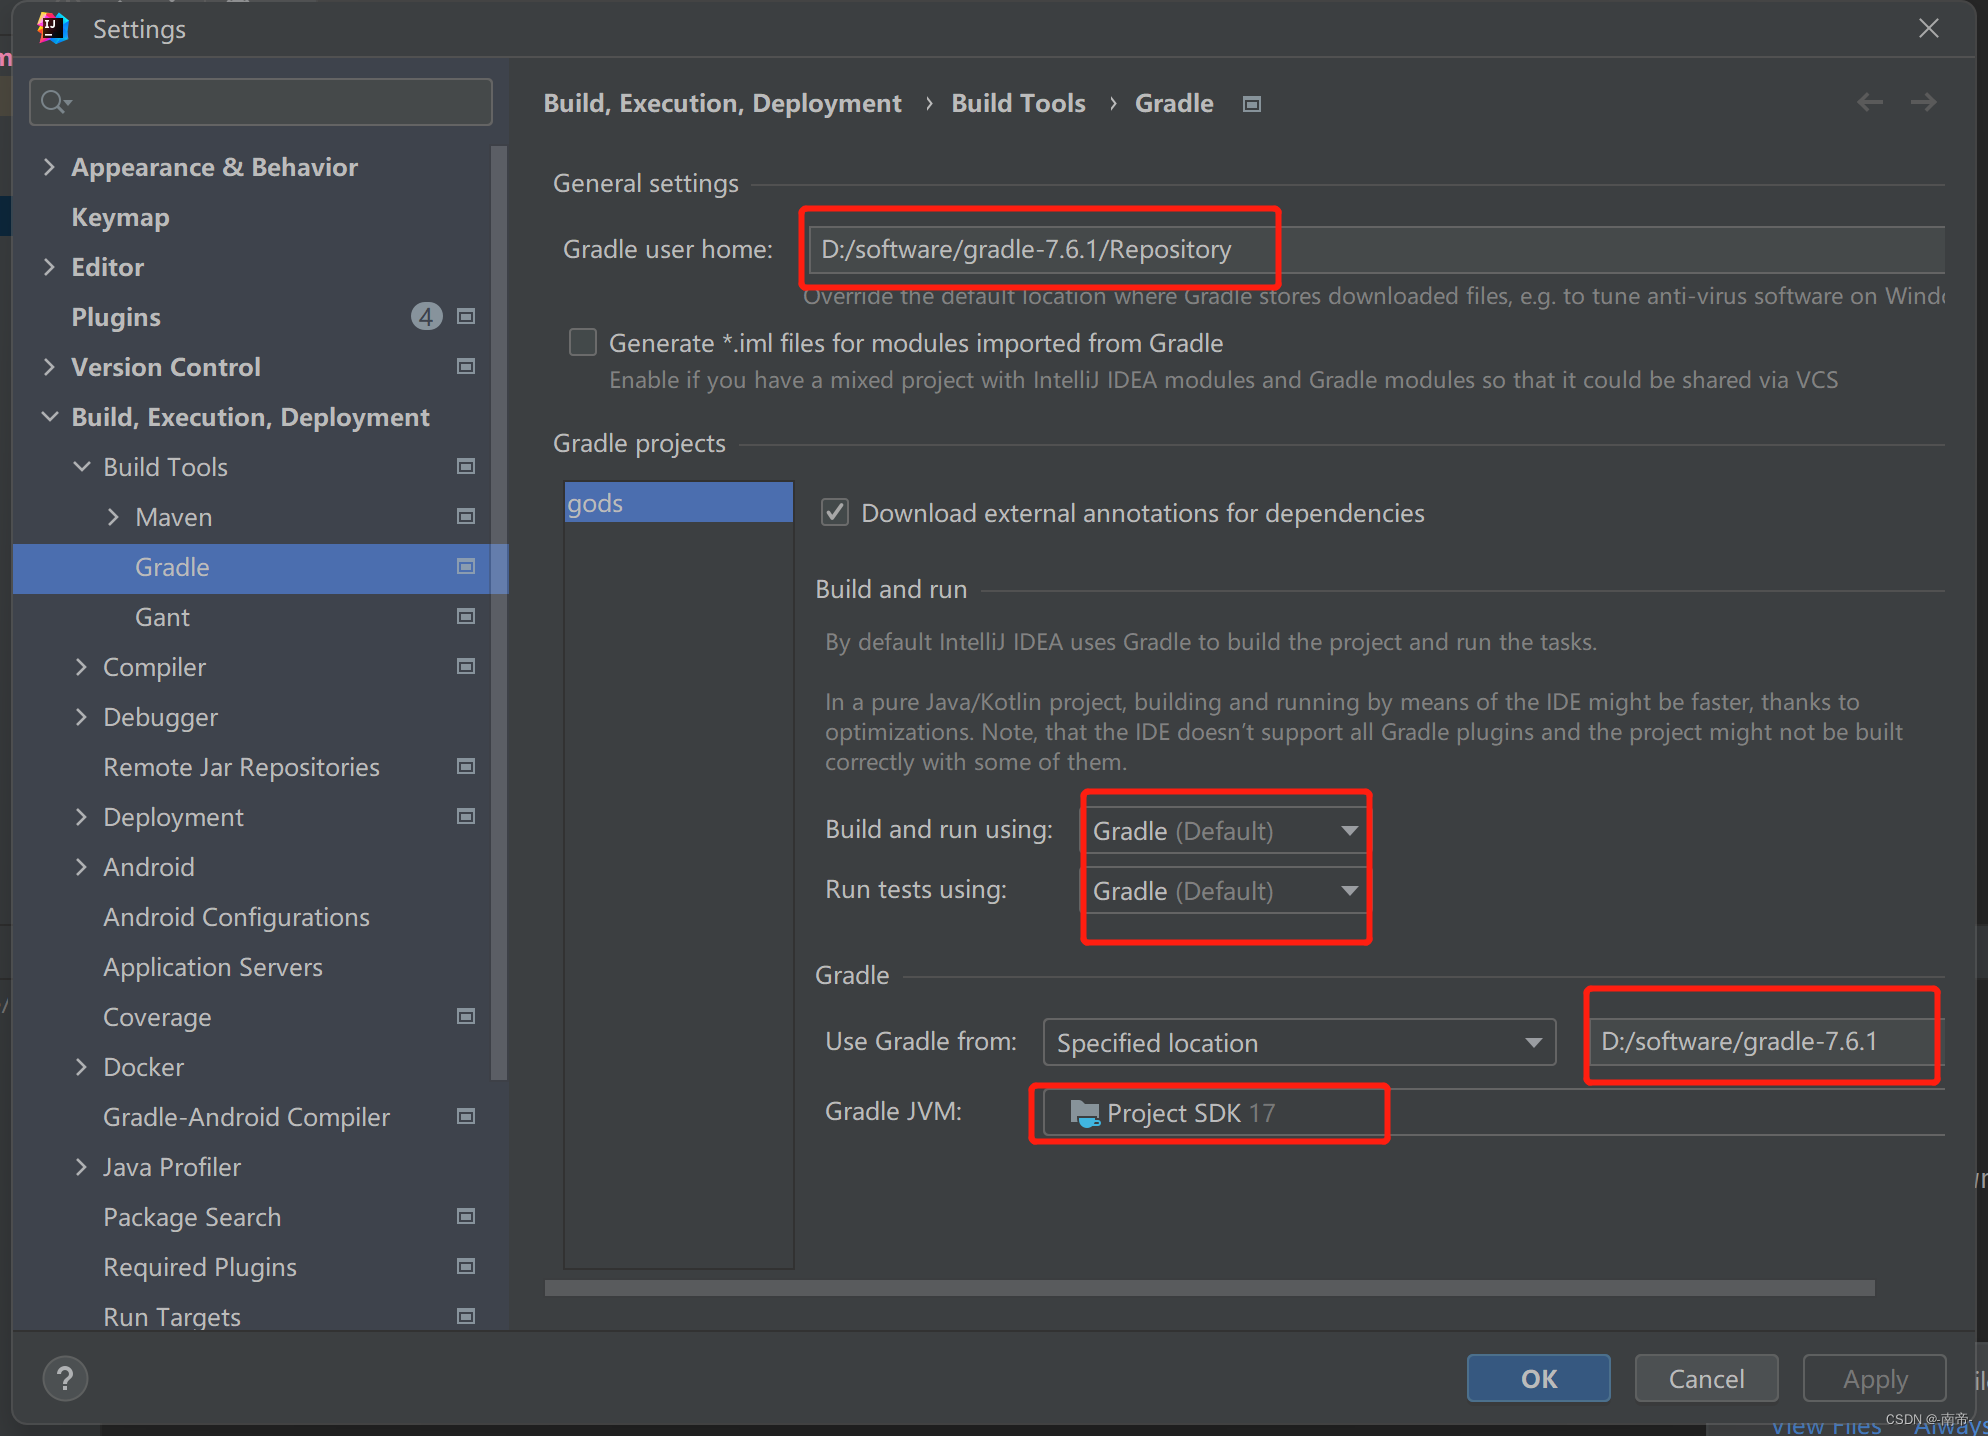
1.2.3、 创建gradle项目
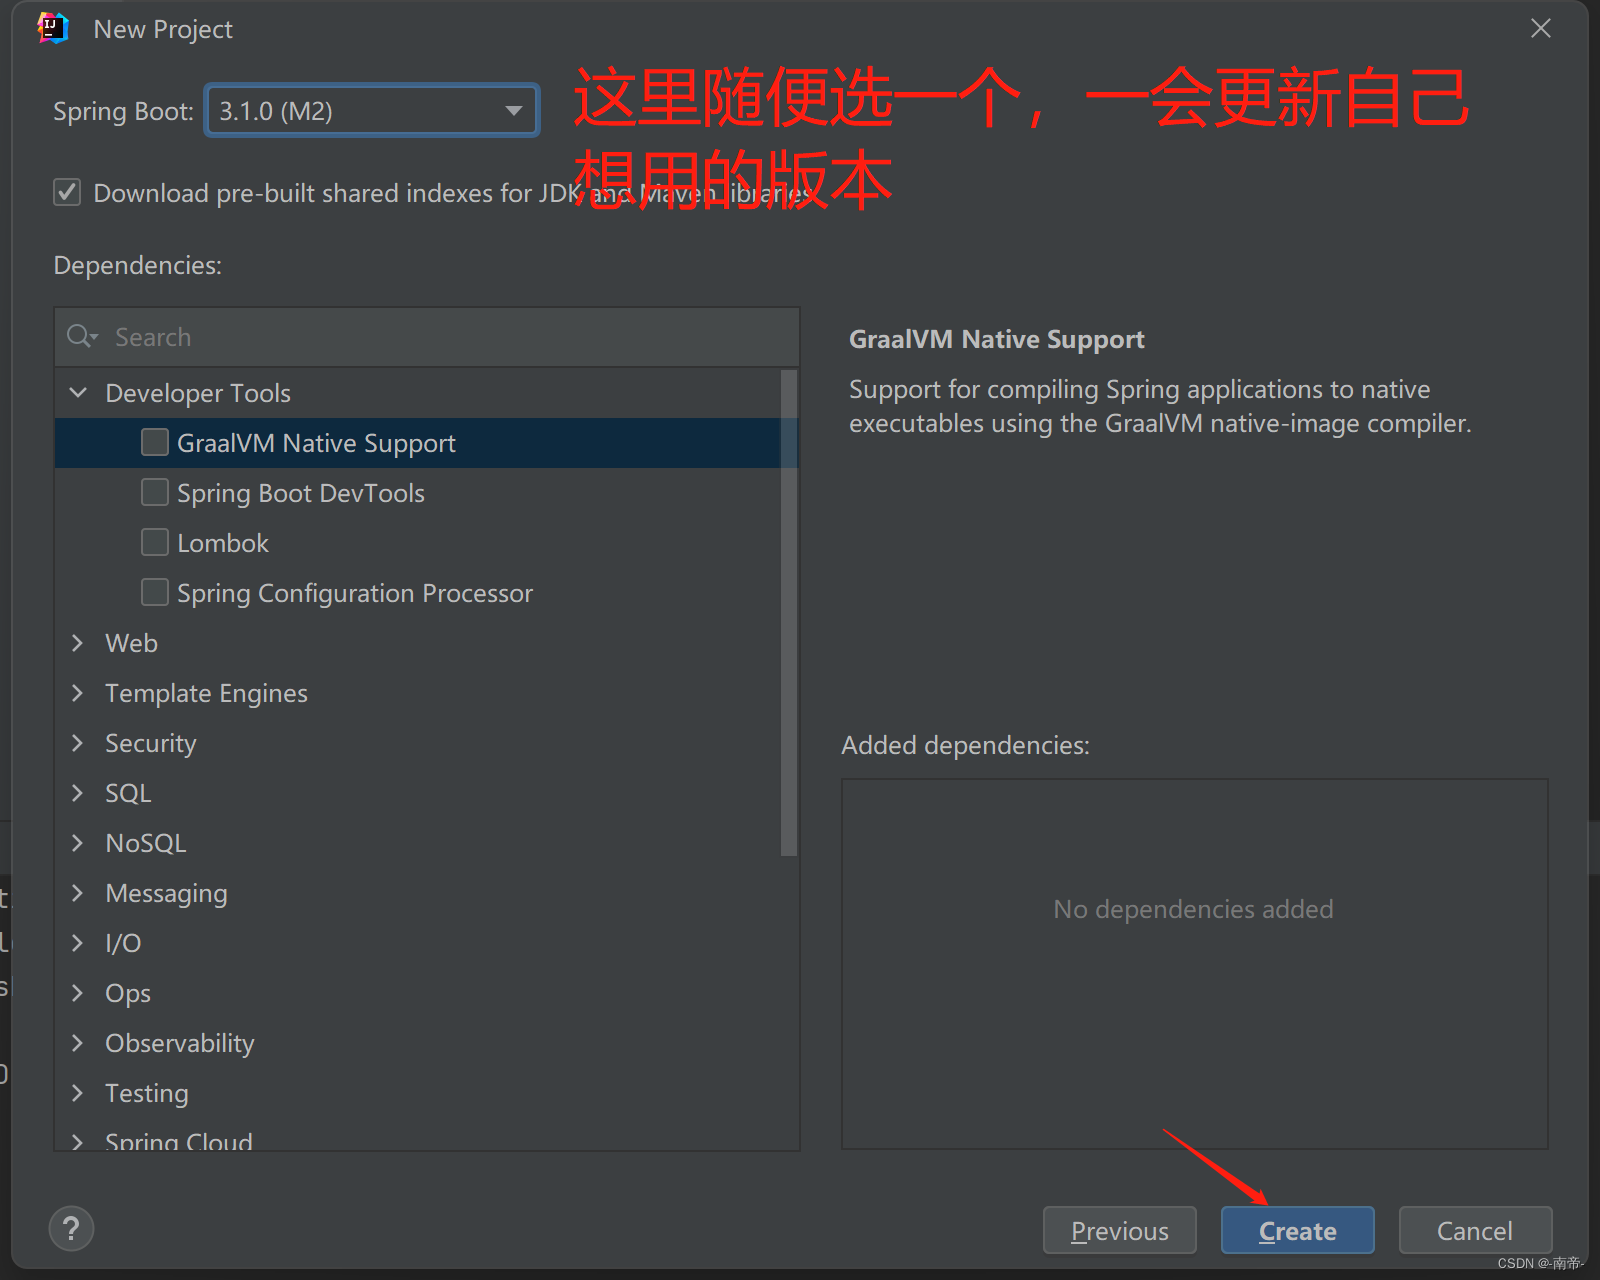
这里选择我们要使用的gradle7.6版本
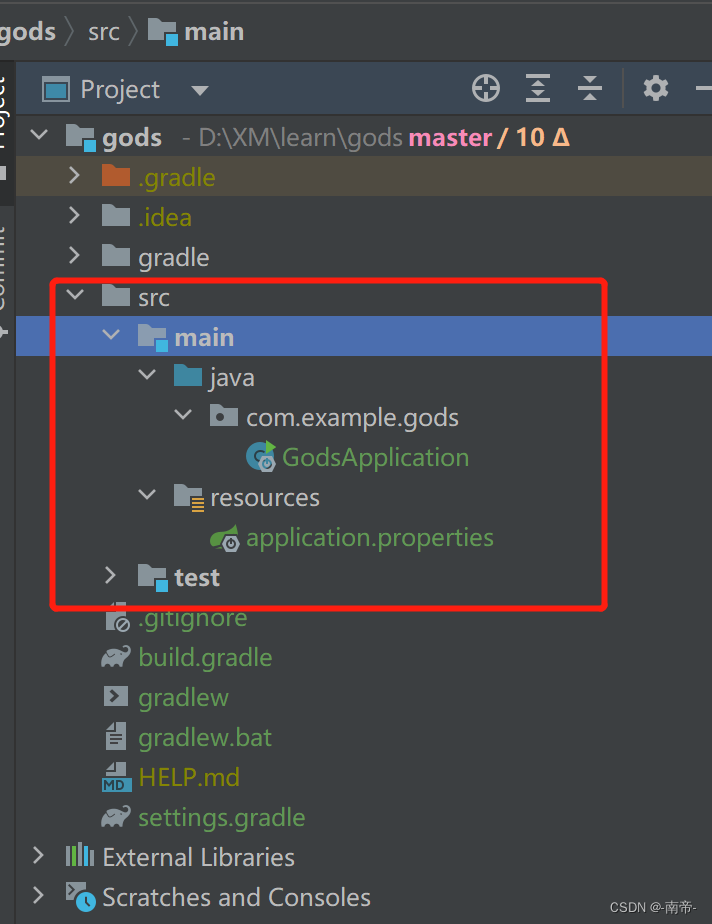
这里可以看到我们项目创建完成后的目录结构,
删掉src目录
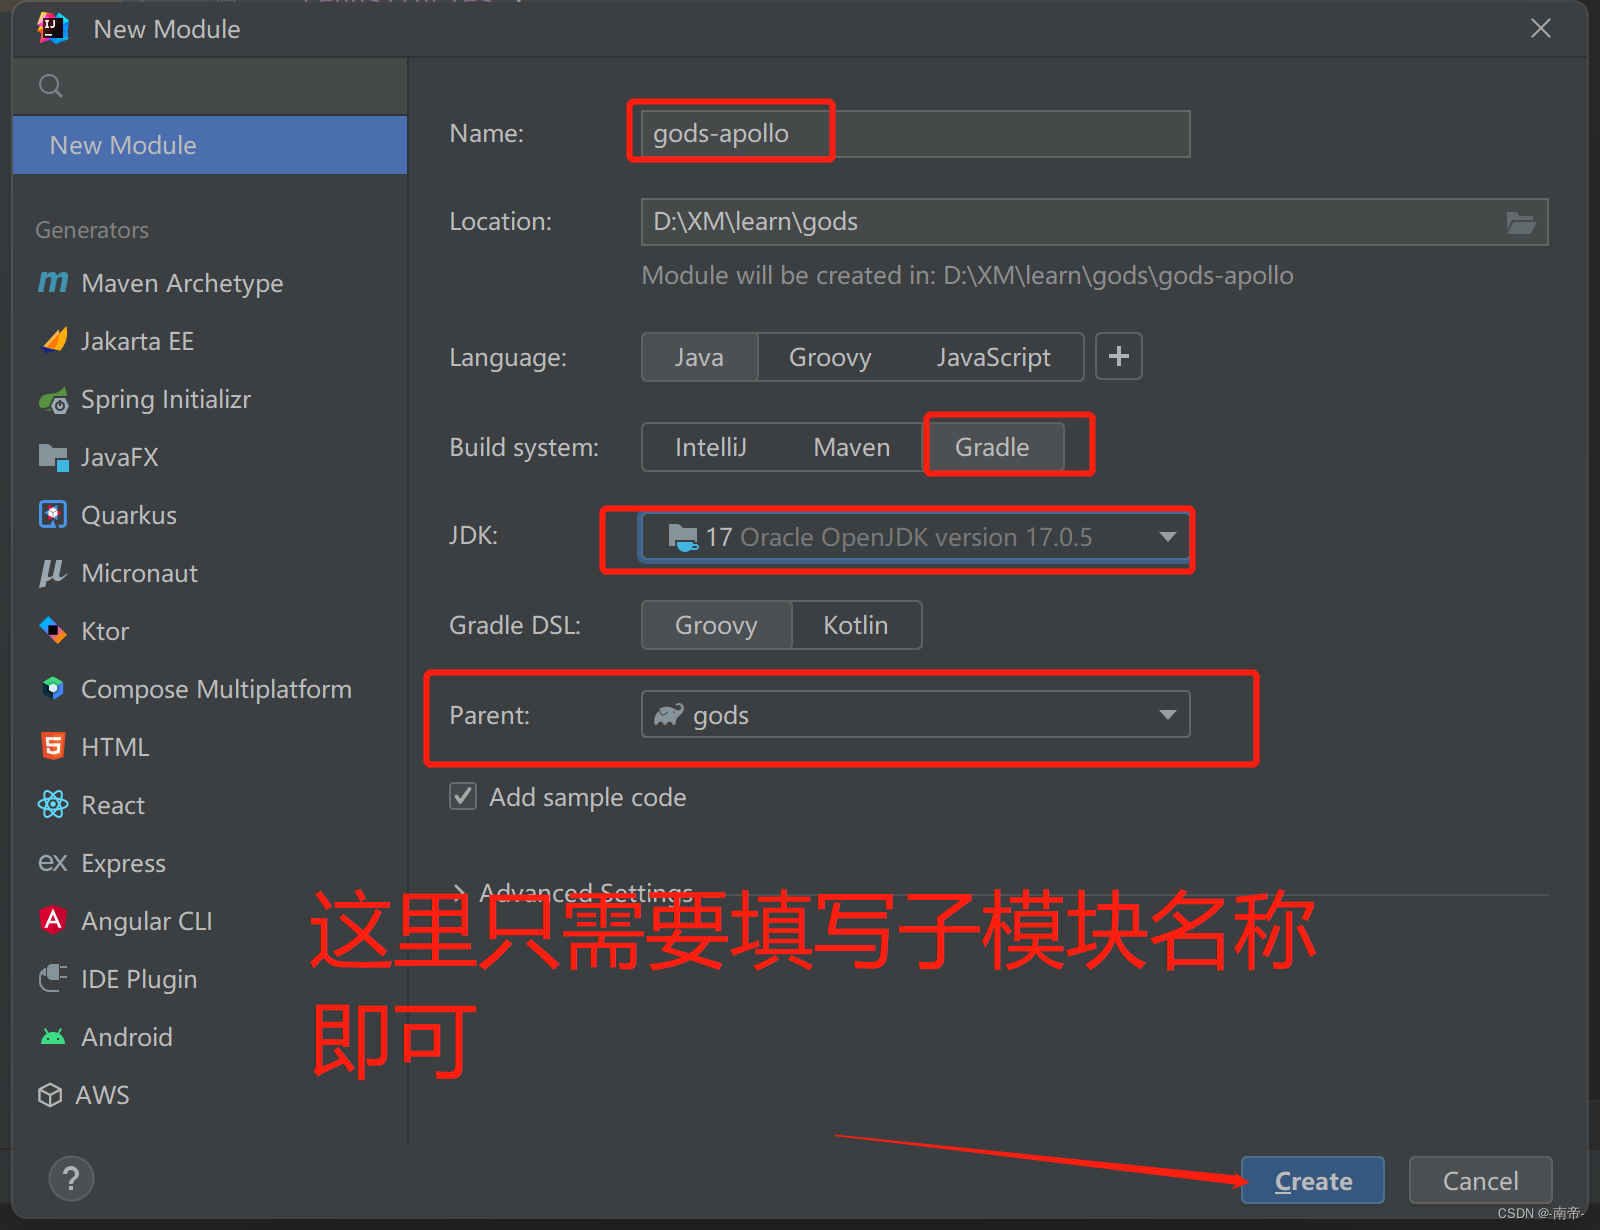
1.2.4、创建子模块
右键项目,创建子模块
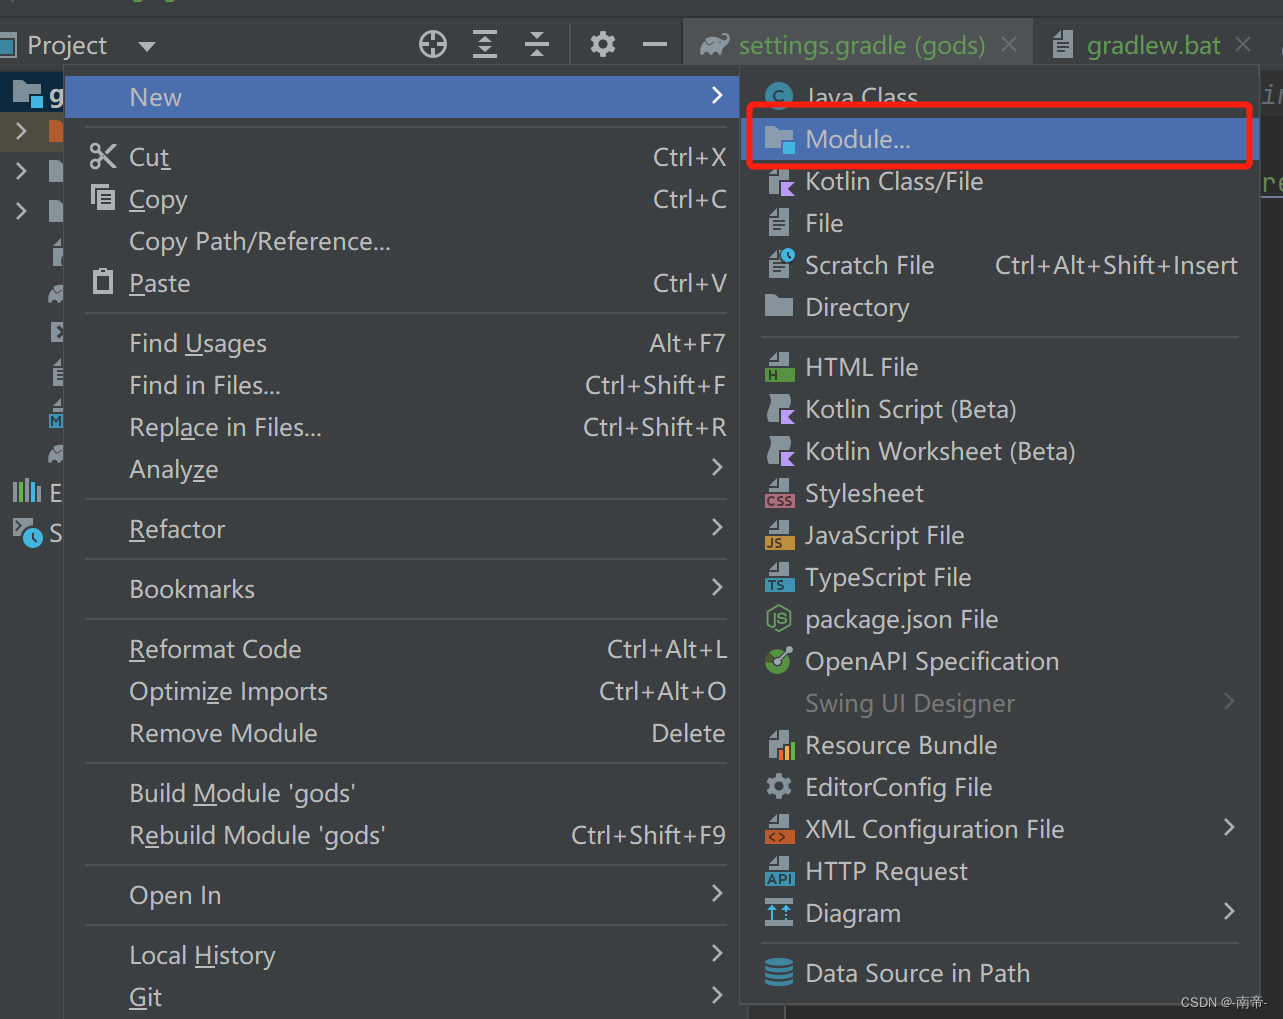
注意是选择 New Module,别问为什么,问就是没看到踩坑了
然后以同样的方式,在去创建几个子模块,如下图
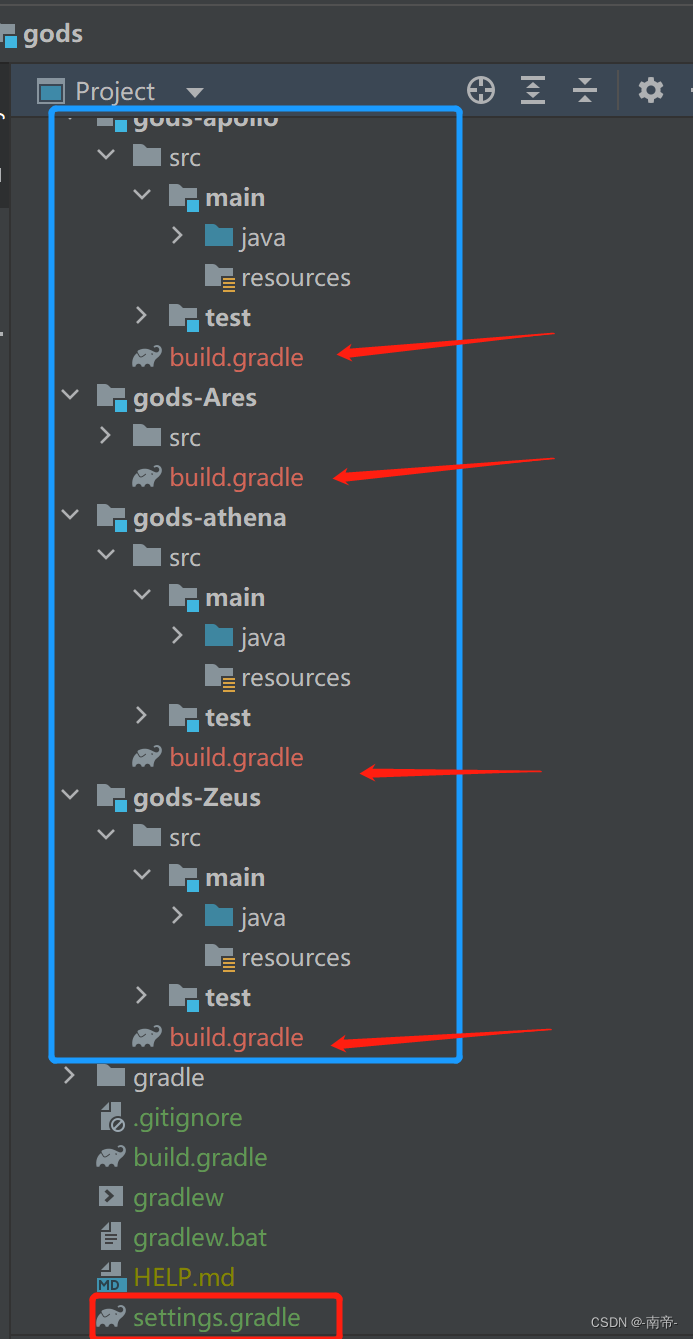
可以看到,每个子模块都生成了
build.gradle,文件类似于 pom文件
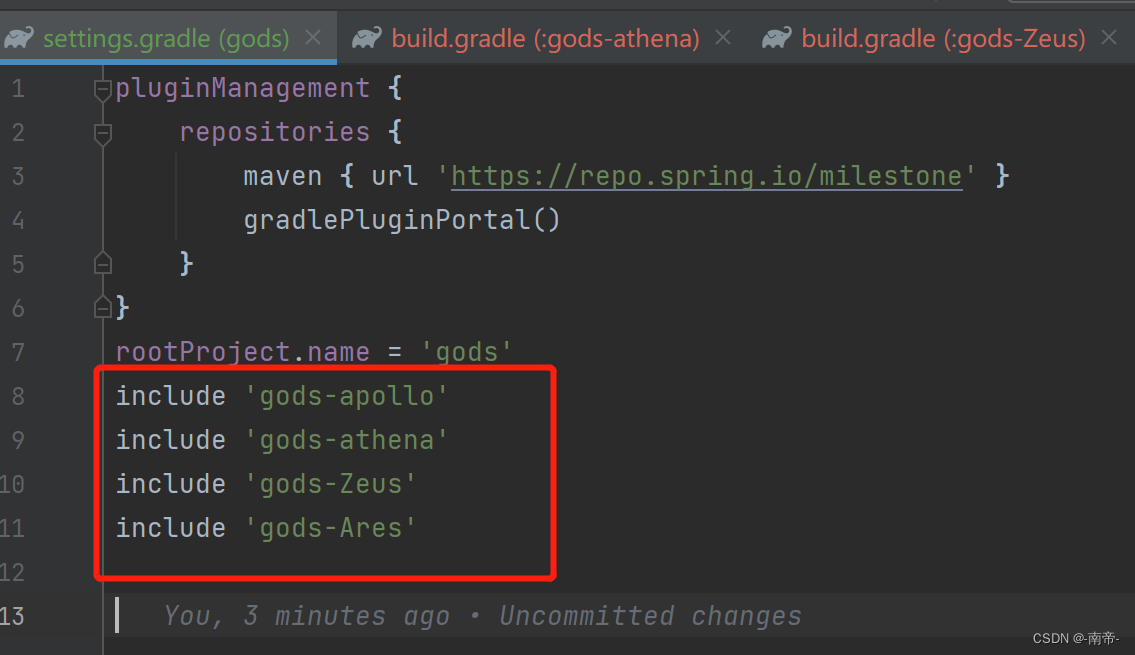
此时我们在看
settings.gradle文件,就会发现,已经自动生成了子模块引入目录
1.2.5、修改父类 build.gradle文件
buildscript{
}

//插件
plugins {
	id 'io.spring.dependency-management' version '1.0.11.RELEASE'
	id 'org.springframework.boot' version '3.1.0-M1'
	id 'java'
}

//全局项目配置
allprojects{
	group = 'com.example'
	version = '0.0.1-SNAPSHOT'
	apply plugin:'idea'
	apply plugin: 'io.spring.dependency-management'
	apply plugin: 'org.springframework.boot'

//jar包寻找顺序从上到下
	repositories {
		mavenLocal()
		maven { url 'https://maven.aliyun.com/repository/public/' }
		maven { url 'https://maven.aliyun.com/repository/google/' }
		maven { url 'https://maven.aliyun.com/repository/jcenter/' }
		maven { url "https://mvn.getui.com/nexus/content/repositories/releases/" }
		maven {
			url 'http://mirrors.huaweicloud.com/repository/maven/'
			allowInsecureProtocol = true
		}
		mavenCentral()
	}

}

//子模块配置
subprojects{
	apply plugin:'java'
	// 指定JDK版本
	sourceCompatibility = '17'
	targetCompatibility = '17'
	[compileJava,compileTestJava,javadoc]*.options*.encoding = 'UTF-8'


	/// 子模块公共jar \\\
	dependencies{
		compileOnly 'org.projectlombok:lombok:1.18.26'
		implementation 'org.projectlombok:lombok:1.18.26'
		implementation 'cn.hutool:hutool-all:5.8.18'
	}


}
1.2.6、修改子模块 build.gradle文件
archivesBaseName = 模块名称
每个子模块都是这么多初始化代码,后续根据需要引入各自需要的依赖
archivesBaseName = "gods-apollo"
dependencies {
    // 专属于这个模块的依赖
}
// 动态移除对kotlin构建插件的权限,避免子模块构建报错
tasks.register("prepareKotlinBuildScriptModel") {}

//include 'gods-apollo'
//include 'gods-athena'
//include 'gods-Zeus'
//include 'gods-Ares'
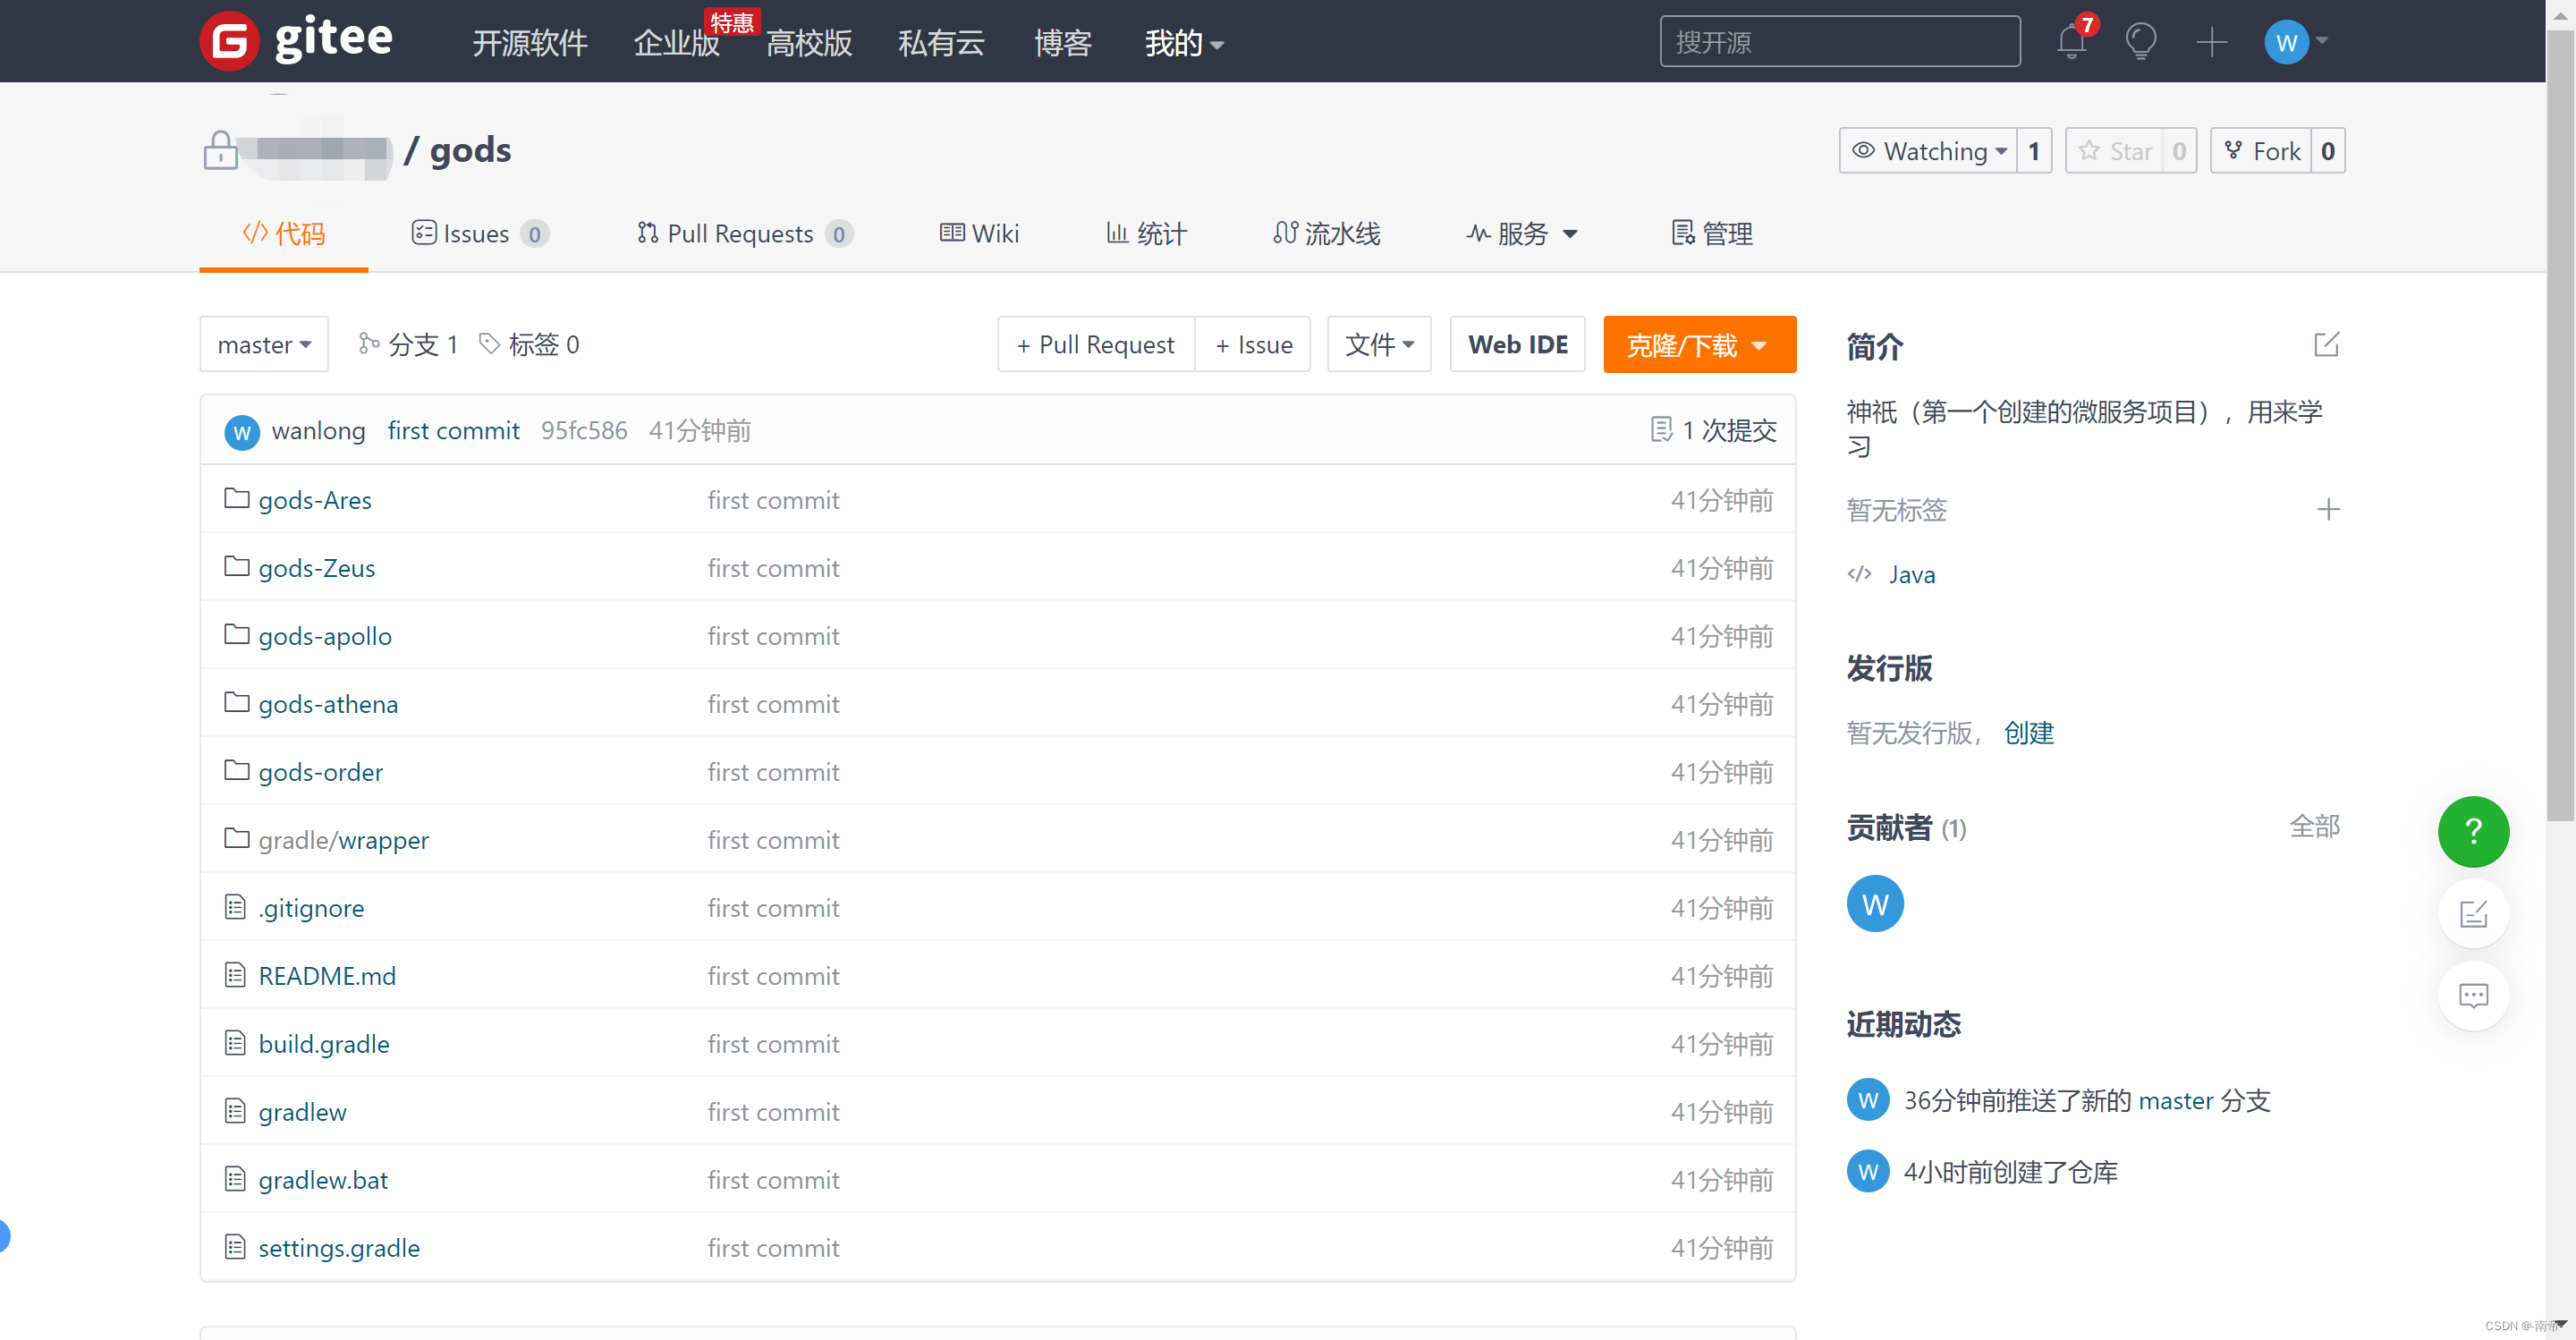
1.2.7、构建项目
BUILD SUCCESSFUL in 2s,成功后开始同步git
1.2.8、上传git仓库
这里是引用
- 打开git,进入项目文件中
git init初始化gittouch README.md创建版本文件git status查看当前工作区文件状态git add .上传所有文件到 暂存区git commit -m " 提交注释"提交文件到本地仓库git remote add origin https://gitee.com/wan_long_bei/gods.git添加远程仓库origin,建立关联git push -u origin "master"把当前分支master推送到远程仓库origin
1.2.9、git 常用知识浅谈
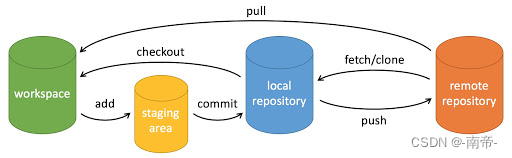
PS:图片来源
workspace:工作区,平时存放代码的位置 staging
area:暂存区/缓存区,用于临时存放你的改动,事实上它只是一个文件,保存即将提交到文件列表信息 local
repository:本地仓库,就是安全存放数据的位置,这里面有你提交到所有版本的数据。其中HEAD指向最新放入仓库的版本 remote
repository:远程仓库,托管代码的服务器
代码从修改到提交到远程仓库,一般需要经历如下5个状态:未修改,已修改,已暂存,已提交,已推送。如下所示:
未修改
       原始内容
已修改    ↓
       工 作 区
已暂存    ↓    git add
       暂 存 区
已提交    ↓    git commit
       本地仓库
已推送    ↓    git push
       远程仓库
注意事项
git init会在项目根目录下初始化一个.git目录,git仓库必须
remote只需执行一次,yourRepository.git是你在github已有的一个仓库
.gitignore,这个文件写入所有不需要加入版本管理的文件,尤其像node_modules
二、嗯,还没想法写啥,先发送吧
总结
切勿着急,欲速则不达
| 技术 |
|---|
| 亢龙, 有悔 |
飞龙在天 , 利见大人 九五 |
| 或跃在渊, 无咎 |
| 君子终日乾乾,夕依若厉无咎 |
| 见龙在田, 利见大人 |
| 潜龙,勿用 |


 652
652


 被折叠的 条评论
为什么被折叠?
被折叠的 条评论
为什么被折叠?
 到【灌水乐园】发言


