一 基本骨架-TabBar基本内容
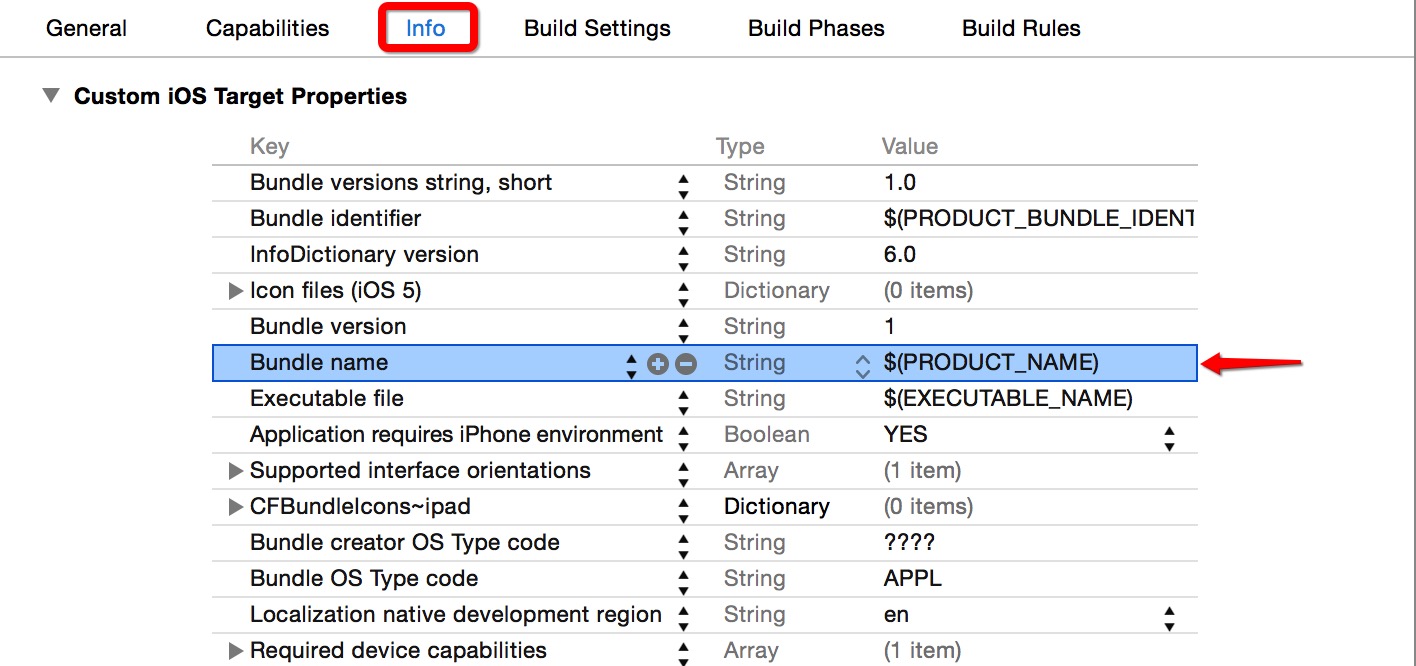
- 应用软件名称设置
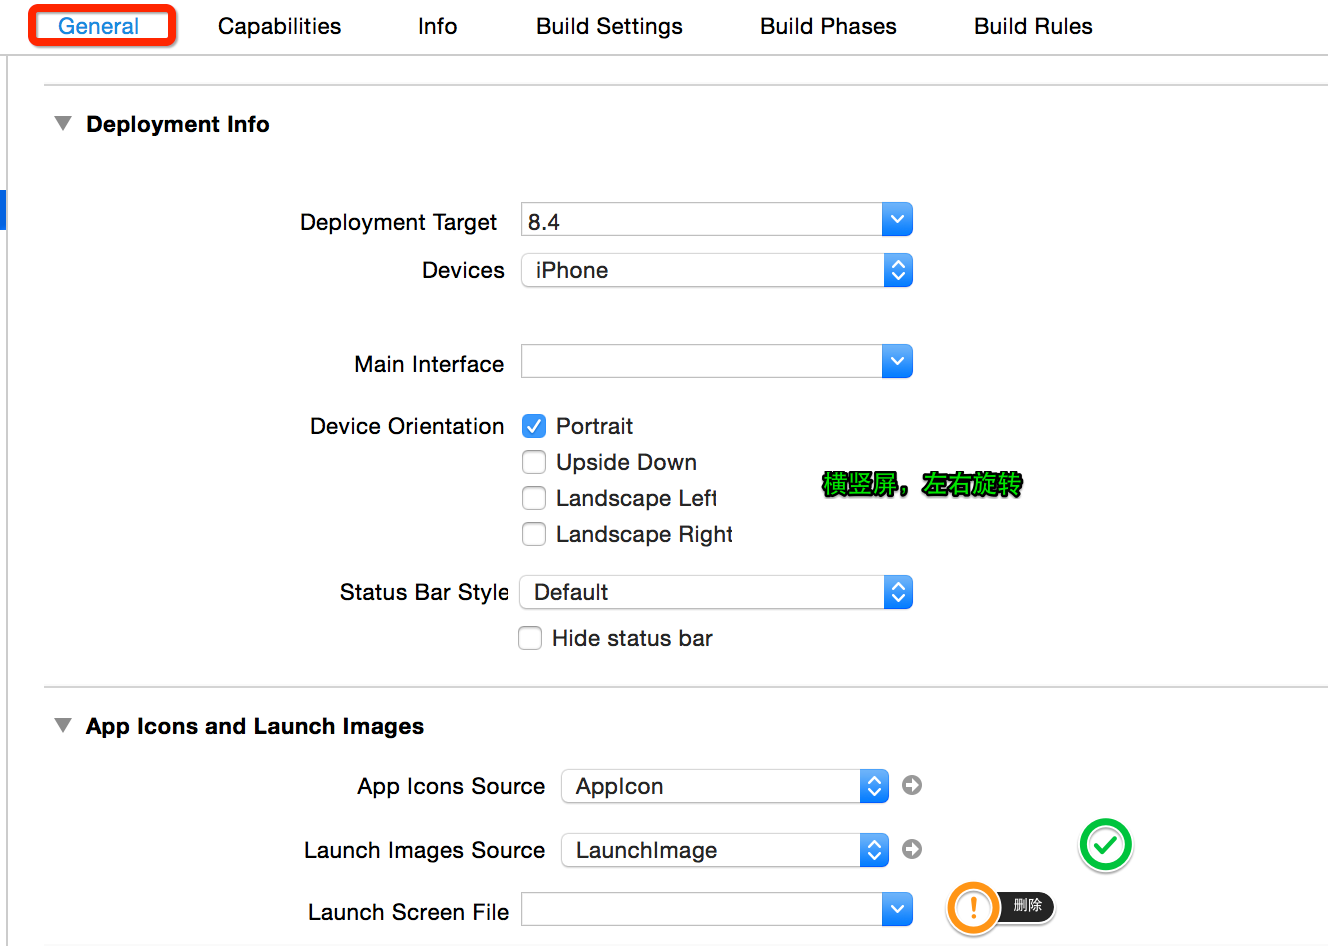
设置启动图片
删除系统自带xib文件
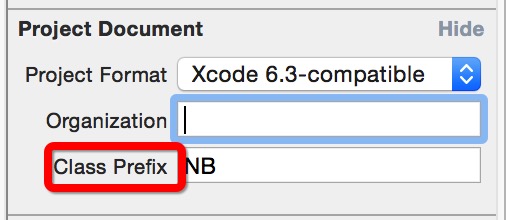
自带类前缀设置
创建跟控制器,添加子控制器
- (BOOL)application:(UIApplication *)application didFinishLaunchingWithOptions:(NSDictionary *)launchOptions {
    // 1.创建窗口
    self.window = [[UIWindow alloc] init];
    self.window.frame = [UIScreen mainScreen].bounds;

    // 2.设置窗口的根控制器
    UITabBarController *rootVc = [[UITabBarController alloc] init];
    self.window.rootViewController = rootVc;

    // 3.添加4个子控制器
    UIViewController *vc1 = [[UIViewController alloc] init];
    vc1.tabBarItem.title = @"精华";
    vc1.tabBarItem.image = [UIImage imageNamed:@"tabBar_essence_icon"];
    vc1.tabBarItem.selectedImage = [UIImage imageNamed:@"tabBar_essence_click_icon"];
    vc1.view.backgroundColor = [UIColor greenColor];
    [rootVc addChildViewController:vc1];

    ……

    // 4.显示窗口
    [self.window makeKeyAndVisible];

    return YES;
}
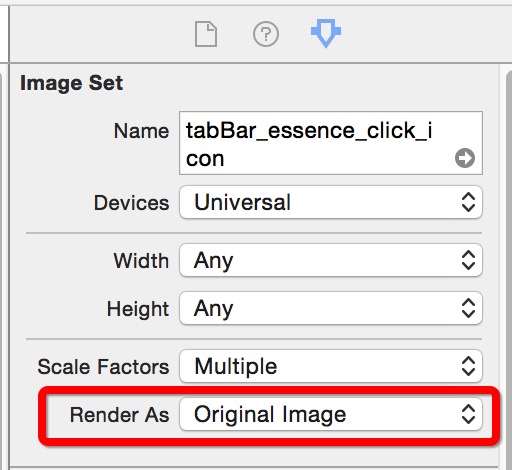
解决图片渲染问题
通过代码
vc1.tabBarItem.selectedImage = [[UIImage imageNamed:@"tabBar_essence_click_icon"] imageWithRenderingMode:UIImageRenderingModeAlwaysOriginal];设置
二 调整TabBar内容外观
- 新建TableBar类 XMGTabBarController
- (void)viewDidLoad {
    [super viewDidLoad];

    // UIControlStateNormal状态下的文字属性
    NSMutableDictionary *normalAttrs = [NSMutableDictionary dictionary];
    // 文字颜色
    normalAttrs[NSForegroundColorAttributeName] = [UIColor grayColor];
    // 文字大小
    normalAttrs[NSFontAttributeName] = [UIFont systemFontOfSize:12];

    // UIControlStateSelected状态下的文字属性
    NSMutableDictionary *selectedAttrs = [NSMutableDictionary dictionary];
    // 文字颜色
    selectedAttrs[NSForegroundColorAttributeName] = [UIColor darkGrayColor];

    // 添加4个子控制器
    UIViewController *vc1 = [[UIViewController alloc] init];
    vc1.tabBarItem.title = @"精华";
    vc1.tabBarItem.image = [UIImage imageNamed:@"tabBar_essence_icon"];
    vc1.tabBarItem.selectedImage = [UIImage imageNamed:@"tabBar_essence_click_icon"];
    [vc1.tabBarItem setTitleTextAttributes:normalAttrs forState:UIControlStateNormal];
    [vc1.tabBarItem setTitleTextAttributes:selectedAttrs forState:UIControlStateSelected];
    vc1.view.backgroundColor = [UIColor greenColor];
    [self addChildViewController:vc1];
}
三 UIAppearnce
- 抽取重复代码
- appearance可以统一设置文字属性
@implementation XMGTabBarController

- (void)viewDidLoad {
    [super viewDidLoad];

    // 设置item属性
    [self setupItem];

    // 添加所有的子控制器
    [self setupChildVcs];
}

/**
 * 设置item属性
 */
- (void)setupItem
{
    // UIControlStateNormal状态下的文字属性
    NSMutableDictionary *normalAttrs = [NSMutableDictionary dictionary];
    // 文字颜色
    normalAttrs[NSForegroundColorAttributeName] = [UIColor grayColor];
    // 文字大小
    normalAttrs[NSFontAttributeName] = [UIFont systemFontOfSize:12];

    // UIControlStateSelected状态下的文字属性
    NSMutableDictionary *selectedAttrs = [NSMutableDictionary dictionary];
    // 文字颜色
    selectedAttrs[NSForegroundColorAttributeName] = [UIColor darkGrayColor];
    // 统一给所有的UITabBarItem设置文字属性
    // 只有后面带有UI_APPEARANCE_SELECTOR的属性或方法, 才可以通过appearance对象来统一设置
    UITabBarItem *item = [UITabBarItem appearance];
    [item setTitleTextAttributes:normalAttrs forState:UIControlStateNormal];
    [item setTitleTextAttributes:selectedAttrs forState:UIControlStateSelected];
}
四 包装导航控制器
/**
 * 添加一个子控制器
 * @param title 文字
 * @param image 图片
 * @param selectedImage 选中时的图片
 */
- (void)setupChildVc:(UIViewController *)vc title:(NSString *)title image:(NSString *)image selectedImage:(NSString *)selectedImage
{
    // 包装一个导航控制器
    UINavigationController *nav = [[UINavigationController alloc] initWithRootViewController:vc];
    [self addChildViewController:nav];

    // 设置子控制器的tabBarItem
    nav.tabBarItem.title = title;
    nav.tabBarItem.image = [UIImage imageNamed:image];
    nav.tabBarItem.selectedImage = [UIImage imageNamed:selectedImage];
}
/**
* 添加所有的子控制器
*/
- (void)setupChildVcs
{
[self setupChildVc:[[XMGEssenceViewController alloc] init] title:@"精华" image:@"tabBar_essence_icon" selectedImage:@"tabBar_essence_click_icon"];
……
五 自定义TabBar
- 系统自带的tabBar是只读的,不能直接赋值
/**
 * 处理TabBar
 */
- (void)setupTabBar
{
//    self.tabBar = [[XMGTabBar alloc] init];
    [self setValue:[[XMGTabBar alloc] init] forKeyPath:@"tabBar"];
}- 自定义TabBar
- (instancetype)initWithFrame:(CGRect)frame
{
    if (self = [super initWithFrame:frame]) {
        UIButton *publishButton = [UIButton buttonWithType:UIButtonTypeCustom];
        [publishButton setBackgroundImage:[UIImage imageNamed:@"tabBar_publish_icon"] forState:UIControlStateNormal];
        [publishButton setBackgroundImage:[UIImage imageNamed:@"tabBar_publish_click_icon"] forState:UIControlStateHighlighted];
        [publishButton sizeToFit];
        // 添加监听
        [publishButton addTarget:self action:@selector(publishClick) forControlEvents:UIControlEventTouchUpInside];
        [self addSubview:publishButton];
        self.publishButton = publishButton;
    }
    return self;
}
/**
 * 布局子控件
 */
- (void)layoutSubviews
{
    [super layoutSubviews];

    // 设置发布按钮的位置
    self.publishButton.center = CGPointMake(self.frame.size.width * 0.5, self.frame.size.height * 0.5);

    // 按钮索引
    int index = 0;

    // 按钮的尺寸
    CGFloat tabBarButtonW = self.frame.size.width / 5;
    CGFloat tabBarButtonH = self.frame.size.height;
    CGFloat tabBarButtonY = 0;

    // 设置4个TabBarButton的frame
    for (UIView *tabBarButton in self.subviews) {
//        if (![tabBarButton isKindOfClass:NSClassFromString(@"UITabBarButton")]) continue;
        if (![NSStringFromClass(tabBarButton.class) isEqualToString:@"UITabBarButton"]) continue;

        // 计算按钮的X值
        CGFloat tabBarButtonX = index * tabBarButtonW;
        if (index >= 2) { // 给后面2个button增加一个宽度的X值
            tabBarButtonX += tabBarButtonW;
        }

        // 设置按钮的frame
        tabBarButton.frame = CGRectMake(tabBarButtonX, tabBarButtonY, tabBarButtonW, tabBarButtonH);

        // 增加索引
        index++;
    }
}
六 pch文件
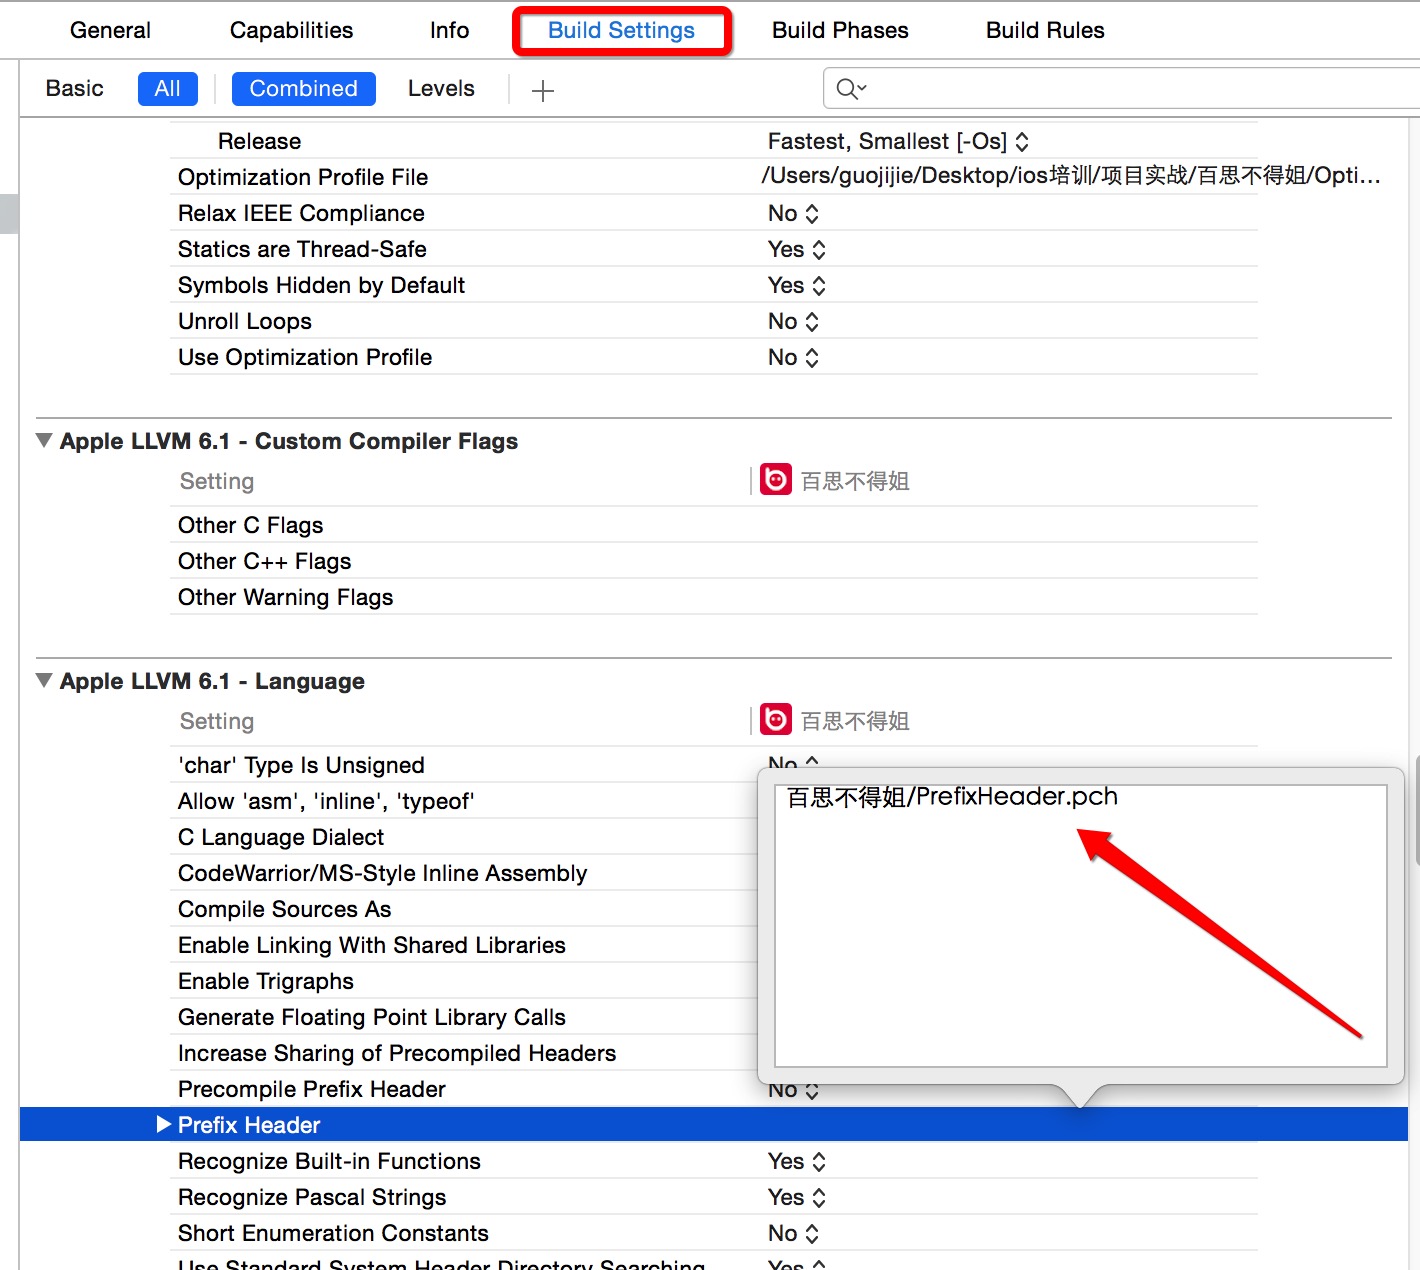
- 添加pch文件
- 路径:根文件名+PrefixHeader.pch
- 路径:根文件名+PrefixHeader.pch
- 格式
/*
 ...表示宏里面的可变参数
 __VA_ARGS__表示函数里面的可变参数
*/
// 日志输出
#ifdef DEBUG // 开发阶段-DEBUG阶段:正常使用Log
#define XMGLog(...) NSLog(__VA_ARGS__)
#else // 发布阶段-上线阶段:移除Log
#define XMGLog(...)
#endif
七 封装item创建
- 建一个分类
- 用分类减少新建一个类
- 分类命名方法名更易读
@implementation UIBarButtonItem (XMGExtension)
+ (instancetype)itemWithImage:(NSString *)image highImage:(NSString *)highImage target:(id)target action:(SEL)action
{
    UIButton *button = [UIButton buttonWithType:UIButtonTypeCustom];
    [button setBackgroundImage:[UIImage imageNamed:image] forState:UIControlStateNormal];
    [button setBackgroundImage:[UIImage imageNamed:highImage] forState:UIControlStateHighlighted];
    [button sizeToFit];
    [button addTarget:target action:action forControlEvents:UIControlEventTouchUpInside];

    return [[self alloc] initWithCustomView:button];
}
@end
八 导航栏返回键
- (void)viewDidLoad {
    [super viewDidLoad];
    self.navigationItem.title = @"设置";

    // 左上角的返回
    UIButton *backButton = [UIButton buttonWithType:UIButtonTypeCustom];
    [backButton setTitle:@"返回" forState:UIControlStateNormal];
    [backButton setTitleColor:[UIColor blackColor] forState:UIControlStateNormal];
    [backButton setTitleColor:[UIColor redColor] forState:UIControlStateHighlighted];
    [backButton setImage:[UIImage imageNamed:@"navigationButtonReturn"] forState:UIControlStateNormal];
    [backButton setImage:[UIImage imageNamed:@"navigationButtonReturnClick"] forState:UIControlStateHighlighted];
    [backButton sizeToFit];
    [backButton addTarget:self action:@selector(back) forControlEvents:UIControlEventTouchUpInside];
    // 注意:返回箭头的位置调整
    backButton.contentEdgeInsets = UIEdgeInsetsMake(0, -20, 0, 0);
    self.navigationItem.leftBarButtonItem = [[UIBarButtonItem alloc] initWithCustomView:backButton];
}

- (void)back
{
    [self.navigationController popViewControllerAnimated:YES];
}- NBMeViewController 设置→返回
- (void)settingClick
{
    NBSettingViewController *setting = [[NBSettingViewController alloc] init];
    setting.hidesBottomBarWhenPushed = YES;// 当push这个控制器时,会自动隐藏底部的工具条
    [self.navigationController pushViewController:setting animated:YES];
}




 被折叠的 条评论
为什么被折叠?


