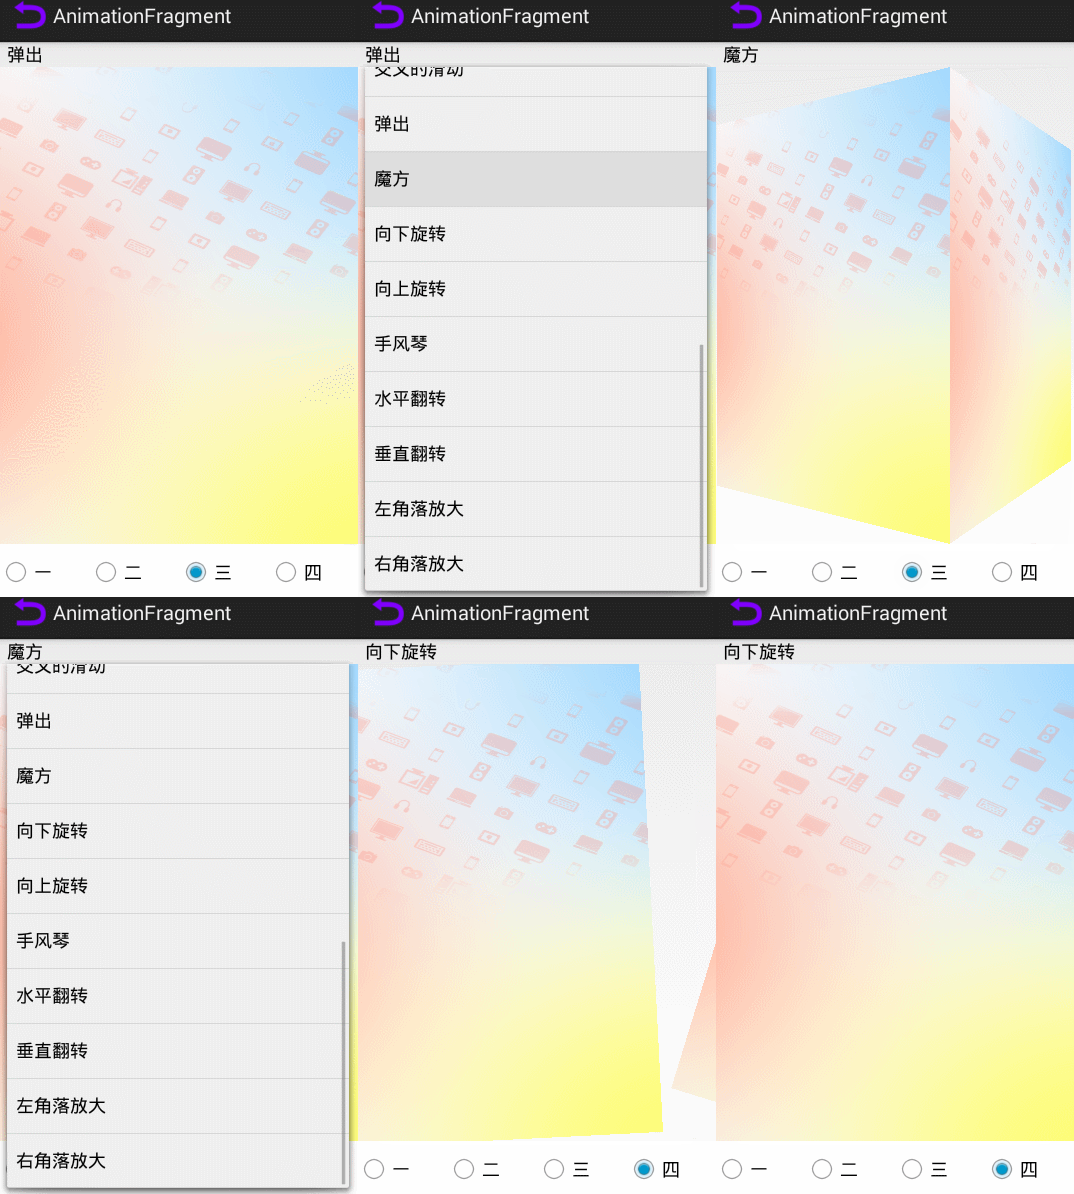
公司项目的主界面是一个Fragment,各个Fragment之间切换的时候,总感觉不太美观,于是想添加切换动画,在网上找了不少demo,总是感觉笔者思路不清晰或者实现起来太麻烦。于是自己整理了一下,只要很简单的几行代码,就能实现我想要的切换动画了。
首先是效果图:
好了,效果图完毕,废话不多说,直接上代码。
首先是MainActivity.java:
public class MainActivity extends Activity implements OnItemSelectedListener{


	RadioGroup radioGroup;
	private Fragment fragment1;
	private Fragment fragment2;
	private Fragment fragment3;
	private Fragment fragment4;
	private int currentSelectPoition = 0;

    @Override
    protected void onCreate(Bundle savedInstanceState) {
        super.onCreate(savedInstanceState);
        setContentView(R.layout.activity_main);

        Spinner spinner = (Spinner) findViewById(R.id.spinner);
        ArrayAdapter<CharSequence> adapter = ArrayAdapter.createFromResource(this, R.array.array_spinner, android.R.layout.simple_spinner_item);
        adapter.setDropDownViewResource(android.R.layout.simple_spinner_dropdown_item);
        spinner.setAdapter(adapter);
        spinner.setOnItemSelectedListener(this);

        radioGroup = (RadioGroup) findViewById(R.id.radiogroup);
        radioGroup.setOnCheckedChangeListener(new RadioGroup.OnCheckedChangeListener() {

			@Override
			public void onCheckedChanged(RadioGroup group, int checkedId) {
				refreshView(checkedId);
			}

		});
        fragment1 = new TestFragment();
        FragmentTransaction fragmentTransaction = getFragmentManager().beginTransaction();
		fragmentTransaction.add(R.id.frameLayout, fragment1);
		fragmentTransaction.commit();
    }

	private void refreshView(int checkedId) {
        FragmentTransaction fragmentTransaction = getFragmentManager().beginTransaction();
        FragmentAnimationFactory.getInstance().setFragmentAnimation(fragmentTransaction, currentSelectPoition);
		switch (checkedId) {
		case R.id.rb_first:
			if(fragment1 == null)
			fragment1 = new TestFragment();
			fragmentTransaction.replace(R.id.frameLayout, fragment1);
			fragmentTransaction.commit();
			break;
		case R.id.rb_secound:
			if(fragment2 == null)
			fragment2 = new TestFragment();
			fragmentTransaction.replace(R.id.frameLayout, fragment2);
			fragmentTransaction.commit();
			break;
		case R.id.rb_third:
			if(fragment3 == null)
			fragment3 = new TestFragment();
			fragmentTransaction.replace(R.id.frameLayout, fragment3);
			fragmentTransaction.commit();
			break;
		case R.id.rb_fourth:
			if(fragment4 == null)
			fragment4 = new TestFragment();
			fragmentTransaction.replace(R.id.frameLayout, fragment4);
			fragmentTransaction.commit();
			break;
		default:
			break;
		}
//		fragmentTransaction.addToBackStack(null);

	}

	@Override
	public void onItemSelected(AdapterView<?> parent, View view, int position,
			long id) {
		currentSelectPoition = position;
	}

	@Override
	public void onNothingSelected(AdapterView<?> parent) {

	}

}
然后是MainActivity对应的布局文件activity_main.xml:
<LinearLayout xmlns:android="http://schemas.android.com/apk/res/android"
    xmlns:tools="http://schemas.android.com/tools"
    android:layout_width="match_parent"
    android:layout_height="match_parent"
    android:orientation="vertical" >

    <Spinner
        android:id="@+id/spinner"
        android:layout_width="match_parent"
        android:layout_height="wrap_content"
        android:gravity="center"
        android:background="@null" />

<com.example.libfragmentainmation.SlidingRelativeLayout
        android:id="@+id/frameLayout"
        android:layout_width="match_parent"
        android:layout_height="0dp"
        android:layout_weight="1" />

    <RadioGroup
        android:id="@+id/radiogroup"
        android:layout_width="match_parent"
        android:layout_height="50dp"
        android:background="@android:color/white"
        android:gravity="center"
        android:orientation="horizontal" >

        <RadioButton
            android:id="@+id/rb_first"
            android:layout_width="0dp"
            android:layout_weight="1"
            android:text="一" />

        <RadioButton
            android:id="@+id/rb_secound"
            android:layout_width="0dp"
            android:layout_weight="1"
            android:text="二" />

        <RadioButton
            android:id="@+id/rb_third"
            android:layout_width="0dp"
            android:layout_weight="1"
            android:text="三" />

        <RadioButton
            android:id="@+id/rb_fourth"
            android:layout_width="0dp"
            android:layout_weight="1"
            android:text="四" />
    </RadioGroup>

</LinearLayout>public class TestFragment extends Fragment {
@Override
public View onCreateView(LayoutInflater inflater, ViewGroup container,
Bundle savedInstanceState) {
View view = View.inflate(getActivity(), R.layout.fragment_view, null);
return view;
}
}<com.example.libfragmentainmation.SlidingRelativeLayout xmlns:android="http://schemas.android.com/apk/res/android"
android:layout_width="match_parent"
android:layout_height="match_parent" >
<ImageView
android:layout_width="match_parent"
android:layout_height="match_parent"
android:scaleType="fitXY"
android:src="@drawable/background" />
</com.example.libfragmentainmation.SlidingRelativeLayout>OK,到这里就实现了我们要的Fragment切换效果了,看起来是不是很简单啊。哈哈,关键的依赖工程就不讲了。直接给大家demo下载地址吧,拿到了demo,我相信,每一个程序猿,都是金刚!
Fragment切换动画demo:点击打开链接


 4585
4585

 被折叠的 条评论
为什么被折叠?


