


1. 商品后台管理
1.1 商品修改操作
1.1.1 页面URL分析

1.1.2 参数分析

1.1.3 返回值结果确定

1.1.4 编辑ItemController
/**
* 商品修改操作
* 1.url地址: http://localhost:8091/item/update
* 2.参数: form表单提交
* 3.返回值: SysResult对象
*/
@RequestMapping("/update")
public SysResult updateItem(Item item){
itemService.updateItem(item);
return SysResult.success();
}
1.1.5 编辑ItemService
@Override
public void updateItem(Item item) {
//更新时间由程序自动填充....
itemMapper.updateById(item);
}
1.2 商品删除
1.2.1 url请求地址说明

1.2.2 请求参数
1.2.3 返回值类型

1.2.4 编辑ItemController
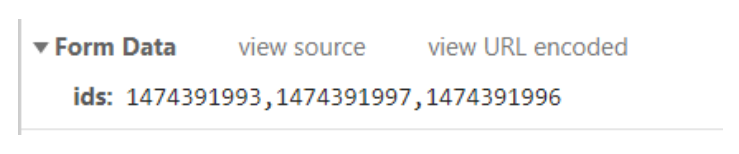
/**
* 业务: 商品删除
* url地址: http://localhost:8091/item/delete
* 参数: ids: 1474391993,1474391997,1474391996
* 返回值: 系统返回值VO
* List 可以赋值 name="list[0]" value=100
* name="list[1]" value=200
*/
@RequestMapping("/delete")
public SysResult deleteItems(Long[] ids){
itemService.deleteItems(ids);
return SysResult.success();
}
1.2.4 编辑ItemService
@Override
public void deleteItems(Long[] ids) {
//1.将数组转化为集合
List<Long> longList = Arrays.asList(ids);
itemMapper.deleteBatchIds(longList);
}
1.3 商品上架/下架操作
1.3.1 业务说明
说明:当用户点击上架/下架的按钮时,需要修改item数据表中的status信息.同时修改时间…

1.3.2 页面分析

1.3.3 参数分析

1.3.4返回值结果分析

1.3.5 修改页面url地址

1.3.6 编辑ItemController
/**
* 实现商品的下架
* url地址: http://localhost:8091/item/updateStatus/2 status=2
* http://localhost:8091/item/updateStatus/1 status=1
* 利用RestFul风格实现通用的操作.
* 参数: ids: 1474391997,1474391996,1474391995
* 返回值: VO对象
*/
@RequestMapping("/updateStatus/{status}")
public SysResult updateStatus(@PathVariable Integer status,Long[] ids){
itemService.updateStatus(status,ids);
return SysResult.success();
}
1.3.7 编辑ItemService
/**
* sql: update tb_item set status = #{status},updated={date}
* where id in (id1,id2,id3)
* MP机制实现
* @param status
* @param ids
*/
@Override
public void updateStatus(Integer status, Long[] ids) {
Item item = new Item(); //封装修改的值
item.setStatus(status);
UpdateWrapper<Item> updateWrapper = new UpdateWrapper<>();
updateWrapper.in("id", Arrays.asList(ids));
itemMapper.update(item,updateWrapper);
}
2. 富文本编辑器
2.1 富文本编辑器介绍
KindEditor是一套开源的HTML可视化编辑器,主要用于让用户在网站上获得所见即所得编辑效果,兼容IE、Firefox、Chrome、Safari、Opera等主流浏览器。
2.2 入门案例
<script type="text/javascript">
$(function(){
KindEditor.ready(function(){
//在指定的位置创建富文本.
KindEditor.create("#editor")
})
})
</script>
</head>
<body>
<h1>富文本编辑器</h1>
<textarea style="width:700px;height:350px" id="editor"></textarea>
</body>
2.3 关于商品模块的表设计
表业务说明: 商品表中的id与商品详情表中的ID是一致的.

2.4 编辑ItemDesc POJO对象
@TableName("tb_item_desc")
@Data
@Accessors(chain = true)
public class ItemDesc extends BasePojo{
//item中的id与ItemDesc中的Id应该保持一致...
@TableId //只标识主键 不能自增.
private Long itemId;
private String itemDesc;
}
2.5 重构商品新增
2.5.1 编辑ItemController
@RequestMapping("/save")
public SysResult saveItem(Item item, ItemDesc itemDesc){
itemService.saveItem(item,itemDesc);
return SysResult.success();
}
2.5.2 编辑ItemService
@Override
@Transactional //控制事务
public void saveItem(Item item, ItemDesc itemDesc) {
//思考:如果每次编辑数据库 每次都需要操作公共的属性...
//完成自动的填充功能
//Date date = new Date();
//item.setStatus(1).setCreated(date).setUpdated(date);
item.setStatus(1);
//如果完成入库操作,时应该动态回显主键信息.
//MP的方式实现数据入库操作,MP会自动的实现主键信息的回显..
itemMapper.insert(item);
//itemDesc属性有值
itemDesc.setItemId(item.getId());
itemDescMapper.insert(itemDesc);
}
2.6 商品详情回显
2.6.1 页面url分析

2.6.2 页面JS

2.6.3 编辑ItemController
/**
* 业务:动态获取商品详情信息
* url地址: http://localhost:8091/item/query/item/desc/1474391999
* 参数: itemId restFul方式获取
* 返回值: 系统VO对象
*/
@RequestMapping("/query/item/desc/{itemId}")
public SysResult findItemDescById(@PathVariable Long itemId){
ItemDesc itemDesc = itemService.findItemDescById(itemId);
return SysResult.success(itemDesc);
}
2.6.4 编辑ItemService
@Override
public ItemDesc findItemDescById(Long itemId) {
return itemDescMapper.selectById(itemId);
}
2.6.5 页面效果展现

2.7 重构商品修改
2.7.1 编辑ItemDescController
@RequestMapping("/update")
public SysResult updateItem(Item item,ItemDesc itemDesc){
itemService.updateItem(item,itemDesc);
return SysResult.success();
}
2.7.2 编辑ItemDescService
@Transactional
@Override
public void updateItem(Item item, ItemDesc itemDesc) {
//更新时间由程序自动填充....
itemMapper.updateById(item);
itemDesc.setItemId(item.getId());
itemDescMapper.updateById(itemDesc);
}
2.8 重构商品删除
@Transactional
@Override
public void deleteItems(Long[] ids) {
//1.将数组转化为集合
List<Long> longList = Arrays.asList(ids);
itemMapper.deleteBatchIds(longList);
//2.删除商品详情信息
itemDescMapper.deleteBatchIds(longList);
}
3. 文件上传
3.1 文件上传入门案例
3.1.1 页面分析
<form action="http://localhost:8091/file" method="post"
enctype="multipart/form-data">
<input name="fileImage" type="file" />
<input type="submit" value="提交"/>
</form>
3.1.2 编辑FileController
package com.jt.controller;
import org.springframework.http.codec.multipart.FormFieldPart;
import org.springframework.web.bind.annotation.RequestMapping;
import org.springframework.web.bind.annotation.RestController;
import org.springframework.web.multipart.MultipartFile;
import java.io.File;
import java.io.IOException;
import java.io.InputStream;
@RestController
public class FileController {
/**
* 文件上传的入门案例
* url:http://localhost:8091/file
* 参数: fileImage 名称
* 返回值: 文件上传成功!!!
* SpringMVC 提供了工具API 专门操作流文件.
*
* 文件上传的具体步骤:
* 1.准备文件目录
* 2.准备文件的全名 xxxx.jpg
* 3.准备文件上传的路径 D:/JT-SOFT/images/xxxx.jpg
* 4.将字节信息输出即可.
* 大小不要超过1M
*/
@RequestMapping("/file")
public String file(MultipartFile fileImage) throws IOException {
String dirPath = "D:/JT-SOFT/images";
File dirFile = new File(dirPath);
if(!dirFile.exists()){
dirFile.mkdirs(); //一劳永逸的写法
}
//获取文件的名称
String fileName = fileImage.getOriginalFilename();
//获取文件全路径
String filePath = dirPath + "/" + fileName;
File file = new File(filePath);
fileImage.transferTo(file); //将字节信息输出到指定的位置中
return "文件上传成功!!!!";
}
}
3.2 商品文件上传实现
3.2.1 页面分析

3.2.2 准备ImageVO对象
package com.jt.vo;
import lombok.AllArgsConstructor;
import lombok.Data;
import lombok.NoArgsConstructor;
import lombok.experimental.Accessors;
@Data
@Accessors(chain = true)
@NoArgsConstructor
@AllArgsConstructor
public class ImageVO {
//{"error":0,"url":"图片的保存路径","width":图片的宽度,"height":图片的高度}
private Integer error; //错误信息 0程序运行正常 1.文件上传有误.
private String url; //图片访问的虚拟路径
private Integer width; // >0
private Integer height; // >0
//设定上传失败的方法
public static ImageVO fail(){
return new ImageVO(1,null,null,null);
}
public static ImageVO success(String url,Integer width,Integer height){
return new ImageVO(0,url,width,height);
}
}
3.2.3 编辑FileController
/**
* 实现文件上传
* url地址: http://localhost:8091/pic/upload?dir=image
* 参数: uploadFile: 文件的字节信息.
* 返回值: {"error":0,"url":"图片的保存路径","width":图片的宽度,"height":图片的高度}
* ImageVO对象...
*/
@RequestMapping("/pic/upload")
public ImageVO upload(MultipartFile uploadFile){
return fileService.upload(uploadFile);
}
3.2.4 编辑FileService
package com.jt.service;
import com.jt.vo.ImageVO;
import org.springframework.stereotype.Service;
import org.springframework.web.multipart.MultipartFile;
import javax.imageio.ImageIO;
import java.awt.image.BufferedImage;
import java.io.File;
import java.io.IOException;
import java.text.SimpleDateFormat;
import java.util.Date;
import java.util.HashSet;
import java.util.Set;
import java.util.UUID;
@Service
public class FileServiceImpl implements FileService{
private String rootDirPath = "D:/JT-SOFT/images";
//1.2 准备图片的集合 包含了所有的图片类型.
private static Set<String> imageTypeSet;
static {
imageTypeSet = new HashSet<>();
imageTypeSet.add(".jpg");
imageTypeSet.add(".png");
imageTypeSet.add(".gif");
}
/**
* 完善的校验的过程
* 1. 校验是否为图片
* 2. 校验是否为恶意程序
* 3. 防止文件数量太多,分目录存储.
* 4. 防止文件重名
* 5. 实现文件上传.
* @param uploadFile
* @return
*/
@Override
public ImageVO upload(MultipartFile uploadFile) {
//1.校验图片类型 jpg|png|gif..JPG|PNG....
//1.1 获取当前图片的名称 之后截取其中的类型. abc.jpg
String fileName = uploadFile.getOriginalFilename();
int index = fileName.lastIndexOf(".");
String fileType = fileName.substring(index);
//将数据转化为小写
fileType = fileType.toLowerCase();
//1.3 判断图片类型是否正确.
if(!imageTypeSet.contains(fileType)){
//图片类型不匹配
return ImageVO.fail();
}
//2.校验是否为恶意程序 根据宽度/高度进行判断
try {
//2.1 利用工具API对象 读取字节信息.获取图片对象类型
BufferedImage bufferedImage = ImageIO.read(uploadFile.getInputStream());
//2.2 校验是否有宽度和高度
int width = bufferedImage.getWidth();
int height = bufferedImage.getHeight();
if(width==0 || height==0){
return ImageVO.fail();
}
//3.分目录存储 yyyy/MM/dd 分隔
//3.1 将时间按照指定的格式要求 转化为字符串.
String dateDir = new SimpleDateFormat("/yyyy/MM/dd/")
.format(new Date());
//3.2 拼接文件存储的目录对象
String fileDirPath = rootDirPath + dateDir;
File dirFile = new File(fileDirPath);
//3.3 动态创建目录
if(!dirFile.exists()){
dirFile.mkdirs();
}
//4.防止文件重名 uuid.jpg 动态拼接
//4.1 动态生成uuid 实现文件名称拼接 名.后缀
String uuid =
UUID.randomUUID().toString().replace("-", "");
String realFileName = uuid + fileType;
//5 实现文件上传
//5.1 拼接文件真实路径 dir/文件名称.
String realFilePath = fileDirPath + realFileName;
//5.2 封装对象 实现上传
File realFile = new File(realFilePath);
uploadFile.transferTo(realFile);
//实现文件上传成功!!!!
String url = "https://img14.360buyimg.com/n0/jfs/t1/45882/22/7027/53284/5d49358aE9c25c1bd/fb7365463f6a1a7b.jpg";
return ImageVO.success(url,width,height);
} catch (IOException e) {
e.printStackTrace();
return ImageVO.fail();
}
}
}
3.2.5 页面效果展现

<?xml version="1.0" encoding="UTF-8"?>
<project xmlns="http://maven.apache.org/POM/4.0.0"
         xmlns:xsi="http://www.w3.org/2001/XMLSchema-instance"
         xsi:schemaLocation="http://maven.apache.org/POM/4.0.0 http://maven.apache.org/xsd/maven-4.0.0.xsd">
    <modelVersion>4.0.0</modelVersion>

    <groupId>com.jt</groupId>
    <artifactId>jt</artifactId>
    <version>1.0-SNAPSHOT</version>

    <!--当前父级工程打包类型,如果修改了项目的名称记得修改modules标签
    -->
    <modules>
        <module>jt-common</module>
        <module>jt-manage</module>
        <module>jt-web</module>
        <module>jt-sso</module>
        <module>jt-cart</module>
        <module>jt-order</module>
    </modules>

    <!--定义父级工程打包类型-->
    <packaging>pom</packaging>

    <!--1.引入springboot的父级项目
    -->
    <parent>
        <groupId>org.springframework.boot</groupId>
        <artifactId>spring-boot-starter-parent</artifactId>
        <version>2.3.4.RELEASE</version>
        <relativePath/> <!-- lookup parent from repository -->
    </parent>

    <!--2.引入属性的配置-->
    <properties>
        <java.version>1.8</java.version>
        <!--跳过测试类打包-->
        <skipTests>true</skipTests>
    </properties>

<!--    在父级项目中添加jar包文件-->
    <dependencies>
        <dependency>
            <groupId>org.springframework.boot</groupId>
            <artifactId>spring-boot-starter-web</artifactId>
        </dependency>

        <dependency>
            <groupId>org.springframework.boot</groupId>
            <artifactId>spring-boot-starter-test</artifactId>
            <scope>test</scope>
            <exclusions>
                <exclusion>
                    <groupId>org.junit.vintage</groupId>
                    <artifactId>junit-vintage-engine</artifactId>
                </exclusion>
            </exclusions>
        </dependency>

        <!--引入插件lombok 自动的set/get/构造方法插件  -->
        <dependency>
            <groupId>org.projectlombok</groupId>
            <artifactId>lombok</artifactId>
        </dependency>

        <!--引入数据库驱动 -->
        <dependency>
            <groupId>mysql</groupId>
            <artifactId>mysql-connector-java</artifactId>
            <scope>runtime</scope>
        </dependency>

        <!--springBoot数据库连接  -->
        <dependency>
            <groupId>org.springframework.boot</groupId>
            <artifactId>spring-boot-starter-jdbc</artifactId>
        </dependency>

        <!--spring整合mybatis-plus -->
        <dependency>
            <groupId>com.baomidou</groupId>
            <artifactId>mybatis-plus-boot-starter</artifactId>
            <version>3.2.0</version>
        </dependency>

        <!--springBoot整合JSP添加依赖  -->
        <!--servlet依赖 -->
        <dependency>
            <groupId>javax.servlet</groupId>
            <artifactId>javax.servlet-api</artifactId>
        </dependency>

        <!--jstl依赖 -->
        <dependency>
            <groupId>javax.servlet</groupId>
            <artifactId>jstl</artifactId>
        </dependency>

        <!--使jsp页面生效 -->
        <dependency>
            <groupId>org.apache.tomcat.embed</groupId>
            <artifactId>tomcat-embed-jasper</artifactId>
        </dependency>

        <!--支持热部署 -->
<!--        <dependency>-->
<!--            <groupId>org.springframework.boot</groupId>-->
<!--            <artifactId>spring-boot-devtools</artifactId>-->
<!--        </dependency>-->

        <!--添加httpClient jar包 -->
        <dependency>
            <groupId>org.apache.httpcomponents</groupId>
            <artifactId>httpclient</artifactId>
        </dependency>

        <!--引入dubbo配置-->
        <dependency>
            <groupId>com.alibaba.boot</groupId>
            <artifactId>dubbo-spring-boot-starter</artifactId>
            <version>0.2.0</version>
        </dependency>

        <!--添加Quartz的支持 -->
<!--        <dependency>-->
<!--            <groupId>org.springframework.boot</groupId>-->
<!--            <artifactId>spring-boot-starter-quartz</artifactId>-->
<!--        </dependency>-->

        <!-- 引入aop支持 -->
        <dependency>
            <groupId>org.springframework.boot</groupId>
            <artifactId>spring-boot-starter-aop</artifactId>
        </dependency>

        <!--spring整合redis -->
        <dependency>
            <groupId>redis.clients</groupId>
            <artifactId>jedis</artifactId>
        </dependency>
        <dependency>
            <groupId>org.springframework.data</groupId>
            <artifactId>spring-data-redis</artifactId>
        </dependency>

    </dependencies>

    <!--
        父级工程只是项目的管理者不会在其中编辑代码,所以不需要添加build
    -->

</project>
server:
  port: 8092
spring:     #定义springmvc视图解析器
  mvc:
    view:
      prefix: /WEB-INF/views/
      suffix: .jsp

dubbo:
  scan:
    basePackages: com.jt
  application:
    name: consumer-web   #定义消费者名称
  registry:               #注册中心地址
    address: zookeeper://192.168.126.129:2181?backup=192.168.126.129:2182,192.168.126.129:2183
#最大连接数
http.maxTotal = 1000
#并发数
http.defaultMaxPerRoute = 20
#创建连接的最长时间
http.connectTimeout=5000
#从连接池中获取到连接的最长时间
http.connectionRequestTimeout=500
#数据传输的最长时间
http.socketTimeout=5000
#提交请求前测试连接是否可用
http.staleConnectionCheckEnabled=true
package com.jt;

import org.springframework.boot.SpringApplication;
import org.springframework.boot.autoconfigure.SpringBootApplication;
import org.springframework.boot.autoconfigure.jdbc.DataSourceAutoConfiguration;

@SpringBootApplication(exclude=DataSourceAutoConfiguration.class)
//springboot启动时排除数据源
public class SpringBootRun {

   public static void main(String[] args) {

      SpringApplication.run(SpringBootRun.class,args);
   }
}
package com.jt.config;

import com.jt.interceptor.UserInterceptor;
import com.jt.util.CookieUtil;
import org.apache.catalina.connector.Request;
import org.springframework.beans.factory.annotation.Autowired;
import org.springframework.context.annotation.Configuration;
import org.springframework.web.servlet.config.annotation.InterceptorRegistry;
import org.springframework.web.servlet.config.annotation.PathMatchConfigurer;
import org.springframework.web.servlet.config.annotation.WebMvcConfigurer;

@Configuration
public class MvcConfigurer implements WebMvcConfigurer{//web.xml配置文件

   //开启匹配后缀型配置
   @Override
   public void configurePathMatch(PathMatchConfigurer configurer) {
      //开启后缀类型的匹配  xxxx.html
      configurer.setUseSuffixPatternMatch(true);
   }


   @Autowired
   private UserInterceptor userInterceptor;
   /**
    * 添加拦截器功能
    */

   @Override
   public void addInterceptors(InterceptorRegistry registry) {


      registry.addInterceptor(userInterceptor)
            .addPathPatterns("/cart/**","/order/**");
   }
}
package com.jt.interceptor;

import com.jt.pojo.User;
import com.jt.thread.UserThreadLocal;
import com.jt.util.CookieUtil;
import com.jt.util.ObjectMapperUtil;
import org.springframework.beans.factory.annotation.Autowired;
import org.springframework.stereotype.Component;
import org.springframework.util.StringUtils;
import org.springframework.web.servlet.HandlerInterceptor;
import redis.clients.jedis.JedisCluster;

import javax.servlet.http.HttpServletRequest;
import javax.servlet.http.HttpServletResponse;

@Component//spring容器管理对象
public class UserInterceptor implements HandlerInterceptor {

    @Autowired
    private JedisCluster jedisCluster;

    /**
     * spring版本升级 4 必须实现所有的方法 spring 5 只需要重写指定的方法即可
     *
     * 需求:拦截/cart开头的所有的请求进行拦截,并且校验用户是否登录.....
     * 拦截器选择:preHander
     * 如何判断用户是否登录:
     *1.检查cookie信息
     * 2.检查Redis中是否有记录
     * true:请求应该放行
     * false:请求应该拦截 则配合重定向的语法实现页面跳转到登录页面 使得程序流转起来
     *
     */

    @Override
    public boolean preHandle(HttpServletRequest request, HttpServletResponse response, Object handler) throws Exception {

        //1.判断用户是否登录 检查cookie是否有值
        String ticket=CookieUtil.getCookieValue(request,"JT_TICKET");

        //2.校验ticket
        if (!StringUtils.isEmpty(ticket)){

            //3.判断redis中是否有值
            if (jedisCluster.exists(ticket)){
                //4.动态获取json信息
                String userJSON=jedisCluster.get(ticket);
                User user= ObjectMapperUtil.toObj(userJSON, User.class);
                request.setAttribute("JT_USER", user);
                UserThreadLocal.set(user);
                return true;
            }

        }
        response.sendRedirect("/user/login.html");
        return false;
    }

    @Override
    public void afterCompletion(HttpServletRequest request, HttpServletResponse response, Object handler, Exception ex) throws Exception {
        //销毁数据
        request.removeAttribute("JT_USER");
        UserThreadLocal.remove();
    }
}
package com.jt.thread;

import com.jt.pojo.User;

public class UserThreadLocal {

    //static不会影响线程 threadLocal创建时跟随线程
    private static ThreadLocal<User> threadLocal=new ThreadLocal<>();
    public static  void set(User user){
        threadLocal.set(user);
    }

    public static User get(){
        return threadLocal.get();
    }

    public static void remove(){
        threadLocal.remove();
    }
}
package com.jt.service;

import com.jt.pojo.Item;

import java.util.List;

public interface HttpClientService {
    List<Item> getItems();
}
package com.jt.service;

import com.jt.pojo.Item;
import com.jt.util.ObjectMapperUtil;
import org.apache.http.HttpResponse;
import org.apache.http.client.HttpClient;
import org.apache.http.client.methods.HttpGet;
import org.apache.http.impl.client.HttpClients;
import org.apache.http.util.EntityUtils;
import org.springframework.stereotype.Service;
import org.springframework.util.StringUtils;

import java.io.IOException;
import java.util.ArrayList;
import java.util.List;

@Service
public class HttpClientServiceImpl implements HttpClientService{

    @Override
    public List<Item> getItems() {
        List<Item> itemList=new ArrayList<>();
        //1.定义远程访问网址
        String url="http://manage.jt.com/getItems";
        HttpClient httpClient =HttpClients.createDefault();
        HttpGet httpGet=new HttpGet(url);
        try {
            HttpResponse httpResponse =httpClient.execute(httpGet);
            if (httpResponse.getStatusLine().getStatusCode()==200){
                String result=
                        EntityUtils.toString(httpResponse.getEntity(), "UTF-8");
            //result是jt-manage为jt-web返回的List<Item>的JSON串
                if (!StringUtils.isEmpty(result)){
                    itemList=ObjectMapperUtil.toObj(result, itemList.getClass());
                }

            }
        } catch (IOException e) {
            e.printStackTrace();
            throw new RuntimeException(e);
        }
        return itemList;
    }
}
package com.jt.controller;

import com.alibaba.dubbo.config.annotation.Reference;
import com.jt.pojo.Cart;
import com.jt.pojo.User;
import com.jt.service.DubboCartService;
import com.jt.thread.UserThreadLocal;
import org.springframework.stereotype.Controller;
import org.springframework.ui.Model;
import org.springframework.web.bind.annotation.PathVariable;
import org.springframework.web.bind.annotation.RequestMapping;
import org.springframework.web.bind.annotation.ResponseBody;

import javax.servlet.http.HttpServletRequest;
import java.util.List;

@Controller
@RequestMapping("/cart")
public class CartController {

    @Reference(timeout = 3000,check = false)
    private DubboCartService cartService;

    /**
     * 业务需求:根据userId查询购物车数据
     * url地址:http://www.jt.com/cart/show.html
     * 请求参数:动态获取userId
     * 返回值结果:cart.jsp页面
     * 页面取值方式:${cartList}
     */

    @RequestMapping("/show")
    public String findCartListByUserId(Model model,HttpServletRequest request){

//        User user = (User) request.getAttribute("JT_USER");
//        Long userId=user.getId();
        Long userId= UserThreadLocal.get().getId();
        List<Cart> cartList=cartService.findCartListByUserId(userId);
        model.addAttribute("cartList", cartList);
        return "cart";
    }

    /**
     * 业务:实现购物车数量的更新
     * url: http://www.jt.com/cart/update/num/562379/8
     * 参数:itemId/num
     * 返回值:void
     *
     */


    @RequestMapping("/update/num/{itemId}/{num}")
    @ResponseBody//1.返回值转化为json 2.ajax结束标识
    public void updateCartNum(Cart cart, HttpServletRequest request){//key的名称必须和属性的名称一致

        //User user = (User) request.getAttribute("JT_USER");
        //Long userId=user.getId();
        Long userId= UserThreadLocal.get().getId();
        cart.setUserId(userId);
        cartService.updateCartNum(cart);

    }


    /**
     * 完成购物车新增
     * url:http://www.jt.com/cart/add/562379.html
     * 参数:form表单提交 对象接收
     * 返回值: 重定向到购物车列表页面中
     *
     */
    @RequestMapping("/add/{itemId}")
    public String saveCart(Cart cart,HttpServletRequest request){

        //User user = (User) request.getAttribute("JT_USER");
      //  Long userId=user.getId();
        Long userId= UserThreadLocal.get().getId();
        cart.setUserId(userId);
        cartService.saveCart(cart);
        return "redirect:/cart/show.html";
    }

    /**
     * 购物车删除操作
     * url地址:http://www.jt.com/cart/delete/562379.html
     * 参数:获取itemId
     * 返回值:重定向到购物车的展现页面
     *
     */

    @RequestMapping("/delete/{itemId}")
    public String deleteCarts(@PathVariable Long itemId,HttpServletRequest request){

        //User user = (User) request.getAttribute("JT_USER");
        //Long userId=user.getId();
        Long userId= UserThreadLocal.get().getId();
        cartService.deleteCarts(userId,itemId);
        return "redirect:/cart/show.html";
    }

}
package com.jt.controller;

import com.jt.pojo.Item;
import com.jt.service.HttpClientService;
import org.springframework.beans.factory.annotation.Autowired;
import org.springframework.web.bind.annotation.RequestMapping;
import org.springframework.web.bind.annotation.RestController;

import java.util.List;

@RestController
public class HttpClientController {

    @Autowired
    private HttpClientService httpClientService;

    /**
     * 获取后端manage中商品数据信息
     */
    @RequestMapping("/getItems")
    public List<Item> getItems(){

        return httpClientService.getItems();
    }
}
package com.jt.controller;

import org.springframework.stereotype.Controller;
import org.springframework.web.bind.annotation.RequestMapping;

@Controller//跳转页面
public class IndexController {

    //用户通过/index请求实现页面的跳转
    @RequestMapping("/index")
    public String index(){

        return "index";
    }
}
package com.jt.controller;

import com.alibaba.dubbo.config.annotation.Reference;
import com.jt.pojo.Item;
import com.jt.pojo.ItemDesc;
import com.jt.service.DubboItemService;
import org.springframework.stereotype.Controller;
import org.springframework.ui.Model;
import org.springframework.web.bind.annotation.PathVariable;
import org.springframework.web.bind.annotation.RequestMapping;

@Controller
@RequestMapping("/items")
public class ItemController {

    @Reference(timeout = 3000,check = false)//消费者启动时不会校验是否有提供者
    private DubboItemService itemService;

    /**
     * 实现商品详情页面跳转
     * url:http://www.jt.com/items/562379.html
     * 参数:562379 itemId
     * 返回值: item.jsp页面
     *${item.title } item对象
     *     ${itemDesc.itemDesc } itemDesc对象
     *
     * 思路:
     * 1.重构jt-manage项目
     * 2.创建中立接口DubboItemService
     * 3.实现业务调用获取item/itemDesc对象
     */

    @RequestMapping("/{itemId}")
    public String findItemById(@PathVariable Long itemId, Model model){

        Item item=itemService.findItemById(itemId);
        ItemDesc itemDesc=itemService.findItemDescById(itemId);
        //问题:商品对象从哪里获取???
        //将数据保存到request域中
        model.addAttribute("item",item);
        model.addAttribute("itemDesc", itemDesc);
        return "item";
    }
}
package com.jt.controller;

import com.alibaba.dubbo.common.utils.StringUtils;
import com.alibaba.dubbo.config.annotation.Reference;
import com.jt.pojo.Cart;
import com.jt.pojo.Order;
import com.jt.service.DubboCartService;
import com.jt.service.DubboOrderService;
import com.jt.thread.UserThreadLocal;
import com.jt.vo.SysResult;
import org.springframework.stereotype.Controller;
import org.springframework.ui.Model;
import org.springframework.web.bind.annotation.RequestMapping;
import org.springframework.web.bind.annotation.ResponseBody;

import java.util.List;

@Controller
@RequestMapping("/order")
public class OrderController {

    @Reference(timeout = 3000,check = false)
    private DubboOrderService orderService;
    @Reference(timeout = 3000,check = false)
    private DubboCartService cartService;

    /**
     * 订单页面跳转
     * url: http://www.jt.com/order/create.html
     * 页面取值: ${carts}
     */
    @RequestMapping("/create")
    public String create(Model model){

        //1.根据userId查询购物车信息
        Long userId = UserThreadLocal.get().getId();
        List<Cart> cartList = cartService.findCartListByUserId(userId);
        model.addAttribute("carts",cartList);
        return "order-cart";
    }

    /**
     * 订单提交
     * url: http://www.jt.com/order/submit
     * 参数: 整个form表单
     * 返回值: SysResult对象   携带返回值orderId
     * 业务说明:
     *   当订单入库之后,需要返回orderId.让用户查询.
     */
    @RequestMapping("/submit")
    @ResponseBody
    public SysResult saveOrder(Order order){
        Long userId = UserThreadLocal.get().getId();
        order.setUserId(userId);
        String orderId = orderService.saveOrder(order);
        if(StringUtils.isEmpty(orderId))
            return SysResult.fail();
        else
            return SysResult.success(orderId);

    }

    /**
     * 实现商品查询
     * 1.url地址: http://www.jt.com/order/success.html?id=71603356409924
     * 2.参数说明: id 订单编号
     * 3.返回值类型: success.html
     * 4.页面取值方式: ${order.orderId}
     */
    @RequestMapping("/success")
    public String findOrderById(String id,Model model){
        Order order = orderService.findOrderById(id);
        model.addAttribute("order",order);
        return "success";
    }


}
package com.jt.controller;

import com.alibaba.dubbo.config.annotation.Reference;
import com.jt.pojo.User;
import com.jt.service.DubboUserService;
import com.jt.util.CookieUtil;
import com.jt.vo.SysResult;
import org.springframework.beans.factory.annotation.Autowired;
import org.springframework.stereotype.Controller;
import org.springframework.util.StringUtils;
import org.springframework.web.bind.annotation.PathVariable;
import org.springframework.web.bind.annotation.RequestMapping;
import org.springframework.web.bind.annotation.ResponseBody;
import redis.clients.jedis.JedisCluster;

import javax.servlet.http.Cookie;
import javax.servlet.http.HttpServletRequest;
import javax.servlet.http.HttpServletResponse;

@Controller//需要进行页面跳转
@RequestMapping("/user")
public class UserController {

    @Reference(timeout = 3000,check = false)
    private DubboUserService userService;

    @Autowired
    private JedisCluster jedisCluster;

    /**
     * 实现用户模块页面跳转
     * url:http://www.jt.com/user/login.html 页面:login.jsp
     * url:http://www.jt.com/user/register.html 页面:register.jsp
     *要求:实现通用的页面跳转
     * restFul方式:
     * 1.动态获取url中的参数,之后实现通用的跳转
     *
     *
     */


    @RequestMapping("/{moduleName}")
    public String module(@PathVariable String moduleName){

        return moduleName;
    }

    /**
     * 需求:实现用户信息注册
     * 1.url请求地址:http://www.jt.com/user/doRegister
     * 2.请求参数: {password:_password,username:_username,phone:_phone},
     * 3.返回值结果:SysResult对象
     */


    @RequestMapping("/doRegister")
    @ResponseBody //将数据转化为JSON
    public SysResult saveUser(User user){
        //消费者给予dubbo协议将user对象进行远程网络数据传输
        userService.saveUser(user);
        return SysResult.success();
    }


    /**
     * 完成用户登陆操作
     * 1.url地址:http://www.jt.com/user/doLogin?r=0.9768995384445416
     * 2。参数:{username:_username,password:_password}
     * 3.返回值:SysResult对象
     *
     * 4.cookie的使用:
     * 4.1 setPath("/") path表示如果需要获取cookie中的数据,则url地址所在路径
     * url:http://www.jt.com/person/findAll
     * cookie.setPath("/");一般都是/
     * cookie.setPath("/person");
     * 4.2 setDemain("xxxxx")  设定cookie共享的域名地址
     */

    @RequestMapping("/doLogin")
    @ResponseBody
    public SysResult doLogin(User user, HttpServletResponse response){

        String ticket= userService.doLogin(user);
        if (StringUtils.isEmpty(ticket)){

            //说明用户名或者密码错误
            return SysResult.fail();
        }else {
            //1.创建Cookie
//            Cookie cookie=new Cookie("JT_TICKET",ticket);
//            cookie.setMaxAge(7*24*60*60);//设定cookie存活的最大值
//            cookie.setPath("/");//设定cookie有效范围
//            cookie.setDomain("jt.com");//设定cookie共享的域名 是实现单点登陆必备要素
//            response.addCookie(cookie);
            CookieUtil.addCookie(response, "JT_TICKET", ticket, 7*24*60*60, "jt.com");
            return SysResult.success();//表示用户登陆成功
        }
    }

    /**
     * 实现用户的退出操作,重定向到系统的首页
     * url:http://www.jt.com/user/logout.html
     *  1.删除Redis中的数据 key
     *  2.删除Cookie记录
     */

    @RequestMapping("logout")
    public String logout(HttpServletRequest request,HttpServletResponse response){

        //1.根据JT_TICKET获取指定的ticket
        String ticket=CookieUtil.getCookieValue(request,"JT_TICKET");
        //2.判断ticket是否为null
        if (!StringUtils.isEmpty(ticket)){
            jedisCluster.del(ticket);
            CookieUtil.deleteCookie(response, "JT_TICKET", "jt.com");
        }


        return "redirect:/";
    }


}
package com.jt;

import org.apache.http.HttpEntity;
import org.apache.http.HttpResponse;
import org.apache.http.client.HttpClient;
import org.apache.http.client.methods.HttpGet;
import org.apache.http.impl.client.HttpClients;
import org.apache.http.util.EntityUtils;
import org.junit.jupiter.api.Test;

import java.io.IOException;

public class HttpClientTest {

    /**
     * 要求:在java代码内部,获取百度的页面
     * 实现步骤:
     * 1.确定目标地址:https://www.baidu.com
     * 2.创建httpClient客户端对象
     * 3.创建请求类型
     * 4.发起http请求,并且获取响应的结果。
     * 之后判断状态码是否为200,如果等于200则请求正确
     * 5.如果请求正确则动态获取响应值信息,之后进行数据的再次加工.....
     */
    @Test
    public void testGet() throws IOException {

        String url="https://www.baidu.com";
        HttpClient httpClient =HttpClients.createDefault();
        HttpGet httpGet=new HttpGet(url);
        HttpResponse httpResponse =httpClient.execute(httpGet);
        if (httpResponse.getStatusLine().getStatusCode()==200){
            //表示用户请求正确
            //获取返回值数据
            HttpEntity httpEntity =httpResponse.getEntity();
            String result=EntityUtils.toString(httpEntity,"UTF-8");
            System.out.println(result);
        }
    }
}
<html>

<h1>hello</h1>
</html>
<html>
<body>
<h2>Hello World!</h2>
</body>
</html>
<!DOCTYPE html>
<html>
<head>
<meta charset="UTF-8">
<title>JSONP测试</title>
<script type="text/javascript" src="http://manage.jt.com/js/jquery-easyui-1.4.1/jquery.min.js"></script>
<script type="text/javascript">
   $(function(){
      alert("测试访问开始!!!!!")
      $.ajax({
         url:"http://manage.jt.com/web/testJSONP",
         type:"get",             //jsonp只能支持get请求
         dataType:"jsonp",       //dataType表示返回值类型
         jsonp: "callback",    //指定参数名称
         jsonpCallback: "hello",  //指定回调函数名称
         success:function (data){   //data经过jQuery封装返回就是json串
            alert(data.id);
            alert(data.name);
            //转化为字符串使用
            //var obj = eval("("+data+")");
            //alert(obj.name);
         }
      });
   })
</script>
</head>
<body>
   <h1>JSON跨域请求测试</h1>
</body>
</html>
<!DOCTYPE html>
<html>
<head>
<meta charset="UTF-8">
<title>测试JSON跨域问题</title>
   <!--js引入函数类库-->
<script type="text/javascript" src="http://manage.jt.com/js/jquery-easyui-1.4.1/jquery.min.js"></script>
<script type="text/javascript">
   /*$(){}结构必然是jQuery函数类库导入后才能正确执行*/
   $(function(){
      alert("我执行了AJAX");
      //利用jQuery发起AJAX请求
      $.get("http://manage.jt.com/test2.json",function(data){
         //alert(data.name);
         console.log(data);
      })
   })
</script>
</head>
<body>
   <h1>JSON跨域请求测试</h1>
</body>
</html>
<!DOCTYPE html>
<html>
<head>
<meta charset="UTF-8">
<title>测试JSON跨域问题</title>
   <script type="text/javascript">
      /*JS是解释执行的语言  */
      /*定义回调函数  */
      function hello(data){
         alert(data.name);
      }
   </script>
   <!--该json一直保存到浏览器中等待调用,但是没有函数名称无法调用  -->
   <script type="text/javascript" src="http://manage.jt.com/test.json"></script>
   <script type="text/javascript" src="http://manage.jt.com/js/jquery-easyui-1.4.1/jquery.min.js"></script>
</head>
<body>
   <h1>JS跨域问题</h1>


</body>


</html>


 101
101


 被折叠的 条评论
为什么被折叠?
被折叠的 条评论
为什么被折叠?
 到【灌水乐园】发言


