


最近项目中引进redis用来存放图片或者一些不常修改的数据,以减轻程序及数据库压力。记录下配置过程。
框架:SpringMVC+Mybatis
版本:
Spring4.0
Mybatis3.0
jedis-2.9.0
spring-data-commons-1.8.6.RELEASE.jar
spring-data-redis-1.8.6.RELEASE.jar
备注:如果是Spring3.0 的版本,请使用低版本的 jedis-2.4.2.jar spring-data-commons-core-1.4.0.RELEASE.jar spring-data-redis-1.4.2.RELEASE.jar
redis配置
1、将下载好的jar包放入项目中。
jedis-2.9.0 下载 spring-data-commons-1.8.6.RELEASE.jar 下载 spring-data-redis-1.8.6.RELEASE.jar下载
2、创建一个spring-context-redis.xml,将redis相关信息集成进Spring中
<beans xmlns="http://www.springframework.org/schema/beans"
    xmlns:context="http://www.springframework.org/schema/context" xmlns:p="http://www.springframework.org/schema/p"
    xmlns:mvc="http://www.springframework.org/schema/mvc" xmlns:xsi="http://www.w3.org/2001/XMLSchema-instance"
    xmlns:tx="http://www.springframework.org/schema/tx" xmlns:util="http://www.springframework.org/schema/util"
    xmlns:aop="http://www.springframework.org/schema/aop"
    xsi:schemaLocation="http://www.springframework.org/schema/beans
      http://www.springframework.org/schema/beans/spring-beans-3.0.xsd
      http://www.springframework.org/schema/context
      http://www.springframework.org/schema/context/spring-context-3.0.xsd
      http://www.springframework.org/schema/mvc
      http://www.springframework.org/schema/mvc/spring-mvc-3.0.xsd
        http://www.springframework.org/schema/tx
        http://www.springframework.org/schema/tx/spring-tx-3.0.xsd
        http://www.springframework.org/schema/aop
    http://www.springframework.org/schema/aop/spring-aop-3.0.xsd
        http://www.springframework.org/schema/util
      http://www.springframework.org/schema/util/spring-util-3.0.xsd">

    <!-- 加载配置属性文件 -->
    <context:property-placeholder ignore-unresolvable="true" location="classpath:config.properties" />

    <bean id="jedisPoolConfig" class="redis.clients.jedis.JedisPoolConfig">
        <property name="maxIdle" value="1" />
        <property name="maxTotal" value="5" />
        <property name="blockWhenExhausted" value="true" />
        <property name="maxWaitMillis" value="30000" />
        <property name="testOnBorrow" value="true" />
    </bean>

    <bean id="jedisConnectionFactory" class="org.springframework.data.redis.connection.jedis.JedisConnectionFactory">
        <property name="hostName" value="${jedis.JedisServerIp}" />
        <property name="port" value="${jedis.JedisServerPort}"/>
<!--    <property name="timeout" value="${jedis.timeout}"/>-->
        <property name="password" value="${jedis.auth}"></property>
        <property name="poolConfig" ref="jedisPoolConfig" />
        <property name="usePool" value="true"/>
    </bean>

    <bean id="redisTemplate" class="org.springframework.data.redis.core.RedisTemplate">
        <property name="connectionFactory"   ref="jedisConnectionFactory" />
        <property name="keySerializer">
            <bean class="org.springframework.data.redis.serializer.StringRedisSerializer" />
        </property>
        <property name="valueSerializer">
            <bean class="org.springframework.data.redis.serializer.JdkSerializationRedisSerializer" />
        </property>
        <property name="hashKeySerializer">
           <bean class="org.springframework.data.redis.serializer.StringRedisSerializer"/>
        </property>
        <property name="hashValueSerializer">
           <bean class="com.bonc.wechat.services.redis.CustomRedisSerializer"/>
        </property>
     </bean>

</beans>
注:hashValueSerializer 是 自己配置的用来序列化的类,可以注掉,也可以改用jedis本身的序列化方法。
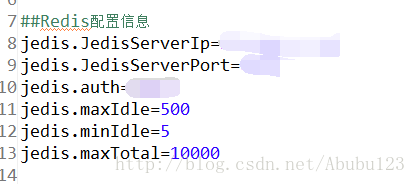
在config.properties中配置好连接地址,端口,密码等信息。
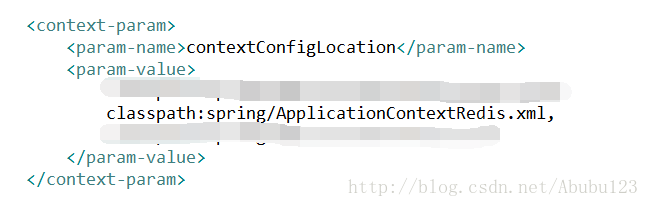
3、在web.xml中注册刚才配置的文件,保证项目启动后能够加载
至此redis已经集成进了项目之中,可能出现的错误就是版本不匹配,即Spring的版本与jedis的版本不匹配产生的,更换相应的版本即可。
redis的使用
1、完成redis配置后,需要创建一个redis的工具类 或者 是 service方法,用来方便的调用redis中的相关增删改查的方法
package com.bonc.wechat.services.redis;

import java.util.HashMap;
import java.util.Map;
import java.util.Map.Entry;
import java.util.Set;

import org.springframework.beans.factory.annotation.Autowired;
import org.springframework.data.redis.core.HashOperations;
import org.springframework.data.redis.core.RedisTemplate;
import org.springframework.data.redis.core.ValueOperations;
import org.springframework.stereotype.Service;

import com.bonc.wechat.common.util.JSONUtil;
import com.bonc.wechat.common.util.RedisDecodeUtil;


@Service
public class RedisService {

	@Autowired
	RedisTemplate<String, Object> redisTemplate;

	/**
	 * 清楚缓存对象
	 * @param rkey
	 * @throws Exception
	 */
	public void del(String rkey) throws Exception {
		redisTemplate.delete(rkey);
	}

	/**
	 * 向redis缓存放入任意对象
	 * @param rkey Map键
	 * @param map
	 * @throws Exception
	 */
	public void oset(String rkey, Object object) throws Exception {
		ValueOperations<String, Object> value = redisTemplate.opsForValue();
		if(object instanceof String){
			value.set(rkey, object.toString());
		}else{
			value.set(rkey, JSONUtil.serialize(object,true));
		}
	}

	/**
	 * 向redis缓存放入Map
	 * @param rkey Map键
	 * @param map
	 * @throws Exception
	 */
	public void oset(String rkey, Map<String,Object> map) throws Exception {
		oset(rkey,map,false);
	}

	/**
	 * 向redis缓存放入Map
	 * @param rkey Map键
	 * @param map
	 * @param override 是否覆盖
	 * @throws Exception
	 */
	public void oset(String rkey, Map<String,Object> map, boolean override) throws Exception {
		del(rkey);
//		if(override) {
//		}
		HashOperations<String, String, Object>  objList = redisTemplate.opsForHash();
		Set<Entry<String, Object>> keys = map.entrySet();
		Map<String,String> temp = new HashMap<String, String>();
		for (Entry<String, Object> entry : keys) {
			temp.put(entry.getKey(), JSONUtil.serialize(entry.getValue(),true));
		}
		objList.putAll(rkey,temp);
	}

	/**
	 * 自增
	 * @param rkey 存放在redis的key
	 * @return
	 * @throws Exception
	 */
	public Long incr(String rkey) throws Exception {
		return incrBy(rkey, 1L);
	}

	/**
	 * 自增
	 * @param rkey 存放在redis的key
	 * @return
	 * @throws Exception
	 */
	public Long incrBy(String rkey,long l) throws Exception {
		ValueOperations<String, Object> value = redisTemplate.opsForValue();
		return value.increment(rkey, l);
	}

	/**
	 * 取出String
	 * @param rkey 存放在redis的key
	 * @return
	 * @throws Exception
	 */
	public String get(String rkey) throws Exception {
		ValueOperations<String, Object> value = redisTemplate.opsForValue();
		Object val = value.get(rkey);
		return val==null?null:val.toString();
	}

	/**
	 * 取出对象
	 * @param rkey 存放在redis的key
	 * @return
	 * @throws Exception
	 */
	public Object oget(String rkey) throws Exception {
		switch(redisTemplate.type(rkey).code()){
			case "string":
				ValueOperations<String, Object> value = redisTemplate.opsForValue();
				return RedisDecodeUtil.parse(value.get(rkey).toString());
			case "hash":
				HashOperations<String, String, Object>  objList = redisTemplate.opsForHash();
				return objList.entries(rkey);
			default:
				return null;
		}
	}

	/**
	 * 按类型获取
	 * @param rkey 存放在redis的key
	 * @param cls value的类类型
	 * @return
	 * @throws Exception
	 */
	@SuppressWarnings("unchecked")
	public <T> T oget(String rkey, Class<?> cls) throws Exception {
		return (T) oget(rkey);
	}

	/**
	 * 按类型获取Map值
	 * @param rkey 存放在redis的key
	 * @param key map的key
	 * @param cls value的类类型
	 * @return
	 * @throws Exception
	 */
	@SuppressWarnings("unchecked")
	public <T> T oget(String rkey, String key, Class<?> cls) throws Exception {
		return (T) hget(rkey,key);
	}

	/**
	 * 获取map值
	 * @param rkey 存放在redis的key
	 * @param key map的key
	 * @return
	 * @throws Exception
	 */
	public Object hget(String rkey,String key) throws Exception {
		if(redisTemplate.hasKey(rkey)){
			HashOperations<String, String, Object>  objList = redisTemplate.opsForHash();
			return objList.get(rkey, key);
		}
		return null;
	}

}
备注:JSONUtil 与 RedisDecodeUtil 下载地址
2、controller中调用。
@Resource
	private RedisService redisService;
/**
* 从redis中获取数据
* 返回值为对象
*/
@RequestMapping(value="/getRedisData")
@ResponseBody
public AppReply<T> getRedisData(@RequestParam("key")String key){
AppReply<T> appReply = new AppReply<>();
try {
Object obj = redisService.oget(key);
if(obj != null){
appReply.setCode("1");
appReply.setObj(obj);
}else{
appReply.setCode("0");
appReply.setObj(null);
}
} catch (Exception e) {
e.printStackTrace();
}
return appReply;
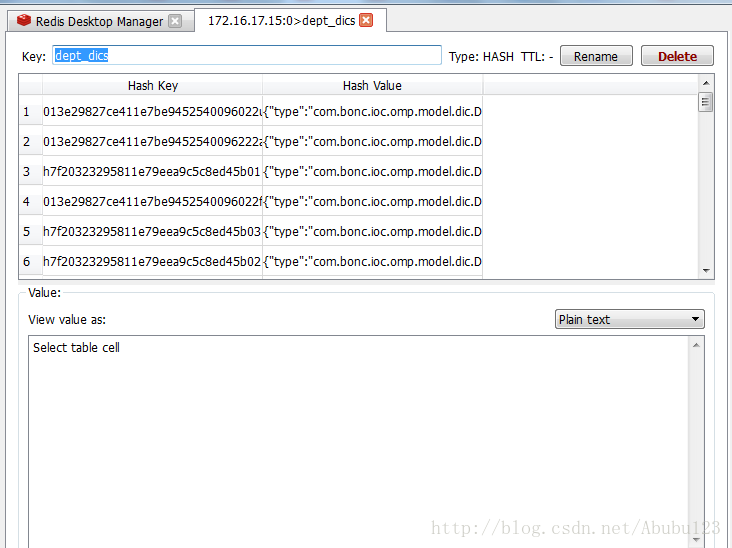
}3、返回数据查看
返回结果:

数据库数据:
至此,SSM整合redis就全部完成。


 388
388


 被折叠的 条评论
为什么被折叠?
被折叠的 条评论
为什么被折叠?
 到【灌水乐园】发言


