


1、零配置
步骤:
(1)在配置文件启用“零配置”。
使用<context:component-scan .../>元素

(2)为Spring Bean添加注解。
@Component:标注一个普通的Spring Bean类。如果不指定id,默认就该类的类名首字母小写作为id。<bean id="" class=""/>(使用注解就不需要指定class了)
@Controller:标注一个控制器组件类。
@Service:标注一个业务逻辑组件类。
@Repository:标注一个DAO组件类。
—— 在Java EE应用中,使用这3个注解可能获得一些额外的好处。
@Scope – 指定Bean的作用域。
相当于scope属性。
@Resource -配置依赖注入( Spring借用了Java EE的Annotation)。
相当于ref属性,且该注解直接支持field注入。
@PostConstruct和@PreDestroy(修饰方法,Spring借用了Java EE的Annotation)。
@PostConstruct - 相当于init-method属性。
@PreDestroy - 相当于destroy-method属性。
@DependsOn:强制初始化其他Bean
相当于depends-on属性
@Lazy:指定延迟初始化。
相当于lazy-init属性
@Autowired与@Qualifier:自动装配。@Autowired默认是byType的自动装配。
@Qualifier可指定byName的自动装配。
相当于autowire属性
2、Spring+Struts2整合
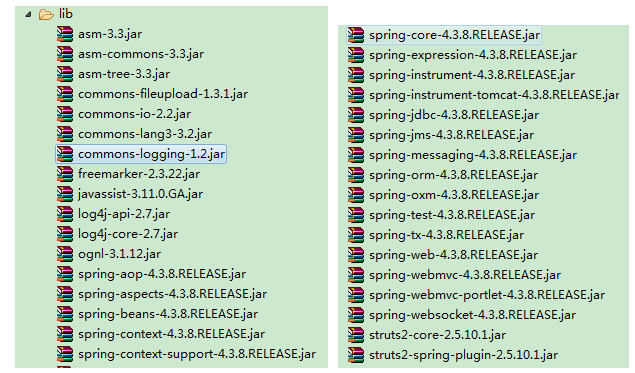
(1)拷JAR包。(Spring20个包+struts2+commons-logging)
(2)配置Struts 2核心控制器+配置文件。

(3)配置Web应用在启动时自动创建Spring容器。
它默认加载WEB-INF/applicationContext.xml作为配置文件

Spring允许通过contextConfigLocation的参数来指定配置文件名

(4)为第三步的Spring提供配置文件。

(5)添加Struts 2-Spring整合的插件包struts2-spring-plugin。
------------------以上为安装步骤,只要做一次---------------------
开发过程:
(1)Action不再主动获取Service组件;
(2)Action为Service提供的setter方法务必与Service的配置id要对应。(byName)
eg:
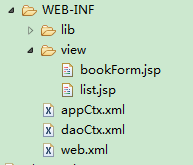
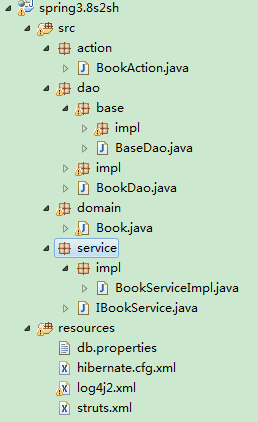
目录结构:
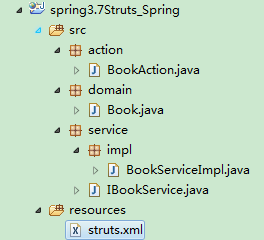
①在appCtx.xml中配置:
<bean id="bookService" class="service.impl.BookServiceImpl"/>②Action类——BookAction.java
public class BookAction extends ActionSupport{
	private static final long serialVersionUID = 1L;
	private Book book ;
	private IBookService bookService;

	public void setBookService(IBookService bookService) {
		this.bookService = bookService;
	}
	public Book getBook() {
		return book;
	}
	public void setBook(Book book) {
		this.book = book;
	}
	public String add(){
		bookService.add(book);
		return SUCCESS;
	}
}
public class Book {

	Integer id;
	String name;
	String author;
     //setter、getter...
}
public class BookServiceImpl implements IBookService{
@Override
public Integer add(Book book) {
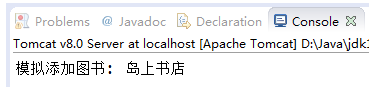
System.out.println("模拟添加图书: "+book.getName());
return 1;
}
}
<struts>
	<!-- 配置Struts2的的后缀 -->
	<constant name="struts.action.extension" value="action,,"></constant>
	<!-- struts2的开发模式打开 -->
	<constant name="struts.devMode" value="true" />

	<package name="bookPkg" namespace="/" extends="struts-default">
		<action name="addBook" class="action.BookAction" method="add">
		<result name="error">/WEB-INF/view/error.jsp</result>
			<result>/WEB-INF/view/list.jsp</result>
		</action>
		<!-- 通用 -->
		<action name="*">
			<result>/WEB-INF/view/{1}.jsp</result>
		</action>
	</package>
</struts>
<%@ page language="java" contentType="text/html; charset=UTF-8"
pageEncoding="UTF-8"%>
<!DOCTYPE html>
<html>
<meta http-equiv="Content-Type" content="text/html; charset=UTF-8">
<title>添加图书</title>
<body>
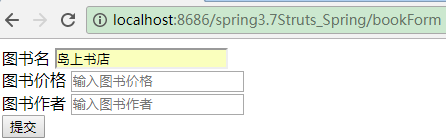
<div class="container">
<form method="POST" action="addBook">
<div class="form-group">
<label for="bookName">图书名</label>
<input type="text" class="form-control" id="bookName" placeholder="输入图书名"
name="book.name">
</div>
<div class="form-group">
<label for="bookPrice">图书价格</label>
<input type="text" class="form-control" id="bookPrice" placeholder="输入图书价格"
name="book.price">
</div>
<div class="form-group">
<label for="bookAuthor">图书作者</label>
<input type="text" class="form-control" id="bookAuthor" placeholder="输入图书作者"
name="book.author">
</div>
<button type="submit" class="btn btn-default">提交</button>
</form>
</div>
</body>
</html>
3、Struts2+Spring+Hibernate整合
步骤:
(1)配置DataSource和SessionFactory
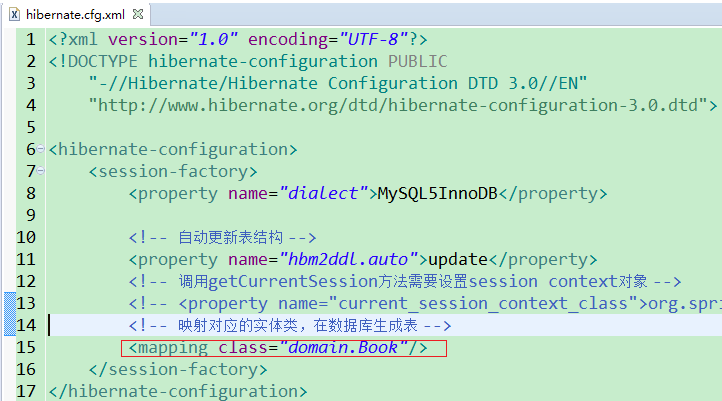
(2)为第一步提供hibernate.cfg.xml配置文件
eg:
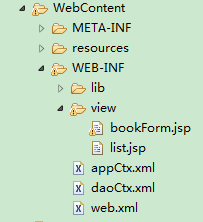
目录结构
①
在daoCtx.xml中配置数据源dataSource(可参考:http://blog.csdn.net/ack_finding/article/details/78870893)

在daoCtx.xml中配置SessionFactory,将dataSource注入sessionFactory

在类路径下提供hibernate.cfg.xml配置文件
配置dao实现类,将sessionFactory注入dao中,这样才能在dao类调用sessionFactory

②在appCtx.xml中配置service实现类,将dao注入service中

③在appCtx.xml中配置事务
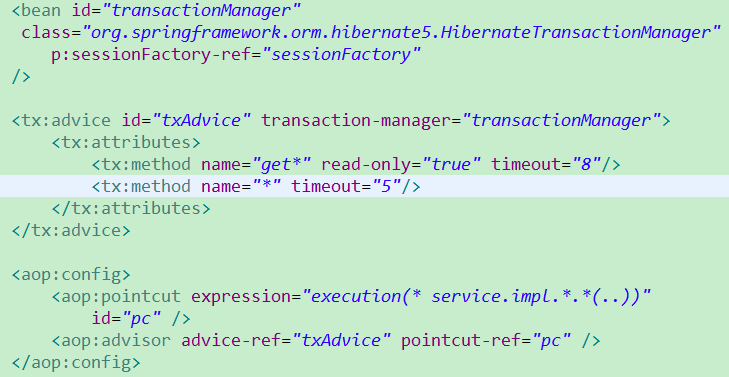
④BookAction.java
public class BookAction extends ActionSupport{

	private static final long serialVersionUID = 1L;

	private Book book ;
	private IBookService bookService;
	private Integer id;
	private List<Book> books;

	public String add(){
		Integer id = bookService.add(book);

		if (id > 0)
			return SUCCESS;
		else
			return ERROR;
	}
	public String delete(){
		bookService.delete(id);
		return SUCCESS;
	}
	public String list(){
		setBooks(bookService.getAllBooks());
		return SUCCESS;
	}
	public List<Book> getBooks() {
		return books;
	}
	public void setBooks(List<Book> books) {
		this.books = books;
	}
	public Integer getId() {
		return id;
	}
	public void setId(Integer id) {
		this.id = id;
	}
	public Book getBook() {
		return book;
	}
	public void setBook(Book book) {
		this.book = book;
	}
	public void setBookService(IBookService bookService) {
		this.bookService = bookService;
	}
}
<package name="bookPkg" namespace="/" extends="struts-default">
<action name="addBook" class="action.BookAction" method="add">
<result name="error">/WEB-INF/view/error.jsp</result>
<result>/WEB-INF/view/list.jsp</result>
</action>
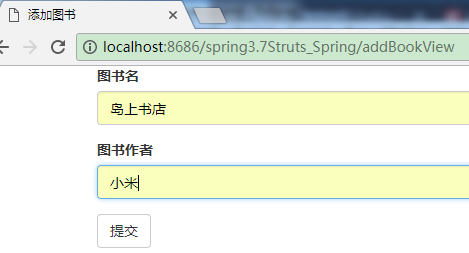
<action name="addBookView">
<result>/WEB-INF/view/bookForm.jsp</result>
</action>
<action name="deleteBook" class="action.BookAction" method="delete">
<result type="chain">listBooks</result>
</action>
<action name="listBooks" class="action.BookAction" method="list">
<result>/WEB-INF/view/list.jsp</result>
</action>
<!-- 通用 -->
<action name="*">
<result>/WEB-INF/view/{1}.jsp</result>
</action>
</package>⑥测试

在运行中使用jstl发现错误:

原因:没有导入jstl包及standard包


 2483
2483


 被折叠的 条评论
为什么被折叠?
被折叠的 条评论
为什么被折叠?
 到【灌水乐园】发言


