


1 Viper简介
viper 配置文件解析库,支持 Yaml、Json、 TOML、HCL 等格式,读取非常的方便。
Github地址:
:https://github.com/spf13/viper
2 Viper安装
Get方式安装:
go get -u github.com/spf13/viper
mod方式引入:
require github.com/spf13/viper v1.9.0
3 Viper编程入门
这里以Yaml文件格式为例进行说明。
第1步:定义Yaml文件。这里配置信息放在resource/Application.yaml中。:
server:
  port: 8080
mysql:
  host: 127.0.0.1
  port: 3306
  user: root
  password: 123456
第2步:定义全局变量vp:
var vp *viper.Viper
第3步:初始化vp:
//spf13/viper的初始化函数
func Init(){
	//初始化viper
	vp = viper.New()
	//设置文件名
	vp.SetConfigName("Application")
	//设置文件类型
	vp.SetConfigType("yaml")
	//设置文件所在的目录
	vp.AddConfigPath("resource")

	if err := vp.ReadInConfig(); err != nil {
		fmt.Println("init fail:",err.Error())
	}
}
第4步:然后就可以根据key获取指定的value
func GetValue(key string) interface{}{
	return vp.Get(key)
}
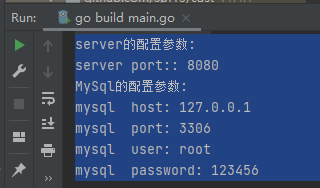
第5步:启动调用函数:
    fmt.Println("server的配置参数:")
	serverPort:= config.GetValue("server.port")
	fmt.Println("server port::",serverPort)

	fmt.Println("MySql的配置参数:")
	host:= config.GetValue("mysql.host")
	fmt.Println("mysql  host:",host)
	port:= config.GetValue("mysql.port")
	fmt.Println("mysql  port:",port)
	user:= config.GetValue("mysql.user")
	fmt.Println("mysql  user:",user)
	password:= config.GetValue("mysql.password")
	fmt.Println("mysql  password:",password)
输出结果如下:
代码:
https://gitee.com/linghufeixia/go-simple
chapter3


 6670
6670


 被折叠的 条评论
为什么被折叠?
被折叠的 条评论
为什么被折叠?
 到【灌水乐园】发言


