


sudo usermod -a -G vboxsf nowind nowind是你的虚拟机登录的用户名解决virtualbox 虚拟机共享文件夹不能使用的问题
第一种:源码内实现pass:
实现EncodeFunctionName 的pass,核心代码如下
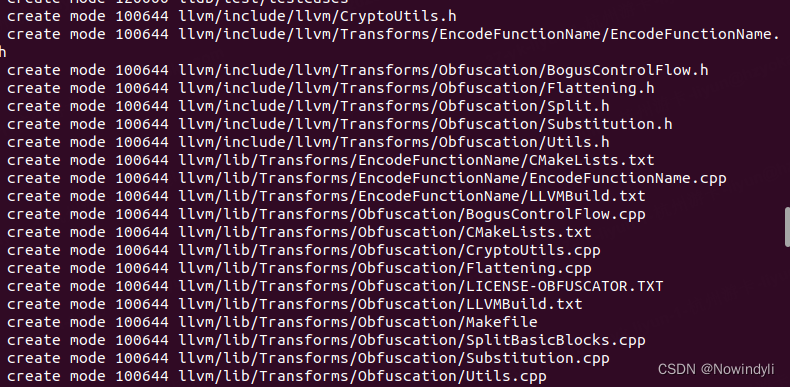
相关文件的修改:
因为后面同样用到ollvm,所以我已经放到一起了,资源下载:
https://download.csdn.net/download/ahjxly/88609122
因为全部都是修改llvm目录下的文件,替换include和lib文件夹
替换完成后 cd cd llvm/llvm-project-9.0.1/llvm/cmake-build-debug/,执行ninja -j8,重新编译下。这次编译会快很多。
然后单独执行 ninja LLVMEncodeFunctionName,生成so文件,进行使用。
使用方式和之前的文章一样,执行
opt -load '/home/nowind/llvm/llvm-project-9.0.1/llvm/cmake-build-release/lib/LLVMEncodeFunctionName.so' -encode hello_clang.ll -o hello_clang_encode.bc
clang hello_clang_encode.bc -o hello_clang_encode
第二种:在源码外实现EncodeFunctionName2,修改根目录下的CMakeList.txt:
set(LLVM_DIR /home/nowind/llvm/llvm-project-9.0.1/llvm/cmake-build-debug/lib/cmake/llvm/),这里为你自己的路径
执行结果如下:
/home/nowind/llvm/CLion-2023.3/clion-2023.3/bin/cmake/linux/x64/bin/cmake -DCMAKE_BUILD_TYPE=Debug -DCMAKE_MAKE_PROGRAM=/usr/bin/ninja -G Ninja -S /home/nowind/llvm/pro/pro2/outPass -B /home/nowind/llvm/pro/pro2/outPass/cmake-build-debug
-- Linker detection: GNU ld
-- Configuring done (0.0s)
-- Generating done (0.0s)
-- Build files have been written to: /home/nowind/llvm/pro/pro2/outPass/cmake-build-debug

[Finished]
/home/nowind/llvm/CLion-2023.3/clion-2023.3/bin/cmake/linux/x64/bin/cmake --build /home/nowind/llvm/pro/pro2/outPass/cmake-build-debug --target all -j 6
[2/2] Linking CXX shared module EncodeFunctionName2/LLVMEncodeFunctionName2.so

Build finished
生成的文件在
/home/nowind/llvm/pro/pro2/outPass/cmake-build-debug/EncodeFunctionName2/LLVMEncodeFunctionName2.so使用opt 命令
opt -load /home/nowind/llvm/pro/pro2/outPass/cmake-build-debug/EncodeFunctionName2/LLVMEncodeFunctionName2.so  -encode2 hello_clang.ll
WARNING: You're attempting to print out a bitcode file.
This is inadvisable as it may cause display problems. If
you REALLY want to taste LLVM bitcode first-hand, you
can force output with the `-f' option.

EncodeFunctionName22: test_hello1 -> 9c119247aefaa12cdd417eb3d57d5b2a
EncodeFunctionName22: main -> main
EncodeFunctionName22: test_hello2 -> af0aaac8b98b759ace7b9eacbd2238a6
得到同样的结果。
clang使用自定义的pass,生成可执行文件
clang -Xclang -load -Xclang /home/nowind/llvm/pro/pro2/outPass/cmake-build-release/EncodeFunctionName2/LLVMEncodeFunctionName2.so -encode2 hello_clang.ll -o hello_clang_encode3 -Wno-unused-command-line-argument
第三种:EncodeFunctionName注册到clang中:
/home/nowind/llvm/llvm-project-9.0.1/llvm/lib/Transforms/IPO/PassManagerBuilder.cpp populateModulePassManager方法中增加 MPM.add(createEncodeFunctionName());
重新编译clang: 这里用的release,因此PATH要改:
ninja clang
export PATH=/home/nowind/llvm/llvm-project-9.0.1/llvm/cmake-build-release/bin:$PATH
clang -mllvm -encode_function_name hello_clang.bc
切换到debug:
修改EncodeFunction中:CMakeLists.txt set(LLVM_DIR /home/nowind/llvm/llvm-project-9.0.1/llvm/cmake-build-debug/lib/cmake/llvm/)
cd cmake-build-debug
ninja opt 重新编译opt
opt -load /home/nowind/llvm/pro/pro2/outPass/cmake-build-debug/EncodeFunctionName2/LLVMEncodeFunctionName2.so -encode2 hello_clang.ll -o hello_clang_encode.bc
注意pass不能重名
opt 断点:
OutPass中配置EncodeFunctionName2的opt为
/home/nowind/llvm/llvm-project-9.0.1/llvm/cmake-build-debug/bin/opt参数配置为:
-load /home/nowind/llvm/pro/pro2/outPass/cmake-build-debug/EncodeFunctionName2/LLVMEncodeFunctionName2.so -encode2 /home/nowind/llvm/pro/pro2/hello_clang.ll -o /home/nowind/llvm/pro/pro2/hello_clang_encode.bc但这样配置完毕后发现一个问题,就是日志在clion控制台中看不到,只有换行,勾选了
Emulate terminal in the output console才能看到,奇怪的很,但也不影响什么


 767
767


 被折叠的 条评论
为什么被折叠?
被折叠的 条评论
为什么被折叠?
 到【灌水乐园】发言


