


实现起来也很简单,主要分3个步骤:
1.创建一个镂空的路径:
UIBezierPath 有个原生的方法- (void)appendPath:(UIBezierPath *)bezierPath, 这个方法作用是俩个路径有叠加的部分则会镂空.
这个方法实现原理应该是path的FillRule 默认是FillRuleEvenOdd(CALayer 有一个fillRule属性的规则就有kCAFillRuleEvenOdd), 而EvenOdd 是一个奇偶规则,奇数则显示,偶数则不显示.叠加则是偶数故不显示.
2.创建CAShapeLayer 将镂空path赋值给shapeLayer
3.将shapeLayer 设置为背景视图的Mask
UIView *backgroundView = [[UIViewalloc]init];
backgroundView.frame =self.view.bounds;
backgroundView.backgroundColor = [UIColorcolorWithWhite:0alpha:0.7];
[self.viewaddSubview:backgroundView];
// 创建一个全屏大的path
UIBezierPath *path = [UIBezierPathbezierPathWithRect:self.view.bounds];
// 创建一个圆形path
UIBezierPath *circlePath = [UIBezierPathbezierPathWithArcCenter:CGPointMake(self.view.center.x,self.view.center.y - 25)
radius:50
startAngle:0
endAngle:2 *M_PI
clockwise:NO];
[path appendPath:circlePath];
CAShapeLayer *shapeLayer = [CAShapeLayerlayer];
shapeLayer.path = path.CGPath;
backgroundView.layer.mask = shapeLayer;
顺便提下,在实际开发中可能遇到这种需求,当tableView 滑动到某个位置的时候才显示新手引导.
这时候就需要将tableView上的坐标转化为相对于屏幕的坐标. 可用原生的方法:
- (CGRect)convertRect:(CGRect)rect toView:(nullable UIView *)view;
- (CGRect)convertRect:(CGRect)rect fromView:(nullable UIView *)view;
渐变进度条:
参考:http://www.cnblogs.com/gardenLee/archive/2016/04/09/5371377.html
2.简单实用为
self.view.backgroundColor = [UIColor whiteColor];
UIView *backgroundView = [[UIViewalloc]init];
backgroundView.frame = self.view.bounds;
backgroundView.backgroundColor = [UIColor redColor];
[self.view addSubview:backgroundView];
CAShapeLayer *shapeLayer = [CAShapeLayerlayer];
// 这个路径是决定这个layer的位置的
shapeLayer.path = [UIBezierPath bezierPathWithRect:CGRectMake(0,100,150,150)].CGPath;
backgroundView.layer.mask = shapeLayer;
分析一下蒙板的原理:我们都知道控件view有一个alpha属性用来设置透明度,默认alpha=1,只有当alpha不为0是我们才能正常的看到View的样子,alpha其实改变的是mask和background layer的透明度,来实现透明效果。而mask是控件view上的一层layer,mask也有一个alpha,要想看到view,只有当mask的透明度不为0时,我们才能看到mask后面的view的样子,view自带的masklayer是不透明的。新创建的masklayer的是透明的,因此,我们只需要给新创建的masklayer一个颜色,使他不透明就能看见蒙板后的View了,而蒙板外是透明的,这样就能实现蒙板效果了。参考:http://blog.csdn.net/qq_22600319/article/details/52189746
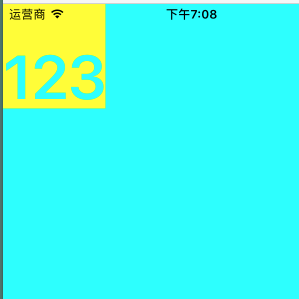
3.镂空文字
@interface LouKongText : UILabel
@end
- (void)drawRect:(CGRect)rect {
// Make sure the UIView's background is set to clear either in code or in a storyboard/nib
CGContextRef context =UIGraphicsGetCurrentContext();
//[[UIColor whiteColor] setFill];
//CGContextAddArc(context, CGRectGetMidX(rect), CGRectGetMidY(rect), CGRectGetWidth(rect)/2, 0, 2*M_PI, YES);
//CGContextFillPath(context);
// Manual offset may need to be adjusted depending on the length of the text
[selfdrawSubtractedText:@"123"inRect:rectinContext:context];
}
- (void)drawSubtractedText:(NSString *)text inRect:(CGRect)rect inContext:(CGContextRef)context {
// Save context state to not affect other drawing operations
CGContextSaveGState(context);
// Magic blend mode
CGContextSetBlendMode(context,kCGBlendModeDestinationOut);
// This seemingly random value adjusts the text
// vertically so that it is centered in the circle.
//CGFloat Y_OFFSET = -2 * (float)[text length] + 5;
// Context translation for label
CGFloat LABEL_SIDE =CGRectGetWidth(rect);
//CGContextTranslateCTM(context, 0, CGRectGetHeight(rect)/2-LABEL_SIDE/2+Y_OFFSET);
// Label to center and adjust font automatically
UILabel *label = [[UILabelalloc]initWithFrame:CGRectMake(0,0, LABEL_SIDE, LABEL_SIDE)];
label.font = [UIFontboldSystemFontOfSize:120];
label.adjustsFontSizeToFitWidth =YES;
label.text = text;
label.textAlignment =NSTextAlignmentCenter;
// 这个颜色是可以改的 可以改成黄色
label.backgroundColor = [UIColorblackColor];
[label.layerdrawInContext:context];
// Restore the state of other drawing operations
CGContextRestoreGState(context);
}
UIView *bg = [[UIViewalloc]initWithFrame:CGRectMake(0,0,300,300)];
bg.backgroundColor = [UIColorcyanColor];
[self.viewaddSubview:bg];
LouKongText *lk = [[LouKongTextalloc]initWithFrame:CGRectMake(0,0,100,100)];
// 其实这个颜色有没有 都没有关系
lk.backgroundColor = [UIColorblackColor];
[bg addSubview:lk];
这个也不错:http://www.cocoachina.com/ios/20160214/15250.html
第一讲是来自 BubbleTransition 中最夺人眼球的形变动画。这个效果在 StarWars.iOS转场动效有两次应用,非常地炫酷;Raywenderlich.com 也出过一个教程来实现这种效果。
BubbleTransition
一般而言,这种效果会使用 UIBezierPath + CAShapeLayer + maskLayer 搞定,但是我去看了看代码,上面的效果其实是下面这样实现的。
BubbleTransition 慢放
Are you kidding me? Are you kidding me? 不知道我为何说两遍的请去欣赏《拯救呆萌》三部曲最终篇《火星救援》。这个效果的开发者真是太有才了,仅仅通过组合视图+缩放这么简单的方法就实现了这个效果,天才。
在上面提到的另外两种效果则是使用提到的 UIBezierPath + CAShapeLayer + maskLayer 套路,关于 UIBezierPath + CAShapeLayer,简书上有一篇写得还不错,就是标题太炫酷,这篇文章示范了使用 UIBezierPath + CAShapeLayer 实现不规则视图,也可以使用上面的简单组合手法轻松实现,但如果面对更加复杂的图形,还是得靠 UIBezierPath + CAShapeLayer。
也许你听说过贝塞尔曲线,但在 iOS 里,UIBezierPath 不仅仅用于生成一条曲线,常规的矩形、圆形、圆角矩形以及椭圆都不在话下,是个普适性的图形对象。而 CAShapeLayer 则是 CALayer 的子类,正如类名描述一样,通过其path属性搭配 UIBezierPath 可以实现多种用普通手段难以实现的外形,以及一些线条动画(可以去看看上面提到的标题很炫酷的文章)。
而 maskLayer,你可能听说过遮罩之类的概念,很像你玩游戏探索地图时的效果,这里实际上指的是CALayer类的mask属性,也是个CALayer对象,UIView类有个maskView的属性,作用相似。其实 BubbleTransition 里作者的实现手法本身就是对 mask 这一概念的应用,真的是太天才了。
使用 UIBezierPath + CAShapeLayer + maskLayer 套路实现上面的效果慢放后是下面这样的,不知道原作者有没有对这两种效果进行过对比,老实说,我觉得原作者的手法实现的效果更好:
NewBubbleTransition
上面方法的核心代码:
|
1
2
3
4
5
6
7
8
9
10
11
12
13
14
|
//利用 UIBezierPath 生成一大一小两条椭形路径,ovalInRect 意思是生成紧贴矩形内部的椭圆,bubble 是 BubbleTransition 中的添加的背景视图,
let circleMaskPathInitial = UIBezierPath(ovalInRect: bubble.frame)
let finalRect = CGRectInset(bubble.frame, -1000, -1000)
let circleMaskPathFinal = UIBezierPath(ovalInRect: finalRect)
//用 CAShapeLayer 作为 mask
let maskLayer = CAShapeLayer()
maskLayer.path = circleMaskPathFinal.CGPath
presentedControllerView.layer.mask = maskLayer
//对 CAShapeLayer 的 path 属性进行动画
let maskLayerAnimation = CABasicAnimation(keyPath:
"path"
)
maskLayerAnimation.fromValue = circleMaskPathInitial.CGPath
maskLayerAnimation.toValue = circleMaskPathFinal.CGPath
maskLayerAnimation.duration = self.transitionDuration(transitionContext)
maskLayer.addAnimation(maskLayerAnimation, forKey:
"path"
)
|
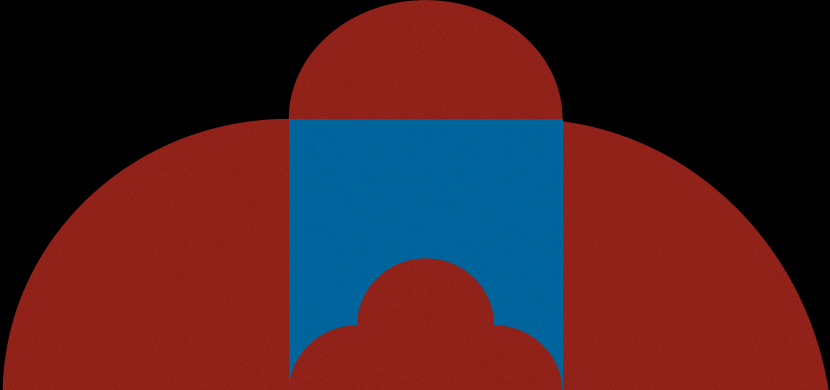
来点不一样的形状,当然从效果上来讲这个形状放在这里不好看。该例子仅作示范。

quincunx.gif
生成梅花形状曲线的代码:
|
1
2
3
4
5
6
7
8
9
10
11
12
13
14
15
16
17
18
|
let width = presentedControllerView.frame.width
let height = presentedControllerView.frame.height
let circleMaskPathInitial = UIBezierPath()
circleMaskPathInitial.moveToPoint(CGPoint(x: 0, y: height))
circleMaskPathInitial.addArcWithCenter(CGPoint(x: width / 4, y: height), radius: width / 4, startAngle: CGFloat(M_PI), endAngle: CGFloat(M_PI * 3 / 2), clockwise:
true
)
circleMaskPathInitial.addArcWithCenter(CGPoint(x: width / 2, y: height - width / 4), radius: width / 4, startAngle: CGFloat(M_PI), endAngle: CGFloat(M_PI * 2), clockwise:
true
)
circleMaskPathInitial.addArcWithCenter(CGPoint(x: width * 3 / 4, y: height), radius: width / 4, startAngle: CGFloat(M_PI * 3 / 2), endAngle:CGFloat(M_PI * 2), clockwise:
true
)
circleMaskPathInitial.moveToPoint(CGPoint(x: 0, y: height))
circleMaskPathInitial.closePath()
let circleMaskPathFinal = UIBezierPath()
circleMaskPathFinal.moveToPoint(CGPoint(x: -width, y: height))
circleMaskPathFinal.addArcWithCenter(CGPoint(x: 0, y: height), radius: height, startAngle: CGFloat(M_PI), endAngle: CGFloat(M_PI * 3 / 2), clockwise:
true
)
circleMaskPathFinal.addArcWithCenter(CGPoint(x: width / 2, y: 0), radius: width / 2, startAngle: CGFloat(M_PI), endAngle: CGFloat(M_PI * 2), clockwise:
true
)
circleMaskPathFinal.addArcWithCenter(CGPoint(x: width, y: height), radius: height, startAngle: CGFloat(M_PI * 3 / 2), endAngle: CGFloat(M_PI * 2), clockwise:
true
)
circleMaskPathFinal.moveToPoint(CGPoint(x: -width, y: height))
circleMaskPathFinal.closePath()
|
示意图
类方法bezierPathWithArcCenter:radius:startAngle:endAngle:clockwise:用于添加圆弧,clockwise参数指示绘制的方向,true时沿顺时针方向绘制,false时沿逆时针方向绘制。下图是该方法文档中的坐标示意图:

Angles in the default coordinate system
在绘制上面的梅花形状的曲线时,注意起始和终点的曲线保持整体的绘制方向一致,不然动画会很奇怪。
总结
差点搞了个大乌龙,不过见识到 BubbleTransition 的实现手段,现在就有两种手段来实现这类效果:
-
尺寸更大的圆角矩形视图充当背景
-
UIBezierPath + CAShapeLayer + maskLayer
我对 BubbleTransition 的手法真是佩服得五体投地,就这么简单地搞定了,UIBezierPath + CAShapeLayer + maskLayer 的很多场景都可以使用这个手法替代,代价也不高。当然面对更复杂的曲线视图,还是用后者比较省心。
UIBezierPath + CAShapeLayer + maskLayer 的组合拳非常适合实现一些不规则的视图,像曲线菜单或任务栏,波纹视图,灌水视图等等,发挥下你的想象力吧。


 846
846


 被折叠的 条评论
为什么被折叠?
被折叠的 条评论
为什么被折叠?
 到【灌水乐园】发言


