


目的
在Net Mvc5或者Net Core Mvc中,我们如何通过cdn的放引入Element-Plus并,使用Element-Plus相关的组件,包含Vue-Icon和多语言的使用。
准备工作
1.这里为了方便,我们直接使用html文件来代替Mvc项目。新建一个index.html文件
2.通过cdn的方式引入vue3、Element-Plus(包含样式、脚本、和多语言包),icons-vue等组件。
<link href="https://cdn.bootcdn.net/ajax/libs/element-plus/2.3.12/index.css" rel="stylesheet" />
    <script src="https://unpkg.com/vue@3"></script>
    <script src="https://cdn.bootcdn.net/ajax/libs/element-plus/2.3.12/index.full.js"></script>
    <script src="https://unpkg.com/@element-plus/icons-vue"></script>
    <script src="https://cdn.bootcdn.net/ajax/libs/element-plus/2.3.12/locale/zh-cn.min.js"></script>
初始化
        const app = Vue.createApp(App);
        Object.entries(ElementPlusIconsVue).forEach(item => {
            app.component(item[0], item[1]);
        });
        app.use(ElementPlus, {locale: ElementPlusLocaleZhCn});
        app.mount("#app");
icon-vue字体全局引用
        Object.entries(ElementPlusIconsVue).forEach(item => {
            app.component(item[0], item[1]);
        });
实现代码
<html>
<head>
<meta charset="UTF-8" />
<title>Element Plus</title>
<meta http-equiv="X-UA-Compatible" content="IE=edge">
<meta name="viewport" content="width=device-width,initial-scale=1.0">
<link href="https://cdn.bootcdn.net/ajax/libs/element-plus/2.3.12/index.css" rel="stylesheet" />
<script src="https://unpkg.com/vue@3"></script>
<script src="https://cdn.bootcdn.net/ajax/libs/element-plus/2.3.12/index.full.js"></script>
<script src="https://unpkg.com/@element-plus/icons-vue"></script>
<script src="https://cdn.bootcdn.net/ajax/libs/element-plus/2.3.12/locale/zh-cn.min.js"></script>
<style>
* {
font-size: 12px;
}
.mt10 {
margin-top: 10px;
}
.workorder-title {
text-align: right;
padding: 5px;
}
.workorder-content {
padding: 5px;
}
</style>
</head>
<body>
<div id="app">
<el-page-header>
<template #icon>
<el-icon><Monitor></Monitor></el-icon>
</template>
<template #title>
工单
</template>
<template #content>
<b>详情</b>
</template>
<template #extra>
<div class="flex items-center">
<el-button type="success" loading>编辑</el-button>
<el-button type="warning" icon="check">提交</el-button>
<el-button type="danger">作废</el-button>
</div>
</template>
</el-page-header>
<el-card size="small" class="mt10">
<template #header>
<b>处理步骤</b>
</template>
<el-steps :active="2" align-center finish-status="success">
<el-step title="提交工单" description="李四,在2023-10-11提交工单。"></el-step>
<el-step title="找商家合核实" description="商家已确认问题,已联系快递公司修改派件地址。"></el-step>
<el-step title="找快递核实" description="快递公司处理中。">
<template #icon>
<el-icon size="100"><more></more></el-icon>
</template>
</el-step>
<el-step title="完成工单" description=""></el-step>
</el-steps>
</el-card>
<el-card size="small" class="mt10">
<template #header>
<b>工单主题</b>
</template>
<el-form :model="form" disabled label-width="120px">
<el-form-item label="工单编号">
<el-input v-model="form.name"></el-input>
</el-form-item>
<el-form-item label="工单状态">
<el-tag type="success" effect="dark">草稿</el-tag>
</el-form-item>
<el-form-item label="创建信息">
<el-date-picker
v-model="form.date1"
type="date"
placeholder="请选择日期"
style="width: 100%"></el-date-picker>
</el-form-item>
<el-form-item label="工单主题">
<el-input v-model="form.title"></el-input>
</el-form-item>
<el-form-item label="问题描述">
<el-input v-model="form.remark" :autosize="{ minRows: 2, maxRows: 4 }" type="textarea"></el-input>
</el-form-item>
</el-form>
</el-card>
<el-card size="small" class="mt10">
<template #header>
<b>扩展信息</b>
</template>
<el-row>
<el-col :span="2"><div class="workorder-title">工单名称:</div></el-col>
<el-col :span="10"><div class="workorder-content">速度快可适当放宽速度快得看看打开</div></el-col>
<el-col :span="2"><div class="workorder-title">处理失效:</div></el-col>
<el-col :span="10"><el-tag type="danger" effect="dark">生效中</el-tag></el-col>
</el-row>
<el-row>
<el-col :span="2"><div class="workorder-title">扩展字段1:</div></el-col>
<el-col :span="10"><div class="workorder-content">速度快可适当放宽速度快得看看打开</div></el-col>
<el-col :span="2"><div class="workorder-title">扩展字段2:</div></el-col>
<el-col :span="10"><div class="workorder-content">有效</div></el-col>
</el-row>
<el-row>
<el-col :span="2"><div class="workorder-title">扩展字段3:</div></el-col>
<el-col :span="10"><div class="workorder-content">速度快可适当放宽速度快得看看打开</div></el-col>
<el-col :span="2"><div class="workorder-title">扩展字段4:</div></el-col>
<el-col :span="10"><div class="workorder-content">有效</div></el-col>
</el-row>
</el-card>
<el-card size="small" class="mt10">
<template #header>
<b>附件信息</b>
</template>
<el-row>
<el-col :span="3" v-for="url in imageList">
<el-image
style="width: 100px; height: 100px"
:src="url"
:zoom-rate="1.2"
:max-scale="7"
:min-scale="0.2"
:preview-src-list="imageList"
:initial-index="4"
fit="cover">
</el-image>
</el-col>
</el-row>
</el-card>
<el-card size="small" class="mt10">
<template #header>
<b>处理日志</b>
</template>
<el-table :data="tableData" stripe border :table-layout="tableLayout">
<el-table-column type="expand">
<template #default="scope">
<el-steps :active="2" align-center finish-status="success" simple>
<el-step title="提交工单" description="李四,在2023-10-11提交工单。"></el-step>
<el-step title="找商家合核实" description="商家已确认问题,已联系快递公司修改派件地址。"></el-step>
<el-step title="找快递核实" description="快递公司处理中。">
<template #icon>
<el-icon color="red" size="24"><warning-filled></warning-filled></el-icon>
</template>
</el-step>
<el-step title="完成工单" description=""></el-step>
</el-steps>
</template>
</el-table-column>
<el-table-column type="selection"></el-table-column>
<el-table-column prop="type" label="处理类型" width="180"></el-table-column>
<el-table-column prop="remark" label="处理备注">
<template #default="scope">
<el-tag class="ml-2" type="success">{{scope.row.remark}}</el-tag>
</template>
</el-table-column>
<el-table-column prop="name" label="处理用户" width="100"></el-table-column>
<el-table-column prop="date" label="操作时间" width="150"></el-table-column>
<el-table-column fixed="right" label="操作" width="100" align="center">
<template #default>
<el-button link type="primary" size="small" @click="handleClick">查看详情</el-button>
</template>
</el-table-column>
</el-table>
<div style="width:100%;display: flex;justify-content: flex-end;align-items: flex-end;margin-top:8px">
<el-pagination
v-model:current-page="page"
:page-size="pageSize"
:small="small"
layout="total, sizes, prev, pager, next, jumper"
:total="total"
@size-change="handleSizeChange"
@current-change="handleCurrentChange">
</el-pagination>
</div>
</el-card>
<!-- <div style="height: 50vh">
<el-auto-resizer>
<template #default="{ height, width }">
<el-table-v2
:columns="columns"
:data="tableData"
:width="width"
:height="height"
fixed>
</el-table-v2>
</template>
</el-auto-resizer>
</div> -->
</div>
<script setup>
const App = {
data() {
return {
form:{
name: '100111',
region: '',
date1: '2023-03-29',
title: '',
remark: '',
desc: '',
},
dialogVisible: false,
tableLayout:'fixed',
page:1,
pageSize:10,
total: 100,
columns:[
{
key: `0`,
dataKey: `type`,
title: `处理类型`,
width: 100,
},
{
key: `1`,
dataKey: `date`,
title: `处理时间`,
width: 150,
},
{
key: `2`,
dataKey: `name`,
title: `处理用户`,
width: 150,
},
{
key: `3`,
dataKey: `remark`,
title: `处理备注`,
width: 500
}
],
tableData: [
{
date: '2016-05-03',
name: 'Tom',
remark: '快递公司处理中。',
type: '快递处理'
},
{
date: '2016-05-02',
name: 'Allen',
remark: '联系快递该派件地址。',
type: '联系快递'
},
{
date: '2016-05-04',
name: 'Jack',
remark: '已联系用户核实具体问题。',
type: '联系用户'
},
{
date: '2016-05-02 10:09:01',
name: '赵三',
remark: '赵三审核通过,原因:快递原因。',
type: '平台审核',
},
{
date: '2016-05-01',
name: '李四',
remark: '用户提交工单',
type: '提交工单',
},
],
imageList: [
'https://fuss10.elemecdn.com/a/3f/3302e58f9a181d2509f3dc0fa68b0jpeg.jpeg',
'https://fuss10.elemecdn.com/1/34/19aa98b1fcb2781c4fba33d850549jpeg.jpeg',
'https://fuss10.elemecdn.com/0/6f/e35ff375812e6b0020b6b4e8f9583jpeg.jpeg',
'https://fuss10.elemecdn.com/9/bb/e27858e973f5d7d3904835f46abbdjpeg.jpeg',
'https://fuss10.elemecdn.com/d/e6/c4d93a3805b3ce3f323f7974e6f78jpeg.jpeg',
'https://fuss10.elemecdn.com/3/28/bbf893f792f03a54408b3b7a7ebf0jpeg.jpeg',
'https://fuss10.elemecdn.com/2/11/6535bcfb26e4c79b48ddde44f4b6fjpeg.jpeg',
'https://fuss10.elemecdn.com/a/3f/3302e58f9a181d2509f3dc0fa68b0jpeg.jpeg'
]
};
},
methods: {
handleClose(){
this.dialogVisible = false;
},
handleSizeChange(pageSize){
this.pageSize = pageSize
},
handleCurrentChange(page){
this.page = page
},
handleClick(){
}
}
};
const app = Vue.createApp(App);
Object.entries(ElementPlusIconsVue).forEach(item => {
app.component(item[0], item[1]);
});
app.use(ElementPlus, {locale: ElementPlusLocaleZhCn});
app.mount("#app");
</script>
</body>
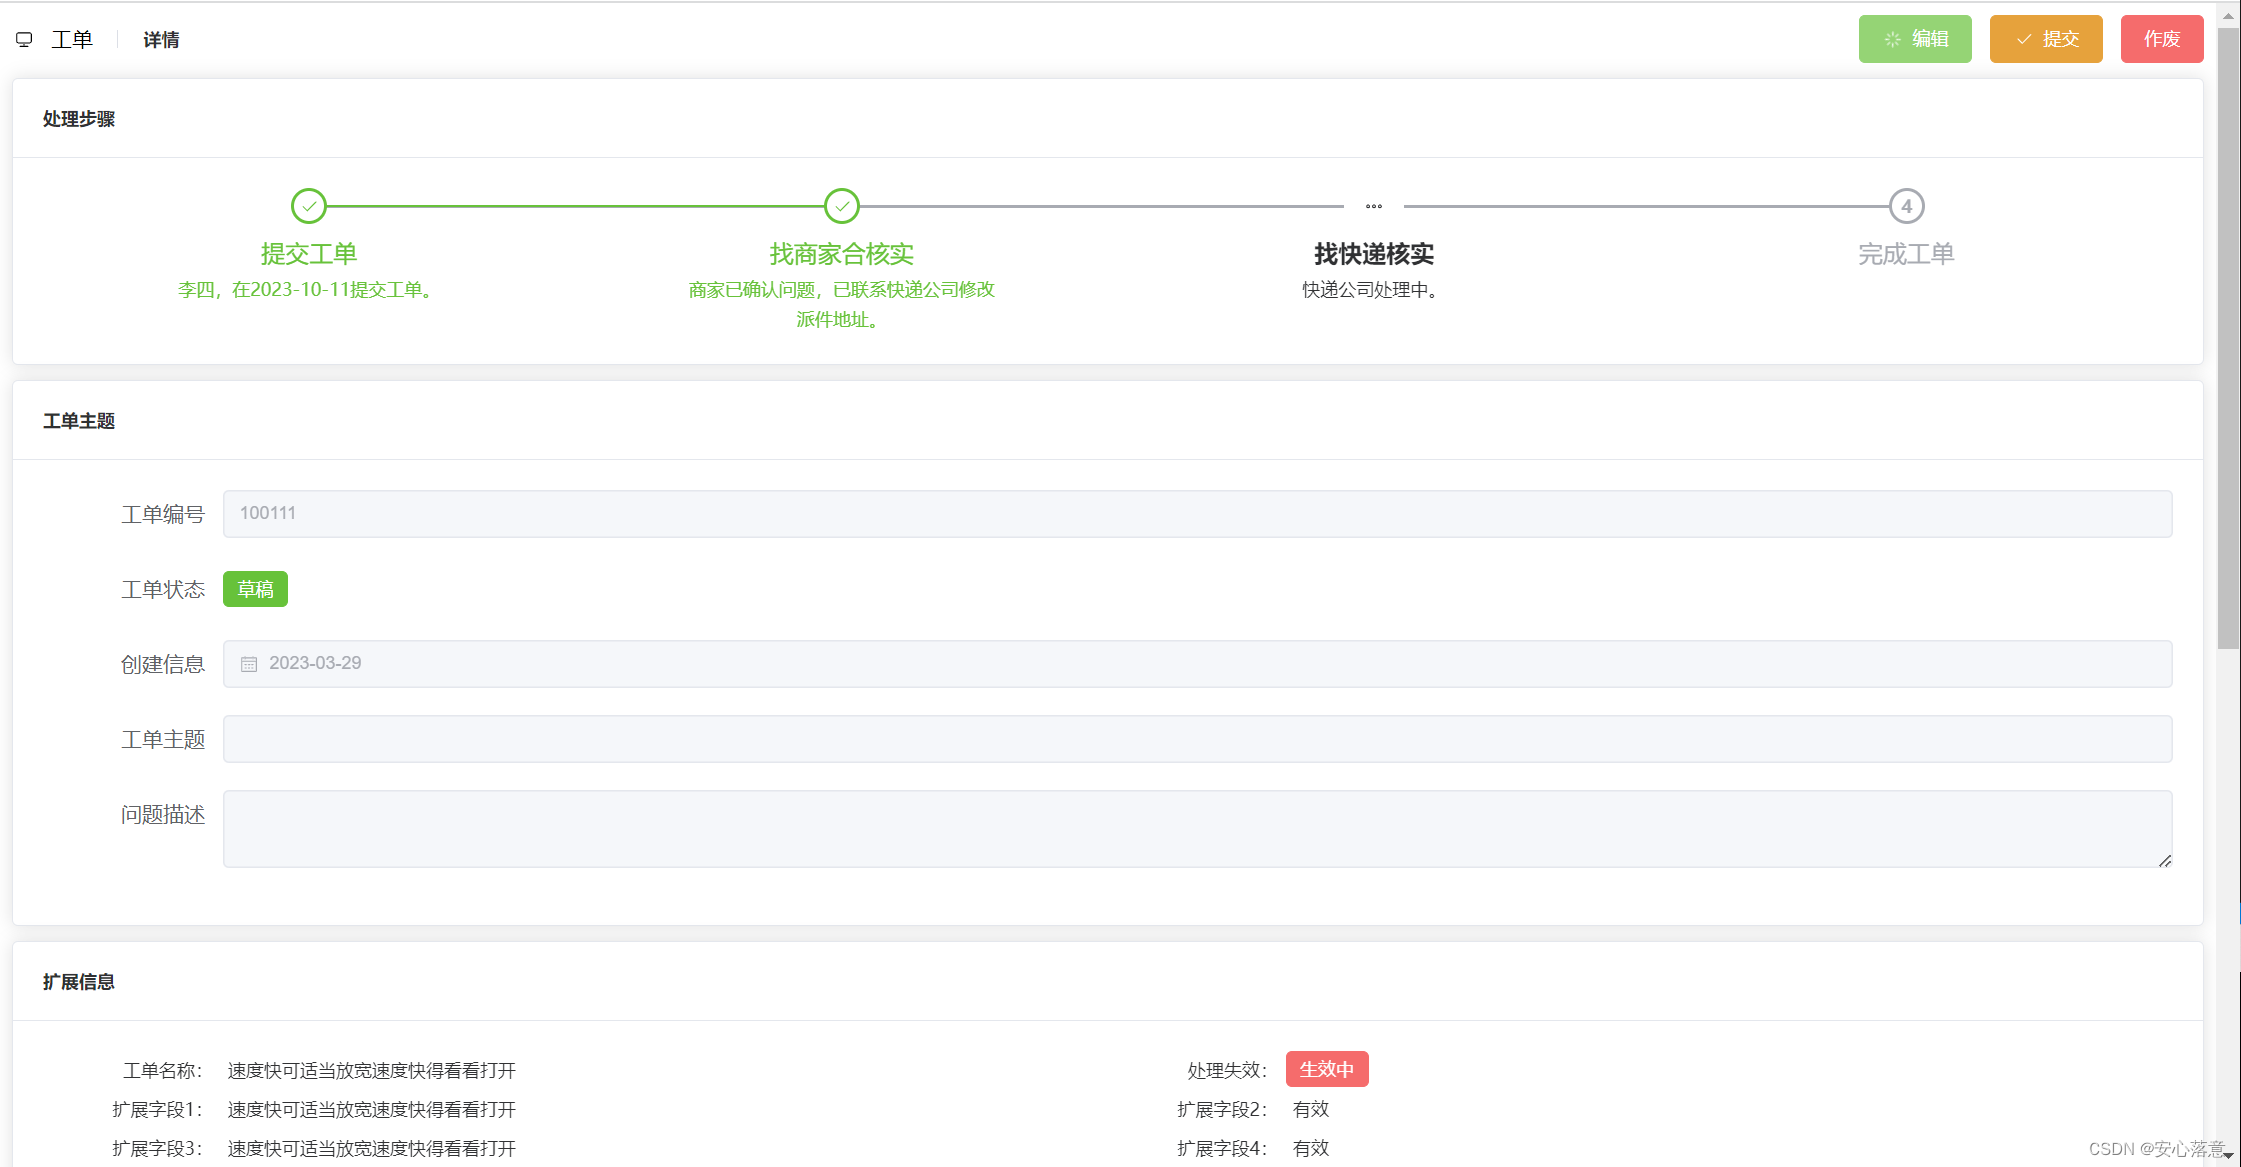
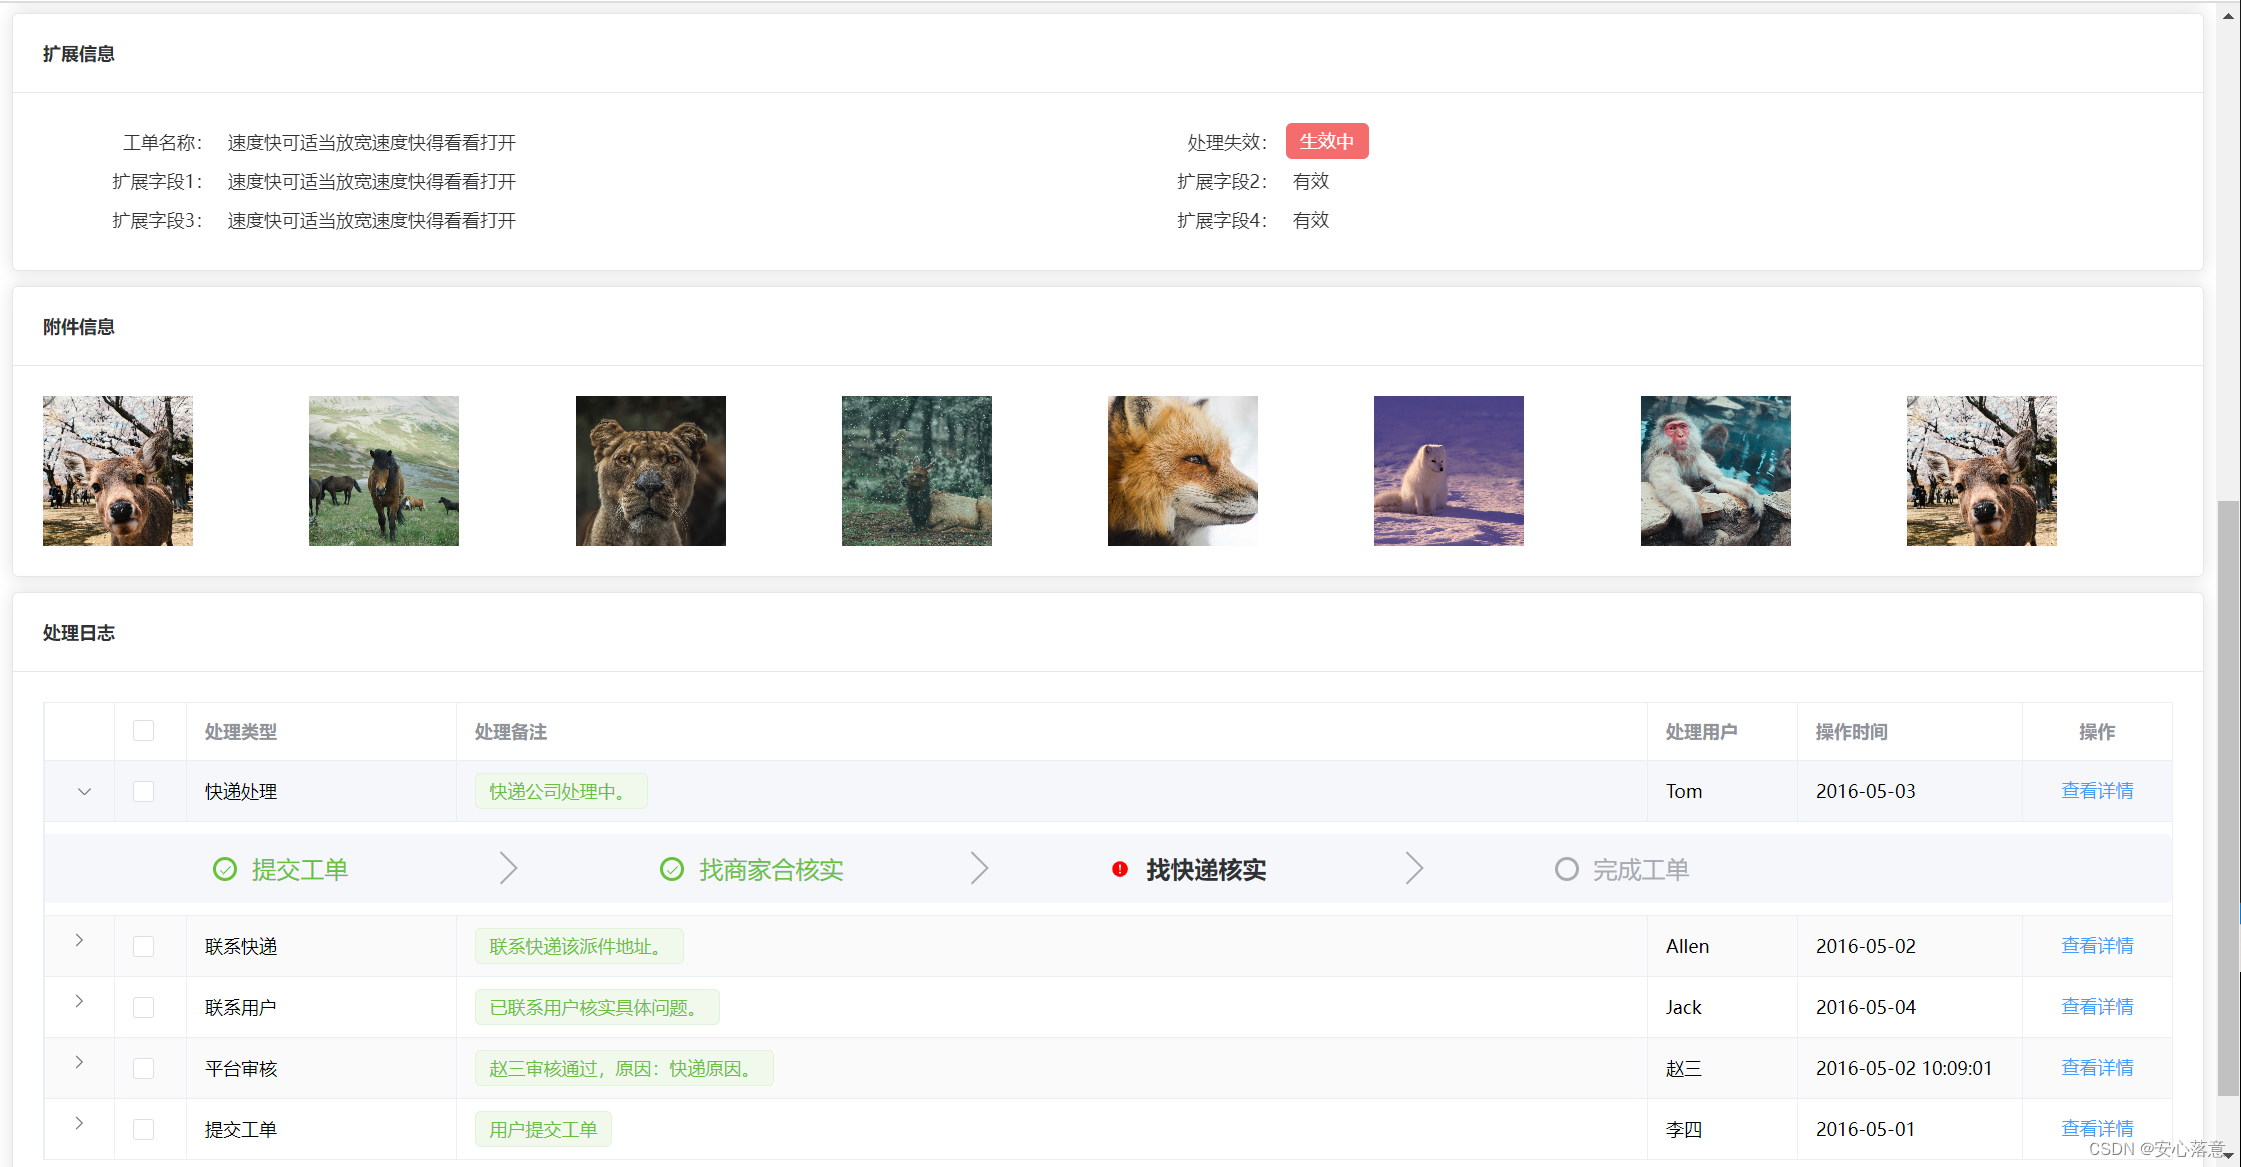
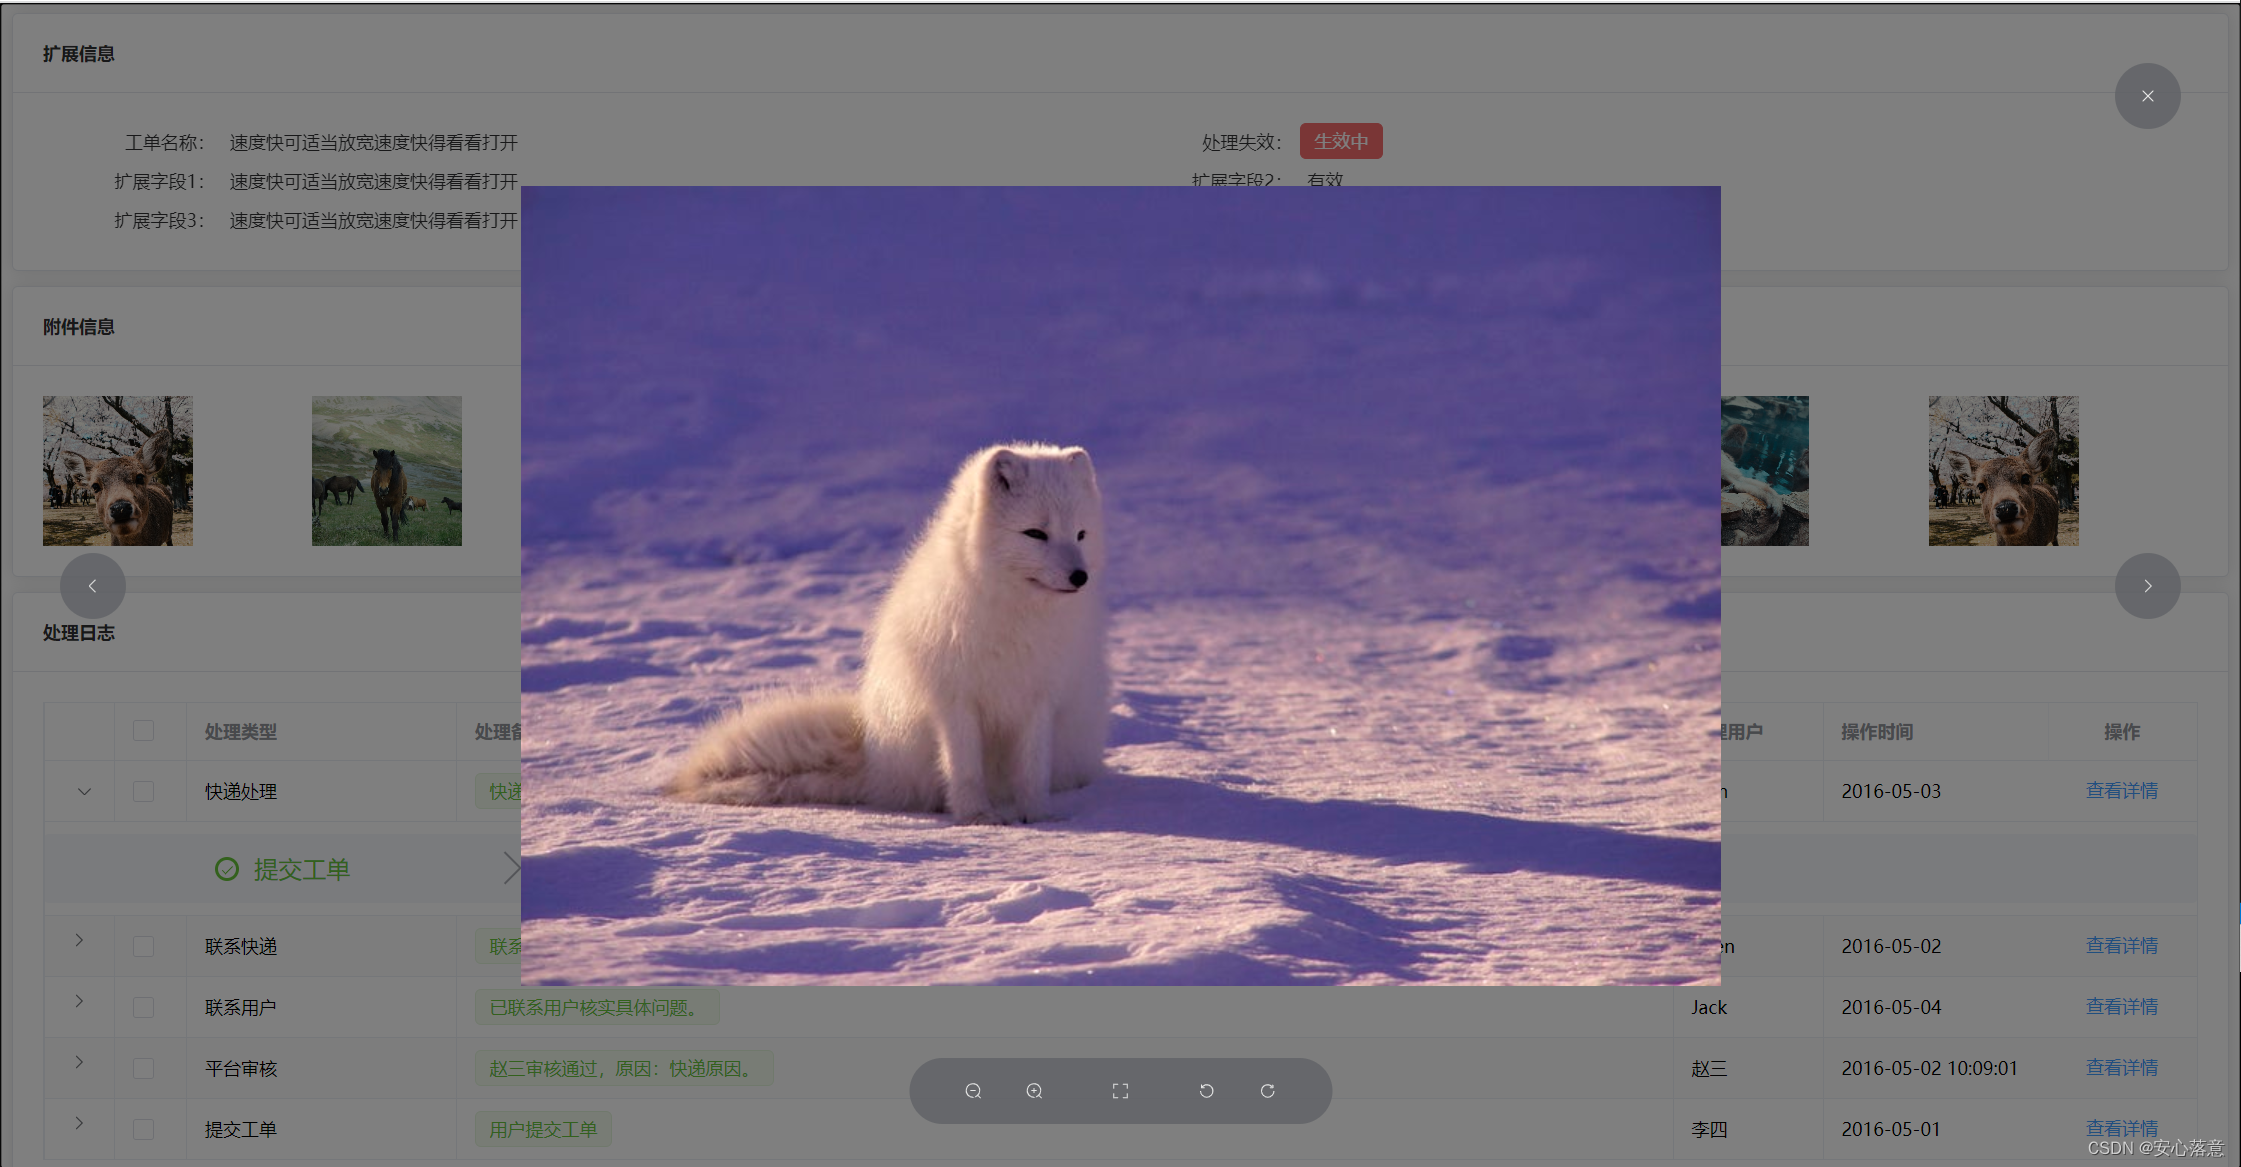
</html>最终效果


 555
555


 被折叠的 条评论
为什么被折叠?
被折叠的 条评论
为什么被折叠?
 到【灌水乐园】发言


