


因为基于不同的协议传输消息,一般的网络架构都是前端是Apache 或者 Nginx处理静态请求,Tomcat处理动态请求,做到动静分离,提高了网站和系统性能。
以下记录本地用nginx+tomcat实现的动静分离的主要步骤。
1. tomcat web应用jsp文件
路径:D:\nginx-1.8.0\Tomcat\tomcat-node1\webapps\examples\index.jsp
<%@ page language="java" import="java.util.*" pageEncoding="UTF-8"%>
<%@ page import="java.text.SimpleDateFormat"%>
<!DOCTYPE HTML PUBLIC "-//W3C//DTD HTML 4.01 Transitional//EN">
<html>
  <head>
    <title>Tomcat集群测试</title>
  </head>
  <body>
    <%
		out.println("["+request.getLocalAddr()+":" +request.getLocalPort()+"]" + "<br/>session id:" + session.getId());
    %>
	<h1>images:</h1>
	<img src="jsp/images/code.gif" />
  </body>
</html>
2. nginx主配置文件
upstream local_tomcat {
	   server localhost:18080;
       server localhost:18081;
	}

    server {
        listen       80;
		server_name  localhost;

        location / {
            root   html;
            index  index.html index.htm;
        }

		# 所有静态请求都由nginx处理,存放目录为html
		location ~ \.(gif|jpg|jpeg|png|bmp|swf)$ {
			root	html;
		}

		# 所有动态请求都转发给tomcat处理
		location ~ \.(jsp|do)$ {
			proxy_pass	http://local_tomcat;
		}

        error_page   500 502 503 504  /50x.html;
        location = /50x.html {
            root   html;
        }
    }
3. 拷贝静态文件
将图片复制到nginx本地目录,这里我们为了方便并且为了目录的一致性,将其源码全部拷贝至nginx节点:
D:\nginx-1.8.0\Tomcat\tomcat-node1\webapps\examples ==========> D:\nginx-1.8.0\html\examples
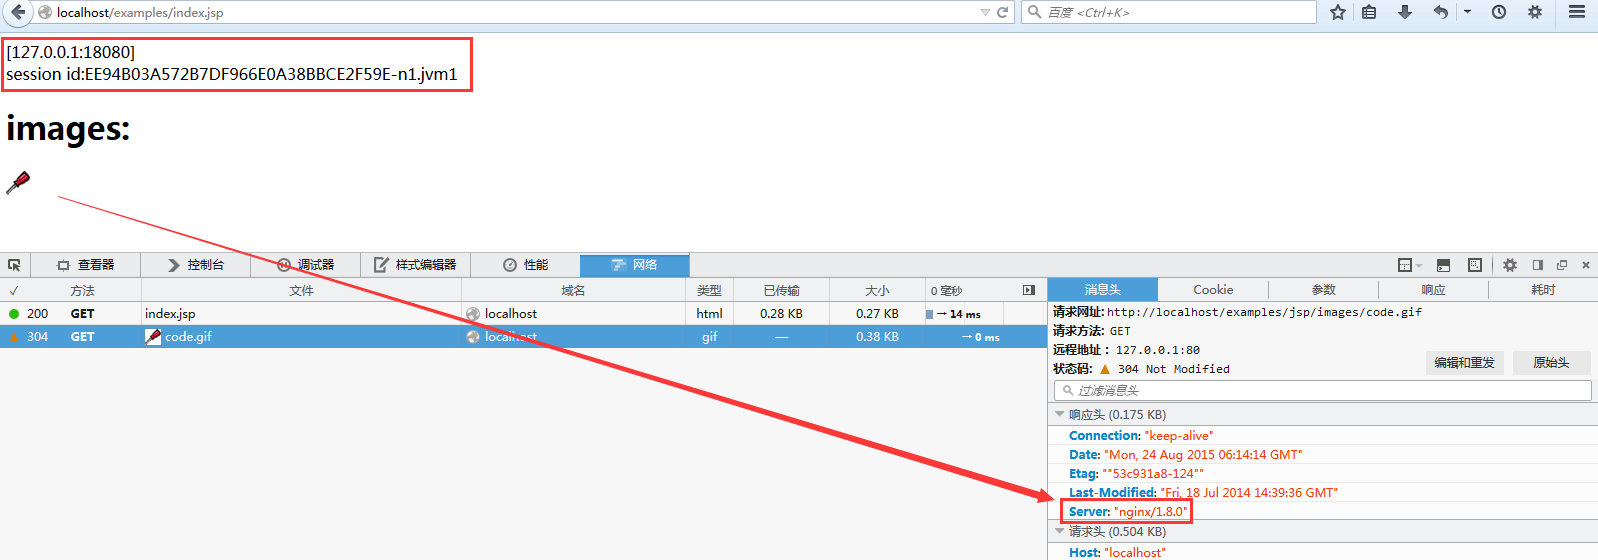
4. 测试截图
访问URL:http://localhost/examples/index.jsp
刷新后:

参考:
1. http://www.tuicool.com/articles/uA36biz
2. http://dl528888.blog.51cto.com/2382721/804596
3. http://outofmemory.cn/code-snippet/3037/nginx-configuration-file-de-location-explain-in-detail


 1506
1506


 被折叠的 条评论
为什么被折叠?
被折叠的 条评论
为什么被折叠?
 到【灌水乐园】发言


