


在本教程中,我们将学习如何使用纯 JavaScript 创建一个 CRUD(创建、读取、更新和删除)应用程序。我们不会使用任何 JavaScript 框架,而是使用纯 JavaScript、CSS 和 HTML 来构建 CRUD 应用程序。
让我们使用 HTML、CSS 和 JavaScript 逐步开发 CRUD 应用程序(员工管理应用程序)。
1. 创建 HTML 页面
让我们创建一个名为index.html的 HTML 文件,并在其中添加以下内容:
<!DOCTYPE html>
<html>

    <head>
        <title>
            JavaScript CRUD Example Tutorial
        </title>
        <link rel="stylesheet" href="style.css">
    </head>

    <body>

        <h1><center>JavaScript CRUD Example Tutorial</center></h1>
        <hr>
        <div class="employee-form">
            <form onsubmit="event.preventDefault();onFormSubmit();" autocomplete="off">
                <div>
                    <label>Full Name*</label><label class="validation-error hide" id="fullNameValidationError">This field is required.</label>
                    <input type="text" name="fullName" id="fullName">
                </div>
                <div>
                    <label>Email Id</label>
                    <input type="text" name="email" id="email">
                </div>
                <div>
                    <label>Salary</label>
                    <input type="text" name="salary" id="salary">
                </div>
                <div>
                    <label>City</label>
                    <input type="text" name="city" id="city">
                </div>
                <div  class="form-action-buttons">
                    <input type="submit" value="Submit">
                </div>
            </form>
        </div>
        <br/>
        <div class = "employees-table">
            <table class="list" id="employeeList">
                <thead>
                    <tr>
                        <th>Full Name</th>
                        <th>Email Id</th>
                        <th>Salary</th>
                        <th>City</th>
                        <th>Actions</th>
                    </tr>
                </thead>
                <tbody>

                </tbody>
            </table>
        </div>
        <script src="script.js"></script>
    </body>
</html>请注意,我们创建了一个员工表单来将新员工添加到列表中。我们还创建了一个 HTML 表格来列出新创建的员工。
我们已经为 HTML 表单中的fullName、email、salary和city输入元素分配了一个唯一的 id:
<input type="text" name="fullName" id="fullName">
<input type="text" name="email" id="email">
<input type="text" name="salary" id="salary">
<input type="text" name="city" id="city">
2. JavaScript 中的 CRUD 操作
让我们创建一个名为script.js的 JavaScript来处理 JavaScript 中的 CRUD 操作及其以下内容:
var selectedRow = null

function onFormSubmit() {
    if (validate()) {
        var formData = readFormData();
        if (selectedRow == null)
            insertNewRecord(formData);
        else
            updateRecord(formData);
        resetForm();
    }
}

function readFormData() {
    var formData = {};
    formData["fullName"] = document.getElementById("fullName").value;
    formData["email"] = document.getElementById("email").value;
    formData["salary"] = document.getElementById("salary").value;
    formData["city"] = document.getElementById("city").value;
    return formData;
}

function insertNewRecord(data) {
    var table = document.getElementById("employeeList").getElementsByTagName('tbody')[0];
    var newRow = table.insertRow(table.length);
    cell1 = newRow.insertCell(0);
    cell1.innerHTML = data.fullName;
    cell2 = newRow.insertCell(1);
    cell2.innerHTML = data.email;
    cell3 = newRow.insertCell(2);
    cell3.innerHTML = data.salary;
    cell4 = newRow.insertCell(3);
    cell4.innerHTML = data.city;
    cell4 = newRow.insertCell(4);
    cell4.innerHTML = `<a onClick="onEdit(this)">Edit</a>
                       <a onClick="onDelete(this)">Delete</a>`;
}

function resetForm() {
    document.getElementById("fullName").value = "";
    document.getElementById("email").value = "";
    document.getElementById("salary").value = "";
    document.getElementById("city").value = "";
    selectedRow = null;
}

function onEdit(td) {
    selectedRow = td.parentElement.parentElement;
    document.getElementById("fullName").value = selectedRow.cells[0].innerHTML;
    document.getElementById("email").value = selectedRow.cells[1].innerHTML;
    document.getElementById("salary").value = selectedRow.cells[2].innerHTML;
    document.getElementById("city").value = selectedRow.cells[3].innerHTML;
}
function updateRecord(formData) {
    selectedRow.cells[0].innerHTML = formData.fullName;
    selectedRow.cells[1].innerHTML = formData.email;
    selectedRow.cells[2].innerHTML = formData.salary;
    selectedRow.cells[3].innerHTML = formData.city;
}

function onDelete(td) {
    if (confirm('Are you sure to delete this record ?')) {
        row = td.parentElement.parentElement;
        document.getElementById("employeeList").deleteRow(row.rowIndex);
        resetForm();
    }
}
function validate() {
    isValid = true;
    if (document.getElementById("fullName").value == "") {
        isValid = false;
        document.getElementById("fullNameValidationError").classList.remove("hide");
    } else {
        isValid = true;
        if (!document.getElementById("fullNameValidationError").classList.contains("hide"))
            document.getElementById("fullNameValidationError").classList.add("hide");
    }
    return isValid;
}
让我们理解上面的 JavaScript 代码。
使用以下函数处理 HTML 表单提交:
function onFormSubmit() {
    if (validate()) {
        var formData = readFormData();
        if (selectedRow == null)
            insertNewRecord(formData);
        else
            updateRecord(formData);
        resetForm();
    }
}
HTML 表单提交后,在 HTML 表中动态创建新记录,函数如下:
function insertNewRecord(data) {
    var table = document.getElementById("employeeList").getElementsByTagName('tbody')[0];
    var newRow = table.insertRow(table.length);
    cell1 = newRow.insertCell(0);
    cell1.innerHTML = data.fullName;
    cell2 = newRow.insertCell(1);
    cell2.innerHTML = data.email;
    cell3 = newRow.insertCell(2);
    cell3.innerHTML = data.salary;
    cell4 = newRow.insertCell(3);
    cell4.innerHTML = data.city;
    cell4 = newRow.insertCell(4);
    cell4.innerHTML = `<a onClick="onEdit(this)">Edit</a>
                       <a onClick="onDelete(this)">Delete</a>`;
}
请注意,我们为 HTML 表中的每条记录动态添加了编辑和删除按钮。
使用以下 JavaScript 函数重置 HTML 表单:
function resetForm() {
    document.getElementById("fullName").value = "";
    document.getElementById("email").value = "";
    document.getElementById("salary").value = "";
    document.getElementById("city").value = "";
    selectedRow = null;
}
使用以下 JavaScript 函数处理 HTML 表格中每一行的编辑操作:
function onEdit(td) {
    selectedRow = td.parentElement.parentElement;
    document.getElementById("fullName").value = selectedRow.cells[0].innerHTML;
    document.getElementById("email").value = selectedRow.cells[1].innerHTML;
    document.getElementById("salary").value = selectedRow.cells[2].innerHTML;
    document.getElementById("city").value = selectedRow.cells[3].innerHTML;
}
请注意,对于编辑操作,我们使用行数据填充 HTML 表单。
编辑操作后,我们需要在 HTML 表格中显示更新的数据,例如:
function updateRecord(formData) {
    selectedRow.cells[0].innerHTML = formData.fullName;
    selectedRow.cells[1].innerHTML = formData.email;
    selectedRow.cells[2].innerHTML = formData.salary;
    selectedRow.cells[3].innerHTML = formData.city;
}
使用以下 JavaScript 函数处理删除操作:
function onDelete(td) {
    if (confirm('Are you sure to delete this record ?')) {
        row = td.parentElement.parentElement;
        document.getElementById("employeeList").deleteRow(row.rowIndex);
        resetForm();
    }
}请注意,我们使用deleteRow()函数从 HTML 表中删除行。
我们还向fullName字段添加了验证:
function validate() {
    isValid = true;
    if (document.getElementById("fullName").value == "") {
        isValid = false;
        document.getElementById("fullNameValidationError").classList.remove("hide");
    } else {
        isValid = true;
        if (!document.getElementById("fullNameValidationError").classList.contains("hide"))
            document.getElementById("fullNameValidationError").classList.add("hide");
    }
    return isValid;
}
3. 样式化 HTML 页面
现在让我们在 HTML 中添加一些 CSS 以使网页更时尚。
让我们创建一个名为style.css的 CSS 文件并向其中添加以下内容:
.employee-form {
    border-style: solid;
    /* margin-bottom: 10px; */
    /* margin-left: 10px; */
    padding: 10px;
    /* width: 50%; */
    margin: auto;
    width: 50%;
    /* border: 3px solid green; */
    /* padding: 10px; */
}

.employees-table {
    border-style: solid;
    /* margin-bottom: 10px; */
    /* margin-left: 10px; */
    padding: 20px;
    /* width: 50%; */
    margin: auto;
    width: 70%;
    /* border: 3px solid green; */
    /* padding: 10px; */
}

body > table{
    width: 80%;
}

table{
    border-collapse: collapse;
}
table.list{
    width:100%;
}

td, th {
    border: 1px solid #dddddd;
    text-align: left;
    padding: 8px;
}
tr:nth-child(even),table.list thead>tr {
    background-color: #dddddd;
}

input[type=text], input[type=number] {
    width: 100%;
    padding: 8px 20px;
    margin: 8px 0;
    display: inline-block;
    border: 1px solid #ccc;
    border-radius: 4px;
    box-sizing: border-box;
}

input[type=submit] {
    width: 30%;
    background-color: black;
    color: white;
    padding: 10px 18px;
    /* margin: 0px 0; */
    border: none;
    border-radius: 5px;
    cursor: pointer;
}

form div.form-action-buttons{
    text-align: right;
}

a{
    cursor: pointer;
    text-decoration: underline;
    color: #0000ee;
    margin-right: 4px;
}

label.validation-error{
    color:   red;
    margin-left: 5px;
}

.hide{
    display:none;
}
在浏览器中运行 index.html
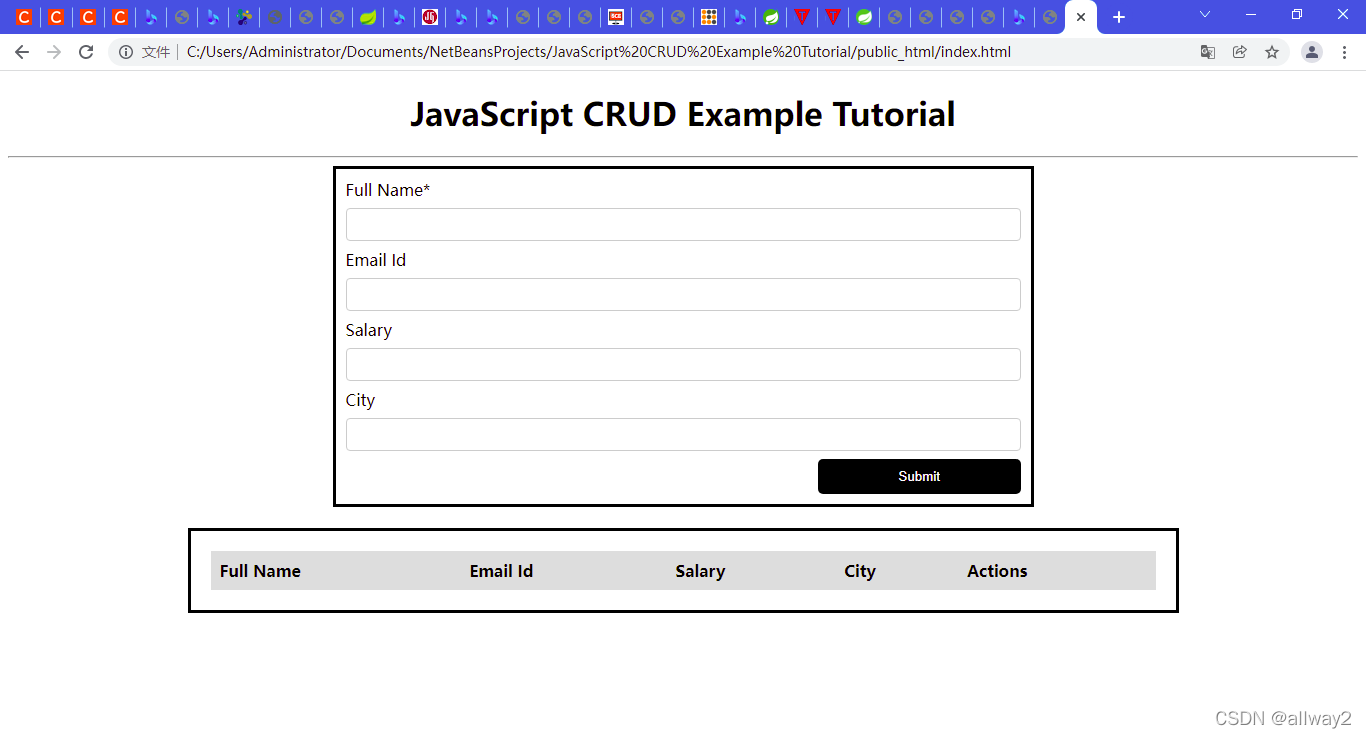
让我们打开index.html文件,浏览器将在网页下方输出:
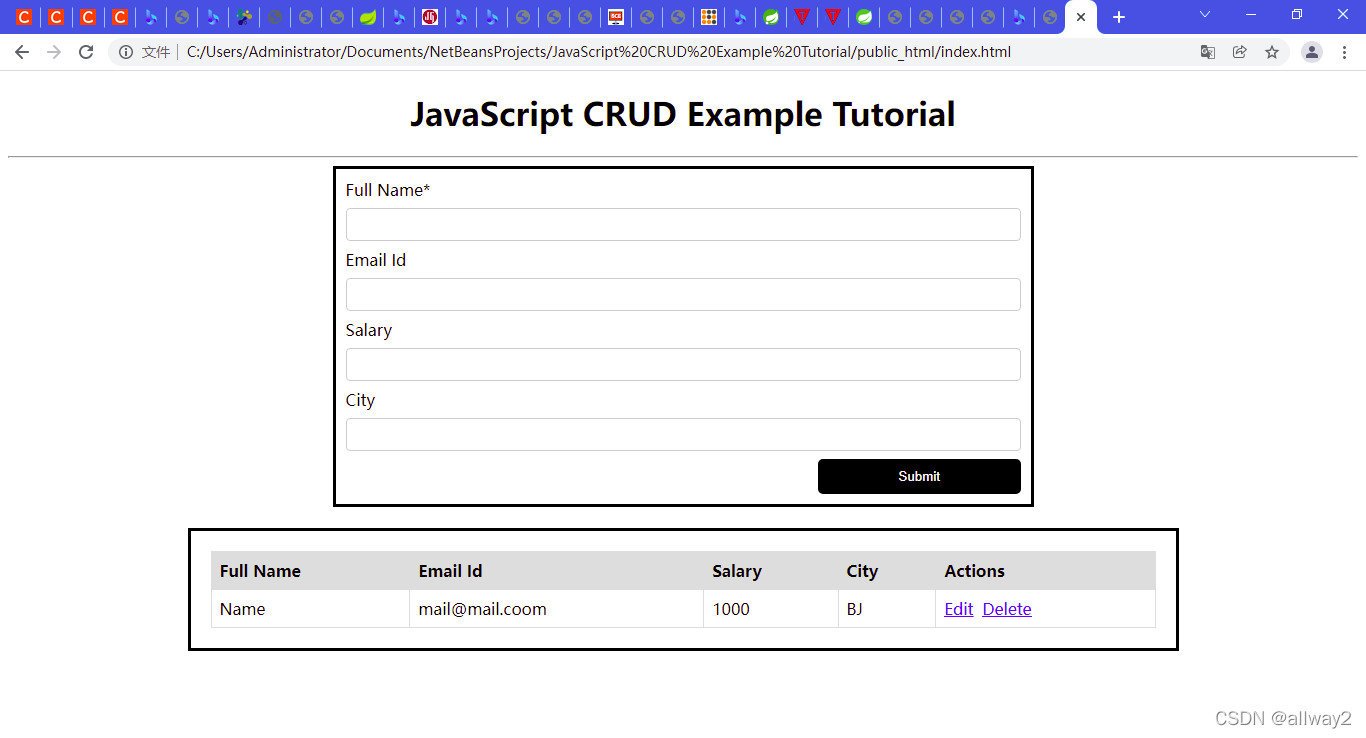
使用 HTML 表单将员工添加到表中:


 7994
7994

 被折叠的 条评论
为什么被折叠?
被折叠的 条评论
为什么被折叠?
 到【灌水乐园】发言


