


在本教程中,我们将学习如何使用 Spring boot 作为后端和 Vue JS 作为前端来构建一个简单的全栈应用程序。
Vue JS 是一个用于在前端构建用户界面 (UI) 的渐进式框架。
Spring Boot 是一个非常流行的 Java 框架,用于构建 RESTful Web 服务和微服务。
使用的工具和技术
后端:
- 弹簧靴
- 春季MVC
- Spring Data JPA(休眠)
- 日食 STS
- H2 数据库
前端:
- 视图 3
- 爱讯
- 引导程序 4
- VS 代码
我们将建造什么?
我们将构建两个项目:
- springboot-backend - 开发和公开 REST API
- vue-frontend - 使用 REST API
1.开发Spring Boot应用-后端
让我们从创建一个 Spring Boot 应用程序开始,并构建一个简单的 REST API。
1. 创建一个 Spring Boot 应用程序
有很多方法可以创建 Spring Boot 应用程序。您可以参考以下文章来创建 Spring Boot 应用程序。
2.添加maven依赖
这是一个完整的 pom.xml 文件供您参考:
<?xml version="1.0" encoding="UTF-8"?>
<project xmlns="http://maven.apache.org/POM/4.0.0"
	xmlns:xsi="http://www.w3.org/2001/XMLSchema-instance"
	xsi:schemaLocation="http://maven.apache.org/POM/4.0.0 https://maven.apache.org/xsd/maven-4.0.0.xsd">
	<modelVersion>4.0.0</modelVersion>
	<parent>
		<groupId>org.springframework.boot</groupId>
		<artifactId>spring-boot-starter-parent</artifactId>
		<version>2.2.1.RELEASE</version>
		<relativePath /> <!-- lookup parent from repository -->
	</parent>
	<groupId>com.blogspot.javabyrajasekhar</groupId>
	<artifactId>SpringbootCommandLineRunner</artifactId>
	<version>0.0.1-SNAPSHOT</version>
	<name>SpringbootCommandLineRunner</name>
	<description>SpringbootCommandLineRunner</description>

	<properties>
		<java.version>1.8</java.version>
	</properties>

	<dependencies>
		<dependency>
			<groupId>org.springframework.boot</groupId>
			<artifactId>spring-boot-starter-web</artifactId>
		</dependency>

		<dependency>
			<groupId>org.springframework.boot</groupId>
			<artifactId>spring-boot-starter-test</artifactId>
			<scope>test</scope>
			<exclusions>
				<exclusion>
					<groupId>org.junit.vintage</groupId>
					<artifactId>junit-vintage-engine</artifactId>
				</exclusion>
			</exclusions>
		</dependency>
		<dependency>
			<groupId>org.springframework.boot</groupId>
			<artifactId>spring-boot-starter-data-jpa</artifactId>
		</dependency>
		<dependency>
			<groupId>com.h2database</groupId>
			<artifactId>h2</artifactId>
			<scope>runtime</scope>
		</dependency>
		<dependency>
			<groupId>org.projectlombok</groupId>
			<artifactId>lombok</artifactId>
			<optional>true</optional>
		</dependency>
	</dependencies>

	<build>
		<plugins>
			<plugin>
				<groupId>org.springframework.boot</groupId>
				<artifactId>spring-boot-maven-plugin</artifactId>
			</plugin>
		</plugins>
	</build>

</project>
3. 创建 JPA 实体 - Employee.java
让我们在 net.javaguides.springboot包中创建一个名为 entity的新 包,然后 在实体包中创建Employee 类 ,其内容如下 -
package net.javaguides.springboot.entity;

import lombok.*;

import javax.persistence.*;

@Getter
@Setter
@NoArgsConstructor
@AllArgsConstructor
@Builder
@Entity
@Table(name = "employees")
public class Employee {

	@Id
	@GeneratedValue(strategy = GenerationType.IDENTITY)
	private long id;

	@Column(name = "first_name", nullable = false)
	private String firstName;

	@Column(name = "last_name")
	private String lastName;
	private String email;

}
4. 创建 Spring Data JPA Repository - EmployeeRepository.java
现在,我们将创建一个 Spring Data JPA 存储库来与 H2 数据库通信。 让我们在 net.javaguides.springboot包中创建一个名为 repository的新 包,然后 在repository包中创建以下EmployeeRepository 接口 :
package net.javaguides.springboot.repository;

import net.javaguides.springboot.entity.Employee;
import org.springframework.data.jpa.repository.JpaRepository;

public interface EmployeeRepository extends JpaRepository<Employee, Long> {

}
5. 带有 REST API 的 Spring 控制器 - /api/employees
让我们在 net.javaguides.springboot包中创建一个名为 controller的新 包,然后在 controller 包中创建以下 EmployeeController类 , 其内容如下 -
package net.javaguides.springboot.controller;

import net.javaguides.springboot.entity.Employee;
import net.javaguides.springboot.repository.EmployeeRepository;
import org.springframework.beans.factory.annotation.Autowired;
import org.springframework.web.bind.annotation.*;

import java.util.List;

@CrossOrigin
@RestController
@RequestMapping("/api")

public class EmployeeController {

	@Autowired
	private EmployeeRepository employeeRepository;

	@GetMapping("/employees")
	public List<Employee> fetchEmployees() {
		return employeeRepository.findAll();
	}
}
请注意,我们添加了以下代码以避免 CORS 问题:
@CrossOrigin6. 运行 Spring Boot Application 并测试 Rest API
让我们在应用程序启动时在employees 表中插入几条记录 。
package net.javaguides.springboot;

import net.javaguides.springboot.entity.Employee;
import net.javaguides.springboot.repository.EmployeeRepository;
import org.springframework.beans.factory.annotation.Autowired;
import org.springframework.boot.CommandLineRunner;
import org.springframework.boot.SpringApplication;
import org.springframework.boot.autoconfigure.SpringBootApplication;

@SpringBootApplication
public class SpringbootBackendApplication implements CommandLineRunner {

	public static void main(String[] args) {
		SpringApplication.run(SpringbootBackendApplication.class, args);
	}

	@Autowired
	private EmployeeRepository employeeRepository;

	@Override
	public void run(String... args) throws Exception {

		Employee employee1 = Employee.builder()
				.firstName("Ramesh")
				.lastName("Fadatare")
				.email("ramesh@gmail.com")
				.build();

		Employee employee2 = Employee.builder()
				.firstName("Tony")
				.lastName("Stark")
				.email("tony@gmail.com")
				.build();

		Employee employee3 = Employee.builder()
				.firstName("John")
				.lastName("Cena")
				.email("cena@gmail.com")
				.build();

		employeeRepository.save(employee1);
		employeeRepository.save(employee2);
		employeeRepository.save(employee3);
	}
}
让我们从 IDE 运行这个 Spring Boot 应用程序 -> 右键单击 -> 运行方式 -> Java 应用程序:
在浏览器中点击此“ http://localhost:8080/api/employees”链接将流行的员工列表为 JSON:
构建 Vue JS 前端应用程序
让我们继续创建一个 Vue 应用程序来使用 /api/employees REST API。
我们将使用 Vue 3 和 Axios HTTP 库在 Vue 应用程序中进行 REST API 调用。我们将使用 VS Code IDE 来构建 Vue 应用程序。
1.Vue JS项目设置
要安装和使用Vue CLI以及运行 Vue 应用程序服务器,您需要安装Node.js JavaScript 运行时和npm(Node.js 包管理器)。npm包含在Node.js中,您可以从Node.js下载安装它。
要测试你的机器上是否正确安装了 Node.js 和 npm,你可以输入
node --version
npm --version要安装vue/cli,请在终端或命令提示符下键入以下命令(注意:在 Windows 中使用管理员打开 cmd。对于 Mac/Linux,请在以下命令之前使用sudo授予权限):
npm install -g @vue/cli
这可能需要几分钟才能安装。您现在可以通过键入以下内容来创建新的 Vue.js 应用程序:
vue create vue-frontend
其中vue-frontend是应用程序的文件夹名称。
让我们通过导航到新文件夹并键入 npm run serve 来启动网络服务器并在浏览器中打开应用程序来快速运行我们的 Vue 应用程序:
cd vue-frontend
npm run serve
2.在VS Code中安装Vetur扩展
让我们在 VS Code 中安装 Vetur扩展,该扩展为 VS Code 提供 Vue.js 语言功能(语法高亮、智能感知、片段、格式)。3. Vue App 中添加 Bootstrap
转到终端并导航到项目的文件夹,然后运行以下命令:
npm install bootstrap —save
npm install --save @popperjs/core
安装引导程序包后,您需要将其导入到您的 Vue 应用程序入口文件main.js中。
import App from './App.vue'
import 'bootstrap'
import 'bootstrap/dist/css/bootstrap.min.css'


import { createApp } from 'vue'


createApp(App).mount('#app')
4.Vue服务类——REST API调用
对于我们的 API 调用,我们将使用 Axios。下面是安装 Axios的 npm 命令。
npm add axios
让我们在src文件夹中创建一个 services文件夹。在services文件夹中, 使用以下代码 创建一个EmployeeService.js类,以通过 Axios 进行 HTTP REST 调用。
import axios from 'axios';

const EMPLOYEE_API_BASE_URL = 'http://localhost:8080/api/employees';

class EmployeeService{

    getEmployees(){
        return axios.get(EMPLOYEE_API_BASE_URL);
    }
}

export default new EmployeeService();
请注意,我们的后端 Employee 端点位于 http://localhost:8080/api/employees。
确保创建 EmployeeService 类的对象,将其导出为:
export default new EmployeeService();5.创建Vue组件-src/components/Employees.vue
让我们在src文件夹中创建一个components文件夹,并使用以下代码创建一个 Employees.vue 文件。
<template>
    <div class = "container">

            <h1 class = "text-center"> Employees List</h1>

            <table class = "table table-striped">
                <thead>
                    <tr>
                        <th> Employee Id</th>
                        <th> Employee First Name</th>
                        <th> Employee Last</th>
                        <th> Employee Email</th>
                    </tr>

                </thead>
                <tbody>
                    <tr v-for="employee in employees" v-bind:key="employee.id">
                        <td> {{employee.id }}</td>
                        <td> {{employee.firstName }}</td>
                        <td> {{employee.lastName}}</td>
                        <td> {{employee.email}}</td>
                    </tr>
                </tbody>
            </table>
        </div>
</template>

<script>

import EmployeeService from '../services/EmployeeService';

export default {
    name: 'Employees',
    data(){
        return {
            employees: []
        }
    },
    methods: {
        getEmployees(){
            EmployeeService.getEmployees().then((response) => {
                this.employees = response.data;
            });
        }
    },
    created() {
        this.getEmployees();
    }
}

</script>关于 Vue,你首先需要理解的是组件的概念。Vue 组件由模板、脚本和样式组成。
- 模板只不过是带有 Vue 指令的 HTML 模板
- 脚本是为 Vue 模块编写的 JavaScript 代码
- style是 Vue 模块的 CSS
created() {
        this.getEmployees();
}methods: {
getEmployees(){
            EmployeeService.getEmployees().then((response) => {
                this.employees = response.data;
            });
}
},
EmployeeService.getEmployees().then - 这将调用 REST API。您可以在 then 方法中定义如何处理响应:
EmployeeService.getEmployees().then((response) => {
this.employees = response.data;
});
6. 应用组件 - src/App.vue
让我们更新App.vue以显示员工组件。<template>
<div id="app">
<Employees />
</div>
</template>
<script>
import Employees from './components/Employees.vue'
export default {
name: 'App',
components: {
Employees
}
}
</script>
<style>
#app {
font-family: Avenir, Helvetica, Arial, sans-serif;
-webkit-font-smoothing: antialiased;
-moz-osx-font-smoothing: grayscale;
text-align: center;
color: #2c3e50;
margin-top: 60px;
}
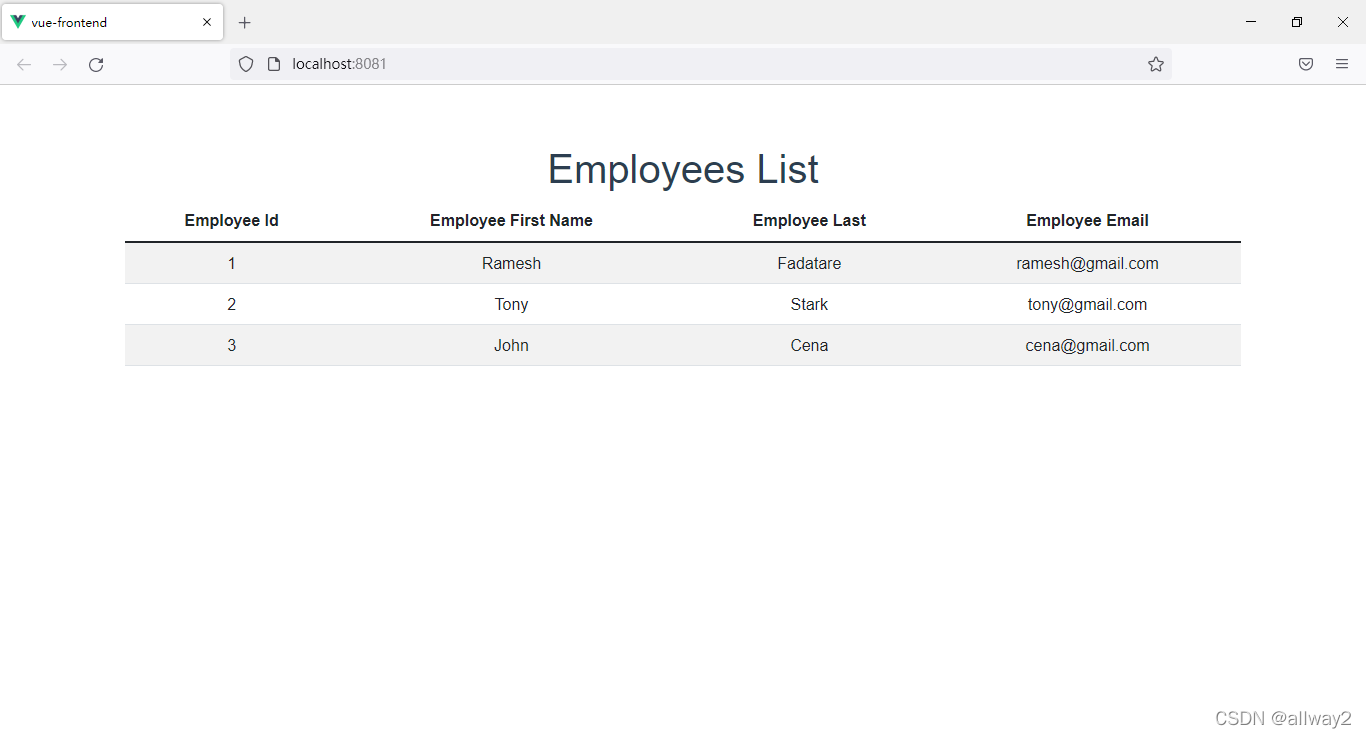
</style>7. 运行 Vue 应用程序
打开终端并移动到项目文件夹并键入以下命令以运行 Vue 应用程序:
npm run serve
在开发模式下运行应用程序。打开 http://localhost: 8081 在浏览器中查看。


 1114
1114

 被折叠的 条评论
为什么被折叠?
被折叠的 条评论
为什么被折叠?
 到【灌水乐园】发言


