


在这个 Spring Boot 教程中,我们将指导您如何使用 Netbeans 构建 MVC Java Web 应用程序(我们使用的是 Apache Netbeans 11.1)。自版本 9 起,Apache 继续开发 Netbeans IDE。您也可以使用 Eclipse、Intellij 或 JDeveloper。通过使用 Spring Boot,构建 Java Web 应用程序实际上比使用 Maven 或 Gradle 手动创建 Java 项目要容易一些。特别是当我们使用 Spring Initialzr 时,它将帮助您创建一组具有受支持依赖项的应用程序包。
目录:
- 步骤 #1:生成 Spring Boot Java Web 应用程序
- 步骤 #2:创建 Java 模型或实体类
- 步骤 #3:创建 Java 存储库接口
- 步骤#4:创建 Spring MVC 控制器
- 步骤 #5:创建 Spring MVC 视图
- 第 6 步:运行 Spring Boot Java Web 应用程序
正如您在上面的目录中看到的那样,构建 MVC Java Web 应用程序需要几个步骤。从创建 Spring Boot 项目、Java 模型、Java 存储库、Java 控制器和 Java 视图开始。此 MVC Java Web 应用程序还使用数据库,我们将使用 H2 In-Memory 数据库或 HSQLDB。对于视图,我们将使用 Thymeleaf 和 Bootstrap。因此,本教程需要以下工具、框架和库:
- Java Development Kit (JDK) 8
- Gradle
- Spring Boot
- Spring MVC
- Spring Data JPA
- H2 Database
- Thymeleaf
- Webjars Bootstrap
- Spring Initializer
- Netbeans
- Terminal or cmd
我们假设你必须在你的机器上安装 Netbeans、JDK 8 和 Gradle。所以,我们只需要生成一个新的 Spring Boot Gradle Java Web App。
步骤 #1:生成 Spring Boot Java Web 应用程序
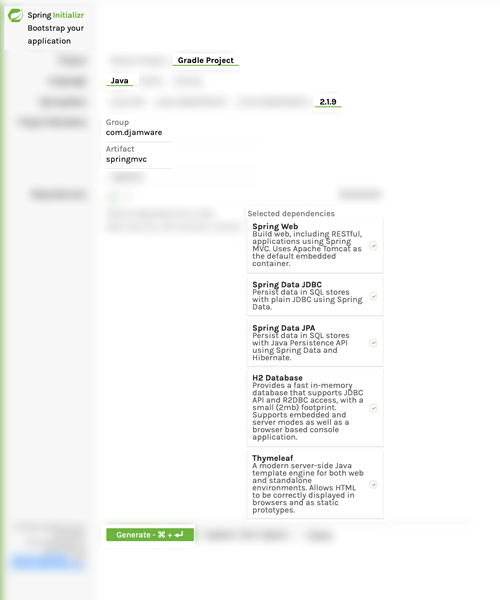
我们将使用 Spring Initializer 创建一个新的 Spring Boot Gradle 项目。Spring Initializr 提供了一个可扩展的 API 来生成快速启动项目,并检查用于生成项目的元数据,例如,列出可用的依赖项和版本。只需转到 Spring Initializer 基于 Web 的 Spring 项目生成器,然后填写所需的框架和库(Spring Web、H2 数据库、Thymeleaf、Spring Data JPA、Spring Data JDBC)。
填写完所有字段后,单击生成项目。它将自动下载压缩的项目。接下来,将压缩后的项目解压缩到您的 java 项目文件夹,然后从 Netbeans IDE 中打开该文件夹一个项目(使用打开项目菜单)。接下来,从 Projects 面板中展开项目名称(我们的:springmvc),然后展开 Build Scripts,您将看到 build.gradle 文件。打开该文件,您将看到此项目信息、插件、存储库和依赖项。
plugins {
    id 'org.springframework.boot' version '2.1.9.RELEASE'
    id 'io.spring.dependency-management' version '1.0.8.RELEASE'
    id 'java'
}

group = 'com.djamware'
version = '0.0.1-SNAPSHOT'
sourceCompatibility = '1.8'

repositories {
    mavenCentral()
}

dependencies {
    implementation 'org.springframework.boot:spring-boot-starter-data-jdbc'
    implementation 'org.springframework.boot:spring-boot-starter-data-jpa'
    implementation 'org.springframework.boot:spring-boot-starter-thymeleaf'
    implementation 'org.springframework.boot:spring-boot-starter-web'
    runtimeOnly 'com.h2database:h2'
    testImplementation 'org.springframework.boot:spring-boot-starter-test'
}
在依赖项正文中为 Bootstrap 和 Thymeleaf 布局方言添加此依赖项。
dependencies {
  ...
    compile 'org.webjars:bootstrap:3.3.7'
  compile 'nz.net.ultraq.thymeleaf:thymeleaf-layout-dialect:2.4.1'
    ...
}
在 Netbeans 中,右键单击项目名称,然后单击 build 以首次构建项目。
步骤 #2:创建 Java 模型或实体类
我们将为这个 Spring MVC Java Web 应用程序创建一个产品数据表。现在,我们将通过创建一个新的 Java 模型或实体来实现 Spring MVC 的术语“M”。右键单击项目名称 -> 新建 -> Java 类。类名填写为 Product,包名填写为 com.djamware.springmvc.models,其他字段保持默认,然后单击 Finish 按钮。新的 Java 类自动打开,然后将所有 Java 代码替换为 Java 实体、自动生成 ID、必填字段、构造函数以及 getter 和 setter 代码。
package com.djamware.springmvc.models;

import javax.persistence.Entity;
import javax.persistence.GeneratedValue;
import javax.persistence.GenerationType;
import javax.persistence.Id;

@Entity
public class Product {

    @Id
    @GeneratedValue(strategy = GenerationType.AUTO)
    private Long id;

    private String prodName;

    private String prodDesc;

    private String prodImage;

    private Double prodPrice;

    public Product() {
    }

    public Product(String prodName, String prodDesc, String prodImage, Double prodPrice) {
        this.prodName = prodName;
        this.prodDesc = prodDesc;
        this.prodImage = prodImage;
        this.prodPrice = prodPrice;
    }

    public Long getId() {
        return id;
    }

    public void setId(Long id) {
        this.id = id;
    }

    public String getProdName() {
        return prodName;
    }

    public void setProdName(String prodName) {
        this.prodName = prodName;
    }

    public String getProdDesc() {
        return prodDesc;
    }

    public void setProdDesc(String prodDesc) {
        this.prodDesc = prodDesc;
    }

    public String getProdImage() {
        return prodImage;
    }

    public void setProdImage(String prodImage) {
        this.prodImage = prodImage;
    }

    public Double getProdPrice() {
        return prodPrice;
    }

    public void setProdPrice(Double prodPrice) {
        this.prodPrice = prodPrice;
    }

}
步骤 #3:创建 Java 存储库接口
接下来,我们必须创建一个扩展产品模型的 JPA 存储库的用户存储库。右键单击项目名称 -> 新建 -> Java 接口。填写类名ProductRepository,包名com.djamware.springmvc.repositories,其他字段默认,点击Finish按钮。新创建的文件将打开,然后用这些代码替换所有 Java 代码。
package com.djamware.springmvc.repositories;

import com.djamware.springmvc.models.Product;
import org.springframework.data.jpa.repository.JpaRepository;

public interface ProductRepository extends JpaRepository<Product, Long> {

    Product findByProdName(final String prodName);

}
如您所见,ProductRepository 接口现在扩展了 Product 类型的 JpaRepository,它只有一个额外的按产品名称查找产品的查询接口。从 Spring Boot 2.1 开始,默认情况下覆盖是禁用的。因此,覆盖此 ProductRepository 将导致运行时出现此错误。
在 null 中定义的 bean 'productRepository' 无法注册。已在 null 中定义了具有该名称的 bean,并且禁用了覆盖。
要解决此问题,只需打开并编辑“Resources/application.properties”,然后添加此行以启用覆盖。
spring.main.allow-bean-definition-overriding=true
步骤#4:创建 Spring MVC 控制器
现在,是时候使用 MVC 的“C”术语了,即控制器。要在 Netbeans 上创建它,只需右键单击项目名称 -> 新建 -> Java 类。用 ProductController 填充类名,用 com.djamware.springmvc.controllers 填充包。将其他字段保留为默认值,然后单击“完成”按钮。新创建的 Java 类文件将自动打开。将所有 Java 代码替换为 @Controller、@RequestMapping、@RequestParam、ProductRepository 的这些代码以及为每个 CRUD 操作返回页面的所有必需的 CRUD 方法。
/*
 * To change this license header, choose License Headers in Project Properties.
 * To change this template file, choose Tools | Templates
 * and open the template in the editor.
 */
package com.djamware.springmvc.controllers;

import com.djamware.springmvc.models.Product;
import com.djamware.springmvc.repositories.ProductRepository;
import org.springframework.beans.factory.annotation.Autowired;
import org.springframework.stereotype.Controller;
import org.springframework.ui.Model;
import org.springframework.web.bind.annotation.PathVariable;
import org.springframework.web.bind.annotation.RequestMapping;
import org.springframework.web.bind.annotation.RequestParam;

@Controller
public class ProductController {

    @Autowired
    ProductRepository productRepository;

    @RequestMapping("/product")
    public String product(Model model) {
        model.addAttribute("products", productRepository.findAll());
        return "product";
    }

    @RequestMapping("/create")
    public String create(Model model) {
        return "create";
    }

    @RequestMapping("/save")
    public String save(@RequestParam String prodName, @RequestParam String prodDesc, @RequestParam Double prodPrice, @RequestParam String prodImage) {
        Product product = new Product();
        product.setProdName(prodName);
        product.setProdDesc(prodDesc);
        product.setProdImage(prodImage);
        product.setProdPrice(prodPrice);
        productRepository.save(product);

        return "redirect:/show/" + product.getId();
    }

    @RequestMapping("/show/{id}")
    public String show(@PathVariable Long id, Model model) {
        model.addAttribute("product", productRepository.findById(id).orElse(null));
        return "show";
    }

    @RequestMapping("/delete")
    public String delete(@RequestParam Long id) {
        Product product = productRepository.findById(id).orElse(null);
        productRepository.delete(product);

        return "redirect:/product";
    }

    @RequestMapping("/edit/{id}")
    public String edit(@PathVariable Long id, Model model) {
        model.addAttribute("product", productRepository.findById(id).orElse(null));
        return "edit";
    }

    @RequestMapping("/update")
    public String update(@RequestParam Long id, @RequestParam String prodName, @RequestParam String prodDesc, @RequestParam Double prodPrice, @RequestParam String prodImage) {
        Product product = productRepository.findById(id).orElse(null);
        product.setProdName(prodName);
        product.setProdDesc(prodDesc);
        product.setProdImage(prodImage);
        product.setProdPrice(prodPrice);
        productRepository.save(product);

        return "redirect:/show/" + product.getId();
    }

}
步骤 #5:创建 Spring MVC 视图
现在,是 MVC 模式视图的 `V` 的时候了。由于我们使用 Thymeleaf 库作为视图模板,因此我们可以为所有 HTML 页面创建相同的布局。Thymeleaf 是一个 Java XML/XHTML/HTML5 模板引擎,可以在 web(基于 servlet)和非 web 环境中工作。它更适合在基于 MVC 的 Web 应用程序的视图层提供 XHTML/HTML5,但它甚至可以在离线环境中处理任何 XML 文件。要创建布局,首先,在 `Resources/templates` 文件夹中创建一个 `default.html` 文件,然后用这些代码行添加或替换它。
<!DOCTYPE html>
<html lang="en"
      xmlns="http://www.w3.org/1999/xhtml"
      xmlns:th="http://www.thymeleaf.org"
      xmlns:layout="http://www.ultraq.net.nz/thymeleaf/layout">
    <head>
        <meta charset="UTF-8"/>
        <title>Default title for my pages</title>
        <link rel="stylesheet" href="/webjars/bootstrap/3.3.7/css/bootstrap.min.css"/>
        <link rel="stylesheet" href="/webjars/bootstrap/3.3.7/css/bootstrap-theme.min.css"/>
        <link rel="stylesheet" href="/css/style.css" />
    </head>
    <body>
        <nav class="navbar navbar-inverse navbar-fixed-top">
            <div class="container">
                <div class="navbar-header">
                    <button type="button" class="navbar-toggle collapsed" data-toggle="collapse" data-target="#navbar" aria-expanded="false" aria-controls="navbar">
                        <span class="sr-only">Toggle navigation</span>
                        <span class="icon-bar"></span>
                        <span class="icon-bar"></span>
                        <span class="icon-bar"></span>
                    </button>
                    <a class="navbar-brand" href="#">Spring MVC</a>
                </div>
                <div id="navbar" class="collapse navbar-collapse">
                    <ul class="nav navbar-nav">
                        <li class="active"><a href="/product">Home</a></li>
                    </ul>
                </div><!--/.nav-collapse -->
            </div>
        </nav>

        <div class="container">
            <div class="starter-template" layout:fragment="content"></div>
        </div><!-- /.container -->

        <script src="/webjars/jquery/1.11.1/jquery.min.js"></script>
        <script src="/webjars/bootstrap/3.3.7/js/bootstrap.min.js"></script>
    </body>
</html>
该 HTML 显示使用 Thymeleaf 布局的布局模板。要使此布局正常工作,请确保您具有先前在第一步中添加的 Thymeleaf 布局方言的其他依赖项。所有 CSS 和 Javascript 文件都放在该文件上,并为所有使用“default.html”作为布局持有者的页面调用一次。此外,我们在该文件上调用 Bootstrap 和 JQuery。接下来,我们为产品列表创建一个名为“product.html”的视图,然后用它替换该文件的所有代码。
<!DOCTYPE HTML>
<html lang="en"
      xmlns="http://www.w3.org/1999/xhtml"
      xmlns:th="http://www.thymeleaf.org"
      xmlns:layout="http://www.ultraq.net.nz/thymeleaf/layout"
      layout:decorate="default">
    <head>
        <title>Product List</title>
    </head>
    <body>
        <div layout:fragment="content" class="row">
            <div class="col-xs-8 col-md-8">
                <h3>
                    <a href="/create" class="btn btn-primary"><span class="glyphicon glyphicon-plus-sign"></span> Product</a>
                </h3>
                <h2>Product List</h2>
                <div class="table-responsive">
                    <table class="table" id="product-table">
                        <thead>
                            <tr>
                                <th>Product Name</th>
                                <th>Product Desc</th>
                                <th>Product Price</th>
                            </tr>
                        </thead>
                        <tbody>
                            <tr th:each="product : ${products}">
                                <td><a th:text="${product.prodName}" th:href="@{'/show/' + ${product.id}}"></a></td>
                                <td th:text="${product.prodDesc}"></td>
                                <td th:text="${product.prodPrice}"></td>
                            </tr>
                        </tbody>
                    </table>
                </div>
            </div>
        </div>
    </body>
</html>
接下来,在 `Resources/templates` 文件夹中创建一个名为 `create.html` 的产品表单的视图,然后用它替换所有代码。
<!DOCTYPE HTML>
<html lang="en"
      xmlns="http://www.w3.org/1999/xhtml"
      xmlns:th="http://www.thymeleaf.org"
      xmlns:layout="http://www.ultraq.net.nz/thymeleaf/layout"
      layout:decorate="default">
    <head>
        <title>Create Product</title>
    </head>
    <body>
        <div layout:fragment="content" class="row">
            <div class="col-xs-8 col-md-8">
                <h3>
                    <a href="/product" class="btn btn-lg btn-primary"><span class="glyphicon glyphicon-list"></span> Product</a>
                </h3>
                <h2>Create Product</h2>
                <form action="/save">
                    <div class="form-group">
                        <label for="email">Product Name:</label>
                        <input type="text" class="form-control" name="prodName" />
                    </div>
                    <div class="form-group">
                        <label for="email">Product Description</label>
                        <textarea class="form-control" name="prodDesc" cols="60" rows="3"></textarea>
                    </div>
                    <div class="form-group">
                        <label for="email">Product Price</label>
                        <input type="number" class="form-control" name="prodPrice" />
                    </div>
                    <div class="form-group">
                        <label for="email">Product Image URL:</label>
                        <input type="url" class="form-control" name="prodImage" />
                    </div>
                    <button type="submit" class="btn btn-success">Save</button>
                </form>
            </div>
        </div>
    </body>
</html>
接下来,在 `Resources/templates` 文件夹中创建一个名为 `show.html` 的显示产品详细信息视图,然后用此替换所有代码。
<!DOCTYPE HTML>
<html lang="en"
      xmlns="http://www.w3.org/1999/xhtml"
      xmlns:th="http://www.thymeleaf.org"
      xmlns:layout="http://www.ultraq.net.nz/thymeleaf/layout"
      layout:decorate="default">
    <head>
        <title>Show Product</title>
    </head>
    <body>
        <div layout:fragment="content" class="row">
            <div class="col-xs-8 col-md-8">
                <h3>
                    <a href="/product" class="btn btn-primary"><span class="glyphicon glyphicon-list"></span> Product</a>
                </h3>
                <h2 th:text="${product.prodName}"></h2>
                <h2><img th:src="${product.prodImage}" width="200" /></h2>
                <dl class="list">
                    <dt>Product Description</dt>
                    <dd th:text="${product.prodDesc}"></dd>
                    <dt>Product Description</dt>
                    <dd th:text="${product.prodPrice}"></dd>
                </dl>
                <form action="/delete">
                    <input type="hidden" name="id" th:value="${product.id}" />
                    <h2><input type="submit" class="btn btn-danger" value="Delete" onclick="return confirm('Are you sure?');" />
                        <a th:href="@{'/edit/' + ${product.id}}" class="btn btn-warning">Edit</a></h2>
                </form>
            </div>
        </div>
    </body>
</html>
接下来,在 `Resources/templates` 文件夹中创建一个名为 `edit.html` 的编辑产品视图,然后用此替换所有代码。
<!DOCTYPE HTML>
<html lang="en"
      xmlns="http://www.w3.org/1999/xhtml"
      xmlns:th="http://www.thymeleaf.org"
      xmlns:layout="http://www.ultraq.net.nz/thymeleaf/layout"
      layout:decorate="default">
    <head>
        <title>Edit Product</title>
    </head>
    <body>
        <div layout:fragment="content" class="row">
            <div class="col-xs-8 col-md-8">
                <h3>
                    <a href="/product" class="btn btn-lg btn-primary"><span class="glyphicon glyphicon-list"></span> Product</a>
                </h3>
                <h2>Edit Product</h2>
                <form action="/update">
                    <div class="form-group">
                        <label for="email">Product Name:</label>
                        <input type="text" class="form-control" name="prodName" th:value="${product.prodName}" />
                    </div>
                    <div class="form-group">
                        <label for="email">Product Description</label>
                        <textarea class="form-control" name="prodDesc" cols="60" rows="3" th:text="${product.prodDesc}"></textarea>
                    </div>
                    <div class="form-group">
                        <label for="email">Product Price</label>
                        <input type="number" class="form-control" name="prodPrice" th:value="${product.prodPrice}" />
                    </div>
                    <div class="form-group">
                        <label for="email">Product Image URL:</label>
                        <input type="url" class="form-control" name="prodImage" th:value="${product.prodImage}" />
                    </div>
                    <input type="hidden" name="id" th:value="${product.id}" />
                    <button type="submit" class="btn btn-success">Save</button>
                </form>
            </div>
        </div>
    </body>
</html>
接下来,打开并编辑静态 HTML 文件“Resources/static/index.html”,然后用它替换所有代码。
<!DOCTYPE HTML>
<html>
<head>
<title>Spring MVC Java Web App</title>
</head>
<body>
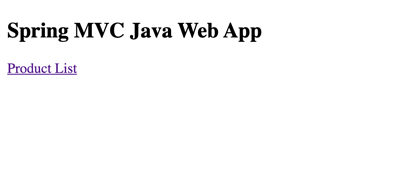
<h2>Spring MVC Java Web App</h2>
<p><a href="/product">Product List</a></p>
</body>
</html>这个 `index.html` 是 Web 应用程序运行后在浏览器上显示的第一个页面。接下来,通过在静态文件夹中创建一个新的 CSS 文件夹来添加一点样式,然后添加一个文件 `style.css`。将这些 CSS 代码行添加到该 CSS 文件中。
body {
  padding-top: 50px;
}
.starter-template {
  padding: 40px 15px;
  text-align: center;
}
第 6 步:运行 Spring Boot Java Web 应用程序
要在 Netbeans IDE 中运行 Spring Boot 应用程序,只需单击工具栏中的播放按钮或右键单击项目面板中的项目名称,然后单击运行。这与从终端输入此命令相同。
./gradlew --configure-on-demand -x check bootRun完整的 Spring Boot MVC Java Web 应用程序如下所示。
它是一种使用 Spring Boot、Data 和 MVC 只需 5 个步骤即可快速创建 Java Web 应用程序的方法。您可以从我们的GitHub获取完整的工作源代码。


 1138
1138


 被折叠的 条评论
为什么被折叠?
被折叠的 条评论
为什么被折叠?
 到【灌水乐园】发言


