


每个 Web 应用程序都需要受到保护。根据您的要求和可行性,可能有不同的解决方案可供选择。有些人可能会选择基本的基于表单的身份验证,有些人可能会一直使用 Oauth2。在本文中,我们将了解如何使用 SSL 实现 2 Way Authentication。
在 2 路身份验证或相互身份验证中,服务器和客户端进行数字握手,其中服务器需要出示证书以向客户端验证自己,反之亦然。一旦此握手成功,则仅允许进一步通信。
我们将逐步了解如何生成自签名证书并将其配置到我们的应用程序和 tomcat 服务器。该图像将使您简要了解我上面的意思。 本示例中使用的软件

- Java 1.8
- Spring Boot 1.5.2.RELEASE
- 雄猫 8.5
我们将使用 Java Key Store 实用程序来生成和存储我们的自签名证书。
为服务器和客户端创建自签名证书
当我们使用 Keytool 时,请在您的环境中检查此命令或实用程序是否可用。
在您的 shell 或命令提示符下使用以下命令为服务器创建一个 JKS 文件。请确保根据您的需要更改公司、位置等信息
|
1
2
3
4
|
keytool -genkey -alias MyServer -keyalg RSA -validity 1825 -keystore "MyServer.jks"
-storetype JKS -dname
"CN=myserver.com,OU=My Company Name,O=My Organization,L=My Location,ST=My State,
C=My Country Short Code" -keypass password -storepass password
|
现在我们需要一个可以作为公共证书分发给客户端的证书文件。运行以下命令以提取该证书。它会在创建 JKS 时询问您在上面提供的密码
|
1
|
keytool -exportcert -alias MyServer -keystore MyServer.jks -file MyServer.cer
|
客户端 JKS 文件和客户端公共证书需要遵循类似的步骤
|
1
2
3
|
keytool -genkey -alias MyClient -keyalg RSA -validity 1825 -keystore MyClient.jks -storetype JKS
-dname "CN=client.com,OU=Client Company,O=Client,L=CLient Location,ST=Client State,C=Client Country Short Code"
-keypass password -storepass password
|
对于客户证书
|
1
|
keytool -exportcert -alias MyClient -keystore MyClient.jks -file MyClientPublic.cer
|
现在我们有了所有的密钥库和公共证书。为了使 2 Way Authentication 起作用,我们需要确保服务器识别客户端的公共证书并且客户端知道服务器证书。
|
1
2
3
4
5
|
--Add Server certificate to client truststore
keytool -importcert -alias MyServer -keystore MyClient.jks -file MyServer.cer
--Add client certificate to server truststore
keytool -importcert -alias MyClient -keystore MyServer.jks -file MyClientPublic.cer
|
至此,我们已经准备好所有的 JKS 和证书。我们将这些配置到我们的 Tomcat 8.5
为 SSL 配置 Tomcat
由于我们需要相互身份验证,我们需要配置 tomcat 以向所有想要通信的客户端请求证书。这可以通过添加或更新 tomcats server.xml 中的现有连接器来完成。请确保您保留现有设置和文件的备份。
将 MyServer.jks 复制到适当的目录并配置连接器,如下所示
|
1
2
3
4
5
6
7
8
9
10
11
12
|
<Connector port="8443"
clientAuth="true"
protocol="org.apache.coyote.http11.Http11NioProtocol"
SSLEnabled="true"
maxThreads="150"
scheme="https"
secure="true"
keystoreFile="C:\core-jks\MyServer.jks"
keystorePass="password"
truststoreFile="C:\core-jks\MyServer.jks"
truststorePass="password"
sslProtocol="TLSv1.2" />
|
重新启动 Tomcat,使上述更改生效。
为 2 路身份验证配置服务器和客户端应用程序
服务器应用
对于服务器应用程序,我们将只有一个简单的 Rest Controller,它可以在 /hello 资源中使用。
|
1
2
3
4
5
6
7
|
@RestController
public class TestController {
@RequestMapping("/hello")
public String hello() {
return "Hello World!! You are seeing this only because I TRUST YOU!!!";
}
}
|
服务器应用程序将托管在我们在上面配置的 tomcat 上。
客户端应用
客户端应用程序也是一个简单的 Spring Boot 应用程序,它对上面托管的服务器资源进行休息调用。
|
1
2
3
4
5
6
7
8
9
10
11
12
13
|
@Component
public class HttpClient implements CommandLineRunner {
@Autowired
private RestTemplate template;
@Override
public void run(String... args) throws Exception {
ResponseEntity<String> response = template.getForEntity("https://localhost:8443/ssl-server-0.0.1-SNAPSHOT/hello",
String.class);
System.out.println(response.getBody());
}
}
|
除此之外,我们需要将客户端 JKS 指定为系统属性。这可以如下完成
|
1
2
3
4
5
6
7
8
9
10
11
12
13
14
15
16
17
18
19
20
21
22
23
24
25
26
27
28
29
30
31
32
33
34
35
36
|
@SpringBootApplication
public class SslClientApplication {
static
{
System.setProperty("javax.net.debug", "all");
System.setProperty("jdk.tls.client.protocols", "TLSv1.2");
System.setProperty("https.protocols", "TLSv1.2");
System.setProperty("javax.net.ssl.trustStore", "c://core-jks//MyClient.jks");
System.setProperty("javax.net.ssl.trustStorePassword", "password");
System.setProperty("javax.net.ssl.keyStore", "c://core-jks//MyClient.jks");
System.setProperty("javax.net.ssl.keyStorePassword", "password");
javax.net.ssl.HttpsURLConnection.setDefaultHostnameVerifier(
new javax.net.ssl.HostnameVerifier() {
public boolean verify(String hostname,
javax.net.ssl.SSLSession sslSession) {
if (hostname.equals("localhost")) {
return true;
}
return false;
}
});
}
@Bean
public RestTemplate template() throws Exception{
RestTemplate template = new RestTemplate();
return template;
}
public static void main(String[] args) {
SpringApplication.run(SslClientApplication.class, args);
}
}
|
你可以看到我已经为 SSL 指定了所有的调试。因此,您将看到服务器和客户端如何进行数字握手。为了加载服务器资源,我添加了一个简单的 Spring Boot 命令行运行器。
|
1
2
3
4
5
6
7
8
9
10
11
12
13
|
@Component
public class HttpClient implements CommandLineRunner {
@Autowired
private RestTemplate template;
@Override
public void run(String... args) throws Exception {
ResponseEntity<String> response = template.getForEntity("https://localhost:8443/ssl-server-0.0.1-SNAPSHOT/hello",
String.class);
System.out.println(response.getBody());
}
}
|
结果
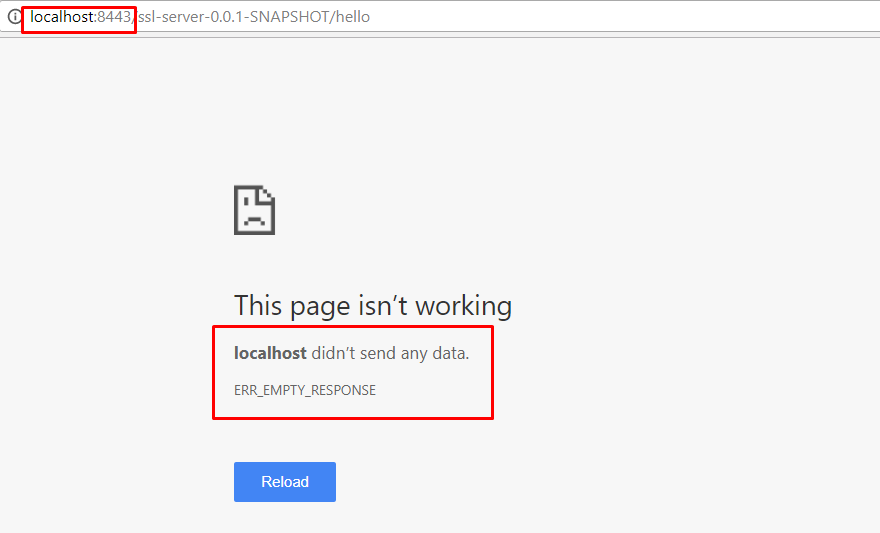
关于结果,如果您尝试在浏览器中加载 URL,它将失败。
另一方面,如果我在传递证书详细信息的地方运行客户端,我会得到正确的响应。

你可以看到我得到了正确的回应。只有在数字握手成功后才会发送响应。服务器和客户端交换将在控制台上可见的信息。
结论
您已使用 SSL 证书成功实施 2 路身份验证。如果您有任何问题,请随时与我联系。您可以从我们下面提到的存储库中下载代码。


 969
969


 被折叠的 条评论
为什么被折叠?
被折叠的 条评论
为什么被折叠?
 到【灌水乐园】发言


