


本页将介绍 Spring Security 密码编码示例。在 Spring Security 中,PasswordEncoder实现了该接口以提供不同类型的密码编码器,例如Argon2PasswordEncoder等BCryptPasswordEncoder。在 Spring Security 5.0 中,默认密码编码器是DelegatingPasswordEncoder。
要在 中配置密码编码器DaoAuthenticationProvider,它提供了setPasswordEncoder方法。
对于 LDAP 身份验证提供程序,我们可以使用passwordEncoder以下内部类的方法。
LdapAuthenticationProviderConfigurer.PasswordCompareConfigurer 在 XML 配置中,要使用密码编码器,请为密码编码器创建一个 bean,并使用<password-encoder>元素内的<authentication-provider>元素对其进行分配。
在此页面上,我们将通过示例讨论使用不同类型的密码编码器。
内容
使用的技术
找出我们示例中使用的技术。
1.Java 11
2.Spring 5.2.1.RELEASE 3.Spring
Boot 2.2.1.RELEASE 4.Maven
3.5.2
密码编码器
Spring Security 提供PasswordEncoder的接口具有不同的密码编码实现。有以下PasswordEncoder方法。
1.
String encode(CharSequence rawPassword) 编码原始密码。
2.
boolean matches(CharSequence rawPassword, String encodedPassword) 验证编码的密码。
3.
default boolean upgradeEncoding(String encodedPassword) 检查编码的密码是否应该再次编码。
找到PasswordEncoder接口的实现。
1. Argon2PasswordEncoder, 2. BCryptPasswordEncoder
3. DelegatingPasswordEncoder, 4. LdapShaPasswordEncoder
5. Md4PasswordEncoder, 6. MessageDigestPasswordEncoder
7. NoOpPasswordEncoder, 8. Pbkdf2PasswordEncoder
9. SCryptPasswordEncoder, 10. StandardPasswordEncoder
找到使用不同密码编码器显示编码和匹配密码的测试类。
PasswordEncoderTest.java
package com.concretepage;
import static org.junit.jupiter.api.Assertions.assertTrue;
import org.junit.jupiter.api.Test;
import org.junit.jupiter.api.extension.ExtendWith;
import org.springframework.security.crypto.argon2.Argon2PasswordEncoder;
import org.springframework.security.crypto.bcrypt.BCryptPasswordEncoder;
import org.springframework.security.crypto.factory.PasswordEncoderFactories;
import org.springframework.security.crypto.password.PasswordEncoder;
import org.springframework.security.crypto.password.Pbkdf2PasswordEncoder;
import org.springframework.security.crypto.scrypt.SCryptPasswordEncoder;
import org.springframework.test.context.ContextConfiguration;
import org.springframework.test.context.junit.jupiter.SpringExtension;
@ExtendWith(SpringExtension.class)
@ContextConfiguration
public class PasswordEncoderTest {
@Test
public void testBCrypt() {
BCryptPasswordEncoder encoder = new BCryptPasswordEncoder();
String result = encoder.encode("ram123");
assertTrue(encoder.matches("ram123", result));
}
@Test
public void testArgon2() {
Argon2PasswordEncoder encoder = new Argon2PasswordEncoder();
String result = encoder.encode("ram123");
assertTrue(encoder.matches("ram123", result));
}
@Test
public void testPbkdf2() {
Pbkdf2PasswordEncoder encoder = new Pbkdf2PasswordEncoder();
String result = encoder.encode("ram123");
assertTrue(encoder.matches("ram123", result));
}
@Test
public void testSCrypt() {
SCryptPasswordEncoder encoder = new SCryptPasswordEncoder();
String result = encoder.encode("ram123");
assertTrue(encoder.matches("ram123", result));
}
@Test
public void testDelegatingPasswordEncoder() {
PasswordEncoder encoder = PasswordEncoderFactories.createDelegatingPasswordEncoder();
String result = encoder.encode("ram123");
System.out.println(result);
assertTrue(encoder.matches("ram123", result));
}
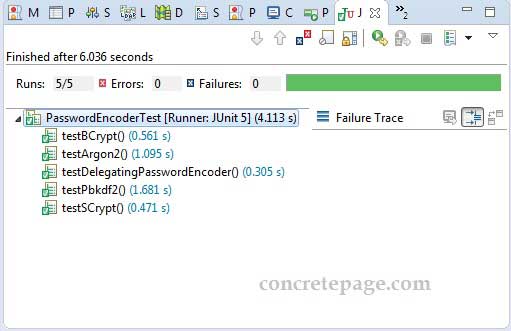
} 找到测试结果的打印屏幕。
BCryptPasswordEncoder
这BCryptPasswordEncoder是使用BCrypt强哈希函数的PasswordEncoder接口的实现。要实例化,我们可以选择传递BCrypt版本和强度。强度值越大,对密码进行哈希处理的工作就越多。我们使用如下 编码和匹配密码。BCryptPasswordEncoderBCryptPasswordEncoder
BCryptPasswordEncoder encoder = new BCryptPasswordEncoder();
String result = encoder.encode("ram123");
assertTrue(encoder.matches("ram123", result));
在我们的 Spring Security Java 配置中,要启用特定的密码编码器,只需为该密码编码器创建一个 bean。
@Configuration
@EnableWebSecurity
public class SecurityConfig extends WebSecurityConfigurerAdapter {
	@Override
	protected void configure(AuthenticationManagerBuilder auth) throws Exception {
		auth.inMemoryAuthentication()
		.withUser("lakhan")
		.password("$2a$10$q5pHs1fyVDbQSnBu3Il/meAONlMYFT1RhGlT2OC6IXX5.bp2JBZU6")
		.roles("USER");
	}
	@Bean
	public PasswordEncoder passwordEncoder() {
		BCryptPasswordEncoder passwordEncoder = new BCryptPasswordEncoder();
		return passwordEncoder;
	}
        ------
}
在 XML 配置中找到要创建的 bean,并使用<password-encoder>element 分配它。
<authentication-manager>
	<authentication-provider>
		<password-encoder ref="passwordEncoder"/>
		<user-service>
			<user name="lakhan"
				 password="$2a$10$q5pHs1fyVDbQSnBu3Il/meAONlMYFT1RhGlT2OC6IXX5.bp2JBZU6"
				 authorities="ROLE_USER" />
		</user-service>
	</authentication-provider>
</authentication-manager>

<beans:bean name="passwordEncoder"
	  class="org.springframework.security.crypto.bcrypt.BCryptPasswordEncoder"/>
Argon2PasswordEncoder
这Argon2PasswordEncoder是使用Argon2散列函数的PasswordEncoder接口的实现。要实例化,我们可以选择传递盐的长度、生成的哈希长度、CPU 成本参数、内存成本参数和并行化参数。要使用,我们需要解决 Bouncy castle 依赖。 Argon2PasswordEncoderArgon2PasswordEncoder
<dependency>
	<groupId>org.bouncycastle</groupId>
	<artifactId>bcprov-jdk15on</artifactId>
	<version>1.64</version>
</dependency> Argon2PasswordEncoder我们可以使用如下 编码和匹配密码。
Argon2PasswordEncoder encoder = new Argon2PasswordEncoder();
String result = encoder.encode("ram123");
assertTrue(encoder.matches("ram123", result));
在 Spring Security Java 配置中,要启用Argon2PasswordEncoder,只需创建它的 bean。
@Configuration
@EnableWebSecurity
public class SecurityConfig extends WebSecurityConfigurerAdapter {
	@Override
	protected void configure(AuthenticationManagerBuilder auth) throws Exception {
		auth.inMemoryAuthentication()
		.withUser("ram")
		.password("$argon2id$v=19$m=4096,t=3,p=1$JudTbnHxqeGVs608XXVcTA$WB7CJvel59tcXBbsXhyq60et7wutd1DYSFufFX9uhtM")
		.roles("USER");
	}
	@Bean
	public PasswordEncoder passwordEncoder() {
		Argon2PasswordEncoder passwordEncoder = new Argon2PasswordEncoder();
		return passwordEncoder;
	}
        ------
}
在 XML 配置中找到要创建的 bean,并使用<password-encoder>element 分配它。
<beans:bean name="passwordEncoder"
          class="org.springframework.security.crypto.argon2.Argon2PasswordEncoder"/>
Pbkdf2PasswordEncoder
这是使用PBKDF2散列函数Pbkdf2PasswordEncoder的接口的实现。要实例化,我们可以选择传递要包含在密码哈希、迭代次数和哈希大小中的秘密值。使用 查找对密码进行编码和匹配的示例。 PasswordEncoderPbkdf2PasswordEncoderPbkdf2PasswordEncoder
Pbkdf2PasswordEncoder encoder = new Pbkdf2PasswordEncoder();
String result = encoder.encode("ram123");
assertTrue(encoder.matches("ram123", result)); 要Pbkdf2PasswordEncoder在 Spring Security Java 配置中使用,只需创建它的 bean。
@Configuration
@EnableWebSecurity
public class SecurityConfig extends WebSecurityConfigurerAdapter {
	@Override
	protected void configure(AuthenticationManagerBuilder auth) throws Exception {
		auth.inMemoryAuthentication()
		.withUser("bharat")
		.password("77a366e9ba2d6830b64d1b86eb7462996f3102d2b76562de3e56e5f13543a02486e1ee553cef18de")
		.roles("USER");
	}
	@Bean
	public PasswordEncoder passwordEncoder() {
		Pbkdf2PasswordEncoder passwordEncoder = new Pbkdf2PasswordEncoder();
		return passwordEncoder;
	}
        ------
}
在 XML 配置中找到要创建的 bean,并使用<password-encoder>element 分配它。
<beans:bean name="passwordEncoder"
          class="org.springframework.security.crypto.password.Pbkdf2PasswordEncoder"/>
SCryptPasswordEncoder
这SCryptPasswordEncoder是PasswordEncoder使用SCrypt散列函数的接口的实现。要实例化SCryptPasswordEncoder,我们可以选择传递 CPU 成本、内存成本、并行化参数、算法的密钥长度和盐长度。要使用SCryptPasswordEncoder,我们需要解决 Bouncy castle 依赖。使用 查找对密码进行编码和匹配的示例SCryptPasswordEncoder。
SCryptPasswordEncoder encoder = new SCryptPasswordEncoder();
String result = encoder.encode("ram123");
assertTrue(encoder.matches("ram123", result)); 要SCryptPasswordEncoder在 Spring Security Java 配置中使用,只需创建它的 bean。
@Configuration
@EnableWebSecurity
public class SecurityConfig extends WebSecurityConfigurerAdapter {
	@Override
	protected void configure(AuthenticationManagerBuilder auth) throws Exception {
		auth.inMemoryAuthentication()
		.withUser("shatru")
		.password("$e0801$VoXA+5ot9fXbuLaOj5izqgd3JrOtBjvsqpbwssgHIA3omPpNB8t+FYtnsVpxx5DJjAvFtrA/klDstepB320TSw==$CLsjnAxzzNof2jkDrSBeoCTvuxO8qi67FRDY0vrCZwY=")
		.roles("USER");
	}
	@Bean
	public PasswordEncoder passwordEncoder() {
		SCryptPasswordEncoder passwordEncoder = new SCryptPasswordEncoder();
		return passwordEncoder;
	}
        ------
}
在 XML 配置中找到要创建的 bean,并使用<password-encoder>element 分配它。
<beans:bean name="passwordEncoder"
          class="org.springframework.security.crypto.scrypt.SCryptPasswordEncoder"/>
委托密码编码器
这DelegatingPasswordEncoder是 Spring Security 5.0 中的默认密码编码器。基于前缀标识符的DelegatingPasswordEncoder委托给另一个。PasswordEncoder例如,
1。
{noop}ram123 将DelegatingPasswordEncoder将此密码委托给NoOpPasswordEncoder.
2.
{bcrypt}$2a$10$q5pHs1fyVDbQSnBu3Il/meAONlMYFT1RhGlT2OC6IXX5.bp2JBZU6 将DelegatingPasswordEncoder将此密码委托给BCryptPasswordEncoder.
3.
{pbkdf2}77a366e9ba2d6830b64d1b86eb7462996f3102d2b76562de3e56e5f13543a02486e1ee553cef18de 将DelegatingPasswordEncoder将此密码委托给Pbkdf2PasswordEncoder.
找到一个完整的例子。
SecurityConfig.java
package com.concretepage;
import org.springframework.context.annotation.Configuration;
import org.springframework.security.config.annotation.authentication.builders.AuthenticationManagerBuilder;
import org.springframework.security.config.annotation.web.builders.HttpSecurity;
import org.springframework.security.config.annotation.web.configuration.EnableWebSecurity;
import org.springframework.security.config.annotation.web.configuration.WebSecurityConfigurerAdapter;

@Configuration
@EnableWebSecurity
public class SecurityConfig extends WebSecurityConfigurerAdapter {
	@Override
	protected void configure(HttpSecurity http) throws Exception {
		http.authorizeRequests()
		   .antMatchers("/**").access("hasRole('USER')")
		   .and().formLogin();
	}

	@Override
	protected void configure(AuthenticationManagerBuilder auth) throws Exception {
		auth.inMemoryAuthentication().withUser("ram")
		.password("{noop}ram123") //ram123
		.roles("USER")
		.and()
		.withUser("lakhan")
		.password("{bcrypt}$2a$10$q5pHs1fyVDbQSnBu3Il/meAONlMYFT1RhGlT2OC6IXX5.bp2JBZU6") //lakhan123
		.roles("USER");
	}
}
找到等效的 XML 配置。
security-config.xml
<?xml version="1.0" encoding="UTF-8"?>
<beans:beans xmlns="http://www.springframework.org/schema/security"
	xmlns:beans="http://www.springframework.org/schema/beans"
	xmlns:xsi="http://www.w3.org/2001/XMLSchema-instance"
	xsi:schemaLocation="http://www.springframework.org/schema/beans
	http://www.springframework.org/schema/beans/spring-beans.xsd
	http://www.springframework.org/schema/security
	http://www.springframework.org/schema/security/spring-security.xsd">
	<http>
		<intercept-url  pattern="/**" access="hasRole('USER')" />
		<form-login />
	</http>
	<authentication-manager>
		<authentication-provider>
		    <user-service>
		        <user name="ram"
		             password="{noop}ram123"
		             authorities="ROLE_USER" />
		        <user name="lakhan"
		             password="{bcrypt}$2a$10$q5pHs1fyVDbQSnBu3Il/meAONlMYFT1RhGlT2OC6IXX5.bp2JBZU6"
		             authorities="ROLE_USER" />
		    </user-service>
		</authentication-provider>
	</authentication-manager>
</beans:beans>
pom.xml
<parent>
	<groupId>org.springframework.boot</groupId>
	<artifactId>spring-boot-starter-parent</artifactId>
	<version>2.2.1.RELEASE</version>
	<relativePath />
</parent>
<properties>
	<context.path>spring-app</context.path>
	<java.version>11</java.version>
</properties>
<dependencies>
	<dependency>
		<groupId>org.springframework.boot</groupId>
		<artifactId>spring-boot-starter-web</artifactId>
	</dependency>
	<dependency>
		<groupId>org.springframework.boot</groupId>
		<artifactId>spring-boot-starter-security</artifactId>
	</dependency>
	<dependency>
		<groupId>org.springframework.boot</groupId>
		<artifactId>spring-boot-starter-test</artifactId>
	</dependency>
	<dependency>
		<groupId>org.junit.jupiter</groupId>
		<artifactId>junit-jupiter-api</artifactId>
		<version>5.3.2</version>
		<scope>test</scope>
	</dependency>
	<dependency>
		<groupId>org.junit.jupiter</groupId>
		<artifactId>junit-jupiter-engine</artifactId>
		<version>5.3.2</version>
		<scope>test</scope>
	</dependency>
	<dependency>
		<groupId>org.junit.jupiter</groupId>
		<artifactId>junit-jupiter-params</artifactId>
		<version>5.3.2</version>
		<scope>test</scope>
	</dependency>
	<dependency>
		<groupId>org.junit.platform</groupId>
		<artifactId>junit-platform-launcher</artifactId>
		<version>1.3.2</version>
		<scope>test</scope>
	</dependency>
	<dependency>
		<groupId>org.bouncycastle</groupId>
		<artifactId>bcprov-jdk15on</artifactId>
		<version>1.64</version>
	</dependency>
</dependencies>
AppController.java
package com.concretepage;
import org.springframework.security.core.Authentication;
import org.springframework.stereotype.Controller;
import org.springframework.web.bind.annotation.GetMapping;
import org.springframework.web.bind.annotation.ResponseBody;

@Controller
public class AppController {
	@GetMapping("/app")
	public @ResponseBody String helloUser(Authentication authentication) {
		return "Welcome! " + authentication.getName();
	}
}
Main.java
package com.concretepage;
import org.springframework.boot.SpringApplication;
import org.springframework.boot.autoconfigure.SpringBootApplication;

@SpringBootApplication
public class Main {
	public static void main(String[] args) {
		SpringApplication.run(Main.class, args);
	}
}
输出
下载项目并使用命令提示符从项目的根文件夹运行以下命令。
mvn spring-boot:run 访问网址。
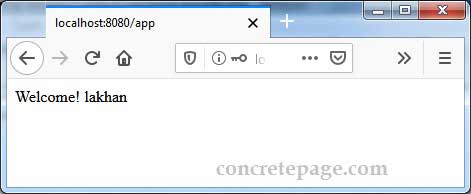
http://localhost:8080/app 输入凭据lakhan/lakhan123
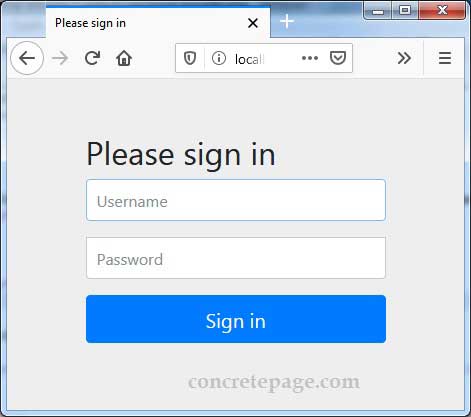
我们将看到如下欢迎页面。


 4438
4438


 被折叠的 条评论
为什么被折叠?
被折叠的 条评论
为什么被折叠?
 到【灌水乐园】发言


