


ViewPager + Fragment + TabPageIndicator 实现标签栏主界面。
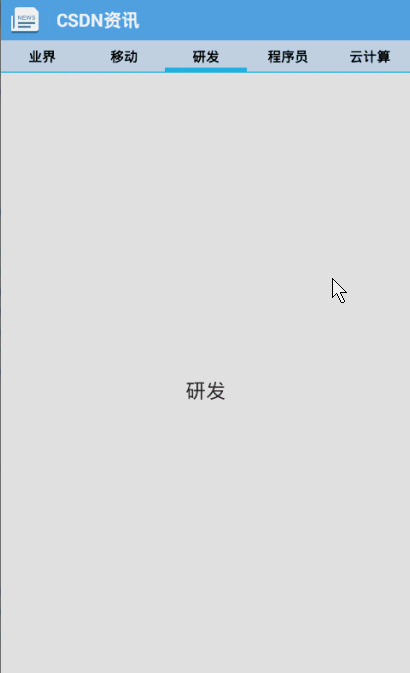
效果图:
1、头部的布局文件,这个很简单:
- <?xml version="1.0" encoding="utf-8"?>
- <LinearLayout xmlns:android="http://schemas.android.com/apk/res/android"
- android:layout_width="match_parent"
- android:layout_height="wrap_content"
- android:background="@color/light_blue"
- android:orientation="horizontal" >
- <ImageView
- android:layout_width="wrap_content"
- android:layout_height="wrap_content"
- android:layout_gravity="center_vertical"
- android:layout_marginLeft="8dp"
- android:layout_marginRight="4dp"
- android:src="@drawable/biz_navigation_tab_news_pressed" />
- <ImageView
- android:layout_width="wrap_content"
- android:layout_height="wrap_content"
- android:layout_gravity="center_vertical"
- android:layout_marginLeft="4dp"
- android:layout_marginRight="4dp"
- android:src="@drawable/base_action_bar_back_divider" />
- <TextView
- android:id="@+id/headTV"
- android:layout_width="0dp"
- android:layout_height="wrap_content"
- android:layout_gravity="center_vertical"
- android:layout_marginLeft="4dp"
- android:layout_weight="1"
- android:text="CSDN资讯"
- android:textColor="@color/white"
- android:textSize="21sp"
- android:textStyle="bold" >
- </TextView>
- </LinearLayout>
显示一个图标和标题。
- <LinearLayout xmlns:android="http://schemas.android.com/apk/res/android"
- xmlns:tools="http://schemas.android.com/tools"
- android:layout_width="match_parent"
- android:layout_height="match_parent"
- android:background="#eee"
- android:orientation="vertical" >
- <include layout="@layout/main_head" />
- <com.viewpagerindicator.TabPageIndicator
- android:id="@+id/id_indicator"
- android:layout_width="fill_parent"
- android:layout_height="wrap_content"
- android:background="@color/transparentblue" >
- </com.viewpagerindicator.TabPageIndicator>
- <android.support.v4.view.ViewPager
- android:id="@+id/id_pager"
- android:layout_width="fill_parent"
- android:layout_height="0dp"
- android:layout_weight="1" />
- </LinearLayout>
一个TabPageIndicator和一个ViewPager。
- package com.zhy.csdndemo;
- import com.viewpagerindicator.TabPageIndicator;
- import android.os.Bundle;
- import android.support.v4.app.FragmentActivity;
- import android.support.v4.app.FragmentPagerAdapter;
- import android.support.v4.view.ViewPager;
- public class MainActivity extends FragmentActivity
- {
- private TabPageIndicator mIndicator ;
- private ViewPager mViewPager ;
- private FragmentPagerAdapter mAdapter ;
- @Override
- protected void onCreate(Bundle savedInstanceState)
- {
- super.onCreate(savedInstanceState);
- setContentView(R.layout.activity_main);
- mIndicator = (TabPageIndicator) findViewById(R.id.id_indicator);
- mViewPager = (ViewPager) findViewById(R.id.id_pager);
- mAdapter = new TabAdapter(getSupportFragmentManager());
- mViewPager.setAdapter(mAdapter);
- mIndicator.setViewPager(mViewPager, 0);
- }
- }
TabAdapter.java
- package com.zhy.csdndemo;
- import android.support.v4.app.Fragment;
- import android.support.v4.app.FragmentManager;
- import android.support.v4.app.FragmentPagerAdapter;
- public class TabAdapter extends FragmentPagerAdapter
- {
- public static final String[] TITLES = new String[] { "业界", "移动", "研发", "程序员杂志", "云计算" };
- public TabAdapter(FragmentManager fm)
- {
- super(fm);
- }
- @Override
- public Fragment getItem(int arg0)
- {
- MainFragment fragment = new MainFragment(arg0);
- return fragment;
- }
- @Override
- public CharSequence getPageTitle(int position)
- {
- return TITLES[position % TITLES.length];
- }
- @Override
- public int getCount()
- {
- return TITLES.length;
- }
- }
MainFragment.java
- package com.zhy.csdndemo;
- import android.annotation.SuppressLint;
- import android.os.Bundle;
- import android.support.v4.app.Fragment;
- import android.view.LayoutInflater;
- import android.view.View;
- import android.view.ViewGroup;
- import android.widget.TextView;
- @SuppressLint("ValidFragment")
- public class MainFragment extends Fragment
- {
- private int newsType = 0;
- public MainFragment(int newsType)
- {
- this.newsType = newsType;
- }
- @Override
- public void onActivityCreated(Bundle savedInstanceState)
- {
- super.onActivityCreated(savedInstanceState);
- }
- @Override
- public View onCreateView(LayoutInflater inflater, ViewGroup container, Bundle savedInstanceState)
- {
- View view = inflater.inflate(R.layout.tab_item_fragment_main, null);
- TextView tip = (TextView) view.findViewById(R.id.id_tip);
- tip.setText(TabAdapter.TITLES[newsType]);
- return view;
- }
- }
- <style name="MyTheme" parent="AppBaseTheme">
- <item name="vpiTabPageIndicatorStyle">@style/MyWidget.TabPageIndicator</item>
- <item name="android:windowBackground">@drawable/init_pic</item>
- <item name="android:windowNoTitle">true</item>
- <item name="android:animationDuration">5000</item>
- <item name="android:windowContentOverlay">@null</item>
- </style>
- <style name="MyWidget.TabPageIndicator" parent="Widget">
- <item name="android:gravity">center</item>
- <item name="android:background">@drawable/vpi__tab_indicator</item>
- <item name="android:paddingLeft">22dip</item>
- <item name="android:paddingRight">22dip</item>
- <item name="android:paddingTop">8dp</item>
- <item name="android:paddingBottom">8dp</item>
- <item name="android:textAppearance">@style/MyTextAppearance.TabPageIndicator</item>
- <item name="android:textSize">16sp</item>
- <item name="android:maxLines">1</item>
- </style>
- <style name="MyTextAppearance.TabPageIndicator" parent="Widget">
- <item name="android:textStyle">bold</item>
- <item name="android:textColor">@color/black</item>
- </style>
在AndroidManifest中注册使用:
- <?xml version="1.0" encoding="utf-8"?>
- <manifest xmlns:android="http://schemas.android.com/apk/res/android"
- package="com.zhy.csdndemo"
- android:versionCode="1"
- android:versionName="1.0" >
- <uses-sdk
- android:minSdkVersion="13"
- android:targetSdkVersion="17" />
- <application
- android:allowBackup="true"
- android:icon="@drawable/ic_launcher"
- android:label="@string/app_name"
- android:theme="@style/AppTheme" >
- <activity
- android:name="com.zhy.csdndemo.MainActivity"
- android:label="@string/app_name"
- android:theme="@style/MyTheme">
- <intent-filter>
- <action android:name="android.intent.action.MAIN" />
- <category android:name="android.intent.category.LAUNCHER" />
- </intent-filter>
- </activity>
- </application>
- </manifest>


 422
422


 被折叠的 条评论
为什么被折叠?
被折叠的 条评论
为什么被折叠?
 到【灌水乐园】发言


