


 本文档详细介绍了如何在网站中集成阿里云云客服在线工作台,包括两种聊天窗引入方式,并重点讲解了如何通过后端Java实现访客名片功能,以便显示真实访客信息。集成过程涉及加密解密操作,需要下载并使用特定的jar包,并配置相应的Controller接口以支持跨域请求。
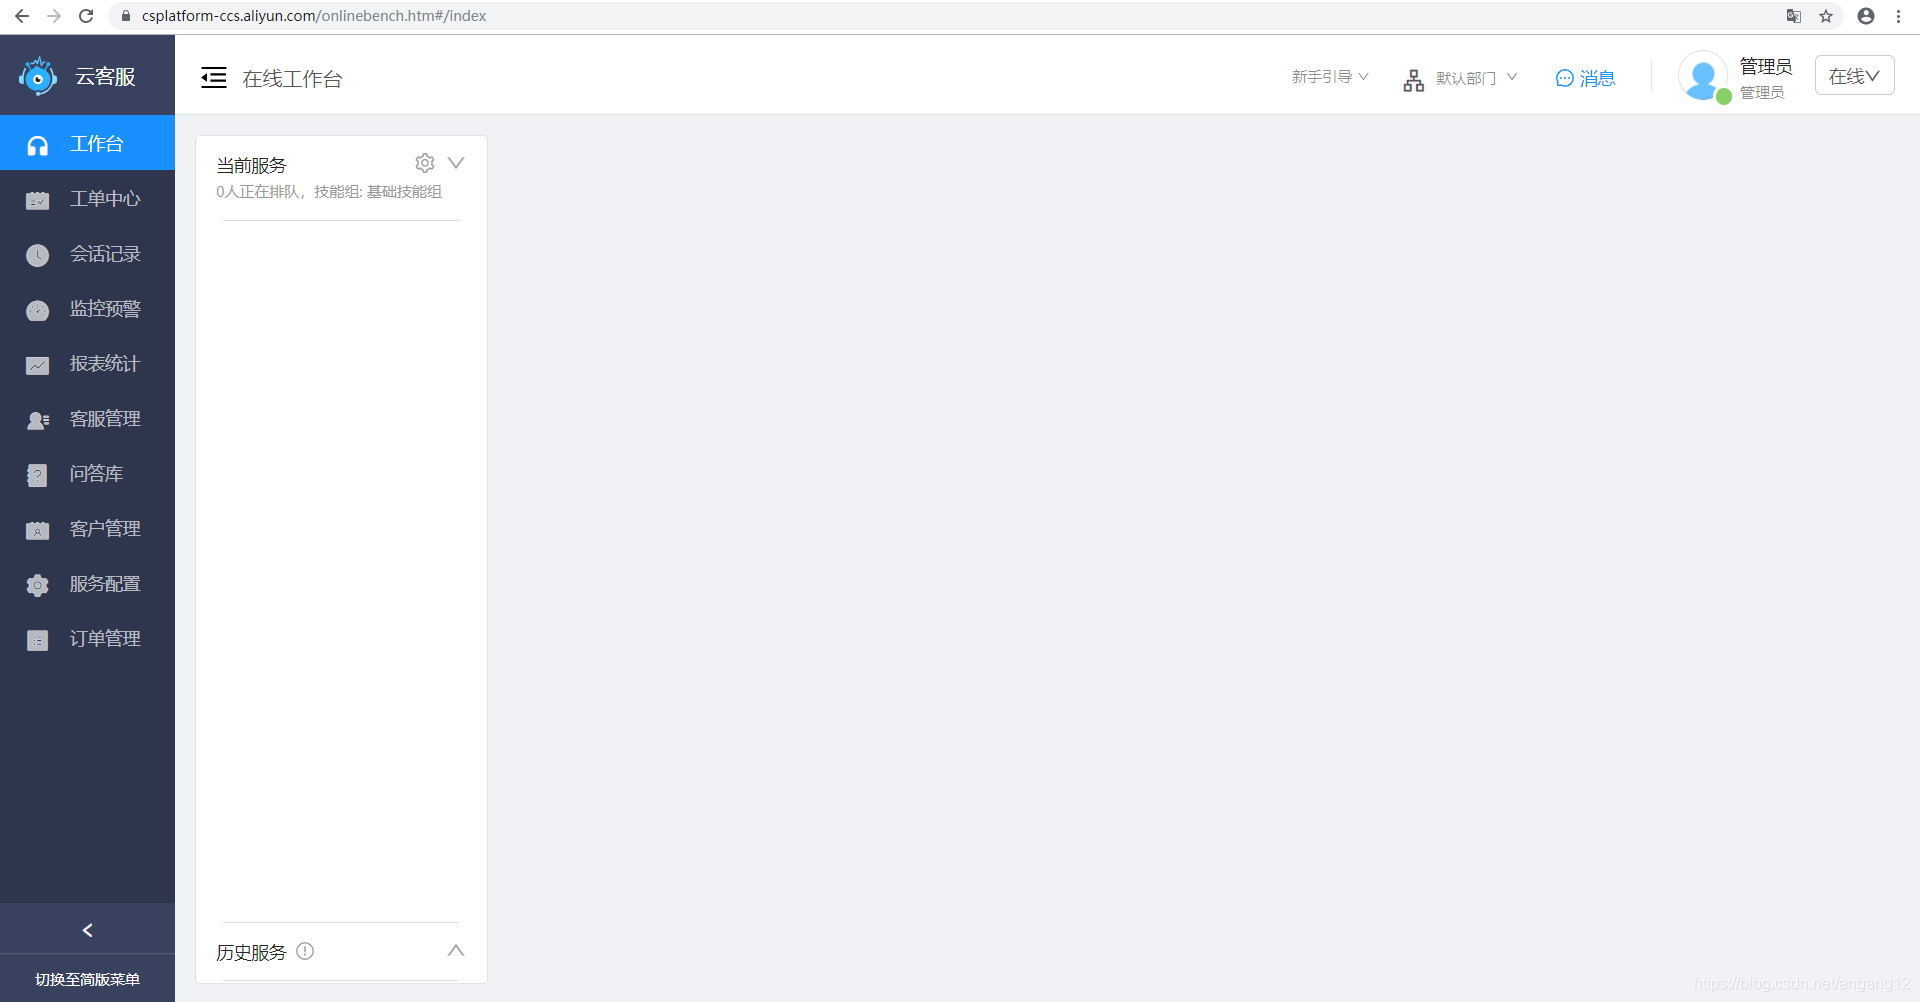
首先,要从阿里云购买云客服产品,购买后就可以打开云客服在线工作台。
地址:
https://help.aliyun.com/document_detail/62314.html?spm=a2c4g.11186623.6.546.23612f847H0KrN
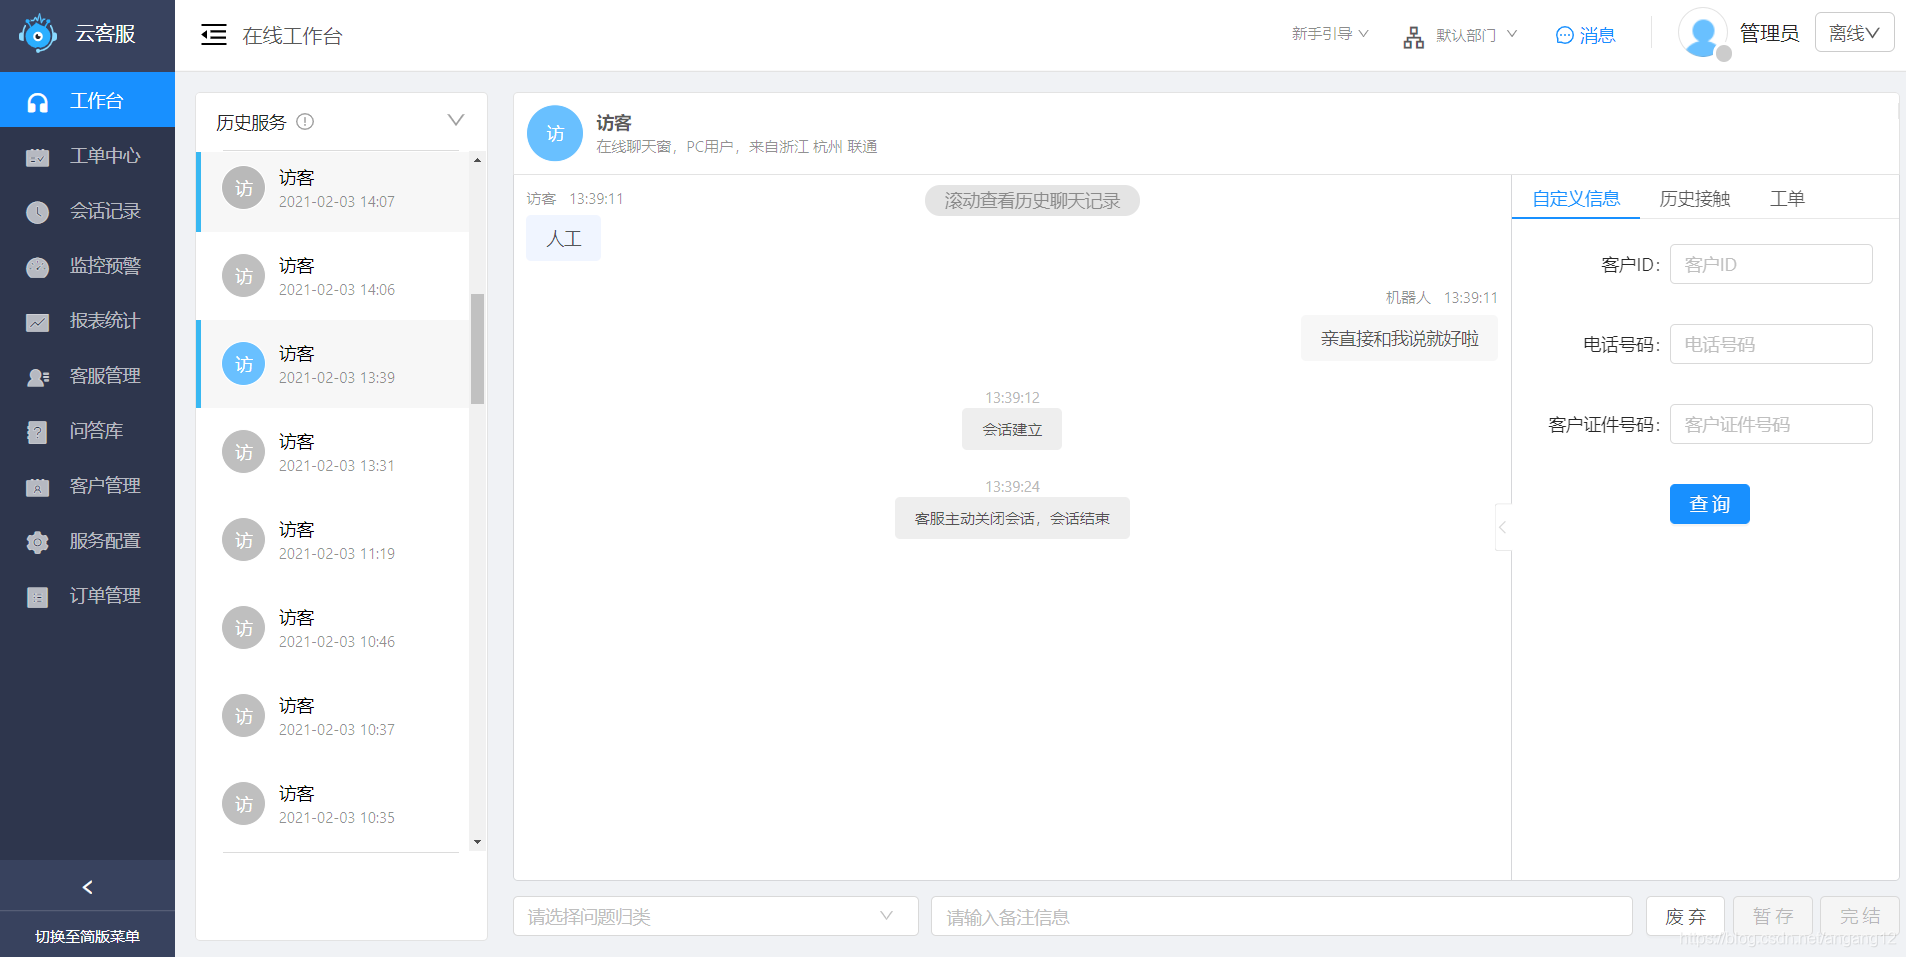
下面是云客服在线工作台:
打开云客服在线工作台的“服务配置/在线配置/聊天窗管理”,然后点击列表中操作下的“聊天窗URL”。可以获取两种引入聊天窗入口的方式:
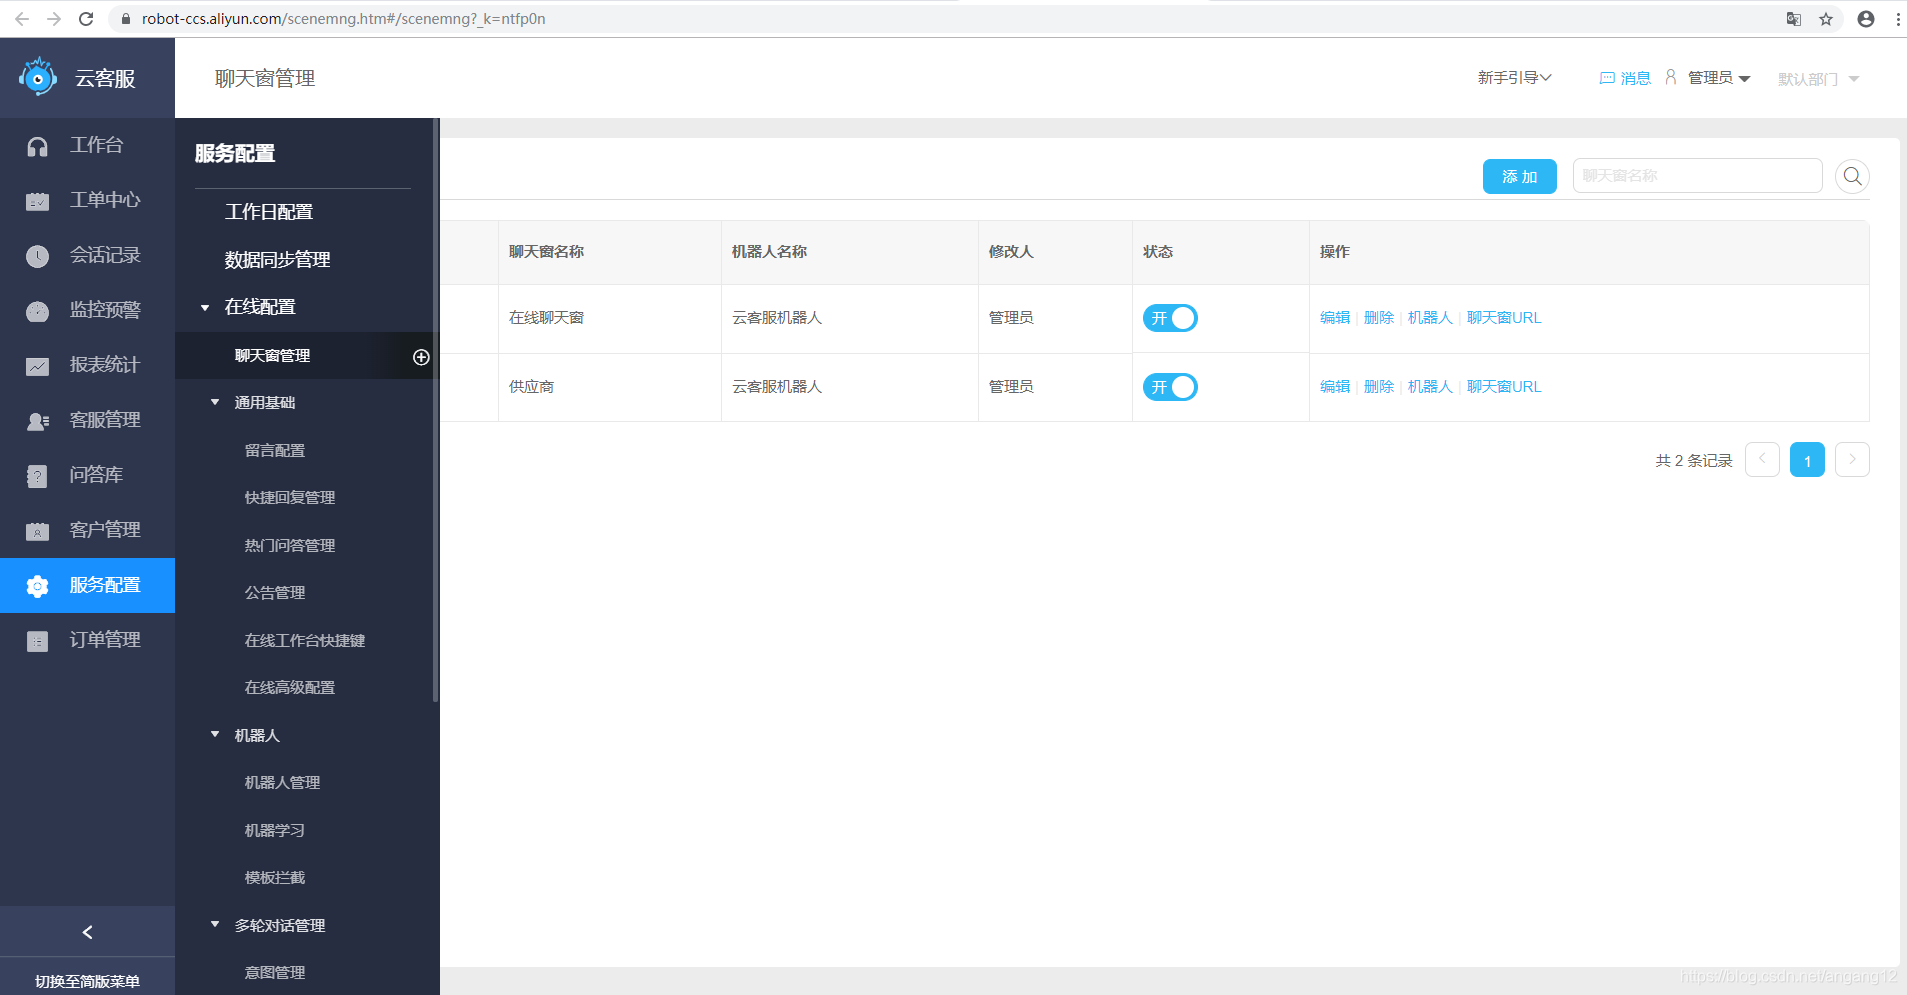
引入聊天窗入口的两种方式:
1.复制以下代码, 插入到您网页代码的前。(tntInstId是企业的租户id,暂时用***代替)
<script type="text/javascript" charset="utf-8"
    src="https://gw.alipayobjects.com/os/rmsportal/xsxusXNIcXwiGqtNiyOd.js"
    chat_url="https://cschat-ccs.aliyun.com/index.htm"
    logo_src="https://i.alipayobjects.com/e/201401/1tdi7nR70h.png"
    logo_position="rt"
    tntInstId="*******&scene=SC********">
</script>
2.将以下的链接直接放到网页对应的元素链接上:(tntInstId是企业的租户id,暂时用***代替)
https://cschat-ccs.aliyun.com/index.htm?tntInstId=*******&scene=SC********
以上者两种方式都可以调到云客服的聊天窗,推荐用第二种,因为后期再拼接其他可能用到的参数时会方便一些。
举个栗子:
<a href='https://cschat-ccs.aliyun.com/index.htm?tntInstId=*******&scene=SC******'>点我咨询</a>
就在前端写一个a标签,加上我们获取聊天窗的链接,就可以接入聊天窗了,很容易。
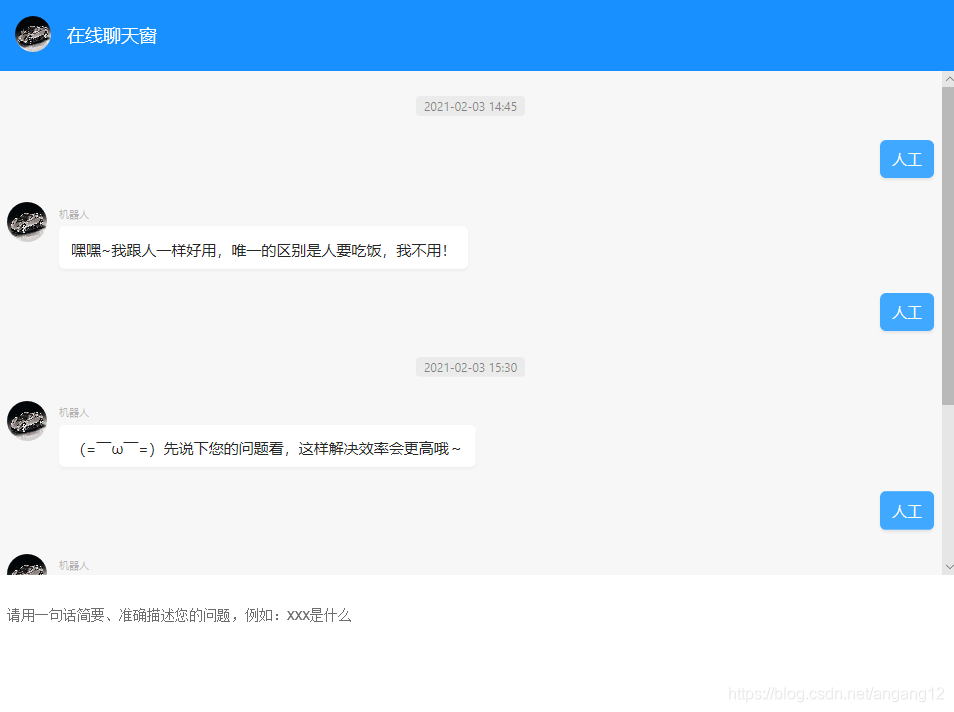
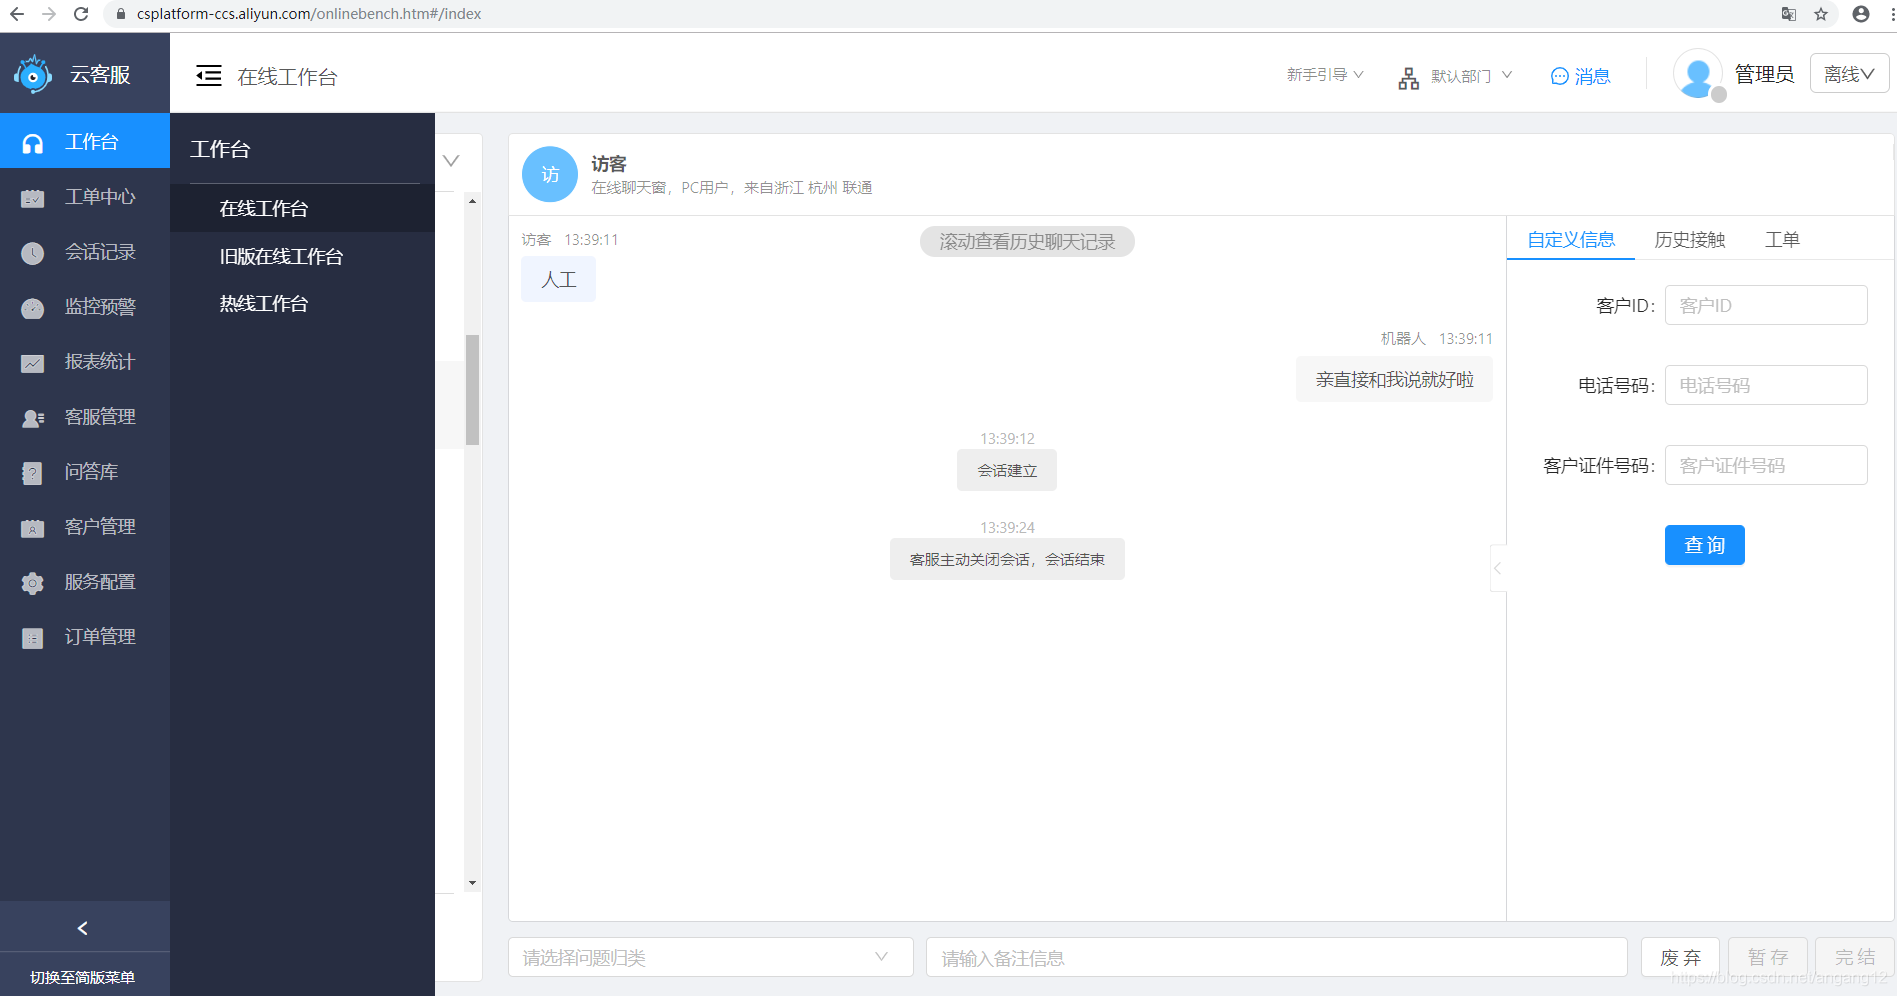
下面是客服端的聊天窗,在云客服在线工作台中可以跟访客聊天。
不过,虽然接入成功了,但显示的用户名称都是“访客”两个字。
所以我们想要显示出真实的访客信息,就需要接入“在线服务访客名片”,出于安全考虑,阿里云那边采用加密的方式来传输用户信息。首先由后端java对访客的真实信息进行加密,然后将加密后的信息传给阿里云,再进行解密,最后再展示出解密后的访客信息。
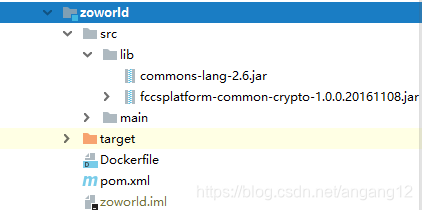
下面是“在线服务访客名片”接入流程地址(需先登录阿里云)。加密解密的相关jar包也在这篇文档中,必须下载。
https://help.aliyun.com/document_detail/68241.html?spm=a2c4g.11186623.6.585.1471525cV9FlSF

jar包下载后放在src目录下的lib包中
依赖
<!-- 在线访客名片信息解密 -->
<dependency>
    <groupId>com.alipay.fc.csplatform</groupId>
    <artifactId>fccsplatform-common-crypto</artifactId>
    <version>1.0.0.20161108</version>
    <scope>system</scope>
    <systemPath>${project.basedir}/src/lib/commons-lang-2.6.jar</systemPath>
</dependency>
<dependency>
    <groupId>com.alipay.fc.csplatform</groupId>
    <artifactId>fccsplatform-common-crypto</artifactId>
    <version>1.0.0.20161108</version>
    <scope>system</scope>
    <systemPath>${project.basedir}/src/lib/fccsplatform-common-crypto-1.0.0.20161108.jar</systemPath>
</dependency>
pom.xml中再加上这个,免得打包的时候不能同时带上jar包
<plugin>
    <groupId>org.apache.maven.plugins</groupId>
    <artifactId>maven-dependency-plugin</artifactId>
    <executions>
        <execution>
            <id>copy-dependencies</id>
            <phase>prepare-package</phase>
            <goals>
                <goal>copy-dependencies</goal>
            </goals>
            <configuration>
                <outputDirectory>${project.build.directory}/classes/lib</outputDirectory>
                <includeScope>compile</includeScope>
            </configuration>
        </execution>
    </executions>
</plugin>
Controller层
import com.alibaba.fastjson.JSONObject;
import com.alipay.fc.csplatform.common.crypto.CustomerInfoCryptoUtil;
import com.totyu.util.ResultUtil;
import com.totyu.vo.Result;
import com.totyu.vo.User;
import com.totyu.zoworld.associates.dao.UserMapper;
import com.totyu.zoworld.config.CurrentUserUtil;
import com.totyu.zoworld.enroll.dao.EnrollDao;
import lombok.extern.slf4j.Slf4j;
import org.jolokia.util.Base64Util;
import org.springframework.beans.factory.annotation.Autowired;
import org.springframework.util.StringUtils;
import org.springframework.web.bind.annotation.*;

import javax.servlet.http.HttpServletRequest;
import javax.servlet.http.HttpServletResponse;
import java.net.URLEncoder;
import java.security.KeyFactory;
import java.security.PublicKey;
import java.security.spec.X509EncodedKeySpec;
import java.util.Map;

@RestController
@Slf4j
public class CustomerInfoController {

    // 公共密钥(需向阿里云提工单,提供租户id,即tntInstId,向售后人员获取,本片文档用******代替)
    private static String PUB_KEY = "MIIBIjANBgkqh******";

    /**
     * 对访客信息进行加密, 聊天窗埋点的时候, 生成埋点URL中的cinfo和key参数 使用此方法.
     * @param request
     * @param response
     * @return
     */
    @ResponseBody
    @RequestMapping(value = "/encrypt", method = RequestMethod.GET)
	public Result encrypt(HttpServletRequest request, HttpServletResponse response) {
        try {
            String userId = "10001";
            String userName = "小张";
            // 还原公钥
            PublicKey publicKey = getPubKey(PUB_KEY);
            // 要加密的信息 请使用json格式的字符串.
            String cinfo = "{\"userId\":\""+userId+"\",\"userName\":\""+userName+"\",\"extInfo\":{\"userId\":\""+userId+"\",\"userName\":\""+userName+"\"}}";
            Map<String, String> res =  CustomerInfoCryptoUtil.encryptByPublicKey(cinfo, publicKey);

            JSONObject jsonObject = new JSONObject();
            jsonObject.put("cinfo", res.get("text"));
            jsonObject.put("key", res.get("key"));
            return ResultUtil.returnData(0, "操作成功!",jsonObject);
        } catch (Exception e) {
            //这里建议使用log记录错误. 减少干扰信息, DEMO里不使用LOG
            e.printStackTrace();
            return null;
        }
    }

    /**
     * 通过外部接口方式接入访客名片.
     * 工作台显示访客信息, 请使用此方法.
     * note : 本接口必须支持跨域访问.
     * @param request
     * @param response
     * @return
     */
    @ResponseBody
    @RequestMapping(value = "/decrypt", method = RequestMethod.POST)
    public JSONObject decrypt(HttpServletRequest request, HttpServletResponse response) {
        try {
            //这两个参数是云客服工作台调用该接口 post body带入的参数.
            String params = request.getParameter("params");
            String key = request.getParameter("key");
            PublicKey publicKey = getPubKey(PUB_KEY);
            //cinfo是用于客户在自己的后台系统来查询该用户更为详细的其他信息.
            String cinfo = CustomerInfoCryptoUtil.decryptByPublicKey(URLEncoder.encode(params, "UTF-8"), URLEncoder.encode(key,"UTF-8"), publicKey);
            JSONObject jsonObject = JSONObject.parseObject(cinfo);
            if(StringUtils.isEmpty(jsonObject.get("userId"))){
                return null;
            }
            String userId = (String)jsonObject.get("userId");
            Map<String,String> extInfo = (Map<String,String>)jsonObject.get("extInfo");
            String userName = extInfo.get("userName");

            String telePhone = "1379999****";
            // mockResult的格式必须按照以下要求
            String mockResult = "{\"message\":\"查询成功\",\"result\":{\"schema\":{\"properties\":{\"telePhone\":{\"name\":\"电话\",\"type\":\"text\"}}},\"telePhone\":\""+telePhone+"\","
                    + "\"userId\":\""+userId+"\",\"userName\":\""+telePhone+"\"},\"success\":true}";
            return JSONObject.parseObject(mockResult);
        } catch (Exception e) {
            //这里建议使用log记录错误. 减少干扰信息, DEMO里不使用LOG
            log.error("e:----" + e);
            e.printStackTrace();
            return null;
        }
    }

    //还原出RSA公钥对象
    private static PublicKey getPubKey(String pubKey) throws Exception {
        X509EncodedKeySpec keySpec = new X509EncodedKeySpec(Base64Util.decode(pubKey));
        KeyFactory keyFactory;
        keyFactory = KeyFactory.getInstance("RSA");
        PublicKey key = keyFactory.generatePublic(keySpec);
        return key;
    }
}
注意:该Controller中的第二个接口@ResponseBody @RequestMapping(value = "/decrypt", method = RequestMethod.POST)
该接口必须支持跨域请求。
接口协议必须是https。
响应头中 Content-Type 为 application/json; charset=utf-8。
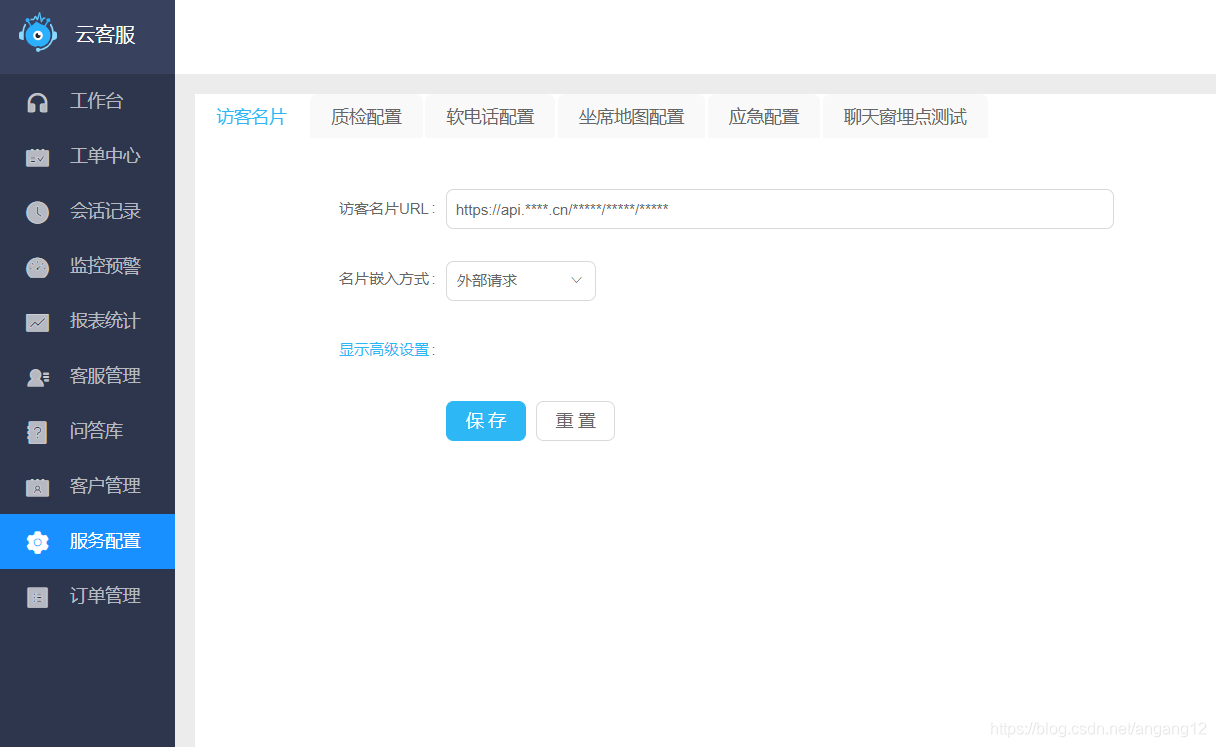
然后找到云客服在线工作台中的“服务配置/热线高级配置”

点击“访客名片”,访客名片URL需填写支持跨域的https接口,也就是Controller层中的第二个接口/decrypt,该接口必须是支持跨域的https接口。然后,名片嵌入方式选择外部请求。再点击保存即可。(此处的操作是为了让阿里云能访问到你的/decrypt接口,阿里云那边要在这个接口上拼接两个字段params和key,这两个字段即访客的加密信息,传到你这个接口里再解密!最后将解密的访客信息展示到客服端页面)。
可以显示访客信息了。


 被折叠的 条评论
为什么被折叠?
被折叠的 条评论
为什么被折叠?
 到【灌水乐园】发言


