一、JDK
1、安装地址
下载地址:http://www.oracle.com/technetwork/java/javase/downloads/jdk7-downloads-1880260.html
我下的是64位的,大家根据自己的需求来下载,谢谢!
2、环境变量
设置JAVA_HOME D:\software\jdk1.7.0_45
设置path %JAVA_HOME%\bin
设置classpath .;%JAVA_HOME%\lib\tools.jar;%JAVA_HOME%\lib\dt.jar;
3、验证是否安装成功
public class HelloWorld{
public static void main(String[] args){
System.out.println("Hello,world!!!");
}
}
存为HelloWorld.java
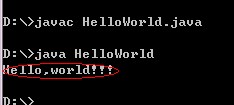
键入
javac HelloWorld.java
java HelloWorld
出现如上图显示,则JDK环境变量配置成功
二、Eclipse
1、安装地址
http://www.eclipse.org/downloads/
这个下载下来解压就能用,我下的是64位的,麻烦各位安需下载
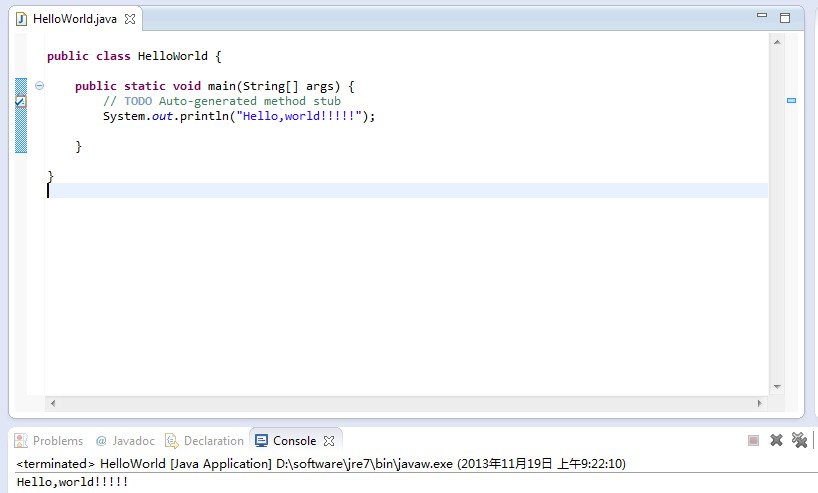
2、验证是否安装成功
如上图显示,即成功
三、Selenium
1、安装文件
下载如下几个文件
Selenium RC: selenium-server-standalone-2.33.0.jar 模拟服务器端,不可少。
IEDriverServer: DriverServer_Win32_2.33.0.zip IE驱动,Firfox和chorm不用驱动。
Selenium Client Drivers: selenium-java-2.33.0.zip 模拟Selenium客户端。
下载地址为:http://www.seleniumhq.org/download/
注意,本文中 我没有下载Selenium IDE,是没有想进行脚本录制工作,所有的准备都是为了手工写脚本而准备的。
四、Eclipse执行Selenium的Java实例
1、引入Selenium包
五、testng
1、安装 TestNG
在 Eclipse 中,点击 Help -> Install new software ,在 add 栏中输入 http://beust.com/eclipse ,在下面就会看到 TestNG.选中点击安装,按下一步直到安装完,在线安装会有点很慢。
六、运行
1、testng小例子
package testng;
import org.openqa.selenium.WebDriver;
import org.testng.annotations.Test;
import org.testng.annotations.BeforeMethod;
import org.testng.annotations.AfterMethod;
public class NewTest {
WebDriver driver;
@Test
public void f() {
driver = new FirefoxDriver();
driver.get("http://www.google.com.hk");
WebElement element = driver.findElement(By.name("q"));
element.sendKeys("hello Selenium!");
element.submit();
}
@BeforeMethod
public void beforeMethod() {
}
@AfterMethod
public void afterMethod() {
System.out.println("Page title is: " + driver.getTitle());
driver.quit();
}
}


 被折叠的 条评论
为什么被折叠?


