


采用创建一个类: HeaderListView ,继承 ListView 来实现;
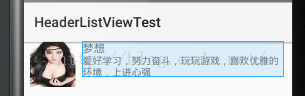
效果图如下:

activity_main.xml 的布局文件如下:
<span style="font-size:18px;"><RelativeLayout xmlns:android="http://schemas.android.com/apk/res/android"
    xmlns:tools="http://schemas.android.com/tools" android:layout_width="match_parent"
    android:layout_height="match_parent" android:paddingLeft="@dimen/activity_horizontal_margin"
    android:paddingRight="@dimen/activity_horizontal_margin"
    android:paddingTop="@dimen/activity_vertical_margin"
    android:paddingBottom="@dimen/activity_vertical_margin" tools:context=".MainActivity">

    <!--android:cacheColorHint="@android:color/transparent" 滚动ListView时不会掉黑 。
    滚动时,重绘View的时候就不会有背景颜色。-->
    <com.crazy.headerlistviewtest.HeaderListView
        android:id="@+id/lv_header"
        android:layout_width="match_parent"
        android:layout_height="match_parent"
        android:cacheColorHint="@android:color/transparent">

    </com.crazy.headerlistviewtest.HeaderListView>

</RelativeLayout>
</span>
item_layout.xml 布局如下:
<span style="font-size:18px;"><?xml version="1.0" encoding="utf-8"?>
<LinearLayout xmlns:android="http://schemas.android.com/apk/res/android"
    android:orientation="horizontal"
    android:layout_width="match_parent"
    android:layout_height="match_parent"
    android:gravity="center_horizontal"
    android:paddingLeft="10dp"
    android:paddingRight="10dp">

    <ImageView
        android:id="@+id/iv"
        android:layout_width="65dp"
        android:layout_height="65dp"
        android:scaleType="fitXY"
        android:src="@drawable/image_1"/>

    <!--TextView 中的内容只是为了演示效果,真正显示的内容在枚举中-->
    <LinearLayout
        android:layout_width="match_parent"
        android:layout_height="wrap_content"
        android:orientation="vertical"
        android:layout_marginLeft="10dp">

        <TextView
            android:id="@+id/tv_name"
            android:layout_width="wrap_content"
            android:layout_height="wrap_content"
            android:text="梦想"
            android:textSize="16sp"/>

        <TextView
            android:id="@+id/tv_content"
            android:layout_width="wrap_content"
            android:layout_height="wrap_content"
            android:text="爱好学习,努力奋斗,玩玩游戏,喜欢优雅的环境,上进心强"
            android:textSize="14sp"/>

    </LinearLayout>

</LinearLayout></span>
layout_header_view.xml 布局文件:
<span style="font-size:18px;"><?xml version="1.0" encoding="utf-8"?>
<RelativeLayout xmlns:android="http://schemas.android.com/apk/res/android"
    android:layout_width="match_parent"
    android:layout_height="150dp">

    <!-- android:scaleType="centerCrop"设置该属性 imageview 才可以缩放-->
    <ImageView
        android:id="@+id/iv_header"
        android:layout_width="match_parent"
        android:layout_height="180dp"
        android:scaleType="centerCrop"
        android:src="@drawable/header1"/>

</RelativeLayout>
</span>

<span style="font-size:18px;">package com.crazy.headerlistviewtest;

import android.app.Activity;
import android.content.Context;
import android.os.Bundle;
import android.view.View;
import android.view.ViewGroup;
import android.view.Window;
import android.view.WindowManager;
import android.widget.BaseAdapter;
import android.widget.ImageView;
import android.widget.TextView;

public class MainActivity extends Activity {

    // 定义显示的数据
    public enum Data{
        item_1("Crazy", "学习Android的学员", R.drawable.image_1),
        item_2("Crazy", "学习Android的学员", R.drawable.image_1),
        item_3("Crazy", "学习Android的学员", R.drawable.image_1),
        item_4("Crazy", "学习Android的学员", R.drawable.image_1),
        item_5("Crazy", "学习Android的学员", R.drawable.image_1),
        item_6("Crazy", "学习Android的学员", R.drawable.image_1),
        item_7("Crazy", "学习Android的学员", R.drawable.image_1),
        item_8("Crazy", "学习Android的学员", R.drawable.image_1),
        item_9("Crazy", "学习Android的学员", R.drawable.image_1),
        item_10("Crazy", "学习Android的学员", R.drawable.image_1),
        item_11("Crazy", "学习Android的学员", R.drawable.image_1),
        item_12("Crazy", "学习Android的学员", R.drawable.image_1);


        private String name;
        private String content;
        private int resId;

        private Data(String name, String content, int resId) {
            this.name = name;
            this.content = content;
            this.resId = resId;
        }

        public String getName() {
            return name;
        }

        public int getResId() {
            return resId;
        }

        public String getContent() {
            return content;
        }
    }

    private HeaderListView lv_header;

    @Override
    protected void onCreate(Bundle savedInstanceState) {
        super.onCreate(savedInstanceState);
        requestWindowFeature(Window.FEATURE_NO_TITLE);
        getWindow().setFlags(WindowManager.LayoutParams.FLAG_FULLSCREEN,
                WindowManager.LayoutParams.FLAG_FULLSCREEN);
        setContentView(R.layout.activity_main);

        initView();

    }

    private void initView() {
        lv_header = (HeaderListView)findViewById(R.id.lv_header);
        initHeaderView();// 要在 adapter 前设置
        MyAdapter myAdapter = new MyAdapter(this);
        lv_header.setAdapter(myAdapter);
    }

    private void initHeaderView(){
        View headerView = getLayoutInflater().inflate(R.layout.layout_header_view, null);
        ImageView iv_header = (ImageView)headerView.findViewById(R.id.iv_header); // 传入
        lv_header.setHeaderIV(iv_header);
        lv_header.addHeaderView(headerView);
    }

    public class MyAdapter extends BaseAdapter{

        public MyAdapter(Context context){

        }

        @Override
        public int getCount() {
            return Data.values().length;
        }

        @Override
        public Object getItem(int position) {
            return Data.values()[position];
        }

        @Override
        public long getItemId(int position) {
            return position;
        }

        @Override
        public View getView(int position, View convertView, ViewGroup parent) {

            ViewHolder viewHolder = null;
            if (convertView == null){
                convertView = getLayoutInflater().inflate(R.layout.item_layout, parent, false);
                viewHolder = new ViewHolder();
                // 初始化
                viewHolder.iv = (ImageView)convertView.findViewById(R.id.iv);
                viewHolder.tv_name = (TextView)convertView.findViewById(R.id.tv_name);
                viewHolder.tv_content = (TextView)convertView.findViewById(R.id.tv_content);

                convertView.setTag(viewHolder);
            } else {
                viewHolder = (ViewHolder)convertView.getTag();
            }
            // 设置数据
            Data data = Data.values()[position];
            viewHolder.iv.setImageResource(data.resId);
            viewHolder.tv_name.setText(data.getName());
            viewHolder.tv_content.setText(data.getContent());
            return convertView;
        }

        class ViewHolder{
            ImageView iv;
            TextView tv_name;
            TextView tv_content;
        }
    }
}
</span>
<span style="font-size:18px;">package com.crazy.headerlistviewtest;

import android.content.Context;
import android.util.AttributeSet;
import android.view.MotionEvent;
import android.view.View;
import android.view.ViewParent;
import android.view.animation.Animation;
import android.view.animation.Transformation;
import android.widget.ImageView;
import android.widget.ListView;


public class HeaderListView extends ListView {

    // 放大的 ImageView
    private ImageView headerIV;
    private int height;

    public void setHeaderIV(ImageView headerIV) {
        this.headerIV = headerIV;
    }

    public HeaderListView(Context context) {
        super(context);
    }

    public HeaderListView(Context context, AttributeSet attrs) {
        super(context, attrs);
    }

    public HeaderListView(Context context, AttributeSet attrs, int defStyleAttr) {
        super(context, attrs, defStyleAttr);
    }

    /**
     * 当 view 依附到 activity 上面的时候回调
     * @param hasWindowFocus
     */
    @Override
    public void onWindowFocusChanged(boolean hasWindowFocus) {
        super.onWindowFocusChanged(hasWindowFocus);

        if (hasWindowFocus){
            height = this.headerIV.getHeight();
        }
    }

    /**
     *  当listview 滚动到顶部的时候,还要下拉,还要网上滚动,那么这时就会调用该方法
     * @param deltaX
     * @param deltaY
     * @param scrollX
     * @param scrollY
     * @param scrollRangeX
     * @param scrollRangeY
     * @param maxOverScrollX
     * @param maxOverScrollY
     * @param isTouchEvent
     * @return
     */
    @Override
    protected boolean overScrollBy(int deltaX, int deltaY, int scrollX, int scrollY, int scrollRangeX, int scrollRangeY, int maxOverScrollX, int maxOverScrollY, boolean isTouchEvent) {

        // 滑动过头的时候回调该方法
        // 控制 imageview 的高度逐渐增加------从而达到滚动图片放大的效果
        boolean isCollpse = resizeOverScrollBy(deltaY);

        return isCollpse == false ? isCollpse: super.overScrollBy(deltaX, deltaY, scrollX, scrollY, scrollRangeX, scrollRangeY, maxOverScrollX, maxOverScrollY, isTouchEvent);
    }

    private boolean resizeOverScrollBy(int deltaY) {

        if (deltaY < 0){
            if (headerIV != null){
                // 当滑动到顶部的时候,还要网上滑动,就改变 imageview 的高度
                headerIV.getLayoutParams().height = headerIV.getHeight() - deltaY;
                headerIV.requestLayout();
            }
        } else {
            if (headerIV != null){
                headerIV.getLayoutParams().height = headerIV.getHeight() - deltaY;
                headerIV.requestLayout();
            }
        }
        return false;
    }

    /**
     * 当listview 没有滑动到底部或顶部时调用
     * @param l
     * @param t
     * @param oldl
     * @param oldt
     */
    @Override
    protected void onScrollChanged(int l, int t, int oldl, int oldt) {
        super.onScrollChanged(l, t, oldl, oldt);
        // 还原图片,保持imageview 的初始化高度
        // 获取imageview 的父容器(RelativeLayout)
        ViewParent parent = this.headerIV.getParent();
        if (parent != null){
            View rootView = (View)parent;
            if (rootView.getTop() < 0 && headerIV .getHeight() > height){

                headerIV.getLayoutParams().height = headerIV.getHeight() + rootView.getTop();

                // 重新摆放子控件
                rootView.layout(rootView.getLeft(), 0, rootView.getRight(), rootView.getBottom());

                // 重新绘制
                headerIV.requestLayout();
            }
        }
    }

    @Override
    public boolean onTouchEvent(MotionEvent ev) {
        // 监听手势抬起
        if (ev.getAction() == MotionEvent.ACTION_UP){
            MyAnimation animation = new MyAnimation(headerIV, height);
            animation.setDuration(300);
            this.headerIV.startAnimation(animation);
        }
        return super.onTouchEvent(ev);
    }

    public class MyAnimation extends Animation{

        private ImageView imageView;
        // imageview 的原始高度
        private int targetHeight;
        // 当前 imageview 的高度
        private int currentHeight;
        // 高度差 当前的减去原始的
        private int extraHeight;

        public MyAnimation(ImageView imageView, int targetHeight){
            this.imageView = imageView;
            this.targetHeight = targetHeight;
            this.currentHeight = imageView.getHeight();
            this.extraHeight = this.currentHeight - this.targetHeight;
        }

        /**
         *  当动画在不断的执行的时候回调该方法(就是监听动画执行的过程)
         * @param interpolatedTime 值得范围 0.0 到 1.0,时间变化因子
         * @param t
         */
        @Override
        protected void applyTransformation(float interpolatedTime, Transformation t) {
            super.applyTransformation(interpolatedTime, t);

            this.imageView.getLayoutParams().height = (int)(this.currentHeight
                    - extraHeight * interpolatedTime);

            this.imageView.requestLayout();
        }
    }
}
</span>


 4917
4917


 被折叠的 条评论
为什么被折叠?
被折叠的 条评论
为什么被折叠?
 到【灌水乐园】发言


