


 这是一个使用Objective-C编写的图片浏览器教学项目,通过左右按钮切换图片并显示对应的序号和描述,项目详细介绍了控件的实现与交互逻辑。
本项目是取自传智播客的教学项目,加入笔者的修改和润饰。
1. 项目名称:图片浏览器
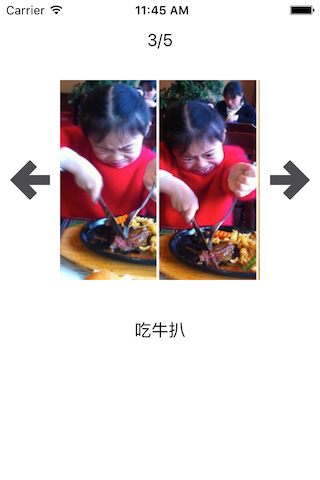
2. 项目截图展示
3. 项目功能
- 点击左右按钮浏览图片,更新序号,图片,描述内容。
- 图片一共五张:显示第一张图片的时候,左边的按钮失效;显示最后一张按钮的时候,右边的按钮失效。
4. 项目代码
#import "ViewController.h"

@interface ViewController ()

@property (nonatomic,strong) UILabel *noLabel;//上面的序号
@property (nonatomic,strong) UIImageView *iconImage;//中间的大图
@property (nonatomic,strong) UILabel *descLabel;//下面的描述
@property (nonatomic,strong) UIButton *leftButton;//左边的按钮
@property (nonatomic,strong) UIButton *rightButton;//右边的按钮

@property (nonatomic,assign) int index;//当前显示的照片索引
@property (nonatomic,strong)NSArray *imageList;//装入图片的数组

@end

@implementation ViewController

#pragma mark - 控件的懒加载

- (NSArray *)imageList{

    if (_imageList == nil) {

        //获得imageList.plist的路径
        NSString *path = [[NSBundle mainBundle] pathForResource:@"imageList" ofType:@"plist"];

         //从文件加载到数组中
         _imageList = [NSArray arrayWithContentsOfFile:path];
    }
    return _imageList;
}

//加载label控件
- (UILabel *)noLabel{

    if (_noLabel == nil) {

        //self.view.bounds.size.width
        _noLabel = [[UILabel alloc] initWithFrame:CGRectMake(0, 20, self.view.bounds.size.width, 40)];

        //居中对齐
        _noLabel.textAlignment = NSTextAlignmentCenter;

        [self.view addSubview:_noLabel];
    }

    return _noLabel;
}

- (UIImageView*)iconImage
{
    if (_iconImage == nil) {

        CGFloat imageW = 200;
        CGFloat imageH = 200;

        CGFloat imageX = (self.view.bounds.size.width - imageW)*0.5;
        CGFloat imageY = CGRectGetMaxY(self.noLabel.frame)+20;//取出矩形最大的Y值,noLabel下面20个y

        _iconImage = [[UIImageView alloc]initWithFrame:CGRectMake(imageX, imageY, imageW, imageH)];

        [self.view addSubview:_iconImage];

    }
    return _iconImage;
}


- (UILabel *)descLabel
{
    if (_descLabel==nil) {

        CGFloat descY = CGRectGetMaxY(self.iconImage.frame);

       _descLabel = [[UILabel alloc]initWithFrame:CGRectMake(0, descY, self.view.bounds.size.width, 100)];

        _descLabel.textAlignment = NSTextAlignmentCenter;

        //需要label具有足够的高度,不限制显示行数
        _descLabel.numberOfLines = 0;

        [self.view addSubview:_descLabel];

    }
    return _descLabel;
}

- (UIButton *)leftButton
{
    if (_leftButton == nil) {

        _leftButton = [[UIButton alloc]initWithFrame:CGRectMake(0, 0, 40, 40)];

        CGFloat centerY = self.iconImage.center.y;
        CGFloat centerX = self.iconImage.frame.origin.x*0.5;

        _leftButton.center = CGPointMake(centerX, centerY);

        [_leftButton setBackgroundImage:[UIImage imageNamed:@"left_normal"] forState:UIControlStateNormal];

        [_leftButton setBackgroundImage:[UIImage imageNamed:@"left_highlighted"] forState:UIControlStateHighlighted];

        [self.view addSubview:_leftButton];

        _leftButton.tag = -1;

        [_leftButton addTarget:self action:@selector(clickButton:) forControlEvents:UIControlEventTouchUpInside];
    }
    return _leftButton;
}

- (UIButton *)rightButton
{
    if (_rightButton ==nil) {

        //先设置按钮的宽高
        _rightButton = [[UIButton alloc]initWithFrame:CGRectMake(0, 0, 40, 40)];
         //再设置按钮的中心点
         CGFloat centerX = self.iconImage.frame.origin.x*0.5;
         CGFloat centerY = self.iconImage.center.y;
        _rightButton.center = CGPointMake(self.view.bounds.size.width - centerX, centerY);

        [_rightButton setBackgroundImage:[UIImage imageNamed:@"right_normal"] forState:UIControlStateNormal];

        [_rightButton setBackgroundImage:[UIImage imageNamed:@"right_highlighted"] forState:UIControlStateHighlighted];

        [self.view addSubview:_rightButton];

        //添加监听方法
        [_rightButton addTarget:self action:@selector(clickButton:) forControlEvents:UIControlEventTouchUpInside];

        _rightButton.tag = 1;

        //显示照片信息(序号,照片,描述)
        [self showPhotoInfo];

    }
    return _rightButton;
}

- (void)viewDidLoad {

    [super viewDidLoad];

    [self showPhotoInfo];

}
#pragma mark - 显示图片方法和点击按钮方法

//显示照片信息(序号,照片,描述)
- (void)showPhotoInfo
{
    //设置序号
    self.noLabel.text = [NSString stringWithFormat:@"%d/%d",self.index+1,5];

     //图像和描述:分别取出数组里每个字典的键值对应的内容
    self.iconImage.image = [UIImage imageNamed:self.imageList[self.index][@"name"]];
    self.descLabel.text = self.imageList[self.index][@"desc"];

    //控制按钮状态:序号显示5和1的情况下禁用右按钮和左按钮
    self.rightButton.enabled = (self.index != 4);
    self.leftButton.enabled = (self.index != 0);

}

//在OC中,很多方法的第一个参数都是触发该方法的对象
- (void)clickButton:(UIButton *)button
{
    //根据按钮显示图片等索引
    self.index += button.tag;
    [self showPhotoInfo];
}
@end
5. 本项目必须掌握的代码段
- 将plist文件内容添加到数组中
        //获得imageList.plist的路径
        NSString *path = [[NSBundle mainBundle] pathForResource:@"imageList" ofType:@"plist"];

         //从文件加载到数组中
_imageList = [NSArray arrayWithContentsOfFile:path];- 保证label自动换行,前提是label控件本身足够高
_descLabel.numberOfLines = 0;
- 给按钮添加监听方法
[_leftButton addTarget:self action:@selector(clickButton:) forControlEvents:UIControlEventTouchUpInside]; - 取出plist里每个字典里的键值里的键对应的内容
    self.iconImage.image = [UIImage imageNamed:self.imageList[self.index][@"name"]];
self.descLabel.text = self.imageList[self.index][@"desc"];- 条件判断&如何禁用按钮
    self.rightButton.enabled = (self.index != 4);
    self.leftButton.enabled = (self.index != 0);
6. 笔记
本项目巧妙地运用了tag来增加/减少图片序号的值。
纯代码实例化控件的时候,用懒加载的方式
//加载label控件
- (UILabel *)noLabel{

    if (_noLabel == nil) {

        //self.view.bounds.size.width
        _noLabel = [[UILabel alloc] initWithFrame:CGRectMake(0, 20, self.view.bounds.size.width, 40)];

        _noLabel.textAlignment = NSTextAlignmentCenter;

        [self.view addSubview:_noLabel];
    }
    return _noLabel;
}
在按钮的懒加载实现方法中,添加了此按钮的监听方法:参照上面左右按钮的监听方法。
在数组里提取对象,在字典里提取key对应的内容都适用中括号
[]来实现的。


 887
887

 被折叠的 条评论
为什么被折叠?
被折叠的 条评论
为什么被折叠?
 到【灌水乐园】发言


