


文章目录
一. 准备工作
确保电脑已安装
JDK及环境配置官网JDK下载地址
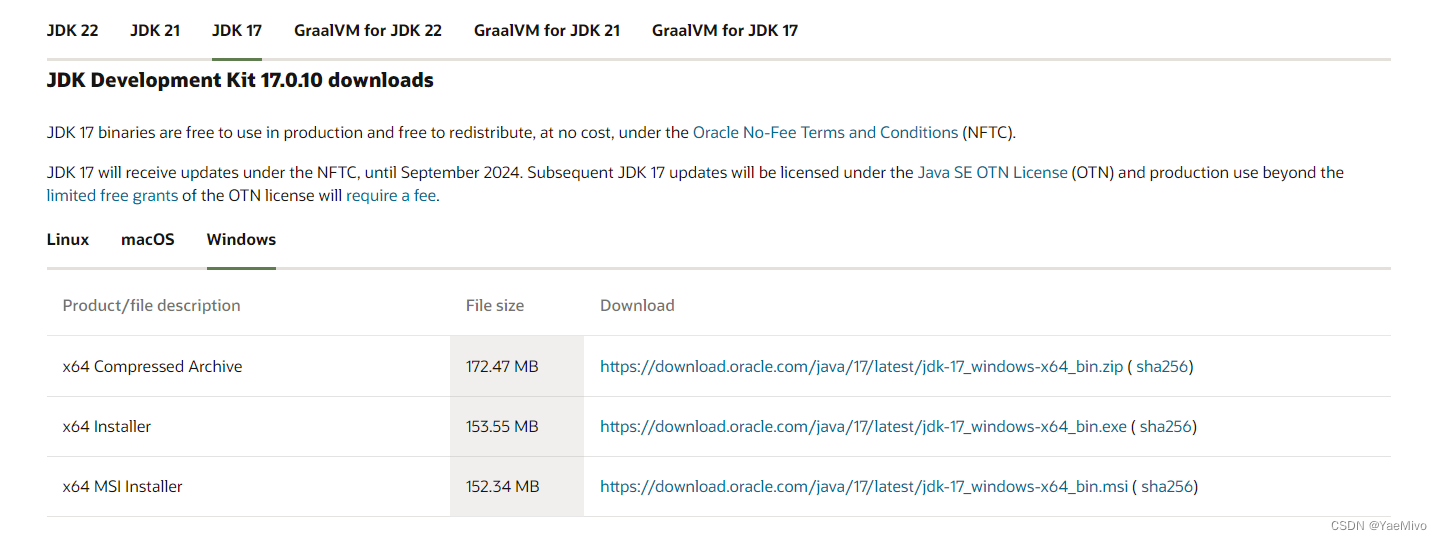
下载
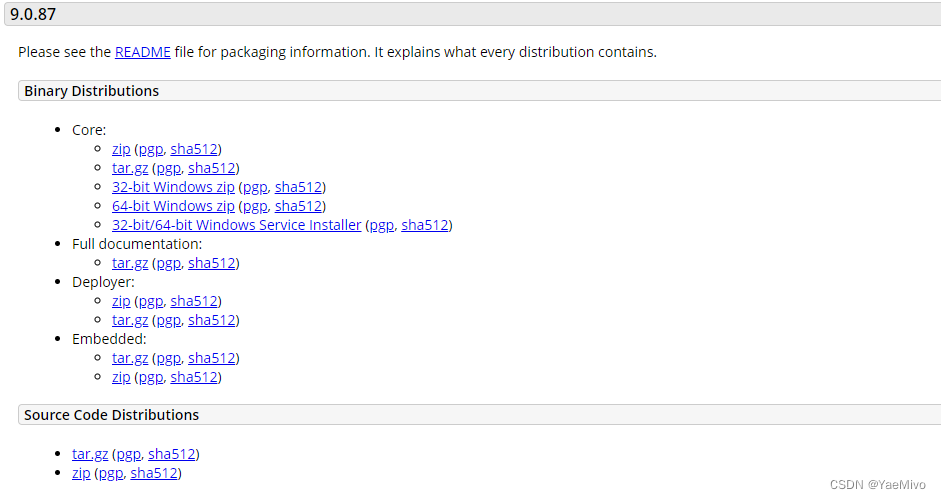
Tomcat部署War包, Tomcat下载地址 , 推荐下载zip, 解压即可
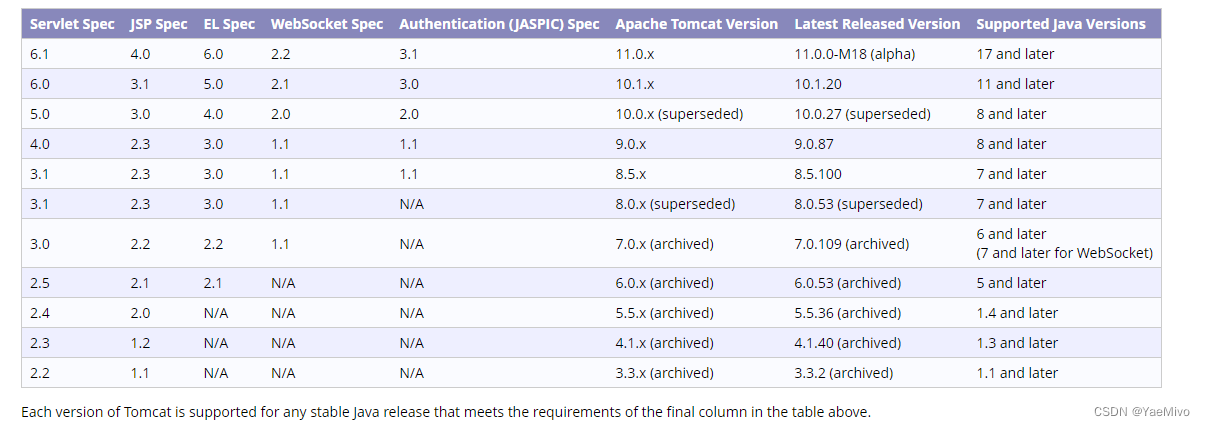
注意JDK版本和Tomcat版本需要对应,参考下图, 看右边两列
二. 将项目打包成War包
1. 指定打包类型为War包
<packaging>war</packaging>
2. 排除SpringBoot内嵌的Tomcat
<dependency>
    <groupId>org.springframework.boot</groupId>
    <artifactId>spring-boot-starter-tomcat</artifactId>
    <scope>provided</scope>
</dependency>
3. 跳过单元测试
<properties>
    <java.version>11</java.version>
    <skipTests>true</skipTests>
</properties>
4. 启动类小修改
继承 SpringBootServletInitializer 并重写 SpringApplicationBuilder
public class MainApplication extends SpringBootServletInitializer {
    public static void main(String[] args) {
        SpringApplication.run(MainApplication.class, args);
    }
    @Override
    protected SpringApplicationBuilder configure(SpringApplicationBuilder builder) {
        return builder.sources(MainApplication.class);
    }
}
最后点击Maven工具的
package进行打包
打包成功的War包会出现在项目的target目录下
5. 拷贝War包到Tomcat
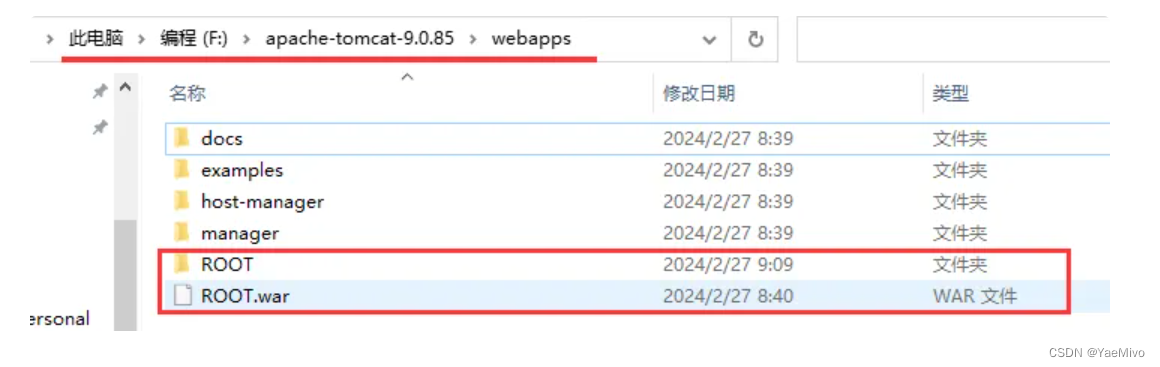
将打包好的war包复制到tomcat下的webapps目录下,
将ROOT文件夹删掉, 之后将复制进来的war包重命名问ROOT.war
三. 修改配置文件及部署
修改配置文件里的端口号为你项目端口号和修改项目war包的绝对路径
配置文件里面有两份配置,方便小伙伴们要在一个Tomcat部署两个War包
server.xml 文件里面不要出现中文!!! 就算是在注释里面有中文也不行!!!
<?xml version="1.0" encoding="UTF-8"?>
<!--
Licensed to the Apache Software Foundation (ASF) under one or more
contributor license agreements. See the NOTICE file distributed with
this work for additional information regarding copyright ownership.
The ASF licenses this file to You under the Apache License, Version 2.0
(the "License"); you may not use this file except in compliance with
the License. You may obtain a copy of the License at
http://www.apache.org/licenses/LICENSE-2.0
Unless required by applicable law or agreed to in writing, software
distributed under the License is distributed on an "AS IS" BASIS,
WITHOUT WARRANTIES OR CONDITIONS OF ANY KIND, either express or implied.
See the License for the specific language governing permissions and
limitations under the License.
-->
<!-- Note: A "Server" is not itself a "Container", so you may not
define subcomponents such as "Valves" at this level.
Documentation at /docs/config/server.html
-->
<Server port="8005" shutdown="SHUTDOWN">
<Listener className="org.apache.catalina.startup.VersionLoggerListener" />
<!-- Security listener. Documentation at /docs/config/listeners.html
<Listener className="org.apache.catalina.security.SecurityListener" />
-->
<!-- APR library loader. Documentation at /docs/apr.html -->
<Listener className="org.apache.catalina.core.AprLifecycleListener" SSLEngine="on" />
<!-- Prevent memory leaks due to use of particular java/javax APIs-->
<Listener className="org.apache.catalina.core.JreMemoryLeakPreventionListener" />
<Listener className="org.apache.catalina.mbeans.GlobalResourcesLifecycleListener" />
<Listener className="org.apache.catalina.core.ThreadLocalLeakPreventionListener" />
<!-- Global JNDI resources
Documentation at /docs/jndi-resources-howto.html
-->
<GlobalNamingResources>
<!-- Editable user database that can also be used by
UserDatabaseRealm to authenticate users
-->
<Resource name="UserDatabase" auth="Container"
type="org.apache.catalina.UserDatabase"
description="User database that can be updated and saved"
factory="org.apache.catalina.users.MemoryUserDatabaseFactory"
pathname="conf/tomcat-users.xml" />
</GlobalNamingResources>
<!-- A "Service" is a collection of one or more "Connectors" that share
a single "Container" Note: A "Service" is not itself a "Container",
so you may not define subcomponents such as "Valves" at this level.
Documentation at /docs/config/service.html
-->
<!-- The First -->
<Service name="Catalina">
<Connector port="8101" protocol="HTTP/1.1"
connectionTimeout="20000"
redirectPort="8443"
maxParameterCount="1000"
/>
<Engine name="Catalina" defaultHost="localhost">
<Realm className="org.apache.catalina.realm.LockOutRealm">
<Realm className="org.apache.catalina.realm.UserDatabaseRealm"
resourceName="UserDatabase"/>
</Realm>
<Host name="localhost" appBase="webapps"
unpackWARs="true" autoDeploy="true">
<Valve className="org.apache.catalina.valves.AccessLogValve" directory="logs"
prefix="localhost_access_log" suffix=".txt"
pattern="%h %l %u %t "%r" %s %b" />
<!-- <Context path="" docBase="F:\apache-tomcat-9.0.85\webapps\springboot-xxxx" reloadable="true"></Context> -->
<!-- <Context path="" docBase="F:\apache-tomcat-9.0.85\webapps\xxxx" reloadable="true"></Context> -->
</Host>
</Engine>
</Service>
<!-- The Second -->
<!-- <Service name="Catalina1">
<Connector port="9988" protocol="HTTP/1.1"
connectionTimeout="20000"
redirectPort="8443"
maxParameterCount="1000"
/>
<Engine name="Catalina1" defaultHost="localhost">
<Realm className="org.apache.catalina.realm.LockOutRealm">
<Realm className="org.apache.catalina.realm.UserDatabaseRealm"
resourceName="UserDatabase"/>
</Realm>
<Host name="localhost" appBase="webapps1"
unpackWARs="true" autoDeploy="true">
<Valve className="org.apache.catalina.valves.AccessLogValve" directory="logs"
prefix="localhost_access_log" suffix=".txt"
pattern="%h %l %u %t "%r" %s %b" />
<Context path="" docBase="F:\apache-tomcat-9.0.85\webapps\springboot-xxxx" reloadable="true"></Context>
<Context path="" docBase="F:\apache-tomcat-9.0.85\webapps\xxxx" reloadable="true"></Context>
</Host>
</Engine>
</Service> -->
</Server>
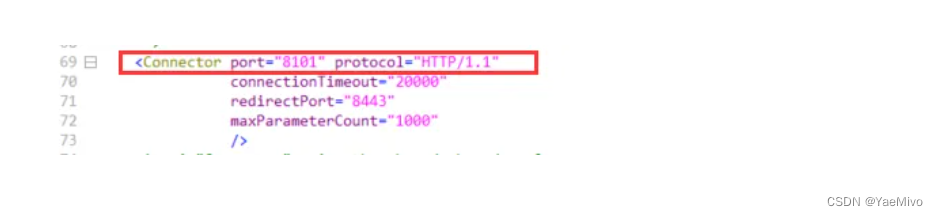
1. 修改监听端口号( server.xml )
如果war包的访问端口不是默认的8080, 则需要到server.xml文件里面更改监听端口
找到这个Connector之后, 修改对应的port端口号为自己的项目端口号即可
2. 修改项目绝对路径
建议直接复制war包所在路径

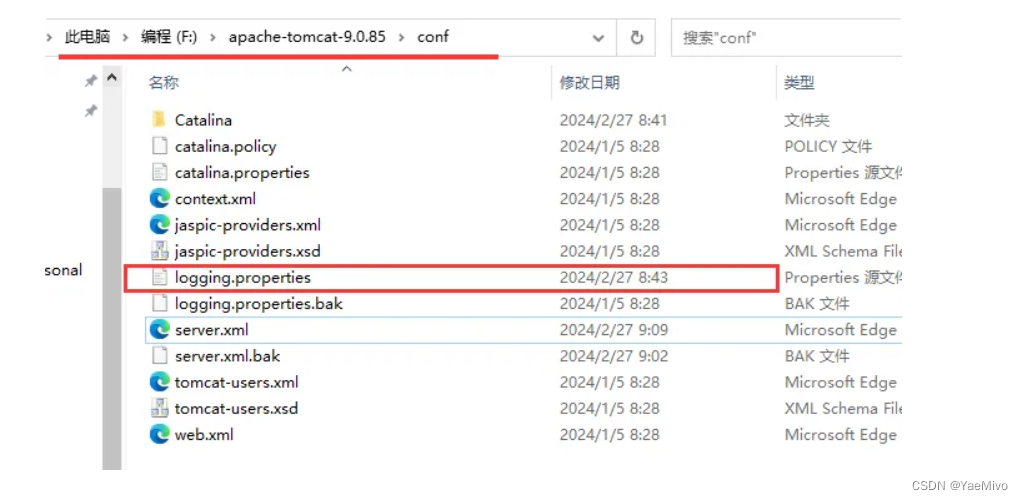
3. 修改部署War包输出日志乱码问题
找到conf目录下的
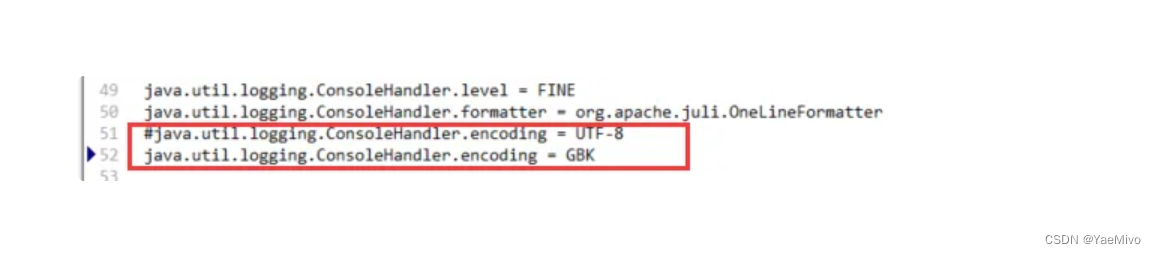
logging.properties来修改对应编码
将UTF-8修改成GBK即可
4. Tomcat 启动!!!
进入bin目录, 双击
startup.bat即可
四. 一个Tomcat部署多个War包
1. 新增一个Service-节点
上面的server.xml文件里已经有两个Service节点了,将注释放开即可
2. 修改新增的Service节点
同理 复制我的
server.xml文件 只需要修改端口号和项目绝对地址即可
点我跳转到 server.xml 文件
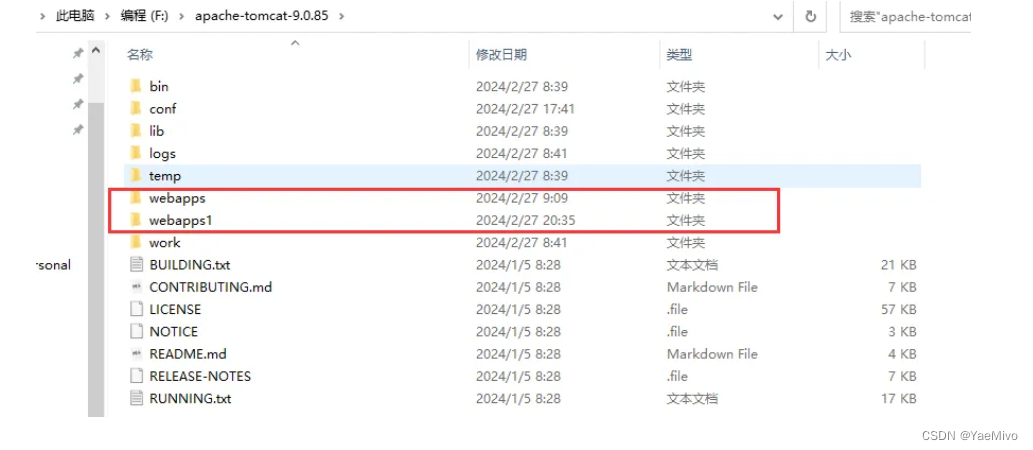
3. 创建对应的webapps
创建对应的
webapps1, 一个文件夹里面放置一个项目的war包即可
4. Tomcat 启动!!!
进入bin目录, 双击
startup.bat即可


 7031
7031

 被折叠的 条评论
为什么被折叠?
被折叠的 条评论
为什么被折叠?
 到【灌水乐园】发言


