


 本文详细介绍了如何使用vSphere Lifecycle Manager(vLCM)来更新ESXi主机。内容涵盖vLCM的功能,如安装补丁和升级主机,以及配置自动下载补丁、创建和管理基线等步骤。
Managing ESXi patches is every VMware admin’s bread and butter. It’s not the most glamorous job, but it is essential. However, as your vSphere environment grows, it can become time consuming to manage VMware patches across 100s of ESXi hosts. Enter vSphere Lifecycle Manager (vLCM)!
In this article, you’ll learn how to update ESXi hosts using vLCM. By the end, you’ll have all the information required to nail your next patching cycle, and save yourself precious time and energy that you can spend on more interesting tasks!
What is vSphere Lifecycle Manager?
vSphere Lifecycle Manager is a built-in vSphere service that provides centralized, automated patch and version management for ESXi hosts. Using vLCM you can perform the following tasks:
• Install patches on ESXi hosts using built-in or custom Patch Baselines.
• Upgrade ESXi hosts using Upgrade Baselines.
• Install and update third-party software on ESXi hosts.
vLCM was introduced in vSphere 7 and comes bundle with the vCenter Server Appliance (VCSA). This is awesome! It means you can dive straight into managing hosts with vLCM, using the built-in vSphere HTML5 Client plug-in, as soon as you’ve deployed your VCSA.
In previous vSphere versions vLCM was known as VMware Update Manager (VUM). Although there are some slight differences in the client interfaces, most of the tasks that you’ll see in this tutorial are essentially the same whether you’re running vLCM or VUM.
Managing the Lifecycle Manager Depot
Before you start updating ESXi hosts it’s a good idea to understand where the patches are stored in vLCM. vLCM uses the concept of a “depot” to store all of its different media such as ESXi updates, ISO images, and 3rd party vendor components.
Viewing available updates in the depot
To view all available ESXi updates in the depot:
- Access the Lifecycle Manager plug-in via the vSphere Client, by browsing to Menu > Lifecycle Manager.
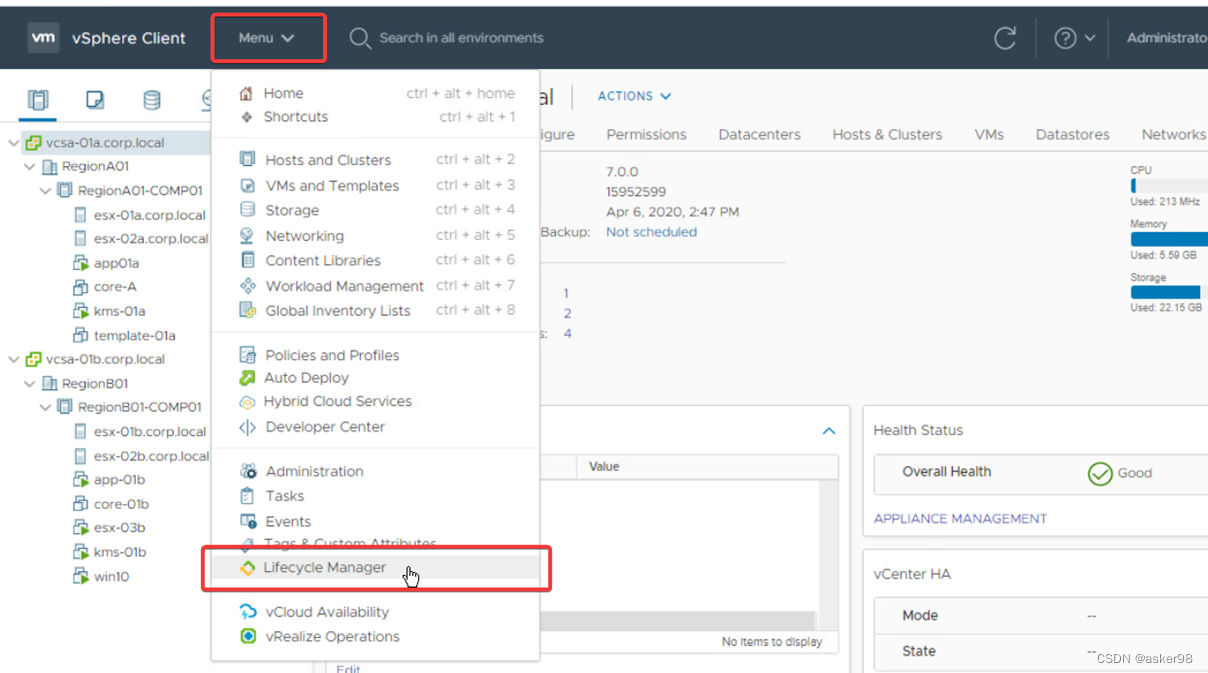
Accessing the vSphere Lifecycle Manager plug-in from the vSphere Client. - Select a vCenter server from the dropdown menu and click the Updates tab. The available updates are shown in the main table.
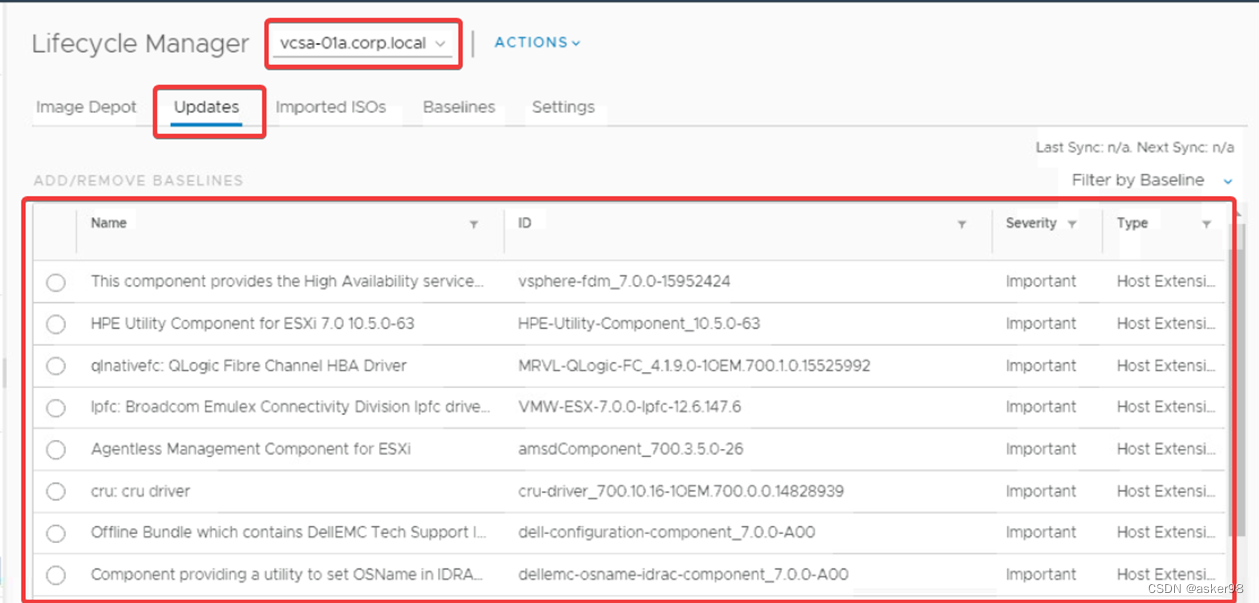
Viewing the available updates in the vLCM depot for a specific vCenter server.
Configuring automatic patch downloads
To ensure you have the latest patches available in your vCenter, you can configure vLCM to automatically download patches from the internet on a schedule. To configure this task:
- In the Lifecycle Manager plug-in, select Settings > Patch Downloads > Edit.

Launching the Edit dialog to configure the automatic download settings. - In the Edit Settings dialog, check the Download patches checkbox, configure the schedule as required, and then click Save.
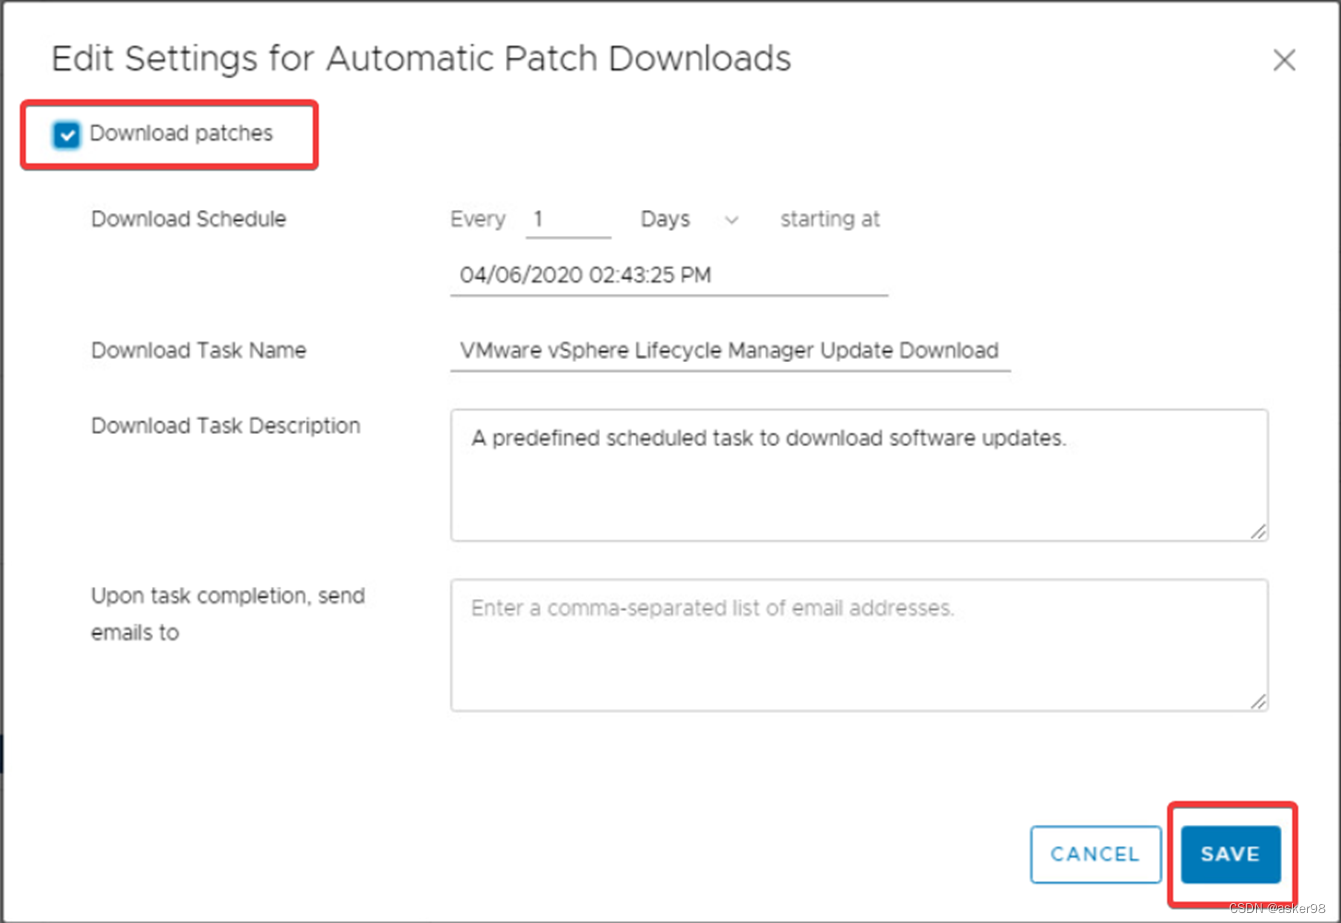
Enabling the download schedule in the Edit Settings dialog.
If you’re behind corporate firewalls you’ll need to make sure there are rules in place allowing access to https://hostupdate.vmware.com to download updates using this method. Alternatively, you can manually import updates into the vLCM depot, using an offline .zip file.
 最低0.47元/天 解锁文章


 1203
1203

 被折叠的 条评论
为什么被折叠?
被折叠的 条评论
为什么被折叠?
 到【灌水乐园】发言


