


demo的前置条件和1.5-RabbitMQ-速入门demo 一样。
Topic Exchange的基本概念:
1.1消费者代码
import com.rabbitmq.client.Channel;
import com.rabbitmq.client.Connection;
import com.rabbitmq.client.QueueingConsumer;
import com.rabbitmq.client.QueueingConsumer.Delivery;
import com.star.movie.common.Constant;

/**
 * @Description:TopicExchange
 * @author:kaili
 * @Date: 2019-04-21 22:29
 **/
public class ConsumerTopicExchange {

    public static void main(String[] args) throws Exception {

        Connection connection = Constant.getConnection();
        Channel channel = connection.createChannel();
        //4 声明
        String exchangeName = "test_topic_exchange";
        String exchangeType = "topic";
        String queueName = "test_topic_queue";
        //String routingKey = "user.*";
        String routingKey = "user.*";
        // 1 声明交换机
        channel.exchangeDeclare(exchangeName, exchangeType, true, false, false, null);
        // 2 声明队列
        channel.queueDeclare(queueName, false, false, false, null);
        // 3 建立交换机和队列的绑定关系:
        channel.queueBind(queueName, exchangeName, routingKey);

        //durable 是否持久化消息
        QueueingConsumer consumer = new QueueingConsumer(channel);
        //参数:队列名称、是否自动ACK、Consumer
        channel.basicConsume(queueName, true, consumer);
        //循环获取消息
        while(true){
            //获取消息,如果没有消息,这一步将会一直阻塞
            Delivery delivery = consumer.nextDelivery();
            String msg = new String(delivery.getBody());
            System.out.println("收到消息:" + msg);
        }
    }
}
1.2 生产者代码
import com.rabbitmq.client.Channel;
import com.rabbitmq.client.Connection;
import com.star.movie.common.Constant;

/**
 * @Description:TopicExchange
 * @author:kaili
 * @Date: 2019-04-21 22:27
 **/
public class ProducerTopicExchange {

    public static void main(String[] args) throws Exception {

        //2 创建Connection
        Connection connection = Constant.getConnection();
        //3 创建Channel
        Channel channel = connection.createChannel();
        //4 声明
        String exchangeName = "test_topic_exchange";
        String routingKey1 = "user.save";
        String routingKey2 = "user.update";
        String routingKey3 = "user.delete.abc";
        //5 发送

        String msg1 = "Hello World RabbitMQ 1 Topic Exchange Message ...";
        String msg2 = "Hello World RabbitMQ 2 Topic Exchange Message ...";
        String msg3 = "Hello World RabbitMQ 3 Topic Exchange Message ...";
        channel.basicPublish(exchangeName, routingKey1 , null , msg1.getBytes());
        channel.basicPublish(exchangeName, routingKey2 , null , msg2.getBytes());
        channel.basicPublish(exchangeName, routingKey3 , null , msg3.getBytes());
        channel.close();
        connection.close();
    }
}
1.3 代码分析
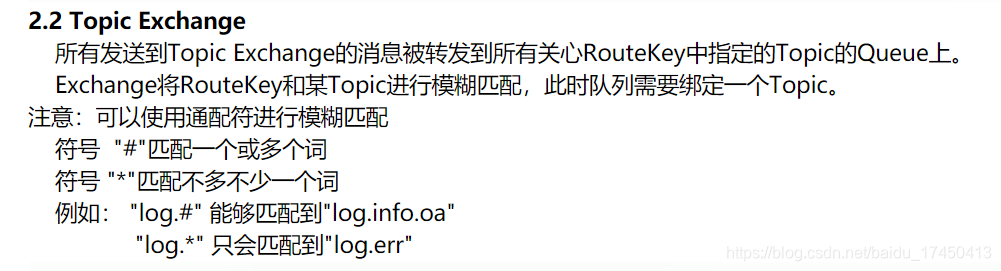
1.生产者定于了类型为topic的交换机test_topic_exchange,队列为test_topic_queue
其绑定关系健为user.*
2.生产者在将消息发送到test_topic_exchange时,如果绑定健“user.”开头的接一个单词的,消息会发送到test_topic_queue队列上。
1.3.1 启动消费者代码
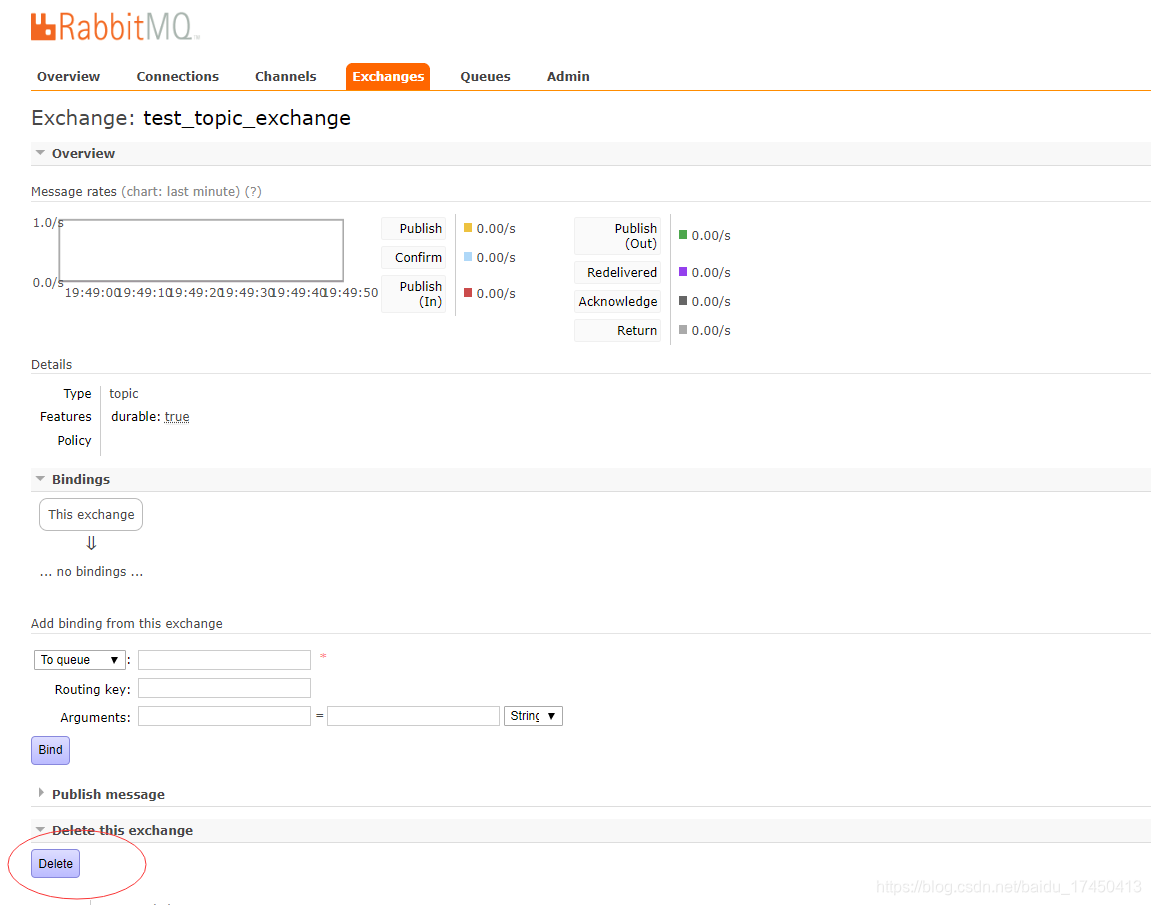
观察管控页面test_topic_exchange交换机信息
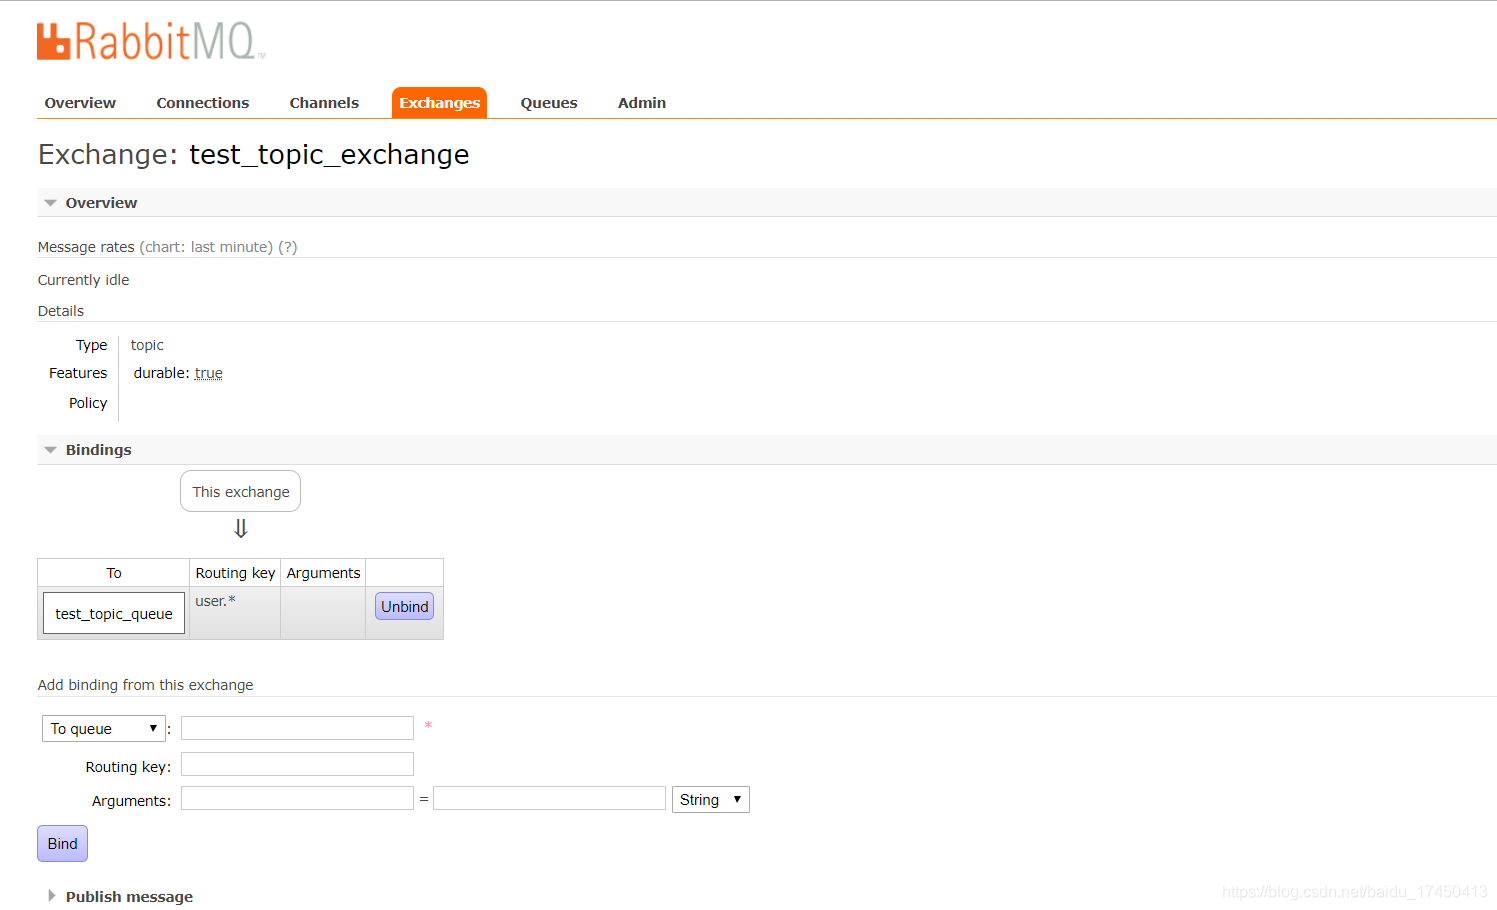
1.3.2 关闭消费者代码,启动生产者代码
观察队列信息,只有两条消息到了test_topic_queue队列,和代码的逻辑一致。启动消费者代码,观察是哪两条消息。
1.3.3 启动消费者代码

从控制台打印的消息可以看出,队列的消息是生产者代码中routingKey1、routingKey2投递的消息,routingKey3投递的消息没有对应的队列接收投递失败。
以上是Topic Exchange中*匹配符的情况,接下来测试#号匹配符的情况
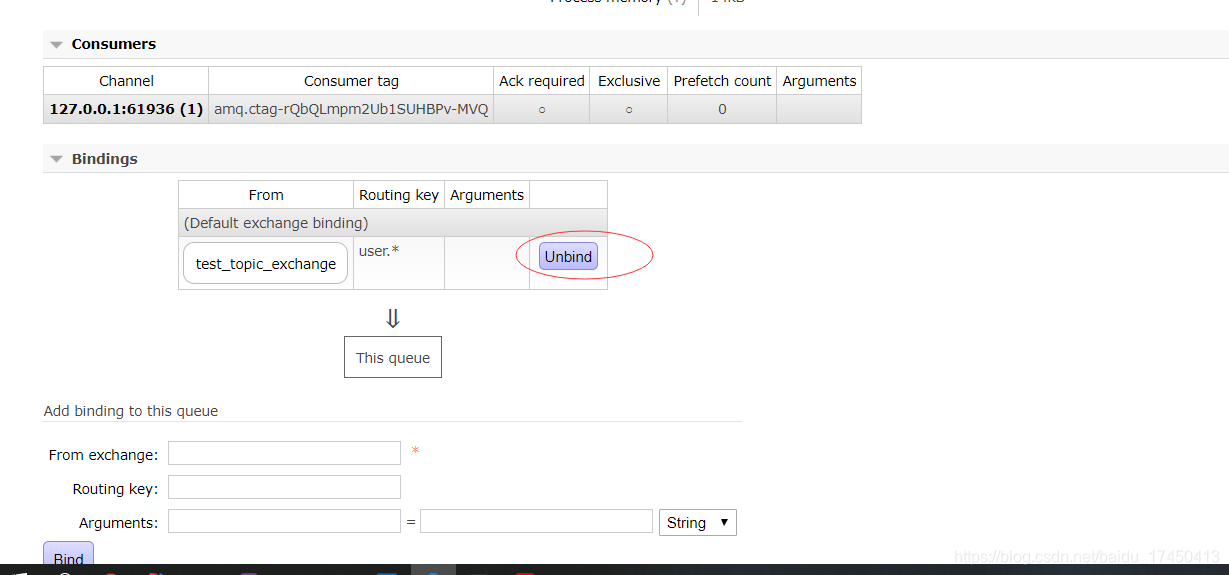
1.3.4 解除队列test_topic_queue和交换机test_topic_exchange的绑定关系
1.3.5 删除test_topic_exchange交换机
1.3.6 修改生产者代码,将部分代码如下修改
//String routingKey = "user.*";
String routingKey = "user.#";
将routingKey改为#号通配符
1.3.7 启动消费者代码生成test_topic_exchange交换机然后停止消费者代码,然后启动生产者代码观察队列的消息数。
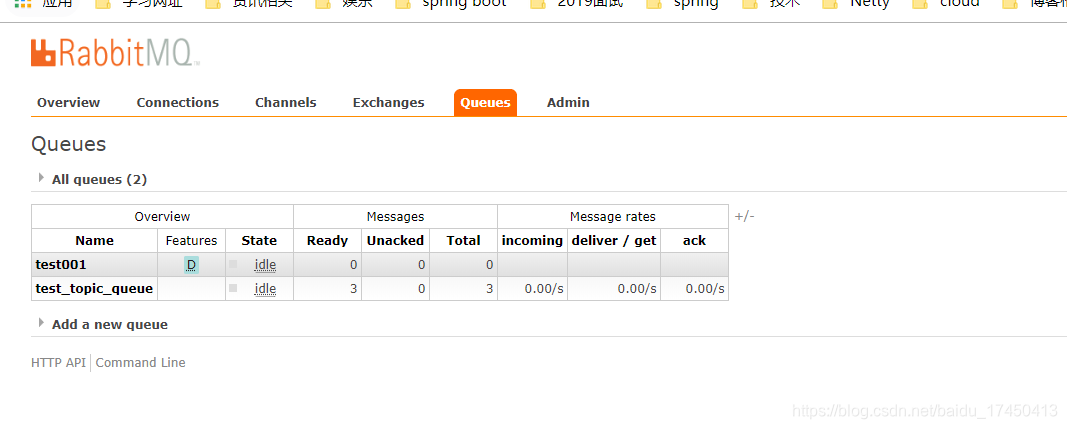
如图,之前的生产者代码投递的三条消息都到队列test_topic_queue上了。
1.3.8 启动消费者代码,观察消费的消息

可以看到是生产者投递的那三条消息


 2084
2084


 被折叠的 条评论
为什么被折叠?
被折叠的 条评论
为什么被折叠?
 到【灌水乐园】发言


