最近刚刚接触 Dubbo这个 框架,遇到了挺多的麻烦,网上搜索来的入门demo也是有挺多问题,百般周折终于弄出来了一个可以使用的小demo,与大家分享。
Zookeeper的介绍和安装:
本Demo中的Dubbo注册中心采用的是Zookeeper,为什么采用Zookeeper呢?
Zookeeper是一个分布式的服务框架,是树形的目录服务的数据存储,能做到集群管理数据,这里能很好的作为Dubbo服务的
注册中心。
Dubbo能与Zookeeper做到集群部署,当提供者出现断电等异常停机的时候。Zookeeper注册中心能自动的删除提供者的信息,
当提供者重启时,能自动恢复注册数据,以及订阅请求。
安装完成后,进入到 bin 目录中,并且启动,zkServer.cmd,这个脚本中会启动一个java进程:
(注:需要先启动zookeeper之后,后续dubbo demo代码运行才能使用 zookeeper注册中心的功能)
2.开始创建我们的maven项目:
先创建一个dubbo-server的项目,项目的目录结构如下图所示:
3.pom.xml文件如下:
<project xmlns="http://maven.apache.org/POM/4.0.0" xmlns:xsi="http://www.w3.org/2001/XMLSchema-instance"
    xsi:schemaLocation="http://maven.apache.org/POM/4.0.0 http://maven.apache.org/xsd/maven-4.0.0.xsd">
    <modelVersion>4.0.0</modelVersion>

    <groupId>com.xbz</groupId>
    <artifactId>dubbo-server</artifactId>
    <version>0.0.1-SNAPSHOT</version>
    <packaging>jar</packaging>

    <name>server</name>
    <url>http://maven.apache.org</url>

    <properties>
        <project.build.sourceEncoding>UTF-8</project.build.sourceEncoding>
    </properties>

    <dependencies>
        <!-- spring begin -->
        <dependency>
            <groupId>org.springframework</groupId>
            <artifactId>spring-context</artifactId>
            <version>4.1.6.RELEASE</version>
        </dependency>
        <!-- spring end -->

        <!-- dubbo begin -->
        <dependency>
            <groupId>com.alibaba</groupId>
            <artifactId>dubbo</artifactId>
            <version>2.5.3</version>
        </dependency>
        <!-- dubbo end -->

        <!-- 注册中心zookeeper begin -->
        <dependency>
            <groupId>org.apache.zookeeper</groupId>
            <artifactId>zookeeper</artifactId>
            <version>3.3.6</version>
        </dependency>
        <!-- 注册中心zookeeper end -->

        <!-- log begin -->
        <dependency>
            <groupId>commons-logging</groupId>
            <artifactId>commons-logging</artifactId>
            <version>1.1.1</version>
        </dependency>
        <dependency>
            <groupId>log4j</groupId>
            <artifactId>log4j</artifactId>
            <version>1.2.15</version>
            <exclusions>
                <exclusion>
                    <groupId>com.sun.jdmk</groupId>
                    <artifactId>jmxtools</artifactId>
                </exclusion>
                <exclusion>
                    <groupId>com.sun.jmx</groupId>
                    <artifactId>jmxri</artifactId>
                </exclusion>
                <exclusion>
                    <artifactId>jms</artifactId>
                    <groupId>javax.jms</groupId>
                </exclusion>
                <exclusion>
                    <artifactId>mail</artifactId>
                    <groupId>javax.mail</groupId>
                </exclusion>
            </exclusions>
        </dependency>
        <!-- log end -->

        <!-- other begin -->
        <dependency>
            <groupId>org.jboss.netty</groupId>
            <artifactId>netty</artifactId>
            <version>3.2.0.Final</version>
        </dependency>
        <dependency>
            <groupId>com.101tec</groupId>
            <artifactId>zkclient</artifactId>
            <version>0.8</version>
        </dependency>
        <!-- other end -->
    </dependencies>
</project> 4.测试接口DemoService和实现类DemoServiceImpl
package com.xbz.service.impl;

import com.xbz.service.DemoService;

public class DemoServiceImpl implements DemoService {

    public String sayHello(String name) {
        System.out.println("init : " + name);
        return "hello " + name;
    }

}
package com.xbz.service;

public interface DemoService {

    String sayHello(String name);

} 5.applicationProvider.xml
<?xml version="1.0" encoding="UTF-8"?>
<beans xmlns="http://www.springframework.org/schema/beans"
    xmlns:xsi="http://www.w3.org/2001/XMLSchema-instance" xmlns:dubbo="http://code.alibabatech.com/schema/dubbo"
    xsi:schemaLocation="http://www.springframework.org/schema/beans http://www.springframework.org/schema/beans/spring-beans.xsd http://code.alibabatech.com/schema/dubbo http://code.alibabatech.com/schema/dubbo/dubbo.xsd ">
    <dubbo:application name="dubbo-demo" />
    <!-- zookeeper注册中心 -->
    <dubbo:registry address="zookeeper://127.0.0.1:2181" />
    <dubbo:protocol name="dubbo" port="20880" />

    <!-- 和本地bean一样实现服务 -->
    <bean id="demoService" class="com.xbz.service.impl.DemoServiceImpl" />

    <!-- 向注册中心注册暴漏服务地址,注册服务 -->
    <dubbo:service interface="com.xbz.service.DemoService"
        ref="demoService" executes="10" />

</beans>
6.服务方主方法ServerMain
package main;

import java.io.IOException;

import org.springframework.context.support.ClassPathXmlApplicationContext;

public class ServerMain {

    public static void main(String[] args) throws IOException {

        ClassPathXmlApplicationContext context = new ClassPathXmlApplicationContext( new String[] { "applicationProvider.xml" });
        context.start();

        System.out.println("输入任意按键退出 ~ ");
        System.in.read();
        context.close();
    }
}
至此,服务方就已经写成功了,接下来开始写客户端那一方,
在写客户端的那一方之前,首先,我们应该先把当前的这个项目放置到maven本地仓库中去,避免后面客户端在写的时候找不到接口从而报错。
方法是这样的:
右键 dubbo-server这个项目,run as --> run configuration —>Maven Build
二、接下来开始写dubbo-client这个项目:
pom.xml文件如下(注意这个pom.xml文件在后面引入了 dubbo-server ):
<project xmlns="http://maven.apache.org/POM/4.0.0" xmlns:xsi="http://www.w3.org/2001/XMLSchema-instance"
    xsi:schemaLocation="http://maven.apache.org/POM/4.0.0 http://maven.apache.org/xsd/maven-4.0.0.xsd">
    <modelVersion>4.0.0</modelVersion>

    <groupId>com.xbz</groupId>
    <artifactId>dubbo-client</artifactId>
    <version>0.0.1-SNAPSHOT</version>
    <packaging>jar</packaging>

    <name>client</name>
    <url>http://maven.apache.org</url>

    <properties>
        <project.build.sourceEncoding>UTF-8</project.build.sourceEncoding>
    </properties>

    <dependencies>
        <!-- spring begin -->
        <dependency>
            <groupId>org.springframework</groupId>
            <artifactId>spring-context</artifactId>
            <version>4.1.6.RELEASE</version>
        </dependency>
        <!-- spring end -->

        <!-- dubbo begin -->
        <dependency>
            <groupId>com.alibaba</groupId>
            <artifactId>dubbo</artifactId>
            <version>2.5.3</version>
        </dependency>
        <!-- dubbo end -->

        <!-- 注册中心zookeeper begin -->
        <dependency>
            <groupId>org.apache.zookeeper</groupId>
            <artifactId>zookeeper</artifactId>
            <version>3.3.6</version>
        </dependency>
        <!-- 注册中心zookeeper end -->

        <!-- log begin -->
        <dependency>
            <groupId>log4j</groupId>
            <artifactId>log4j</artifactId>
            <version>1.2.15</version>
            <exclusions>
                <exclusion>
                    <groupId>com.sun.jdmk</groupId>
                    <artifactId>jmxtools</artifactId>
                </exclusion>
                <exclusion>
                    <groupId>com.sun.jmx</groupId>
                    <artifactId>jmxri</artifactId>
                </exclusion>
                <exclusion>
                    <artifactId>jms</artifactId>
                    <groupId>javax.jms</groupId>
                </exclusion>
                <exclusion>
                    <artifactId>mail</artifactId>
                    <groupId>javax.mail</groupId>
                </exclusion>
            </exclusions>
        </dependency>
        <!-- log end -->

        <!-- other begin -->
        <dependency>
            <groupId>com.101tec</groupId>
            <artifactId>zkclient</artifactId>
            <version>0.8</version>
        </dependency>
        <dependency>
            <groupId>com.xbz</groupId>
            <artifactId>dubbo-server</artifactId>
            <version>0.0.1-SNAPSHOT</version>
        </dependency>
        <!-- other end -->
    </dependencies>
</project>
2.消费端applicationConsumer.xml文件
<?xml version="1.0" encoding="UTF-8"?>
<beans xmlns="http://www.springframework.org/schema/beans"
    xmlns:xsi="http://www.w3.org/2001/XMLSchema-instance" xmlns:dubbo="http://code.alibabatech.com/schema/dubbo"
    xsi:schemaLocation="http://www.springframework.org/schema/beans http://www.springframework.org/schema/beans/spring-beans.xsd http://code.alibabatech.com/schema/dubbo http://code.alibabatech.com/schema/dubbo/dubbo.xsd ">
    <dubbo:application name="dubbo-demo" />
    <!-- zookeeper注册中心 -->
    <dubbo:registry address="zookeeper://127.0.0.1:2181" />
    <dubbo:protocol name="dubbo" port="20880" />

    <!--提供方信息-->
    <dubbo:application name="dubbo-client" owner="mic"/>


    <!--  引用zookeeper上注册的远程服务  -->
    <dubbo:reference id="demoService"
                     interface="com.xbz.service.DemoService"
                     protocol="dubbo"/>


</beans>
3.客户端消费主方法clientMain
package main;

import org.springframework.context.support.ClassPathXmlApplicationContext;

import com.xbz.service.DemoService;

public class ClientMain {
    public static void main(String[] args) {
        ClassPathXmlApplicationContext context = new ClassPathXmlApplicationContext(
                new String[] { "applicationConsumer.xml" });
        context.start();
        DemoService service = (DemoService) context.getBean("demoService");
        System.out.println(service.sayHello("world"));
        context.close();
    }
}
client的项目结构如下:
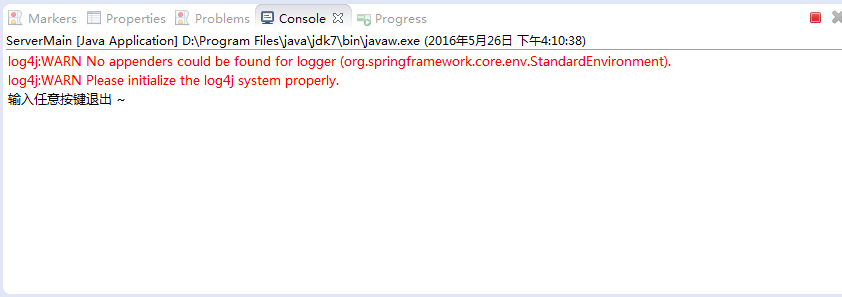
于是开始运行两边的主程序,启动服务方
运行客户端:
这时客户端输出的结果:
服务器端输出的结果:
进入dubbo-admin界面进行服务的管理。(首先我们应该先下载 dubbo-admin的包,可以在guthub上下载)
,然后将dubbo-admin这个包放入到tomcat中的 web-app目录下:随后启动Tomcat。
并且访问dubbo的管理菜单:(登录时候的用户名和密码初始化都是 root)


 2379
2379

 被折叠的 条评论
为什么被折叠?


