


[Android]FloatingText仿点赞+1等效果
@Author GQ 2016年07月29日

自定义View,可以仿点赞往上飘+1的一个特效,或者点击加入
购物车商品抛物线特效。
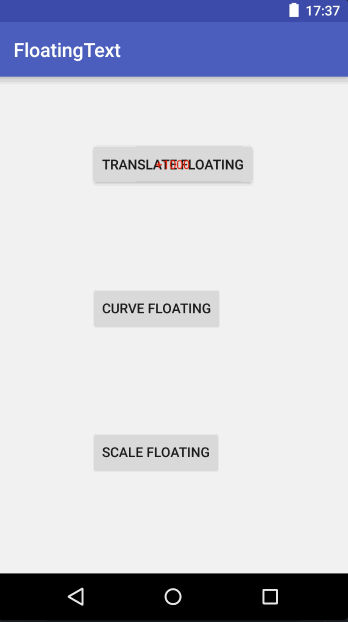
FloatingText 是一个能够在任何控件之上执行漂浮效果动画的控件。效果图
1. AndroidStudio使用
dependencies {

    compile 'com.ufreedom.uikit:FloatingTextLibrary:0.2.0'

}
2. 使用
FloatingText   floatingText = new FloatingText.FloatingTextBuilder(Activity)
    .textColor(Color.RED) // 漂浮字体的颜色
    .textSize(100)   // 浮字体的大小
    .textContent("+1000") // 浮字体的内容
    .offsetX(100) // FloatingText 相对其所贴附View的水平位移偏移量
    .offsetY(100) // FloatingText 相对其所贴附View的垂直位移偏移量
    .floatingAnimatorEffect(FloatingAnimator) // 漂浮动画
    .floatingPathEffect(FloatingPathEffect) // 漂浮的路径
    .build();

floatingText.attach2Window(); //将FloatingText贴附在Window上

//启动漂浮效果
floatingText.startFloating(View); // 传入一个View,FloatingText 就会相对于这个View执行漂浮效果
自定义漂浮动画
通过实现 FloatingAnimator 接口可以实现自定义漂浮动画,详情查看原github。自定义漂浮路径
通过实现 FloatingPathEffect 和 FloatingPathAnimator 可以自定义路径动画
FloatingPath 代表浮动路径
JAVA
// +1 向上移动效果
final View layoutTranslateFloating = findViewById(R.id.layoutTranslateView);
final View translateFloatingView = findViewById(R.id.translateView);
final FloatingText   translateFloatingText = new FloatingText.FloatingTextBuilder(MainActivity.this)
                .textColor(Color.RED)
                .textSize(100)
                .textContent("+1")
                .build();
        translateFloatingText.attach2Window();

        assert layoutTranslateFloating != null;
        layoutTranslateFloating.setOnClickListener(new View.OnClickListener() {
            @Override
            public void onClick(View view) {
                translateFloatingText.startFloating(translateFloatingView);
            }
        });


//+1 放大效果

View layoutScaleView = findViewById(R.id.layoutScaleView);
final View scaleView = findViewById(R.id.scaleView);
final FloatingText  scaleFloatingText = new FloatingText.FloatingTextBuilder(MainActivity.this)
                .textColor(Color.parseColor("#7ED321"))
                .textSize(100)
                .offsetY(-100)
                .floatingAnimatorEffect(new ScaleFloatingAnimator())
                .textContent("+1")
                .build();
        scaleFloatingText.attach2Window();

        assert scaleView != null;
        assert layoutScaleView != null;
        layoutScaleView.setOnClickListener(new View.OnClickListener() {
            @Override
            public void onClick(View view) {
                scaleFloatingText.startFloating(scaleView);
            }
        });


//自定义 螺旋上升动画
final FloatingText  cubicFloatingText = new FloatingText.FloatingTextBuilder(MainActivity.this)
                .textColor(Color.RED)
                .textSize(100)
                .floatingAnimatorEffect(new CurvePathFloatingAnimator())
                .floatingPathEffect(new CurveFloatingPathEffect())
                .textContent("Hello! ")
                .build();
        cubicFloatingText.attach2Window();


        View layoutCurveView = findViewById(R.id.layoutCurveView);
        final View curveView = findViewById(R.id.curveView);
        assert curveView != null;
        assert layoutCurveView != null;
        layoutCurveView.setOnClickListener(new View.OnClickListener() {
            @Override
            public void onClick(View view) {
                cubicFloatingText.startFloating(curveView);
            }
        });
- XML
<FrameLayout
        android:id="@+id/layoutTranslateView"
        android:layout_width="234.4dp"
        android:layout_height="80dp"
        android:layout_alignParentLeft="true"
        android:layout_centerHorizontal="true"
        android:layout_marginTop="50dp"
        >

        <TextView
            android:id="@+id/translateView"
            android:layout_width="wrap_content"
            android:layout_height="wrap_content"
            android:layout_gravity="center_horizontal"
            android:layout_marginTop="20dp"
            android:text="Translate Floating"
            android:textColor="@android:color/white" />

    </FrameLayout>


 158
158

 被折叠的 条评论
为什么被折叠?
被折叠的 条评论
为什么被折叠?
 到【灌水乐园】发言


