


 本文详细介绍了Disconf配置中心的部署流程,包括Nginx、Apache Tomcat、Zookeeper、Redis、Mysql等组件的配置,以及Disconf源码的编译和部署步骤。
参考文章链接
https://www.cnblogs.com/shuaiandjun/p/8412628.html
配置环境清单
- Nginx-1.16.1
- Apache-tomcat-7.0.96
- Zookeeper-3.4.10
- Redis-windows
- Mysql5.5
- disconf-master源码
安装环境
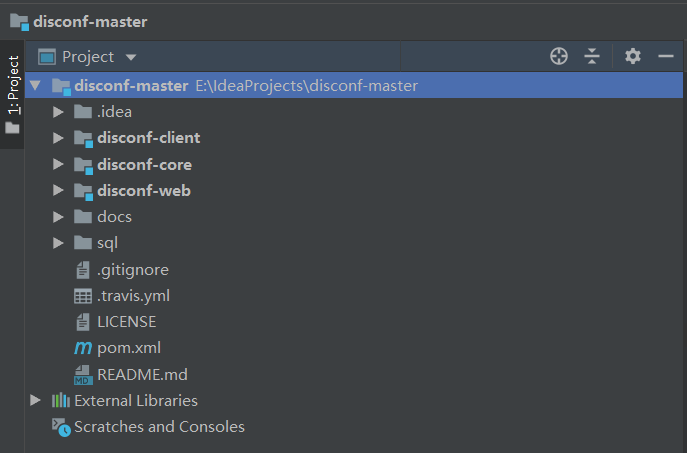
- 下载安装disconf-master源码
Github下载地址
https://github.com/knightliao/disconf
下载后用IDEA打开如下图1所示,并导入pom文件中的依赖库
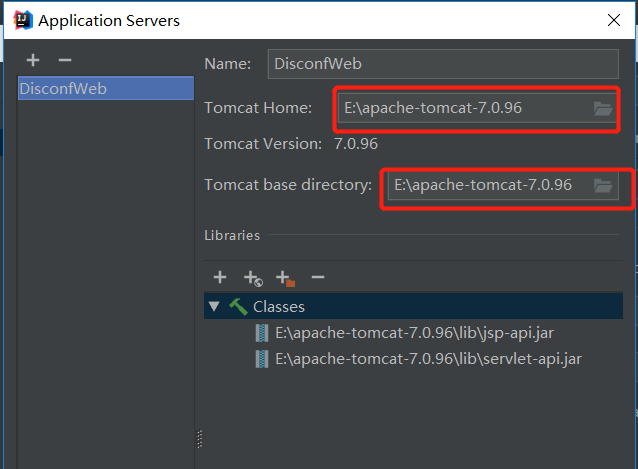
- 下载安装tomcat
官方网站下载地址
https://tomcat.apache.org/download-70.cgi
下载后解压缩,进入目录apache-tomcat-7.0.96\bin,修改文件startup.bat,在其头部加入环境变量配置,不然会出现启动服务器时闪退的问题,修改后运行startup.bat文件,打开浏览器访问 localhost:8080 ,显示tomcat欢迎界面即可。

接下来在IDEA配置tomcat服务器,首先配置要导出的war包,在父模块中的pom文件中编辑,添加disconf-web
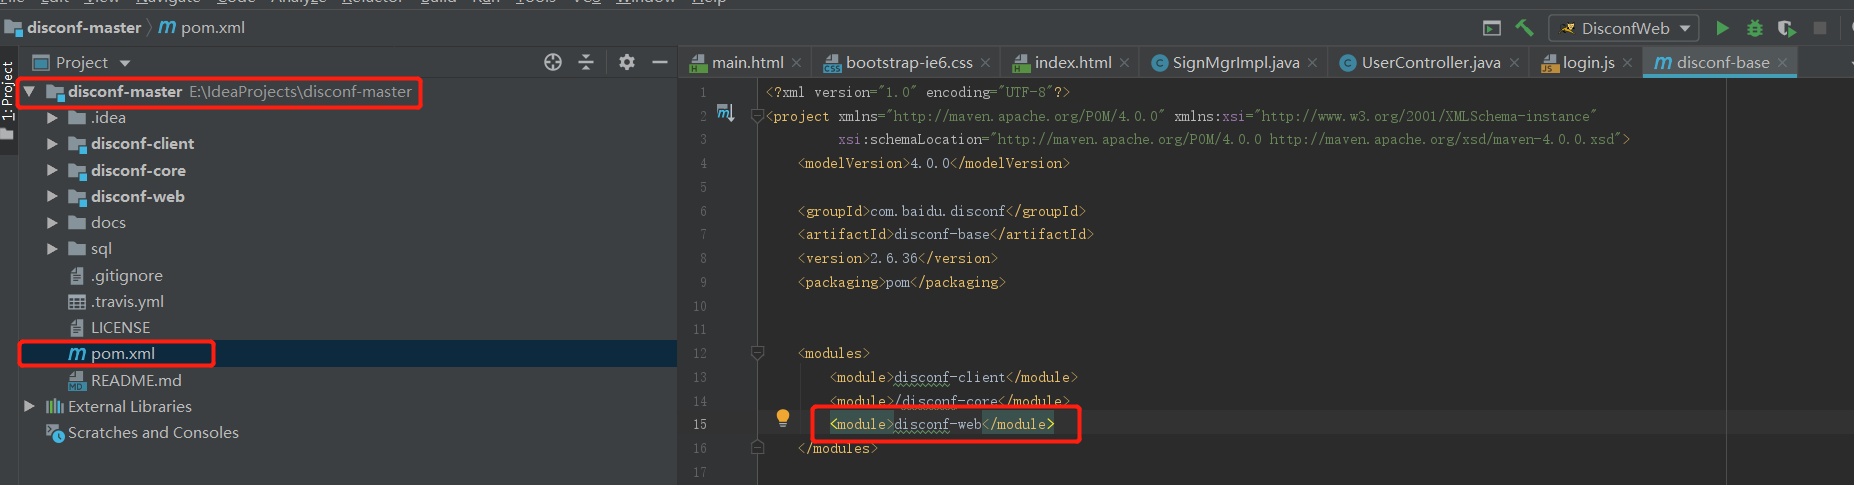
然后在disconf-web中指定其版本号,注意此时的pom文件和上面的pom文件并不一样

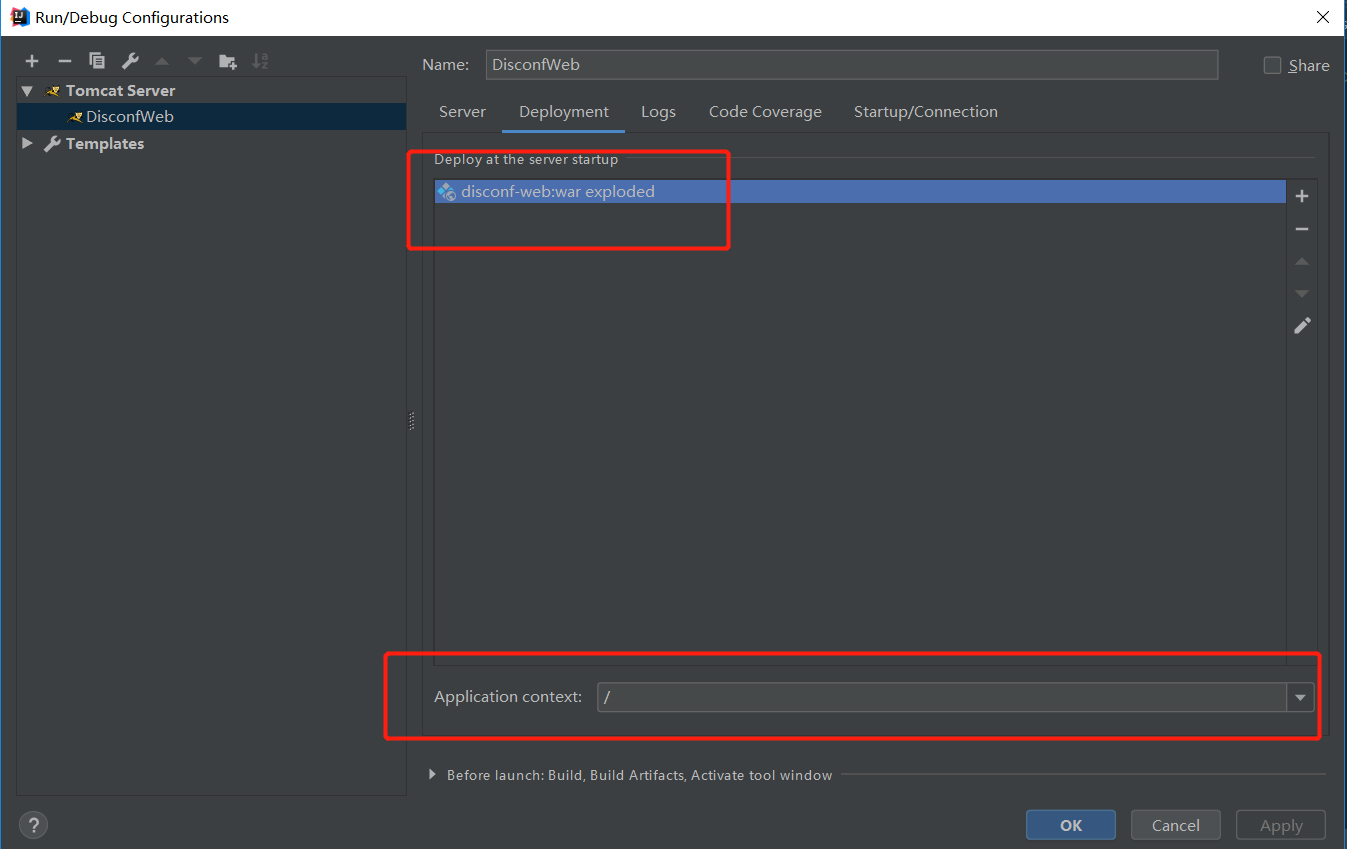
在IDEA启动配置中,设置所使用的tomcat,如下图所示
指定我们tomcat的后台端口,这里所用的是9999端口
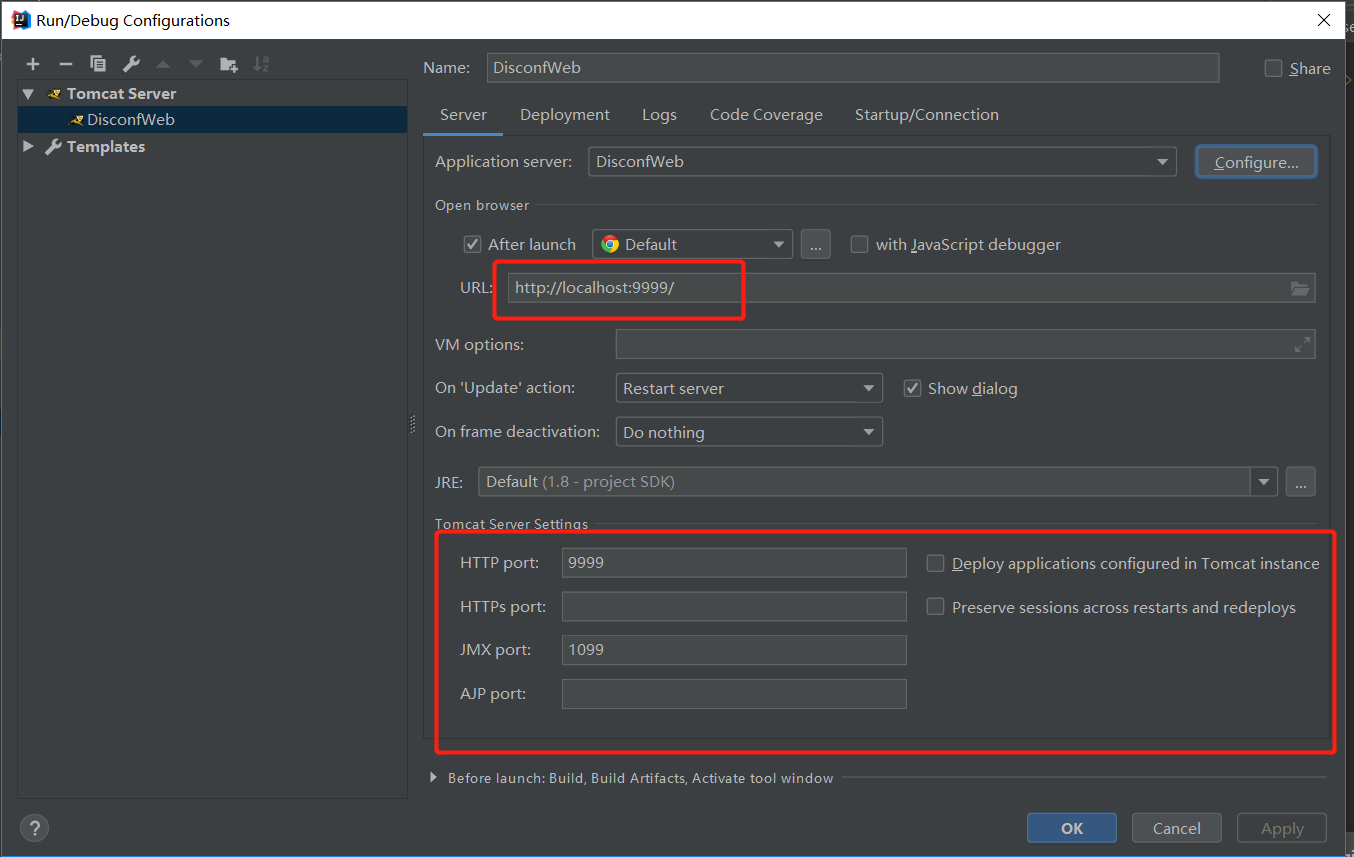
指定启动的war包以及访问路径
- Nginx
官方网站下载
http://nginx.org/en/download.html
下载完解压后,进入\nginx-1.16.1\conf下,打开nginx.conf文件,在其中新增一个server配置,这样就nginx就会将请求转发到tomcat处理。
`server {
       listen       8089;  #这里是nginx的监听端口
        server_name  localhost;

    location / {
        root E:/IdeaProjects/disconf-master/disconf-web/html;   #这里指向项目中disconf-web子模块中html位置
        if ($query_string) {
            expires max;
        }
    }

    location ~ ^/(api|export) {
        proxy_pass_header Server;
        proxy_set_header Host $http_host;
        proxy_redirect off;
        proxy_set_header X-Real-IP $remote_addr;
        proxy_set_header X-Scheme $scheme;
        proxy_pass http://127.0.0.1:9999;      #tomcat端口
    }

    location = /favicon.ico {
        log_not_found off;
        access_log off;
    }
	}	`
- Zookeeper
官方网站下载
https://www.apache.org/dyn/closer.cgi/zookeeper/
解压后,依然修改zkServer.cmd和zkCli.cmd两个文件,在文件头指定jdk路径
setlocal SET JAVA_HOME=E:\Java\jdk1.8.0_201
修改后进入ZK根目录下,新建两个文件夹data和log,用于储存相关信息,然后进入conf目录下,新建zoo.cfg文件,内容为
# The number of milliseconds of each tick
tickTime=2000
# The number of ticks that the initial
# synchronization phase can take
initLimit=10
# The number of ticks that can pass between
# sending a request and getting an acknowledgement
syncLimit=5
# the directory where the snapshot is stored.
# do not use /tmp for storage, /tmp here is just
# example sakes.
dataDir=data目录的绝对地址,/要加转义//
dataLogDir=log目录的绝对地址,/要加转义//
# the port at which the clients will connect
clientPort=2181
# the maximum number of client connections.
# increase this if you need to handle more clients
#maxClientCnxns=60
#
# Be sure to read the maintenance section of the
# administrator guide before turning on autopurge.
#
# http://zookeeper.apache.org/doc/current/zookeeperAdmin.html#sc_maintenance
#
# The number of snapshots to retain in dataDir
#autopurge.snapRetainCount=3
# Purge task interval in hours
# Set to "0" to disable auto purge feature
#autopurge.purgeInterval=1
然后依次启动zkServer.cmd和zkCli.cmd,即可,如果出现闪退的情况,可以在文件尾部加pause()来查看报错信息。
- Redis-windows
GitHub下载
https://github.com/microsoftarchive/redis/releases - Mysql配置
Mysql安装不再赘述,这里介绍Mysql如何安装disconf数据库,进入mysql数据库中,依次执行如下4个sql文件即可。
0-init_table.sql create db,tables
1-init_data.sql create data
201512/20151225.sql patch
20160701/20160701.sql patch
启动disconf
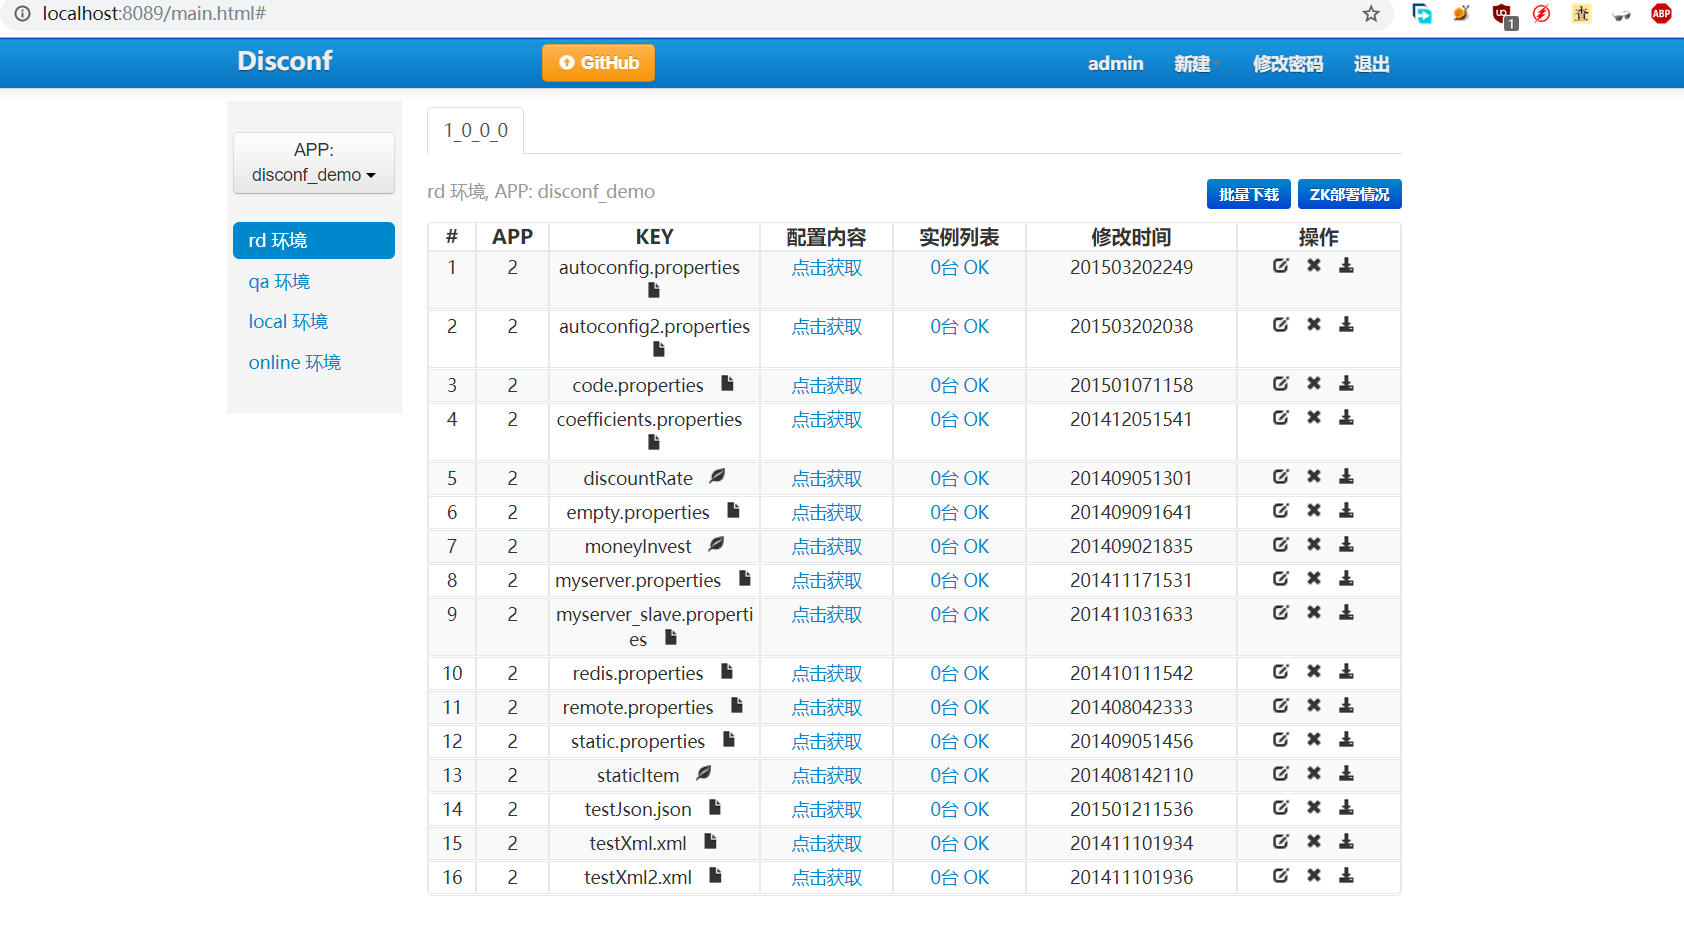
首先启动nginx,mysql,zookeeper客户端和服务端,redis,然后访问localhost:8089/main.html ,出现以下界面说明nginx启动成功。

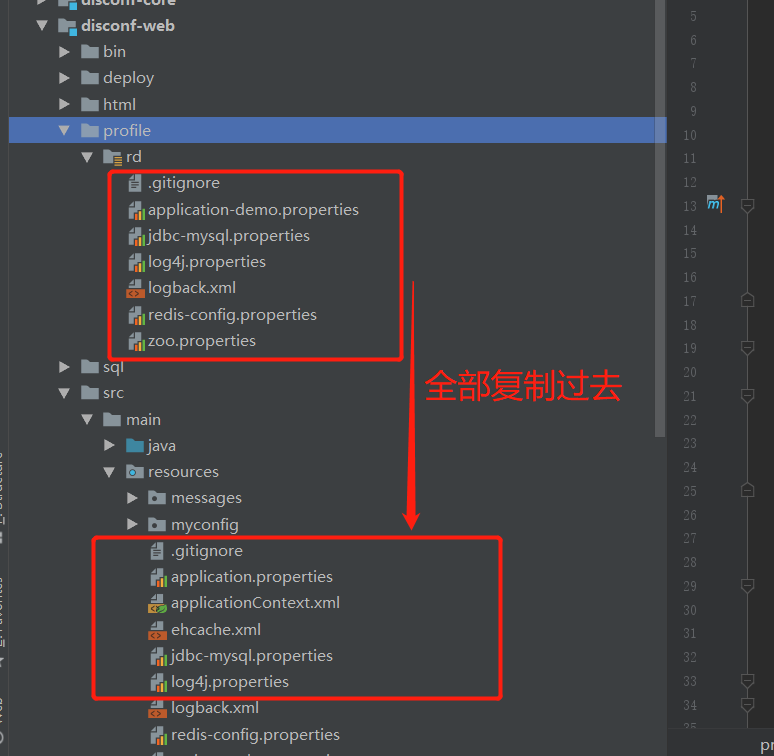
修改disconf的配置文件,将application-demo.properties重命名为application.properties,并修改jdbc-mysql.properties,redis-config.properties和zoo.properties文件,让其指向自己已经安装好的软件
启动项目后,访问localhost:8089/main.html 输入用户名admin 密码admin,登陆成功后,显示如下界面即说明安装成功


 9457
9457

 被折叠的 条评论
为什么被折叠?
被折叠的 条评论
为什么被折叠?
 到【灌水乐园】发言


