


一、V7效果真的的v587,识别率和速度都有了极大的提升,这里先放最新鲜的github链接:
https://github.com/WongKinYiu/yolov7
二、v7的训练我这里就不做过多的赘述了,这里主要是进行讲解怎么把.pt文件转为onnx和后续的推理问题:
2.1首先是pip的版本非常重要,博主亲自测试了,发现确实只有对应版本,ONNX才能成功,以至于后续的onnxruntime才能正常的ReadLoad~~
pip install onnx==1.12.0
pip install onnx-simplifier==0.4.0
pip install coloredlogs==15.0.1
pip install humanfriendly==10.0
pip install onnxruntime-gpu==1.12.0
pip isntall onnxsim-no-ort==0.4.0
pip install opencv-python==4.5.2.52(注意cv2一定不能用4.6.0)
pip install protobuf==3.19.4
pip install setuptools==63.2.0
我进行运行的torch和torchvision版本是:
torch1.12.0+cu113 + torchvision 0.13.0+cu113 + python3.8
这里值得注意的是,在v7的requirements.txt中备注了不要使用这个版本训练,但是做推理的时候我发现,就这个版本可以完成推理,太难了QAQ。。。。
这里推荐一个下载torch的.whl文件的链接:https://download.pytorch.org/whl/torch_stable.html
在里面找到对应的版本就行了(PS:只要torch与torchvison版本对应上就行,cu前缀其实限制没那么多,我的cuda是11.0,但是我pip install 的torch轮子的cu113的O(∩_∩)O):

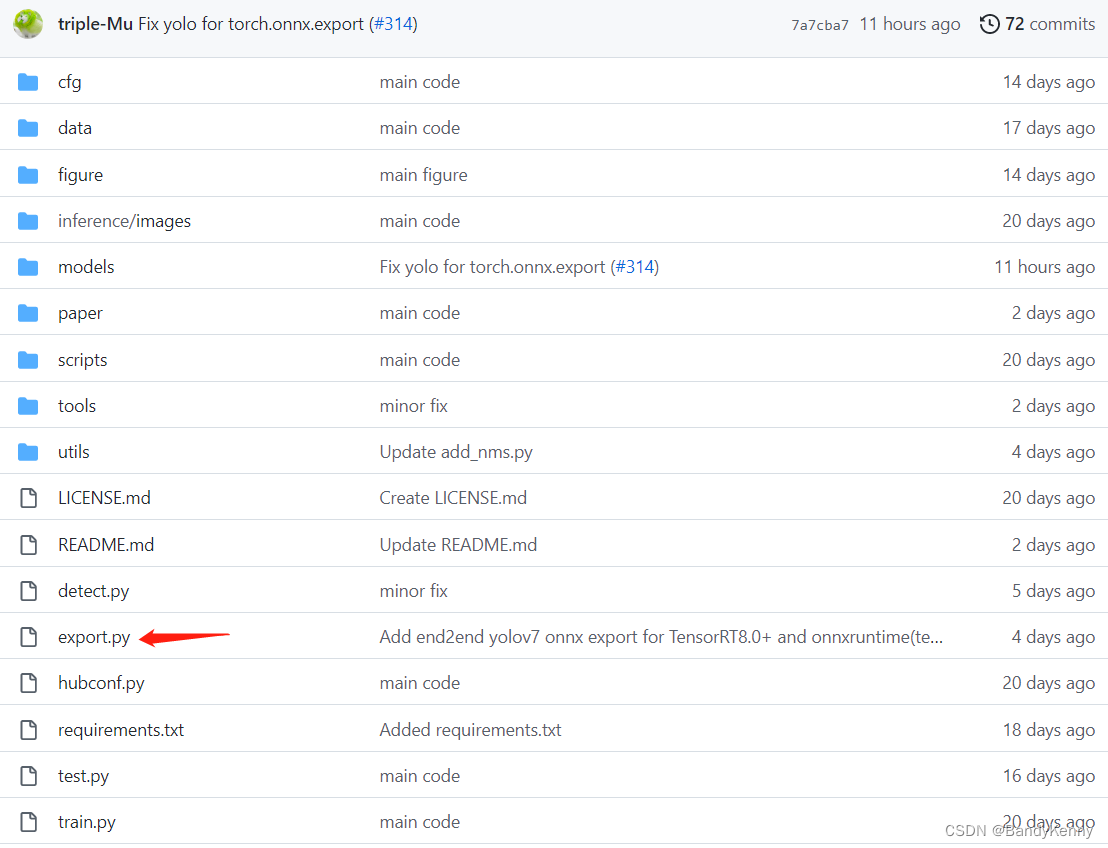
2.2 有了转换环境之后我们进行export.py的关键步骤:
在V7项目的根目录下有export.py文件,这里不对文件内部做修改,可以直接执行命令语句:
python export.py --grid --end2end --simplify --topk-all 100 --iou-thres 0.3 --conf-thres 0.8 --img-size 640 640 --max-wh 640 --weights weights/onnxruntime.pt切记需要将这些超参数打上,看了下解释因该是做了模型剪枝simple啥的,所以相关的参数必须齐全,--weights这里写你们自己的模型pt文件就可以了,其它参数根据自己的模型进行修改就好了,我这里拿V7官方的预训练好的模型(yolov7-tiny.pt)进行演示:
忽略一些警告,如下图所示就这么轻松转换成功啦:
我们在netro(https://netron.app/)中打开这个onnx看一看,发现在输出已经处理好变为7维的向量了:

三、关于推理部署
有了onnx文件,我们需要放在onnxruntime工具包下做推理
3.1 加载推理模型:
    def init_engine(self):
        providers = ['CUDAExecutionProvider', 'CPUExecutionProvider'] if self.device else ['CPUExecutionProvider']
        self.session = ort.InferenceSession(self.weights, providers=providers)
3.2 对输入图像进行前处理(做灰条填充)+变为tensor能认的4维:
    def letterbox(self, im, color=(114, 114, 114), auto=True, scaleup=True, stride=32):
        # 调整大小和垫图像,同时满足跨步多约束
        shape = im.shape[:2]  # current shape [height, width]
        new_shape = self.img_new_shape

        # 如果是单个size的话,就在这里变成一双
        if isinstance(new_shape, int):
            new_shape = (new_shape, new_shape)

        # 尺度比 (new / old)
        r = min(new_shape[0] / shape[0], new_shape[1] / shape[1])
        if not scaleup:  # 只缩小,不扩大(为了更好的val mAP)
            r = min(r, 1.0)

        # 计算填充
        new_unpad = int(round(shape[1] * r)), int(round(shape[0] * r))
        dw, dh = new_shape[1] - new_unpad[0], new_shape[0] - new_unpad[1]  # wh padding

        if auto:  # 最小矩形区域
            dw, dh = np.mod(dw, stride), np.mod(dh, stride)  # wh padding

        dw /= 2  # divide padding into 2 sides
        dh /= 2

        if shape[::-1] != new_unpad:  # resize
            im = cv2.resize(im, new_unpad, interpolation=cv2.INTER_LINEAR)
        top, bottom = int(round(dh - 0.1)), int(round(dh + 0.1))
        left, right = int(round(dw - 0.1)), int(round(dw + 0.1))
        im = cv2.copyMakeBorder(im, top, bottom, left, right, cv2.BORDER_CONSTANT, value=color)  # add border
        im = im.transpose((2, 0, 1))
        im = np.expand_dims(im, 0)
        im = np.ascontiguousarray(im)
        im = im.astype(np.float32)
        im /= 255
        return im, r, (dw, dh)
3.3 然后就可以放如onnxruntime中得到那7维的输出结果了:
    def preprocess(self, image_path):
        self.img = cv2.imread(image_path)
        self.img = cv2.cvtColor(self.img, cv2.COLOR_BGR2RGB)
        image = self.img.copy()
        im, ratio, dwdh = self.letterbox(image, auto=False)
        t1 = time.time()
        outputs = self.predict(im)
        print("推理时间", (time.time() - t1) * 1000, ' ms')
        ori_images = [self.img.copy()]
        for i, (batch_id, x0, y0, x1, y1, cls_id, score) in enumerate(outputs):
            image = ori_images[int(batch_id)]
            box = np.array([x0, y0, x1, y1])
            box -= np.array(dwdh * 2)
            box /= ratio
            box = box.round().astype(np.int32).tolist()
            cls_id = int(cls_id)
            score = round(float(score), 3)
            name = self.names[cls_id]
            color = self.colors[name]
            name += ' ' + str(score)
            cv2.rectangle(image, box[:2], box[2:], color, 2)
            cv2.putText(image, name, (box[0], box[1] - 2), cv2.FONT_HERSHEY_SIMPLEX, 0.75, [225, 255, 255], thickness=2)
        a = Image.fromarray(ori_images[0])
        return a
3.4 pre的部分比较简单基本onnx都处理过了,直接拿字典结果就可以
def predict(self, im):
outname = [i.name for i in self.session.get_outputs()]
inname = [i.name for i in self.session.get_inputs()]
inp = {inname[0]: im}
outputs = self.session.run(outname, inp)[0]
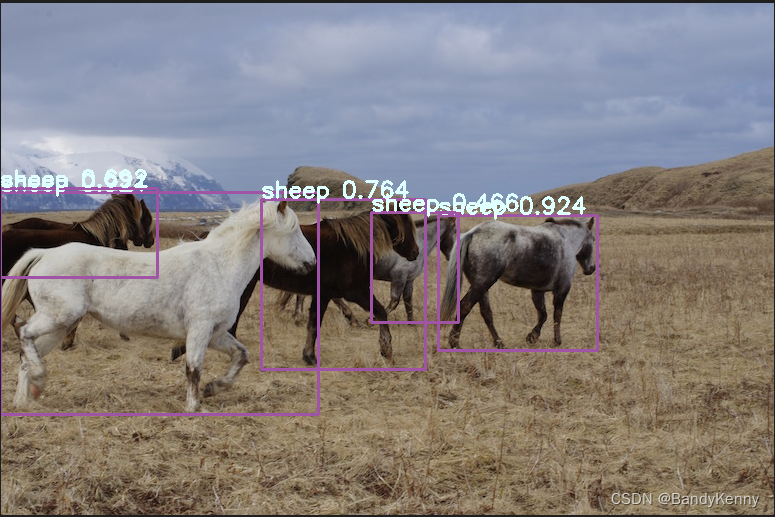
return outputs3.5 可以看看推理时间还是非常快的,单帧在10ms左右,真是100FPS!!!!!

3.6 放一张马的传统,哈哈:
2022年9月21日 最后补充下,其实上面就是源码,把它拼接到一起就是一个整体脚本了呀😂
import os
import cv2
import time
import requests
import argparse
import random
import numpy as np
import onnxruntime as ort
from PIL import Image

names = ["1", "2", "3", "4", "5", "6", "unknow" 'truck', 'boat', 'traffic light',
         'fire hydrant', 'stop sign', 'parking meter', 'bench', 'bird', 'cat', 'dog', 'horse', 'sheep', 'cow',
         'elephant', 'bear', 'zebra', 'giraffe', 'backpack', 'umbrella', 'handbag', 'tie', 'suitcase', 'frisbee',
         'skis', 'snowboard', 'sports ball', 'kite', 'baseball bat', 'baseball glove', 'skateboard', 'surfboard',
         'tennis racket', 'bottle', 'wine glass', 'cup', 'fork', 'knife', 'spoon', 'bowl', 'banana', 'apple',
         'sandwich', 'orange', 'broccoli', 'carrot', 'hot dog', 'pizza', 'donut', 'cake', 'chair', 'couch',
         'potted plant', 'bed', 'dining table', 'toilet', 'tv', 'laptop', 'mouse', 'remote', 'keyboard', 'cell phone',
         'microwave', 'oven', 'toaster', 'sink', 'refrigerator', 'book', 'clock', 'vase', 'scissors', 'teddy bear',
         'hair drier', 'toothbrush']


class ONNX_engine():
    def __init__(self, weights, size, cuda) -> None:
        self.img_new_shape = (size, size)
        self.weights = weights
        self.device = cuda
        self.init_engine()
        self.names = names
        self.colors = {name: [random.randint(0, 255) for _ in range(3)] for i, name in enumerate(self.names)}

    def init_engine(self):
        providers = ['CUDAExecutionProvider', 'CPUExecutionProvider'] if self.device else ['CPUExecutionProvider']
        self.session = ort.InferenceSession(self.weights, providers=providers)

    def predict(self, im):
        outname = [i.name for i in self.session.get_outputs()]
        inname = [i.name for i in self.session.get_inputs()]
        inp = {inname[0]: im}
        outputs = self.session.run(outname, inp)[0]
        # print(outputs.shape)
        return outputs

    def preprocess(self, image_path):
        print('----------', image_path, '---------------')
        self.img = cv2.imread(image_path)
        self.img = cv2.cvtColor(self.img, cv2.COLOR_BGR2RGB)
        image = self.img.copy()
        im, ratio, dwdh = self.letterbox(image, auto=False)
        t1 = time.time()
        outputs = self.predict(im)
        print("推理时间", (time.time() - t1) * 1000, ' ms')
        ori_images = [self.img.copy()]
        for i, (batch_id, x0, y0, x1, y1, cls_id, score) in enumerate(outputs):
            image = ori_images[int(batch_id)]
            box = np.array([x0, y0, x1, y1])
            box -= np.array(dwdh * 2)
            box /= ratio
            box = box.round().astype(np.int32).tolist()
            cls_id = int(cls_id)
            score = round(float(score), 3)
            name = self.names[cls_id]
            color = self.colors[name]
            name += ' ' + str(score)
            print("pre result is :", box, name)
            cv2.rectangle(image, box[:2], box[2:], color, 2)
            cv2.putText(image, name, (box[0], box[1] - 2), cv2.FONT_HERSHEY_SIMPLEX, 0.75, [225, 255, 255], thickness=1)
        a = Image.fromarray(ori_images[0])
        return a

    def letterbox(self, im, color=(114, 114, 114), auto=True, scaleup=True, stride=32):
        # 调整大小和垫图像,同时满足跨步多约束
        shape = im.shape[:2]  # current shape [height, width]
        new_shape = self.img_new_shape

        # 如果是单个size的话,就在这里变成一双
        if isinstance(new_shape, int):
            new_shape = (new_shape, new_shape)

        # 尺度比 (new / old)
        r = min(new_shape[0] / shape[0], new_shape[1] / shape[1])
        if not scaleup:  # 只缩小,不扩大(为了更好的val mAP)
            r = min(r, 1.0)

        # 计算填充
        new_unpad = int(round(shape[1] * r)), int(round(shape[0] * r))
        dw, dh = new_shape[1] - new_unpad[0], new_shape[0] - new_unpad[1]  # wh padding

        if auto:  # 最小矩形区域
            dw, dh = np.mod(dw, stride), np.mod(dh, stride)  # wh padding

        dw /= 2  # divide padding into 2 sides
        dh /= 2

        if shape[::-1] != new_unpad:  # resize
            im = cv2.resize(im, new_unpad, interpolation=cv2.INTER_LINEAR)
        top, bottom = int(round(dh - 0.1)), int(round(dh + 0.1))
        left, right = int(round(dw - 0.1)), int(round(dw + 0.1))
        im = cv2.copyMakeBorder(im, top, bottom, left, right, cv2.BORDER_CONSTANT, value=color)  # add border
        im = im.transpose((2, 0, 1))
        im = np.expand_dims(im, 0)
        im = np.ascontiguousarray(im)
        im = im.astype(np.float32)
        im /= 255
        return im, r, (dw, dh)


if __name__ == '__main__':
    parser = argparse.ArgumentParser()
    parser.add_argument('--weights', type=str, default='./weights/coil_onnxruntime.onnx', help='weights path of onnx')
    parser.add_argument('--cuda', type=bool, default=True, help='if your pc have cuda')
    parser.add_argument('--imgs_path', type=str, default='inference/images', help='infer the img of path')
    parser.add_argument('--size', type=int, default=640, help='infer the img size')
    opt = parser.parse_args()

    onnx_engine = ONNX_engine(opt.weights, opt.size, opt.cuda)
    save_path = './inference'
    for img_path in os.listdir(opt.imgs_path):
        img_path_file = opt.imgs_path + '/' + img_path
        # print('The img path is: ', img_path_file)
        a = onnx_engine.preprocess(img_path_file)
        # a.save(save_path + '/' + 'pre_img' + '/' + img_path)
print('*'*50)参考代码:https://colab.research.google.com/github/WongKinYiu/yolov7/blob/main/tools/YOLOv7onnx.ipynb


 1万+
1万+


 被折叠的 条评论
为什么被折叠?
被折叠的 条评论
为什么被折叠?
 到【灌水乐园】发言


