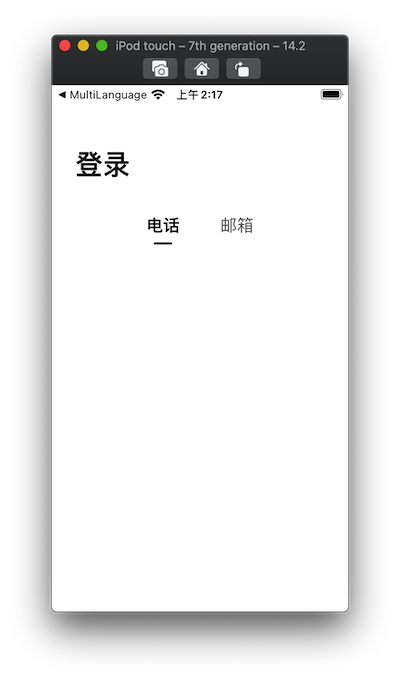
1.截图
2.代码
2.1 XYswitchView.swift
import UIKit
protocol XYswitchViewDelegate : AnyObject{
var isPhoneBtnSelected:Bool {get set}
}
class XYswitchView: UIView {
private weak var delegate:XYswitchViewDelegate?
override init(frame: CGRect) {
super.init(frame: frame)
setupUI()
}
convenience init(delegate:XYswitchViewDelegate){
self.init(frame: CGRect.zero)
self.delegate = delegate
isPhoneBtnSelected = true
}
var isPhoneBtnSelected: Bool{
set{
delegate?.isPhoneBtnSelected = newValue
if newValue {
phoneBtn.isSelected = true
emailBtn.isSelected = false
phoneBtnLine.isHidden = false
emailBtnLine.isHidden = true
}else{
phoneBtn.isSelected = false
emailBtn.isSelected = true
phoneBtnLine.isHidden = true
emailBtnLine.isHidden = false
}
}
get{
return phoneBtn.isSelected
}
}
lazy var phoneBtn:UIButton = {
let btn = UIButton(type: .custom)
btn.addTarget(self, action: #selector(phoneBtnClick), for: .touchUpInside)
btn.setTitle(LocalizableManager.localValue("phone"), for: .normal)
btn.setAttributedTitle(phoneBtnNormal, for: .normal)
btn.setAttributedTitle(phoneBtnSelected, for: .selected)
return btn
}()
@objc func phoneBtnClick(){
isPhoneBtnSelected = true
}
lazy var phoneBtnLine:UIView = {
let view = UIView()
view.backgroundColor = UIColor.hexColor(hexValue: 0x0D0E0F)
view.layer.cornerRadius = 1.25
view.layer.masksToBounds = true
return view
}()
lazy var emailBtn:UIButton = {
let btn = UIButton(type: .custom)
btn.addTarget(self, action: #selector(emailBtnClick), for: .touchUpInside)
btn.setTitle(LocalizableManager.localValue("email"), for: .normal)
btn.setAttributedTitle(emailBtnNormal, for: .normal)
btn.setAttributedTitle(emailBtnSelected, for: .selected)
return btn
}()
lazy var emailBtnLine:UIView = {
let view = UIView()
view.backgroundColor = UIColor.hexColor(hexValue: 0x0D0E0F)
view.layer.cornerRadius = 1.25
view.layer.masksToBounds = true
return view
}()
@objc func emailBtnClick(){
isPhoneBtnSelected = false
}
required init?(coder: NSCoder) {
fatalError("init(coder:) has not been implemented")
}
}
extension XYswitchView {
func setupUI(){
addSubview(emailBtn)
emailBtn.snp.makeConstraints { (make) in
make.centerY.equalToSuperview()
make.centerX.equalToSuperview().multipliedBy(1.25)
}
addSubview(emailBtnLine)
emailBtnLine.snp.makeConstraints { (make) in
make.width.equalTo(20)
make.height.equalTo(2.5)
make.centerX.equalTo(emailBtn)
make.top.equalTo(emailBtn.snp_bottom)
}
addSubview(phoneBtn)
phoneBtn.snp.makeConstraints { (make) in
make.centerY.equalToSuperview()
make.centerX.equalToSuperview().multipliedBy(0.75)
}
addSubview(phoneBtnLine)
phoneBtnLine.snp.makeConstraints { (make) in
make.width.equalTo(20)
make.height.equalTo(2.5)
make.centerX.equalTo(phoneBtn)
make.top.equalTo(phoneBtn.snp_bottom)
}
}
private var phoneBtnSelected:NSAttributedString {
NSAttributedString(string: LocalizableManager.localValue("phone"), attributes: [NSAttributedString.Key.font : UIFont(name: "PingFangSC-Semibold", size: 18),NSAttributedString.Key.foregroundColor:UIColor.hexColor(hexValue: 0x0F0F0F)])
}
private var emailBtnSelected:NSAttributedString {
NSAttributedString(string: LocalizableManager.localValue("email"), attributes: [NSAttributedString.Key.font : UIFont(name: "PingFangSC-Semibold", size: 18),NSAttributedString.Key.foregroundColor:UIColor.hexColor(hexValue: 0x0F0F0F)])
}
private var phoneBtnNormal:NSAttributedString {
NSAttributedString(string: LocalizableManager.localValue("phone"), attributes: [NSAttributedString.Key.font : UIFont(name: "PingFangSC-Regular", size: 18),NSAttributedString.Key.foregroundColor:UIColor.hexColor(hexValue: 0x5C5C5C)])
}
private var emailBtnNormal:NSAttributedString {
NSAttributedString(string: LocalizableManager.localValue("email"), attributes: [NSAttributedString.Key.font : UIFont(name: "PingFangSC-Regular", size: 18),NSAttributedString.Key.foregroundColor:UIColor.hexColor(hexValue: 0x5C5C5C)])
}
}
2.2 LoginVC.swift
class LoginVC: UIViewController, XYswitchViewDelegate {
var isPhoneBtnSelected: Bool{
set{
if newValue {
}else{
}
}
get{ true }
}
lazy var switchView:XYswitchView = {
let switchView = XYswitchView(delegate: self)
return switchView
}()
func setupUI(){
view.addSubview(loginLabel)
loginLabel.snp.makeConstraints { (make) in
make.left.equalToSuperview().offset(25)
make.top.equalToSuperview().offset(Global.statusBarHeight + 44)
}
view.addSubview(switchView)
switchView.snp.makeConstraints { (make) in
make.left.right.equalToSuperview()
make.height.equalTo(50)
make.top.equalTo(loginLabel.snp_bottom).offset(15)
}
}
3.参考博客
25.swift-UIView(纯代码自定义) - 简书


 本文介绍了如何使用Swift创建一个名为XYswitchView的自定义视图,该视图包含电话和电子邮件按钮,用于切换选择。XYswitchView实现了委托协议,允许在选择更改时更新关联的ViewController。在LoginVC.swift中,这个视图被用作登录页面的一部分,根据用户选择的按钮执行相应的操作。


 被折叠的 条评论
为什么被折叠?
被折叠的 条评论
为什么被折叠?
 到【灌水乐园】发言


