


shell编程(二)
Shell脚本编程准备
第一个shell脚本
add 脚本
#! /bin/bash

echo "Please type first number:"
read param1

echo "Please type second number:"
read param2

result=$[$param1+$param2]

echo "The result is: $result"
. helloworld
chmod u+x helloworld
helloworld
shell编程中的变量
shell脚本中的自定义变量
- 声明 var=2
- 调用方式 $var
- 范围:脚本生存期内
赋值,引号的问题
- 单纯赋值 k=te 可不加引号 或加单引号 或加双引号
- 赋的值有空格,则必须要加引号
- 赋的值有其他变量的引用,则 单引号表单纯的句子,双引号表引用. 没空格的话,可不用引号
k4=$k-------
echo $k4
te-------k4='this $k'
echo $k4
this $k
k4="this $k"
echo $k4
this te反引号`(~那有)将执行的结果放入变量
:~$ date
Sat Jan 23 19:22:37 CST 2016
:~$ var=`date`
:~$ echo $var
Sat Jan 23 19:22:59 CST 2016
shell 的环境变量
set 查看所有变量
env 查看全局环境变量
1.修改环境变量
- PATH=$PATH:-shellscript
:~/shellscript$ PATH_SELF=`pwd`     # 自定义变量,范围为当前脚本
:~/shellscript$ echo $PATH_SELF
/home/dr/shellscript
:~/shellscript$ vim envpath    #echo $PATH_SELF
:~/shellscript$ chmod u+x ./envpath
:~/shellscript$ ./envpath   #无输出,PATH_SELF范围为自己脚本
:~/shellscript$ export PATH_SELF    #添加到环境变量,但只可在自己终端看到,在其他终端看不见
:~/shellscript$ ./envpath
/home/dr/shellscript
环境变量的生存期
- /etc/profile # 整个系统重启时加载
/etc/bash.bashrc
/etc/profile.d/*.sh -
home/.bashprofile,
home/.bash_login,
home/.profile
home/.bash_rc
- 首先读取/etc/profile(PATH/USER/HOSTNAME/HISTSIZE等)
- 前面的调用 /etc/profile.d/*.sh(颜色,语言,指令别名alias等)
- ~/.bash_profile, ~/.bash_login, ~/.profile(只依次读取其中一个) 用户调用自己的,不同用户不同
- ~/.bash_rc, /etc/bashrc
- source 指令加载脚本的变更(不用重新登录) source .bashrc ,source ~/.bash_rc
* 修改/etc/profile*
:~$ env |grep 'PATH'
PATH=/usr/local/sbin:/usr/local/bin:/usr/sbin:/usr/bin:/sbin:/bin:/usr/games:/usr/local/games
:~$ sudo vim /etc/profile     # PATH=$PATH:~/shellscript
:~$ echo $PATH    # 没加进去
/usr/local/sbin:/usr/local/bin:/usr/sbin:/usr/bin:/sbin:/bin:/usr/games:/usr/local/games
:~$ . /etc/profile     # 相当于source 指令加载脚本的变更
:~$ echo $PATH
/usr/local/sbin:/usr/local/bin:/usr/sbin:/usr/bin:/sbin:/bin:/usr/games:/usr/local/games:~shellscript:/home/dr/shellscript
但再起一个终端则还是没加进去
要重启整个系统(加载了/etc/profile),则无论起多少终端都可看见成功加进去了
* 修改$home/.bashrc*
:~$ vim .bashrc
:~$ . .bashrc
:~$ echo $PATH
/usr/local/sbin:/usr/local/bin:/usr/sbin:/usr/bin:/sbin:/bin:/usr/games:/usr/local/games:/home/dr/shellscript
再起一个终端发现加进去了。在用户目录下修改的 在bash启动初始化时调用
再起一个终端
:~$ echo $PATH
/usr/local/sbin:/usr/local/bin:/usr/sbin:/usr/bin:/sbin:/bin:/usr/games:/usr/local/games:/home/dr/shellscript
:~$ /bin/bash
:~$ echo $PATH
/usr/local/sbin:/usr/local/bin:/usr/sbin:/usr/bin:/sbin:/bin:/usr/games:/usr/local/games:/home/dr/shellscript:/home/dr/shellscript
但执行:~$ /bin/bash 发现又调用了。
* 每次bash启动都调用$home/.bashrc, 在子进程调用多次。*
shell中数学运算
- expr expression 运算符需转义(\,例如 +),运算符两旁要空格
- result= [expression]运算符不需转义,运算符可不加空格result= [ param1+ param2]
浮点运算 bc
dr@dr-VirtualBox:~$ bc
bc 1.06.95
Copyright 1991-1994, 1997, 1998, 2000, 2004, 2006 Free Software Foundation, Inc.
This is free software with ABSOLUTELY NO WARRANTY.
For details type `warranty'.
100/3
33
scale=4
100/3
33.3333
quitdr@dr-VirtualBox:~$ var=`echo "scale=4;10/3" |bc`
dr@dr-VirtualBox:~$ echo $var
3.3333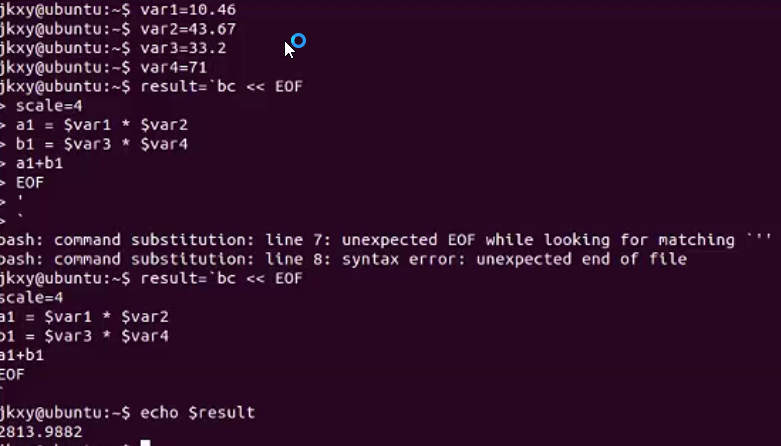
Shell编程中的用户输入处理
命令行参数
通过$ 来传递参数
0(不接受第一个参数,传递其他), 1……, 9, {10},${11}……
#! /bin/bash

echo "the comment is $0"
echo "first number: $1"
echo "first number: $2"
SUM=$[$1+$2]
echo "The result is: $SUM"
:~$ ./shellscript/add 5 7
the comment is ./shellscript/add
first number: 5
first number: 7
The result is: 12basename 命令只获得脚本名称
- add: echo
basename $0- :~$ shellscript/add 5 7
add
cal :
#! /bin/bash

name=`basename $0`
if [ $name = 'add' ]
then
        result=$[$1+$2]
elif [ $name = 'minus' ]
then
        result=$[$1-$2]
fi
echo "The $0 result is $result":~/shellscript$ ls
cal envpath helloworld
:~/shellscript$ ln -s cal add # 软链接
:~/shellscript$ ln -s cal minus
:~/shellscript$ ls -l
total 12
lrwxrwxrwx 1 dr dr 3 Jan 24 19:28 add -> cal
-rwxrw-r-- 1 dr dr 146 Jan 24 19:19 cal
-rwxrw-r-- 1 dr dr 30 Jan 23 20:45 envpath
-rwxrw-r-- 1 dr dr 31 Jan 24 12:47 helloworld
lrwxrwxrwx 1 dr dr 3 Jan 24 19:28 minus -> cal
:~/shellscript$ ./add 20 10
The ./add result is 30
:~/shellscript$ ./minus 20 10
The ./minus result is 10永久重定向 exec 文件描述符>filepath
    #! /bin/bash
    exec 1>testoupt  # 这里就把整个脚本的输出都定向了
    exec 2>errlog
    echo "test error" >&2  # 错误信息还需要临时重定向
    echo "normal output 1"
    echo "normal output 2"
    #! /bin/bash
    exec 0< errlog
    count=1
    while raed line
    do
        echo "line #$count : $line"
        count=$[ $count+1 ]
    done
- $# 参数个数
- $* 所有参数
- $@ 参数列表
命令行参数处理
- shell脚本中 shift 向前移动参数,如 2变成 1, 1没了,访问 1 的值等于以前$2
- getopt getopts 处理分离参数
在脚本中获取输入—read
处理超时
#! /bin/bash

if read -t 5 -p "Please type your input:" input
then
        echo "you typed : $input"
else
        echo "Timeout"
fidr@dr-VirtualBox:~/shellscript$ . read_test1
Please type your input:Timeout
dr@dr-VirtualBox:~/shellscript$ . read_test1
Please type your input:kkk
you typed : kkk隐藏方式读取
read_test2:
echo "Please input a password:"
read -s passwd
echo "Your password is $passwd"dr@dr-VirtualBox:~/shellscript$ . read_test2
Please input a password:
Your password is 123读取文件
使用了重定向
read_test3:
#! /bin/bash

exec 0< read_test1
count=1

while read line
do
        echo "#$count: $line"
        count=$[ $count + 1 ]
done
dr@dr-VirtualBox:~/shellscript$ . read_test3
#1: #! /bin/bash
#2:
#3: if read -t 5 -p "Please type your input:" input
#4: then
#5: echo "you typed : $input"
#6: else
#7: echo "Timeout"
#8: fi使用管道
read_test3:
#! /bin/bash

count=1

cat read_test1 | while read line
do
        echo "#$count: $line"
        count=$[ $count + 1 ]
done
函数
- 在脚本中定义函数 add(){}
- 在终端或其他脚本中引用函数库文件 source filepath ,使用 add 3 4
/test1 两种定义函数格式,return,反引号
    #! /bin/bash
    function func1 {
        echo 'this my first function'
    }
    func1  # 定义之后才能调用
    func2() {
        echo 'This is another function'
        return 20
    }
    func2
    echo "$?"  # 必须在函数执行后立即执行,对退出状态码进行访问,必须在0-255,没有return时默认正确是0,不成功是其他
    value=`func1`  # 将func1的输出赋值给value,这里是用的反引号,命令替换是指shell能够将一个命令的标准输出插在一个命令行中任何位置
    echo "$value"
/test2 函数变量参数的使用
    #! /bin/bash
    add() {
        if [ $# -eq 2 ];then
            result=$[ $1+$2 ]
            echo $result
        else
            echo "Please input 2 params"
            return 1
        fi
    }
    value=`add $1 $2`  # 函数的echo会返回到这里
    if [ $? -eq 0 ]; then  # 判断退出码
        echo $value
    else
        echo "Err: $value"
    fi
/test3 数组参数的处理 局部定义域local
    #! /bin/bash
    testarray(){
        echo "$@"
        echo "$1"
        echo "$2"
        echo "$#"
    }
    sum(){
        local result=0  # 不加local是全局变量
        for var in $@
        do
            result=$[ $result + $var ]
        done
        echo $result
        local newarray=(`echo "$@"`)
        echo ${newarray[*]}  # 返回数组
    }
    array=(1 2 3 4 5 6 7)
    testary $array  # 这里只传进去了第一个参数
    testary ${array[*]}  # 将数组当成了7个参数传了进去
    sum ${array[*]}
    echo "This is outside function: $result"  # 此时访问不到了
函数库:包含了一些列函数的封装,包含可重用函数的脚本文件
    # /calc.sh 函数库文件,加.sh是为了更方便的查找脚本,可以不加
    #! /bin/bash
    add() {
        local result=0
        if [ $# -eq 2 ]; then
            result=$[ $1 + $2 ]
            echo $result
        else
            echo 'Need 2 number params'
            return 1
        fi
    }
    sum(){
        local result=0
        for var in $@
        do
            result=$[ $result + $var ]
        done
        echo $result
    }
    # /test4 测试文件
    #! /bin/bash
    source ./calc.sh  # 将已知文件引入到当前环境
    echo `add 12 23`
bash启动时,自动引入函数库
- vim ~/.bashrc
- 在最后添加 . ~/shellscript/calc.sh
条件判断
文件表达式
- if [ -f file ] 如果文件存在
- if [ -d … ] 如果目录存在
- if [ -s file ] 如果文件存在且非空
- if [ -r file ] 如果文件存在且可读
- if [ -w file ] 如果文件存在且可写
- if [ -x file ] 如果文件存在且可执行
整数变量表达式
- if [ int1 -eq int2 ] 如果int1等于int2
- if [ int1 -ne int2 ] 如果不等于
- if [ int1 -ge int2 ] 如果>=
- if [ int1 -gt int2 ] 如果>
- if [ int1 -le int2 ] 如果<=
- if [ int1 -lt int2 ] 如果<
字符串变量表达式
- if [ a= b ] 如果string1等于string2 字符串允许使用赋值号做等号
- if [ string1!= string2 ] 如果string1不等于string2
- if [ -n $string ] 如果string 非空(非0),返回0(true)
- if [ -z $string ] 如果string 为空
- if [ $sting ] 如果string 非空,返回0 (和-n类似)
if的格式
    if condition1
    then
        command1
    elif condition2
        command2
    else
        commandN
    fi
    # 下面是实例
    num1=$[2*3]
    num2=$[1+5]
    if test $[num1] -eq $[num2]
    then
        echo '两个数字相等!'
    else
        echo '两个数字不相等!'
    fi
循环
简单for的一个例子,数据四种来源,默认分隔符是空格,换行,制表符 IFS修改分隔符
    #! /bin/bash
    for val in Jan Feb Mar Apr May  # 列表循环
    do
        echo "Month name is $val"
    done
    list="Jan Feb Mar Apr May"
    for val in $list  # 使用变量实现循环
    do
        echo "Month name is $val in list"
    done
    IFS=$";"  # 修改分隔符为;且只有;
    for var in `cat datefile`  # 文件读入,默认分隔符是空格,换行,制表符
    do
        echo "Month name is $val in file"
    done
    for var in ~/shellscript/*  # 也可以是c*  # 可以直接读取文件列表,一定要加通配符
    do  # 等同于 for var in `ls ~/shellscript/*`
        echo "$var"
    done
    for((i=1,j=10;i<=10;i++,j--))  # 类C的结构
    do
        echo "test number is $i $j"
    done
while test command,until test command语句
var=1
while [ $var -lt 10 ]  # command写成[]的形式
do
    echo "$var"
    var=$[ $var+1 ]  # expression 写成$[]的形式
done
var=1
while [ $var -en 10 ]  # command写成[]的形式
do
    echo "$var"
    var=$[ $var+1 ]  # expression 写成$[]的形式
done
shell 脚本的运行控制
Linux的信号
产生信号
- man 7 sigal 查看对信号的支持
- 终止进程 Ctrl+C
- 暂停进程 Ctrl+z (还在进程中,可用 ~$ ps -ef | grep ping 查看)
- kill 终止进程
- ps 查看进程
:~$ ps
  PID TTY          TIME CMD
 3027 pts/8    00:00:00 bash
 3045 pts/8    00:00:00 ping
 3046 pts/8    00:00:00 ps
:~$ kill -9 3045    #(-9 无条件终止,PID)
[1]+  Killed                  ping www.baidu.com
运行控制
信号机制 man 7 signal 进行查看 ps kill
- 组合键产生信号
- Ctrl + C 终止进程 SIGINT
- Ctrl + Z 暂停进程 SIGSTP
- ping www.baidu.com
- Ctrl + Z
- ps -ef | grep ping # 可以看到ping命令还在执行中
- 命令产生信号 kill、killall
- ps # 查看当前的进程
- kill -9 25949 # -9是无条件终止,25949是ps命令查出来的PID
- ps # 刚放的进程已经被终止
脚本中处理信号捕捉 trap
    #!/bin/bash
    trap "echo 'Signal traped SIGINT for Ctrl+C'" SIGINT  # 改变Ctrl + C为 输出文本
    trap "echo 'quit script'" EXIT  # 捕捉退出命令,并修改
    count=1
    while [ $count -le 10 ]
    do
        echo "Loop # $count"
        sleep 1  # 1秒钟的休眠
        count=$[ $count + 1 ]
    done
    trap - EXIT  # 移除添加的trap,不会再输出quit script
    echo 'Loop ended'
/bgtest 后台运行脚本 可以同时执行多个进程 & jobs fg bg nice renice ps al nohup
    # 只需要输入 ./bgtest &
    # nice -n 10 ./bgtest > temp & 后台运行脚本,优先级10(最高-20,最低19)
    # renice 10 -p 19863 通过PID来修改进程的优先级
    # ps al 可以查看进程优先级,普通用户只能最高设置到0
    # nohup ./bgtest & 使脚本的运行与bash无关,可以关掉bash,默认输出到nohup.out
    #!/bin/bash
    trap "echo 'quit script'" EXIT
    count=1
    while [ $count -le 10 ]
    do
        echo "Loop # $count"
        sleep 5
        count=$[ $count + 1 ]
    done
    trap - EXIT
    echo 'Loop ended'
/attest 定时运行脚本 at atq atrm
- Ubuntu默认没有at命令,sudo apt-get install at
- at 默认是以邮件的形式发送到指定的邮箱,所以脚本开头有一个标准输出重定向
    # at -M -f ./attest 18:18 M参数指的是不用邮箱,f参数是运行脚本
    # at -M -f ./attest now+2 min
    # atq 会看到at的运行队列
    # atrm 12 通过PID来删除at作业
    #!/bin/bash
    exec 1>>atresult
    echo "script run at `date`"
    echo "end scritp"
启动时运行脚本
系统启动时运行
- 不同系统启动运行不同,主要有一下两种
- System V init
- Upstart init
- 自定义开机运行脚本
- debian /etc/init.d/rc.local
- Ubuntu /etc/rc.local
- openSUSE /etc/init.d/boot.local
- CentOS /etc/rc.d/rc.local
- 在Ubuntu中
- vim /etc/rc.local 最开始添加调试功能
- exec 1>>/home/helloworld/logs/startup/logs
- exec 2>>/home/helloworld/logs/startup/error
- 后面输入脚本的路径就行了,环境变量要放到另外的脚本,然后引入
shell启动时运行
- 启动shell的三种方式
- 启动bash
- 通过ssh登陆
- 通过ssh执行命令 直接执行,不会login shell,在man ssh中可以查到
- 因此,使用ssh执行命令,不会调用/etc/profile指定的设置,只调用/etc/.bashrc这个文件
- 下面是各种启动shell时调用的文件
- 启动bash /etc/profile /etc/.bashrc
- 通过ssh登陆 /etc/profile /etc/.bashrc
- 通过ssh执行命令 /etc/.bashrc
周期运行脚本 cron crontab anacron
- vim /etc/crontab 查看cron时效表格式
- ls /etc/cron* 查看更多的信息,可以添加自己的脚本到指定的文件夹下
- crontab -l 显示当前用户的时间表
- crontab -e 修改用户时间表
- 缺点是默认电脑是7*24小时都开机的,可以用anacron
- vim /etc/anacrontab 查看格式,最小配置是1天1次
- 部分转自他人 *


 285
285

 被折叠的 条评论
为什么被折叠?
被折叠的 条评论
为什么被折叠?
 到【灌水乐园】发言


