


2016.06.28更新
现在我将android端作为client,pc端作为server端。目的就是为了让android端能够更加灵活地链接pc端。主要修改如下:
1. 修改整体架构,将pc端作为server端,android端作为client端。 pc端一直在监听来自android端的消息,如果android端有链接请求则建立请求; 如果android端断开链接则pc端继续监听,直到有链接消息。
2. 增加服务自动发现机制,pc端只需要运行程序即可,android端也只需要 打开app,然后app会通过UDP的224.0.0.1地址进行组播查找服务,如果找到 服务,则向服务器发起链接。
3. 修改音量键对应的键值,音量下键对应方向键下键,音量上键对应方向键上键。
详细的代码可以查看我的开源项目主页:https://github.com/CreateChance/WirelessHid
+++++++++++++++++++++++++++++++++++++++++++++++++++++++++++++++++++++++
偶然间突发奇想,想到能不能让我们的在我们的手机设备上滑动触摸屏进而控制pc上的鼠标移动,也就说把我们的android设备当成是pc设备的触摸板呢?要想实现这个目标,首先要想一想android设备和pc设备之间的通讯基础是什么?这个通讯技术必须是android和pc同时支持的,目前看来也就是wifi,蓝牙。首先说一下蓝牙,蓝牙是一个提供个人局域网的安全无线电通讯技术,相对于wifi而言,蓝牙的功耗相对较低,尤其是BLE技术使得蓝牙的功耗可以和zigbee媲美了,并且android也支持了基于蓝牙的socket操作。但是pc上的java部分对于蓝牙的socket支持就不是很好了,实现起来比较麻烦。但是wifi虽然功耗相对蓝牙而言比较高了点,但是实现起来非常容易,就是socket就好了!所以在第一版本中,可以先使用wifi作为传输技术。
解决了传输技术之后,还需要解决的是都有哪些数据类型,怎么传递数据,使用什么样的协议的问题。这些问题很关键,这涉及到以后的程序可扩展性问题,如果这部分欠缺考虑的话,那么后期的修改和扩展将是一个灾难。进过仔细考量之后,决定采用google的protobuf来封装所有的数据,因为protobuf灵活,小巧,高效,正好就是我要的。
进过了几天的业余时间开发,终于出来了一个可以运行展示的初级版本,这个版本可以满足基本的需求。目前我已经将这个代码开源出来了,项目地址是github:https://github.com/CreateChance/WirelessHid
UI的设计
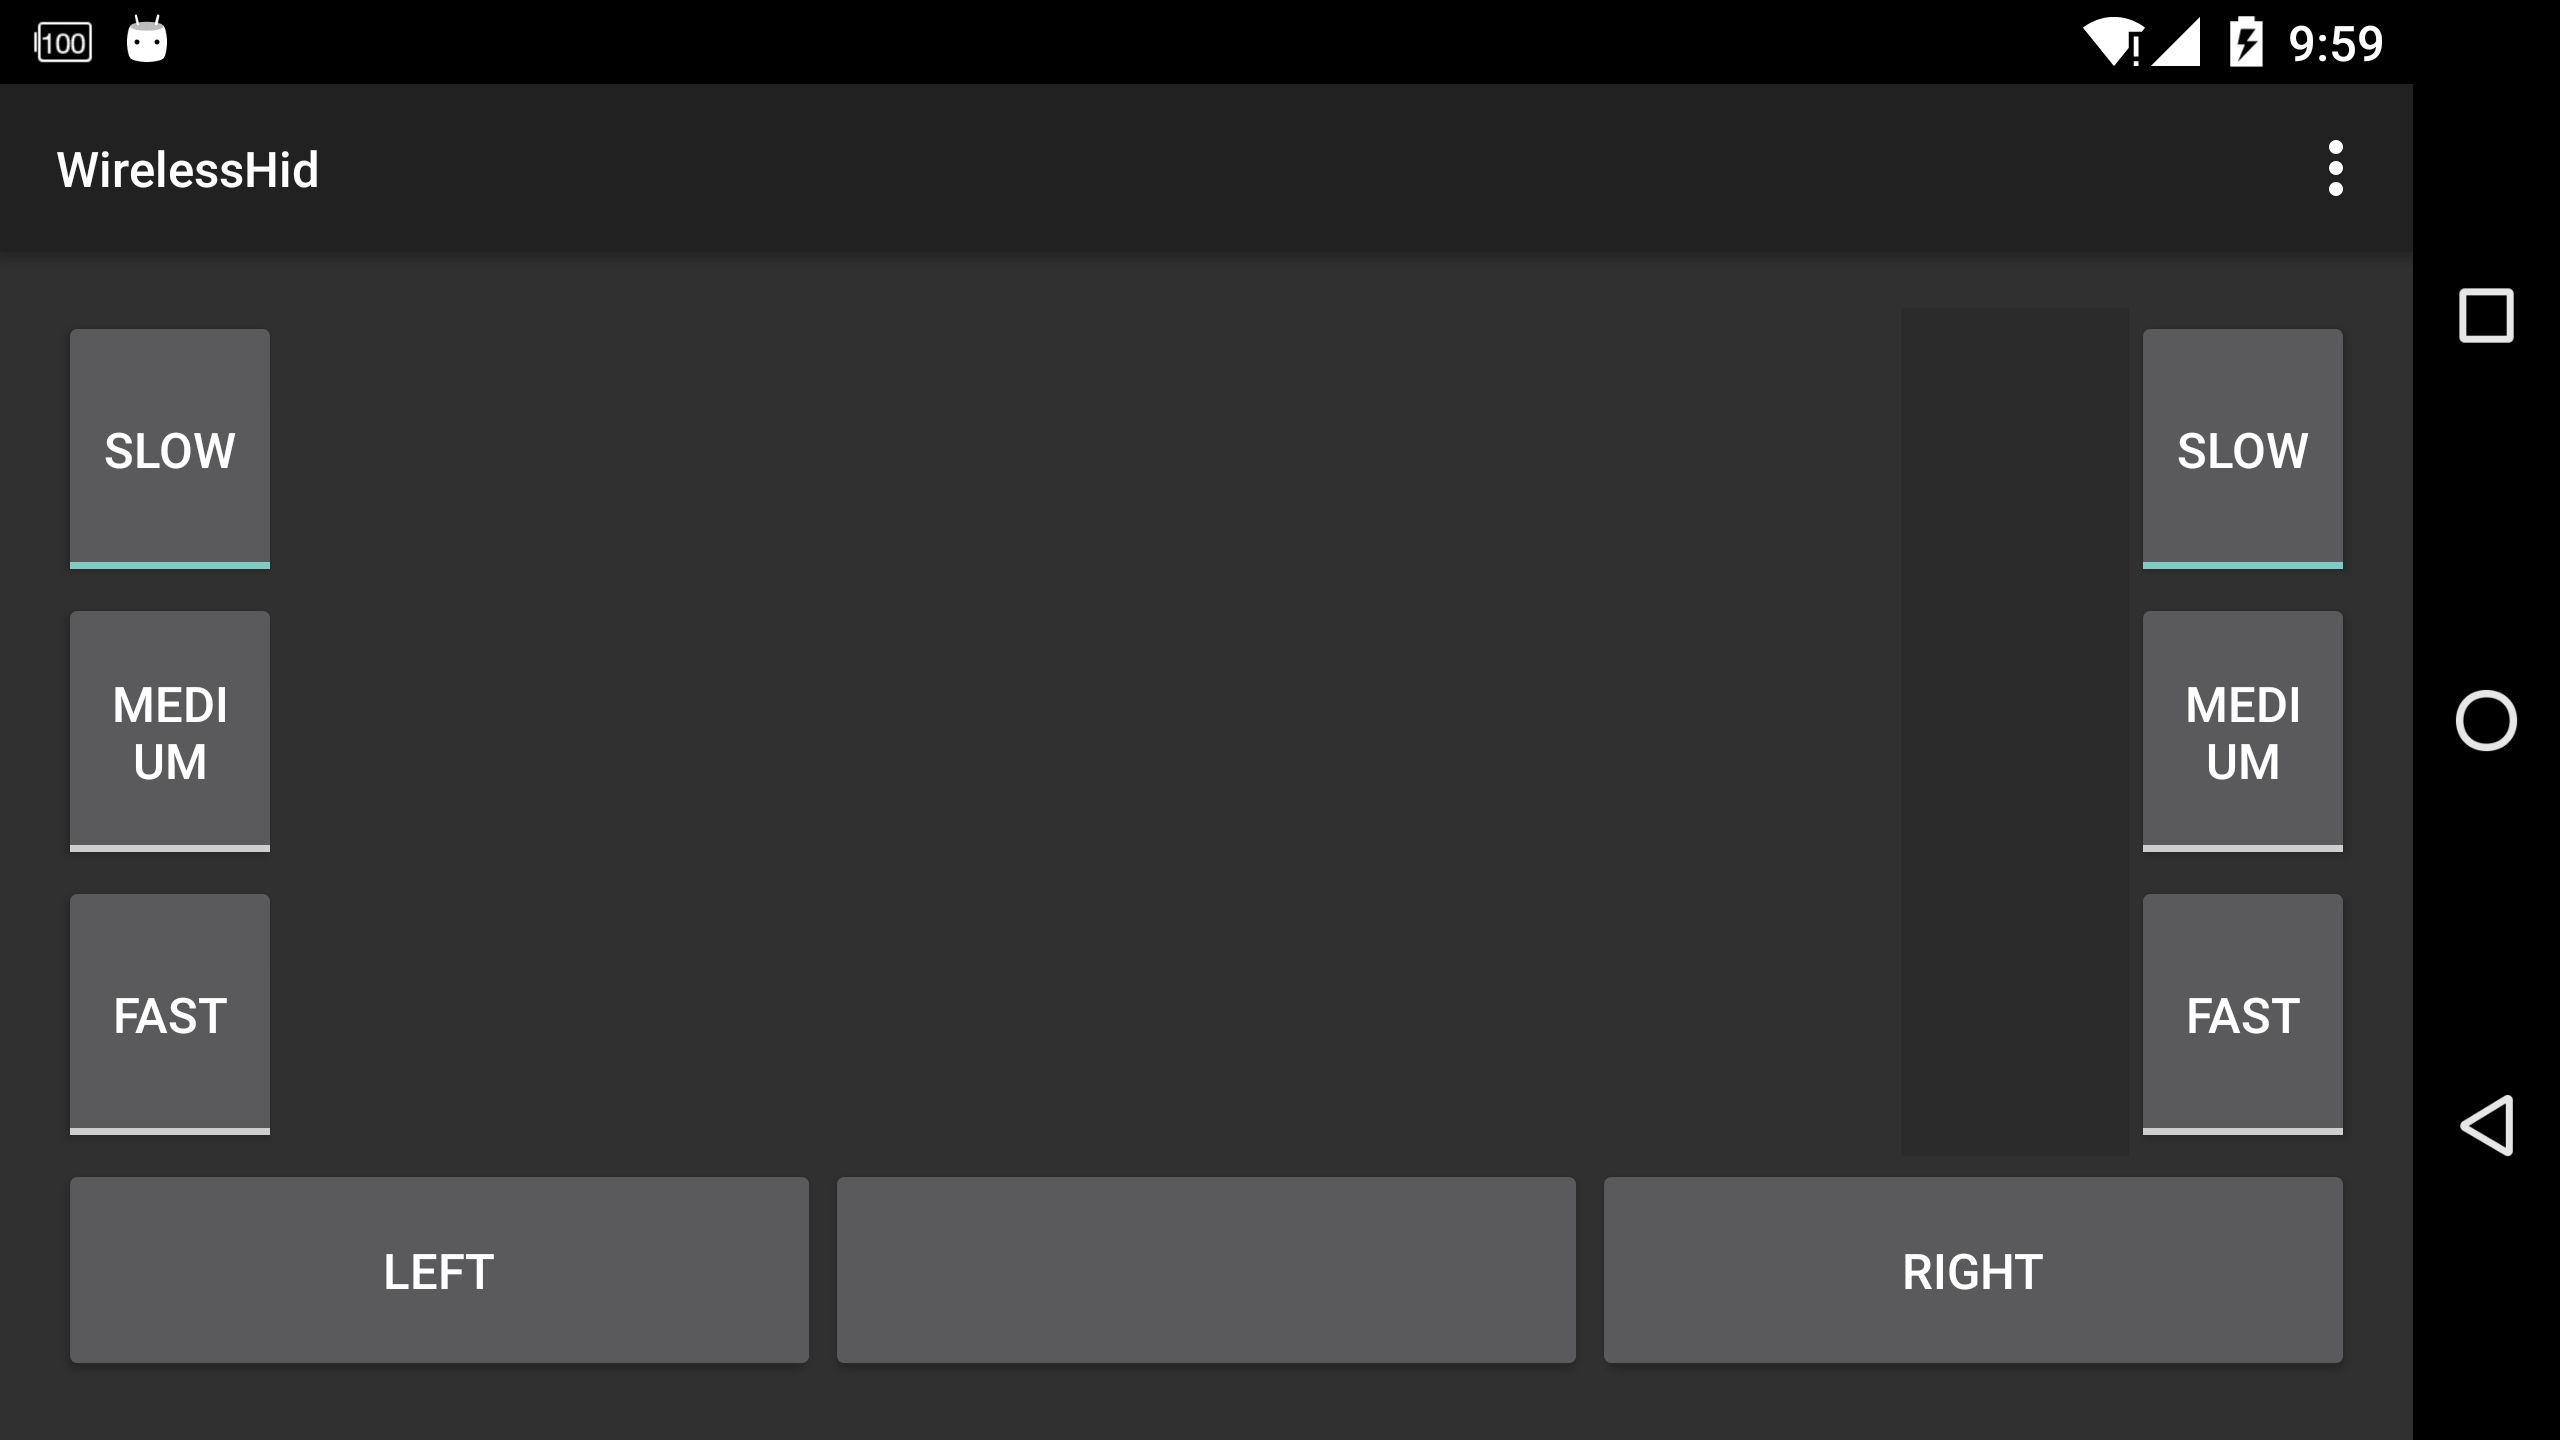
我要做的就是使用手机实现一个touchpad和keyboard,这就决定了UI的设计必须符合我们日常见到的实体touchpad和keyboard的样式。进过设计之后,touchpad部分设计为一个fragment,它的布局如下:
<LinearLayout xmlns:android="http://schemas.android.com/apk/res/android"
    xmlns:tools="http://schemas.android.com/tools"
    android:layout_width="match_parent"
    android:layout_height="match_parent"
    android:orientation="vertical" >

    <LinearLayout
        android:layout_width="match_parent"
        android:layout_height="0dp"
        android:layout_weight="1"
        android:orientation="horizontal" >

        <LinearLayout
            android:id="@+id/speed_control"
            android:layout_width="65dip"
            android:layout_height="match_parent"
            android:orientation="vertical" >

            <ToggleButton
                android:layout_width="match_parent"
                android:layout_height="0dp"
                android:layout_weight="1"
                android:textOn="@string/speed_slow"
                android:textOff="@string/speed_slow"
                android:tag="1" />

            <ToggleButton
                android:layout_width="match_parent"
                android:layout_height="0dp"
                android:layout_weight="1"
                android:textOn="@string/speed_medium"
                android:textOff="@string/speed_medium"
                android:tag="3" />

            <ToggleButton
                android:layout_width="match_parent"
                android:layout_height="0dp"
                android:layout_weight="1"
                android:textOn="@string/speed_fast"
                android:textOff="@string/speed_fast"
                android:tag="5" />

        </LinearLayout>

        <View
            android:id="@+id/touchpad"
            android:layout_width="0dp"
            android:layout_height="match_parent"
            android:layout_weight="1" />

        <View
            android:id="@+id/scrollzone"
            android:layout_width="65dip"
            android:layout_height="match_parent"
            android:background="#2b2b2b" />

        <LinearLayout
            android:id="@+id/scroll_speed_control"
            android:layout_width="65dip"
            android:layout_height="match_parent"
            android:orientation="vertical" >

            <ToggleButton
                android:layout_width="match_parent"
                android:layout_height="0dp"
                android:layout_weight="1"
                android:textOn="@string/speed_slow"
                android:textOff="@string/speed_slow"
                android:tag="1" />

            <ToggleButton
                android:layout_width="match_parent"
                android:layout_height="0dp"
                android:layout_weight="1"
                android:textOn="@string/speed_medium"
                android:textOff="@string/speed_medium"
                android:tag="3" />

            <ToggleButton
                android:layout_width="match_parent"
                android:layout_height="0dp"
                android:layout_weight="1"
                android:textOn="@string/speed_fast"
                android:textOff="@string/speed_fast"
                android:tag="5" />

        </LinearLayout>

    </LinearLayout>

    <LinearLayout
        android:id="@+id/buttons"
        android:layout_width="match_parent"
        android:layout_height="65dip"
        android:orientation="horizontal" >

        <Button
            android:layout_width="0dp"
            android:layout_height="match_parent"
            android:layout_weight="1"
            android:tag="0"
            android:text="left"
            android:id="@+id/left_button" />

        <Button
            android:layout_width="0dp"
            android:layout_height="match_parent"
            android:layout_weight="1"
            android:tag="1" />

        <Button
            android:layout_width="0dp"
            android:layout_height="match_parent"
            android:layout_weight="1"
            android:tag="2"
            android:id="@+id/right_button"
            android:text="right" />

    </LinearLayout>

</LinearLayout>
运行时的效果如下:
键盘的布局就比较复杂了,这部分也是一个fragment,整体布局如下:
<LinearLayout xmlns:android="http://schemas.android.com/apk/res/android"
    xmlns:tools="http://schemas.android.com/tools"
    android:layout_width="match_parent"
    android:layout_height="match_parent"
    android:orientation="vertical" >

    <LinearLayout
        android:layout_width="match_parent"
        android:layout_height="wrap_content"
        android:orientation="horizontal" >

        <TextView
            android:id="@+id/led_numlock"
            android:text="@string/led_numlock"
            android:background="@color/led_off"
            style="@style/keyboard_led" />

        <TextView
            android:id="@+id/led_capslock"
            android:text="@string/led_capslock"
            android:background="@color/led_off"
            style="@style/keyboard_led" />

        <TextView
            android:id="@+id/led_scrolllock"
            android:text="@string/led_scrolllock"
            android:background="@color/led_off"
            style="@style/keyboard_led" />

    </LinearLayout>

    <LinearLayout
        android:id="@+id/keyboard"
        android:layout_width="match_parent"
        android:layout_height="match_parent"
        android:orientation="vertical" >

    </LinearLayout>
</LinearLayout>
这个布局中首先放上3个textview在一个LinearLayout这三个textview充当真实键盘上的3个led灯:num lock, caps lock, scroll lock。然后就是一个存放实际keyboard布局的LinearLayout容器,这么做的目的是这样的:因为手机的屏幕很小,想要放下一个标准键盘上的所有的按键肯定是不行的,因此需要将键盘分区,然后分别展示,这里的这个容器就是用来存放不同分区,不同布局的键盘部分。目前我把键盘分成了2个部分:主键盘部分,导航部分加上数字部分。其中主键盘部分是我们最常使用的部分,这部分包含了26个字母,0~9数字(字母上排),12个功能键等,导航部分就是上下左右键盘,上页下页部分等,数字部分就是数字小键盘和一些控制按键,我把导航键和数字键合并在一起了,这两部分的布局如下:
主键盘部分:
<Keyboard>
    <Layout>
        <Key keyLabel="Esc" keyCode="27"/>
        <Key keyLabel=
最低0.47元/天 解锁文章


 1603
1603


 被折叠的 条评论
为什么被折叠?
被折叠的 条评论
为什么被折叠?
 到【灌水乐园】发言


