


1.准备工作
①oracle数据库部署需要oracle19c安装包和oracle19c预安装包
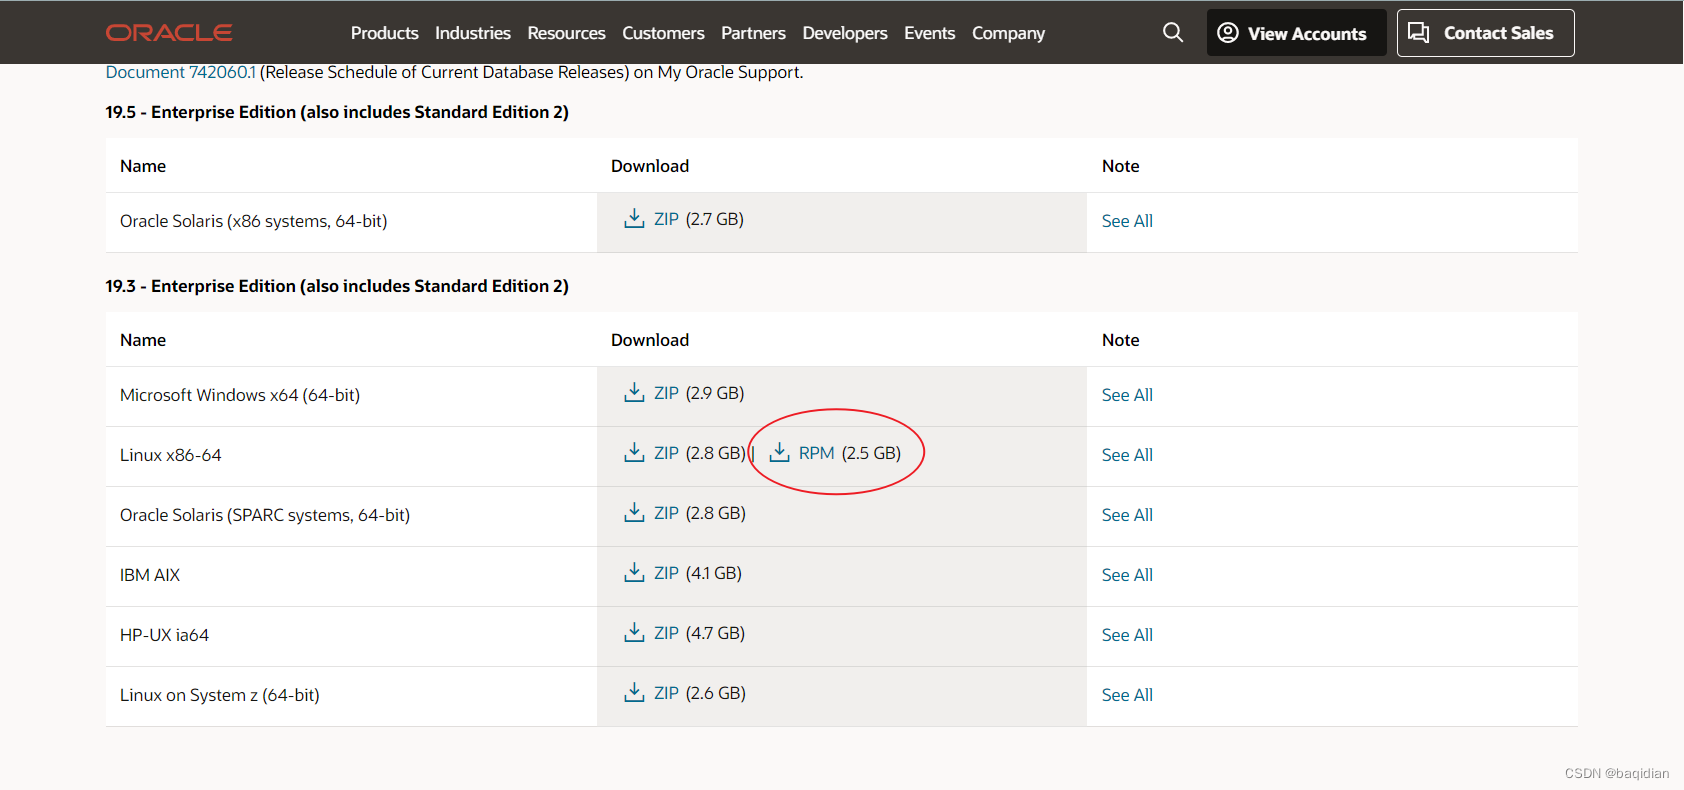
②Oracle安装包下载地址:
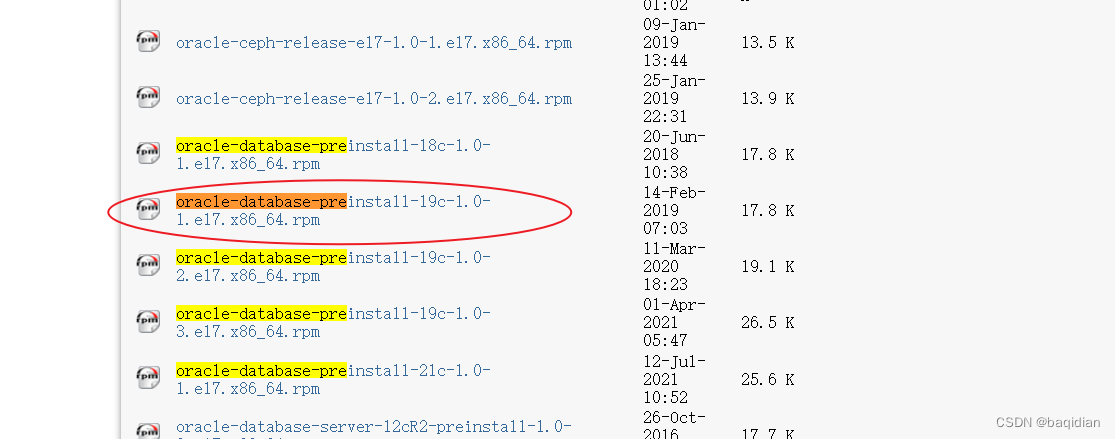
③Oracle预安装包下载地址:
Oracle Linux 7 (x86_64) Latest | Oracle, Software. Hardware. Complete.![]() https://yum.oracle.com/repo/OracleLinux/OL7/latest/x86_64/index.htmlctrl+f右上角输入oracle-database-preinstall回车查询。
https://yum.oracle.com/repo/OracleLinux/OL7/latest/x86_64/index.htmlctrl+f右上角输入oracle-database-preinstall回车查询。
2.使用rz命令将RPM包传入linux中
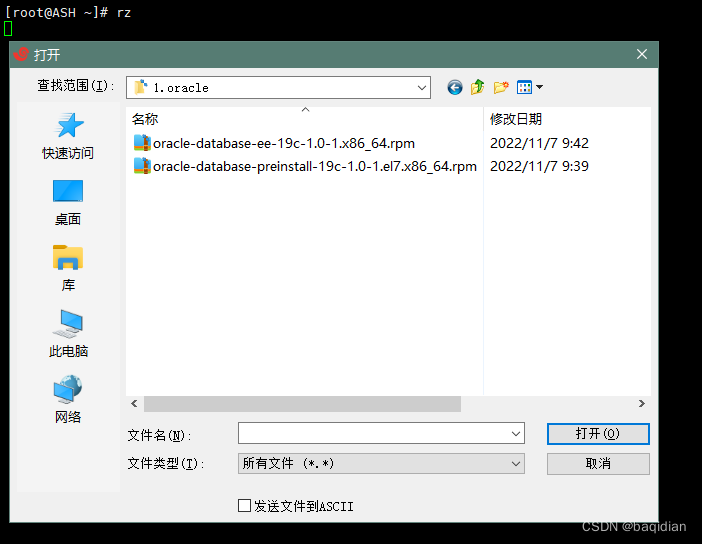
3.安装RPM包
①yum -y localinstall oracle-database-preinstall-19c-1.0-1.el7.x86_64.rpm
②yum -y localinstall oracle-database-ee-19c-1.0-1.x86_64.rpm
③最后显示Complete! 表示安装完成
4.添加ip和主机名
①vim /etc/hosts

②:wq保存退出
5.初始化(时间较长)
①/etc/init.d/oracledb_ORCLCDB-19c configure

②初始化完成

6.切换oracle用户
①修改密码 passwd oracle

②切换用户 su - oracle
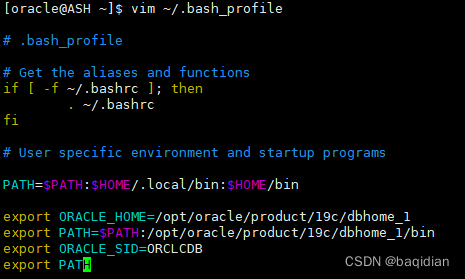
7.添加环境变量
①vim ~/.bash_profile
export ORACLE_HOME=/opt/oracle/product/19c/dbhome_1
export PATH=$PATH:/opt/oracle/product/19c/dbhome_1/bin
export ORACLE_SID=ORCLCDB
②source ~/.bash_porfile
![]()
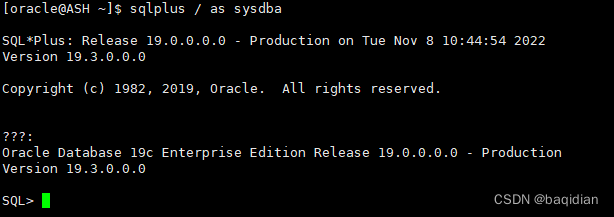
8.登入oracle数据库
①sqlplus / as sysdba
②alter user system identified by 123456;

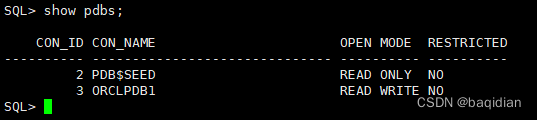
9.查看PDB容器
①show pdbs;
10.创建PDB容器(名称ash_test)
① create pluggable database ash_test
admin user ash identified by 123456 roles=(connect,resource,dba)
file_name_convert=('/opt/oracle/oradata/ORCLCDB/pdbseed','/opt/oracle/oradata/ORCLCDB/ash_test');

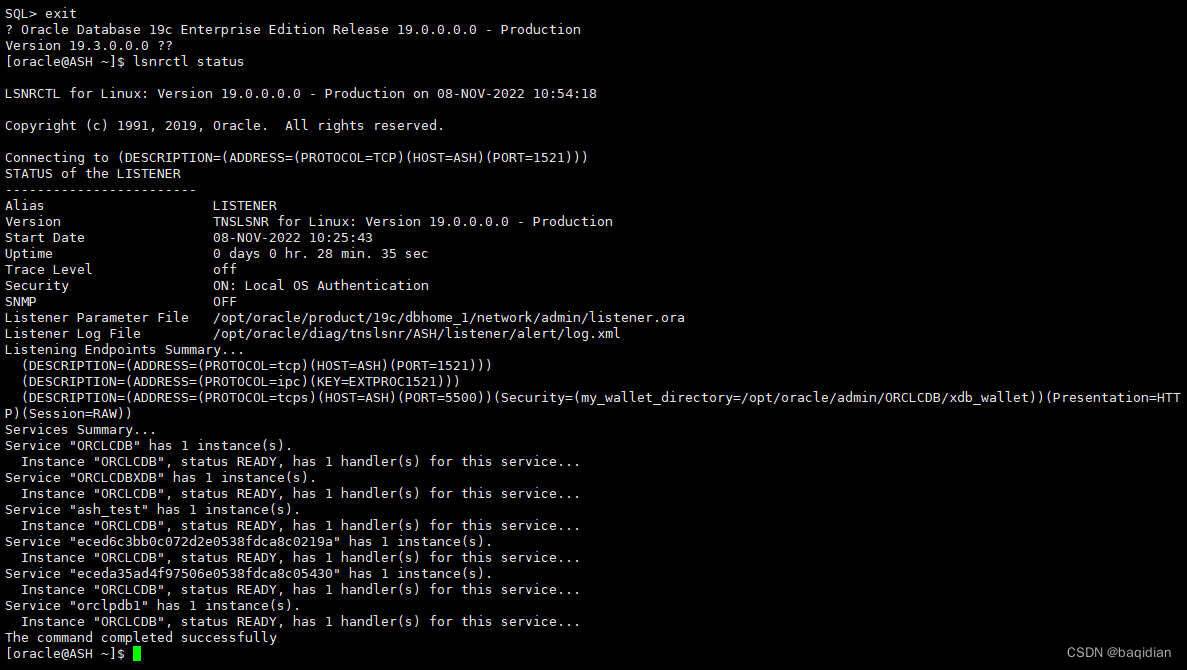
11.开启监听
①SQL> exit
②[oracle@ASH ~]$ lsnrctl status
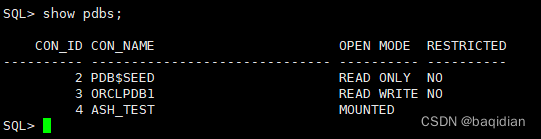
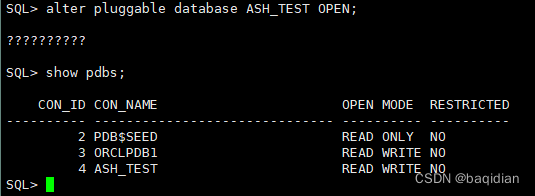
12.ash_test容器是否开启
①进入oracle数据库
[oracle@ASH ~]$ sqlplus / as sysdba
②查看容器是否开启
SQL> show pdbs;
③ 开启容器
SQL> alter pluggable database ASH_TEST OPEN;
13.查看防火墙
①[root@ASH ~]# systemctl status firewalld
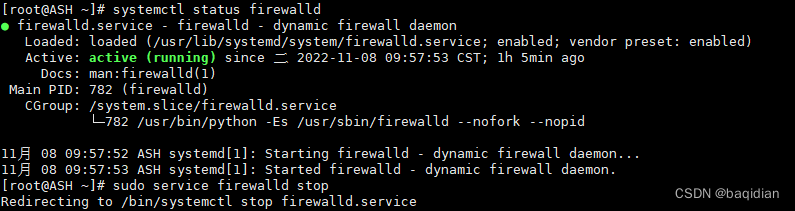
②永久关闭防火墙
[root@ASH ~]# systemctl disable firewalld
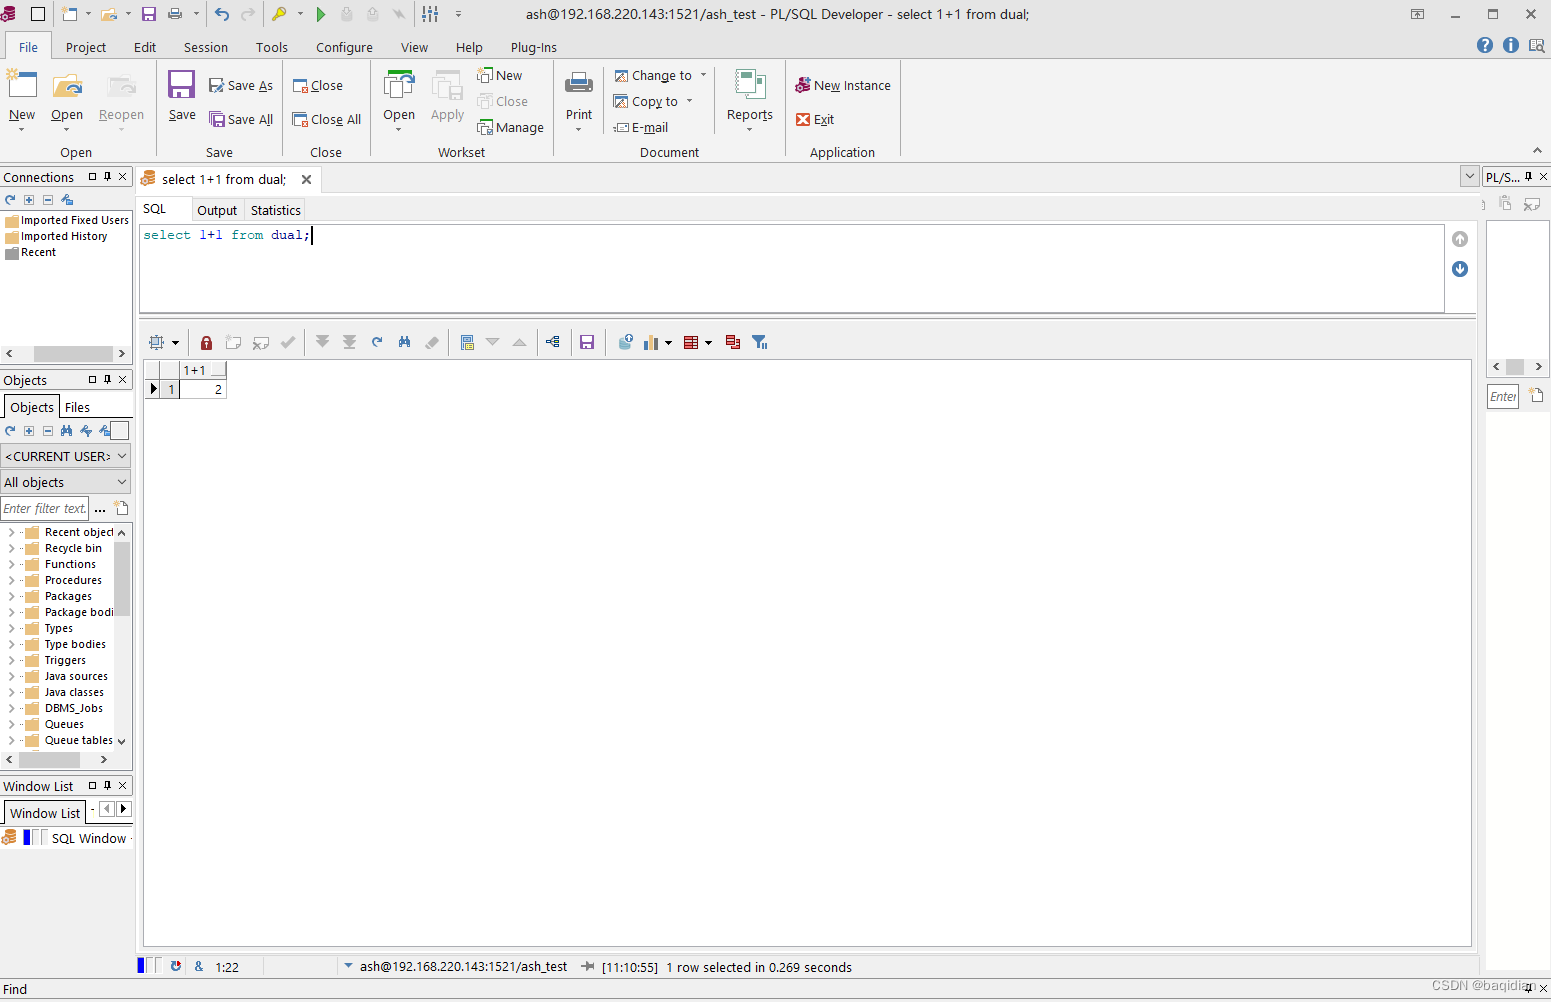
14.登入plsql
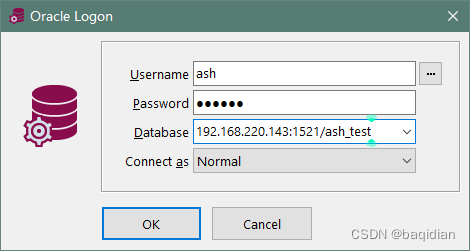
①连接成功


 1万+
1万+


 被折叠的 条评论
为什么被折叠?
被折叠的 条评论
为什么被折叠?
 到【灌水乐园】发言


