


GitLab跨版本升级之旅【10.0.0-->16.10.1】
- 前言
- 升级前需要准备的事情
- 正式开始升级
- 安装顺序
- 下载正确的安装包
- 正式安装
- 安装10.8.7版本
- 重新安装gitlab 10.8.7 升级包【10.0.0->10.8.7】
- 安装完后端服务运行正常,前端不能访问的解决方案
- 依次安装11.11.5【10.8.7-->11.11.5】
- 依次安装12.0.4【11.11.5-->12.0.4】
- 依次安装12.10.8【12.0.4-->12.10.8】
- 依次安装13.0.6【12.10.8-->13.0.6】
- 安装13.12.7【13.0.6-->13.12.7】失败
- 重新安装并恢复【13.0.6】
- 重新安装13.12.7【13.0.6-->13.12.7】
- 安装14.0.9【13.12.7-->14.0.9】
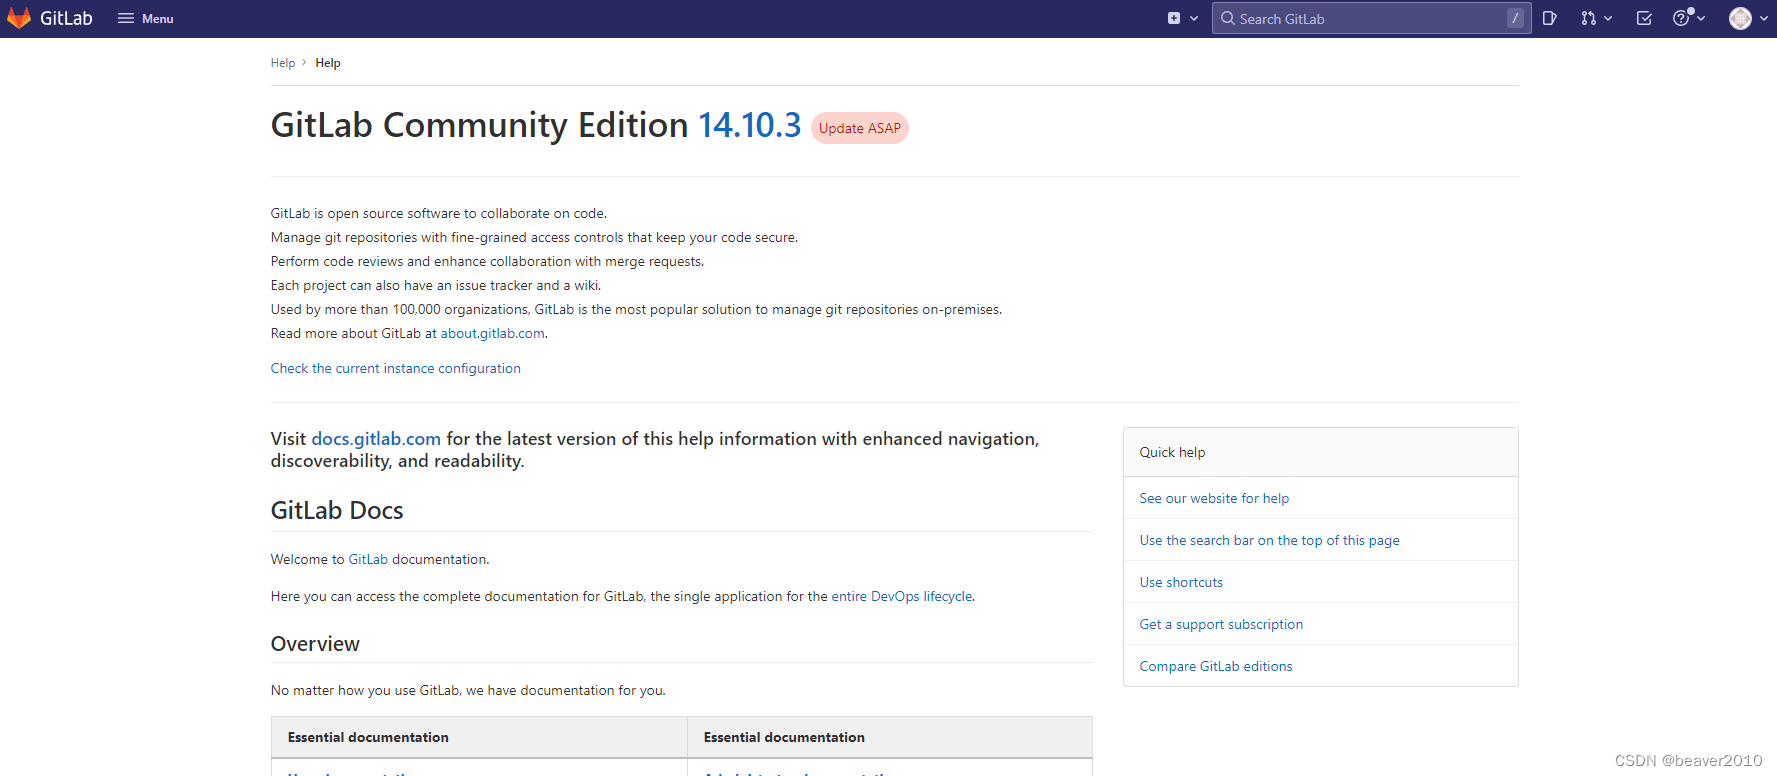
- 安装14.10.3【14.0.9-->14.10.3】
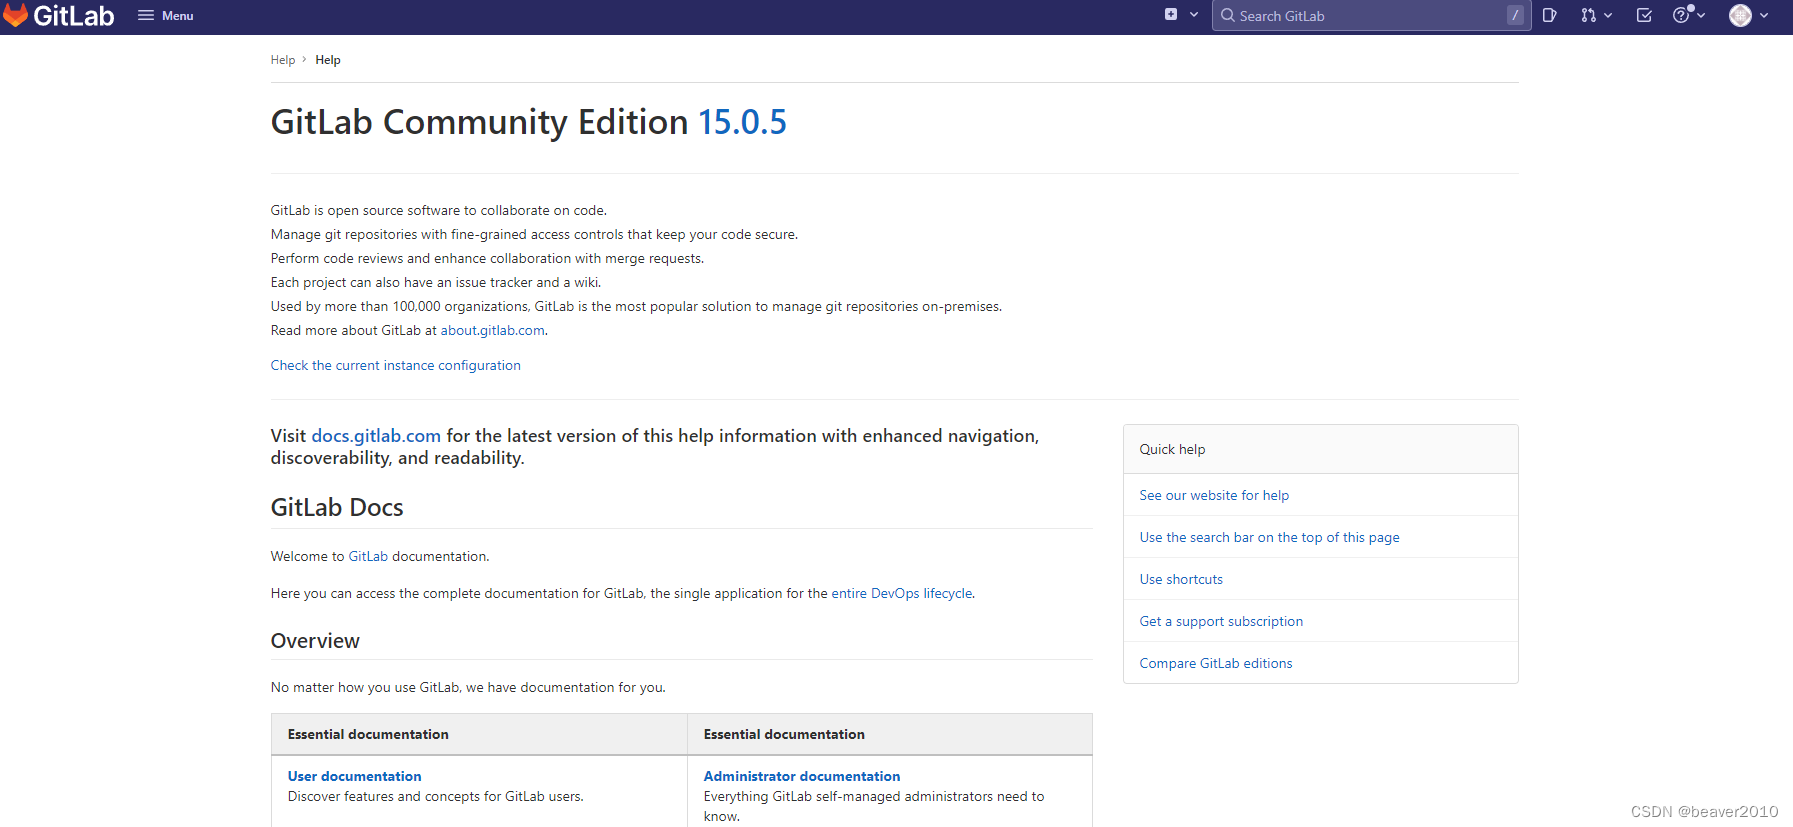
- 安装15.0.5【14.10.3-->15.0.5】
- 安装15.11.12【15.0.5-->15.11.12】报错
- 重新安装15.11.12【15.0.5-->15.11.12】
- 安装16.3.6【15.11.12-->16.3.6】
- 安装16.7.7【16.3.6-->16.7.7】
- 最后安装16.10.1【16.7.7-->16.10.1】
前言
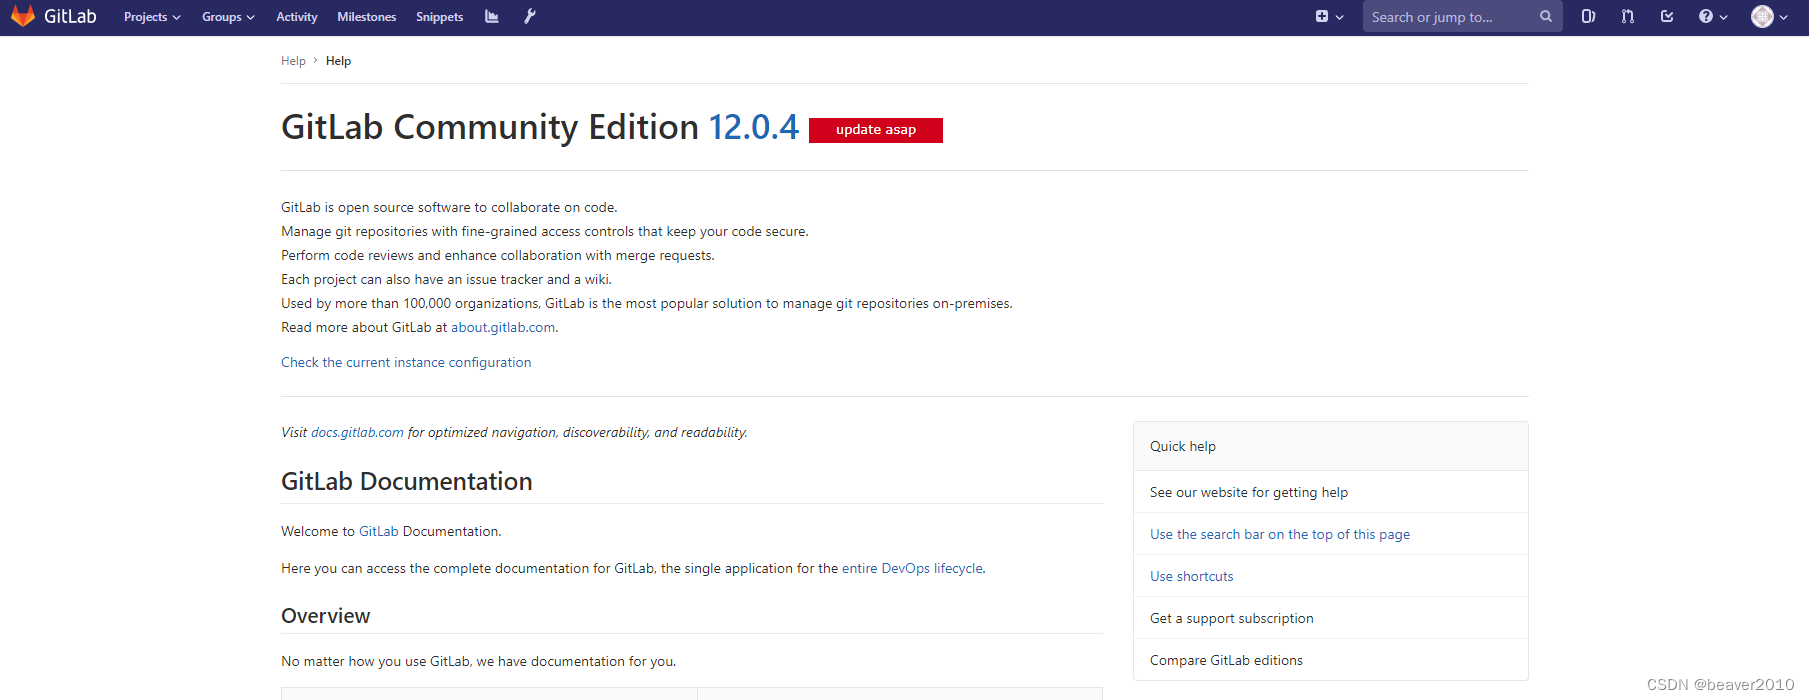
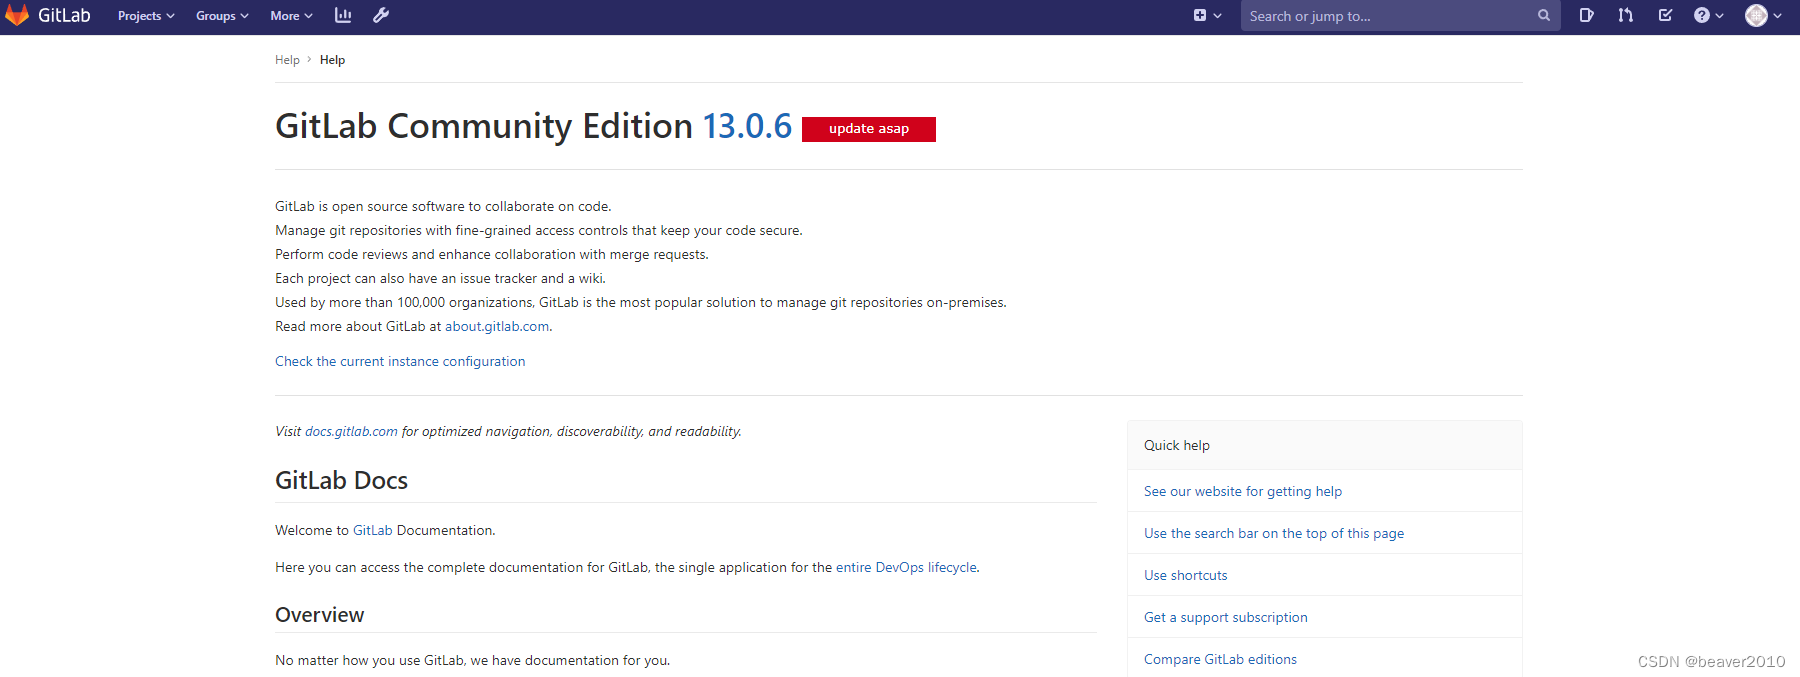
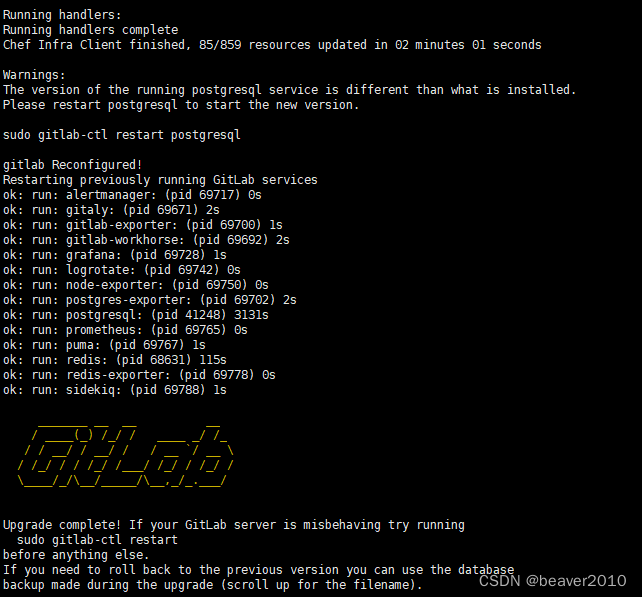
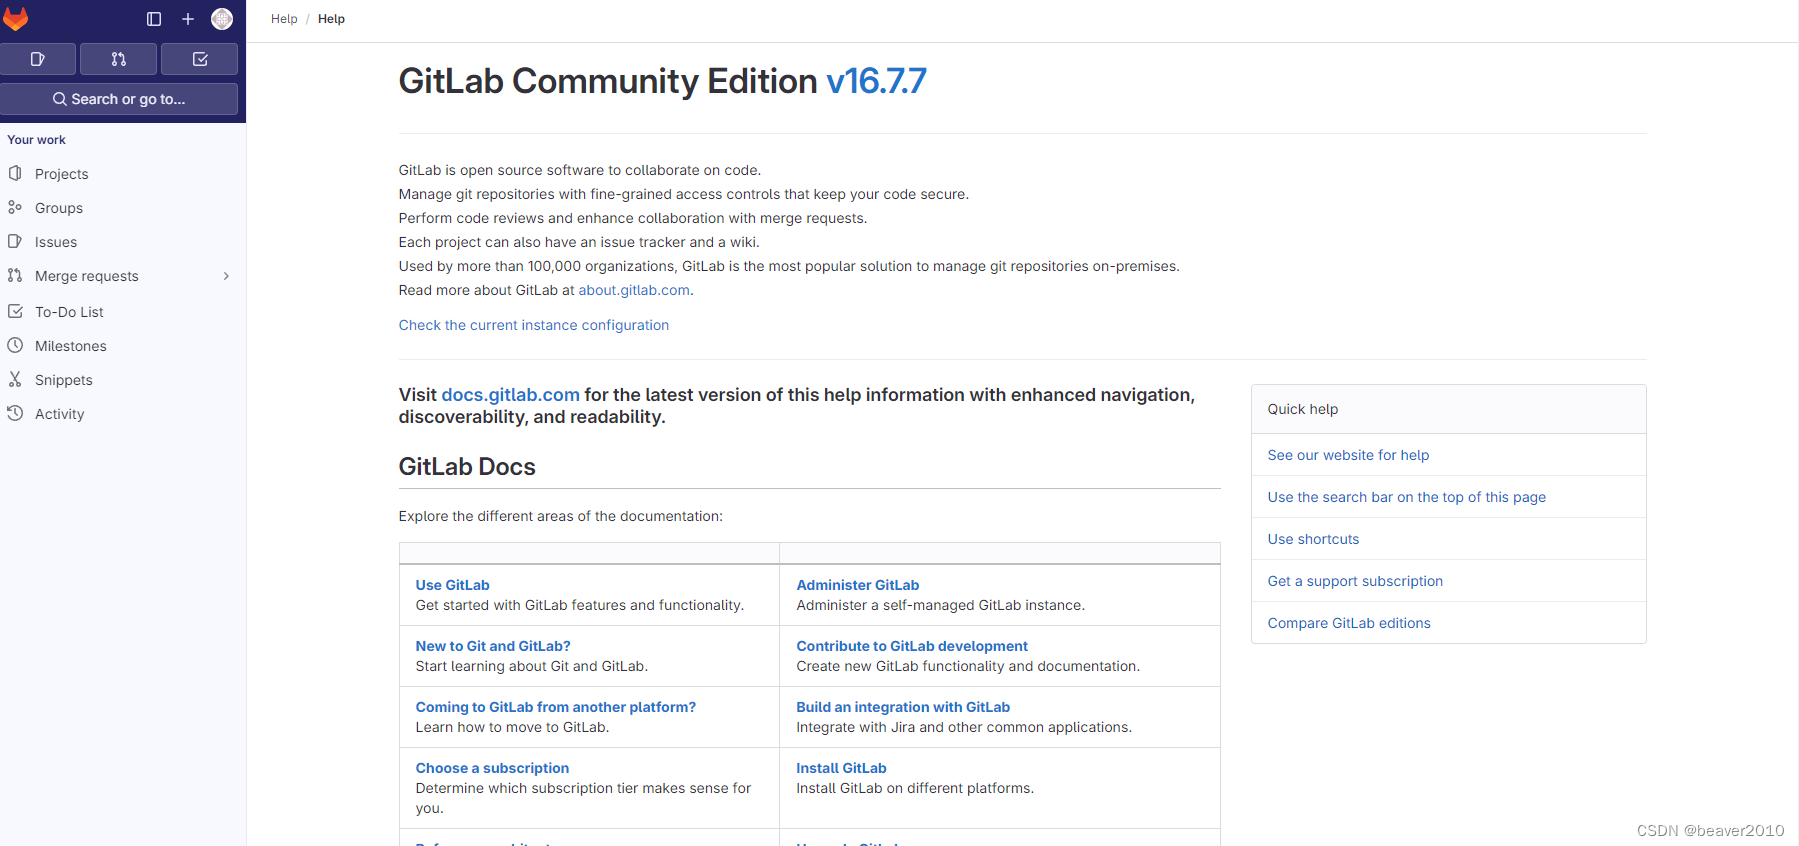
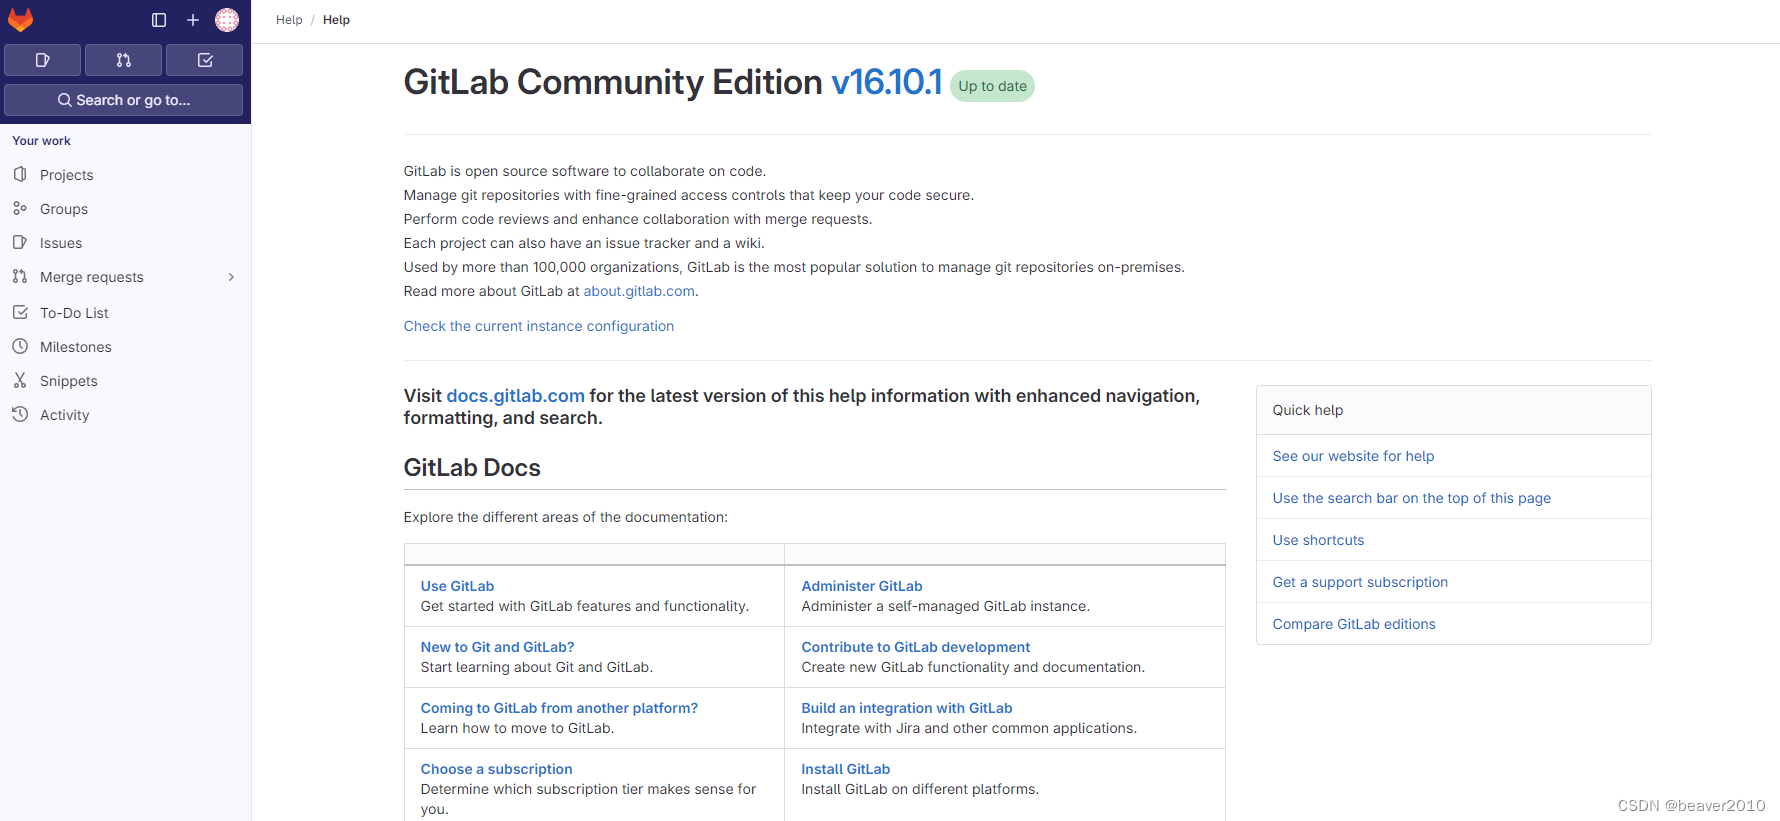
先说一下背景,一次无心升级,升级路上很多坑,官方文档有比较详细的描述,但确实没办法事无巨细,这其中有GitLab导致的,也有系统导致的,虽然我知道任何东西升级都有风险,但这有点超乎我的意料,本来应该几个小时完成,最后用了一天时间完成升级,结果是挺完美的,先上2张图。
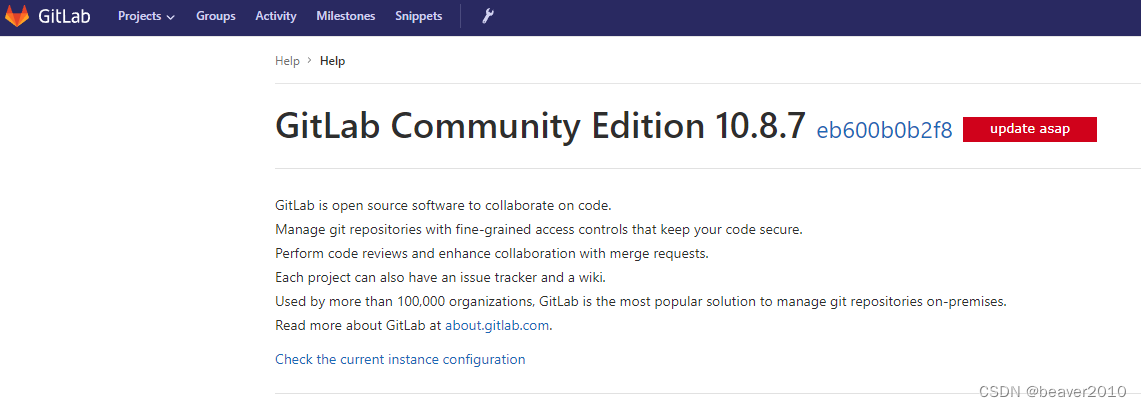
升级前,其实升级前是10.0.0的版本,但没想到升级到这个版本是比较曲折的,所以没有截图,主要是因为我的GitLab是2019年安装的了,确实比较久了,有些新功能确实需要用,所以没办法只能硬着头皮去升级。
升级后

升级前需要准备的事情
首先需要确定一下自己的系统环境,这里重点强调一下,这个GitLab是我自己的私人使用,主要存储一些个人的项目,所以我才敢这么升级;
同学们要注意,生产环境别这么干,要根据自己的实际环境进行升级,先在模拟环境多走几遍,确认没问题再上生产,一定做好GitLab的备份和系统的备份;
为什么说系统备份,因为GitLab的高版本,需要GLIBC依赖的高版本,单独升级GLIBC一个是对系统运行有直接风险,另外一个对一些程序有一定风险,这个就没有K8s好,不依赖宿主系统环境;
另外依赖关系不可能手动一个个去查,所以升级整个系统是上上策,否则你的系统是有可能会被你干废,当然单独升级的方案我没有尝试,是有很大概率出问题。
系统环境
操作系统:Ubuntu 16.04 64位
GitLab:10.0.0
最主要是上边2个环境,其它的对本次升级理论上影响不大,不过这需要自己评估下,我的服务器是阿里云的,我有对系统盘和数据盘的定期备份,所以不存在升级失败不能回退问题,我可以随时恢复,在任何升级前全面的备份是非常重要的,这个在哪里都适用。
Tips:我的GitLab组件中Nginx是单独的,不是集成在GitLab中;
可能有的同学是Docker或者K8s环境下部署的,但如果是跨版本升级的话,数据能否顺利跨版本升级我不确定是否可行,主要原因是我的环境配置并不高,而且上边运行的东西比较杂,上K8s的话服务器成本就有点高了,GitLab高版本的使用环境建议4C8G,否则你升级过程中就会失败;
从10.x直接升级到16.x,在K8s环境中可能行,但PG的表的格式有可能不能直接通用,在某一次跨版本升级过程中,我大概看到了这么一段安装日志,需要从新建表并从新导入数据;
上生产环境前一定多验证,我的环境不一定适合你;
至于环境导致的问题在CentOS与Rocky或者其它环境都是基于RedHat,碰到的问题大同小异,其它系统就得看情况了。
整体升级流程
GitLab升级版本顺序
这个不是固定,根据GitLab版本与系统环境有关系,下边是我的跨版本升级的迭代关系
10.0.0->10.8.7->11.11.5->12.0.4->12.10.8->13.0.6->13.12.7->14.0.9->14.10.3->15.0.5->15.11.12->16.3.6->16.7.7->16.10.1;
能明确的是从10.0.0直接升级到16.10.1是不可能的,更新的东西比较多,同时也涉及数据库的表结构变更。
正式开始升级
安装顺序
上述的迭代关系是依次升级得出来结论,倒序从16.10.1一直装到10.8.7得出来安装顺序;
这里就不把所有安装报错贴出来了,只展示安装16.10.1时的报错;
dpkg -i gitlab-ce_16.10.1-ce.0_amd64.deb
(Reading database … 208693 files and directories currently installed.)
Preparing to unpack gitlab-ce_16.10.1-ce.0_amd64.deb …
gitlab preinstall: It seems you are upgrading from 10.0 to 16.10.
gitlab preinstall: It is required to upgrade to the latest 16.7.x version first before proceeding.
gitlab preinstall: Please follow the upgrade documentation at https://docs.gitlab.com/ee/update/#upgrading-to-a-new-major-version
dpkg: error processing archive gitlab-ce_16.10.1-ce.0_amd64.deb (–install):
subprocess new pre-installation script returned error exit status 1
Errors were encountered while processing:
gitlab-ce_16.10.1-ce.0_amd64.deb
看到上边加粗的部分了吗,迭代顺序就是这么来的。
下载正确的安装包
根据自己的系统环境下载正确的安装包,报错里提供了下载地址,开发人员很细心,报错也足够详细;
我的ubuntut系统比较老,搜索自己的系统
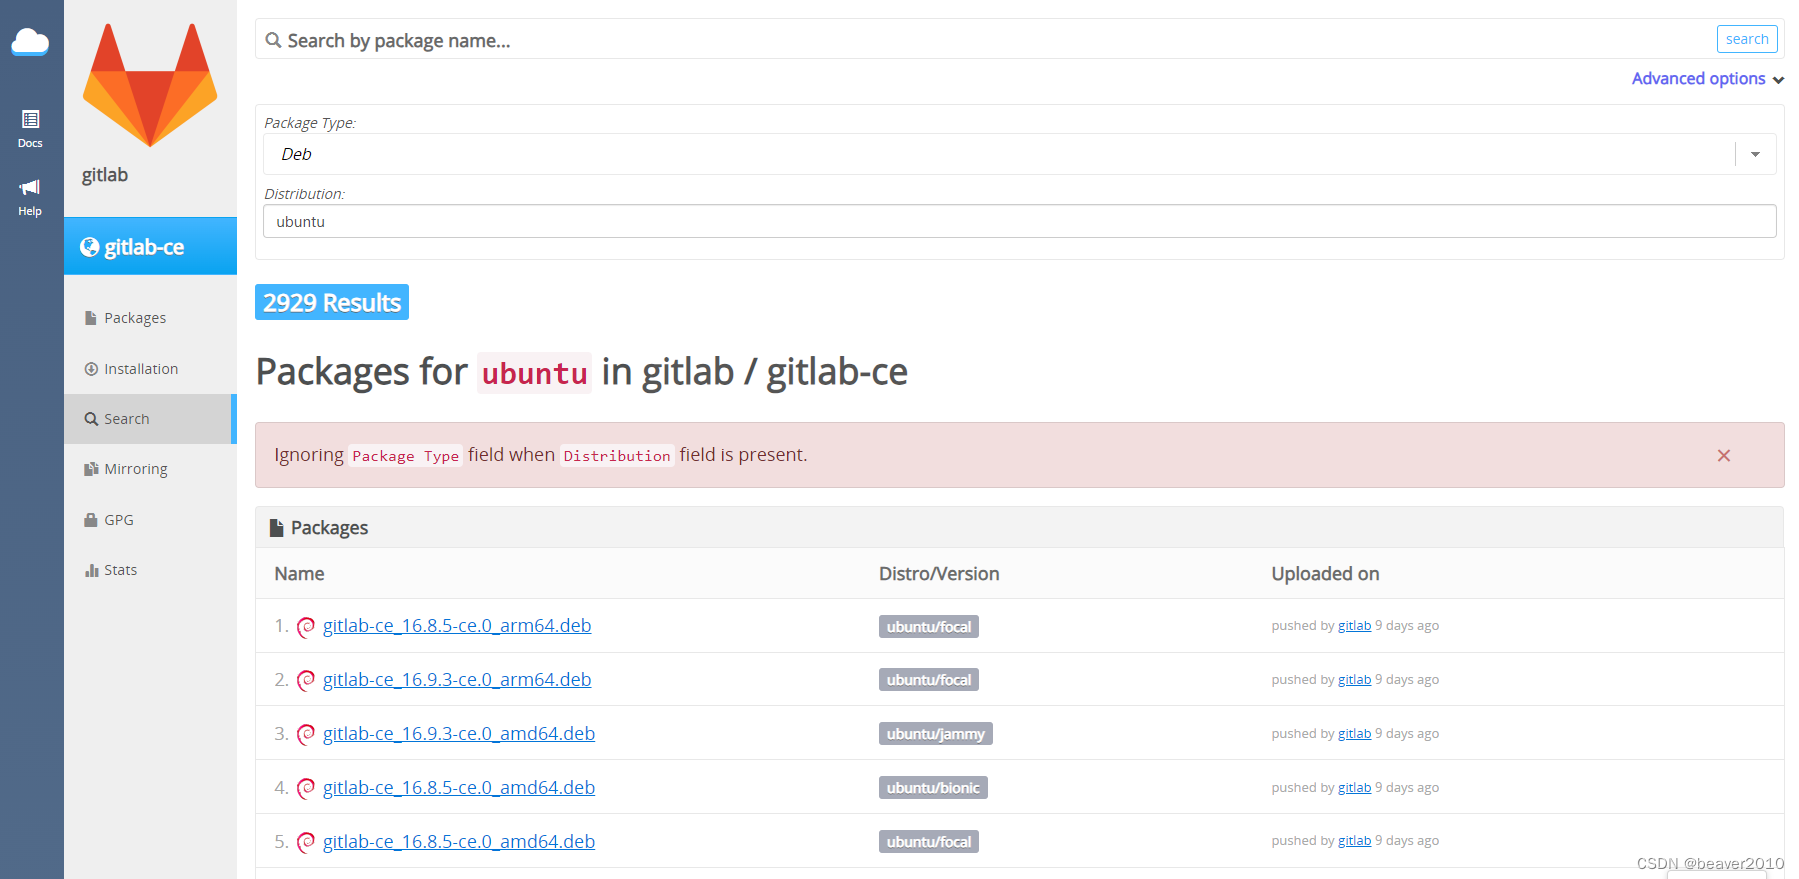
这里注意GitLab可以运行两种CPU架构下,不要下载错了,每个升级文件都不太小,最大1.3GB,选择适合自己系统的镜像下载

右下方有一个wget下载链接,用这个链接下载
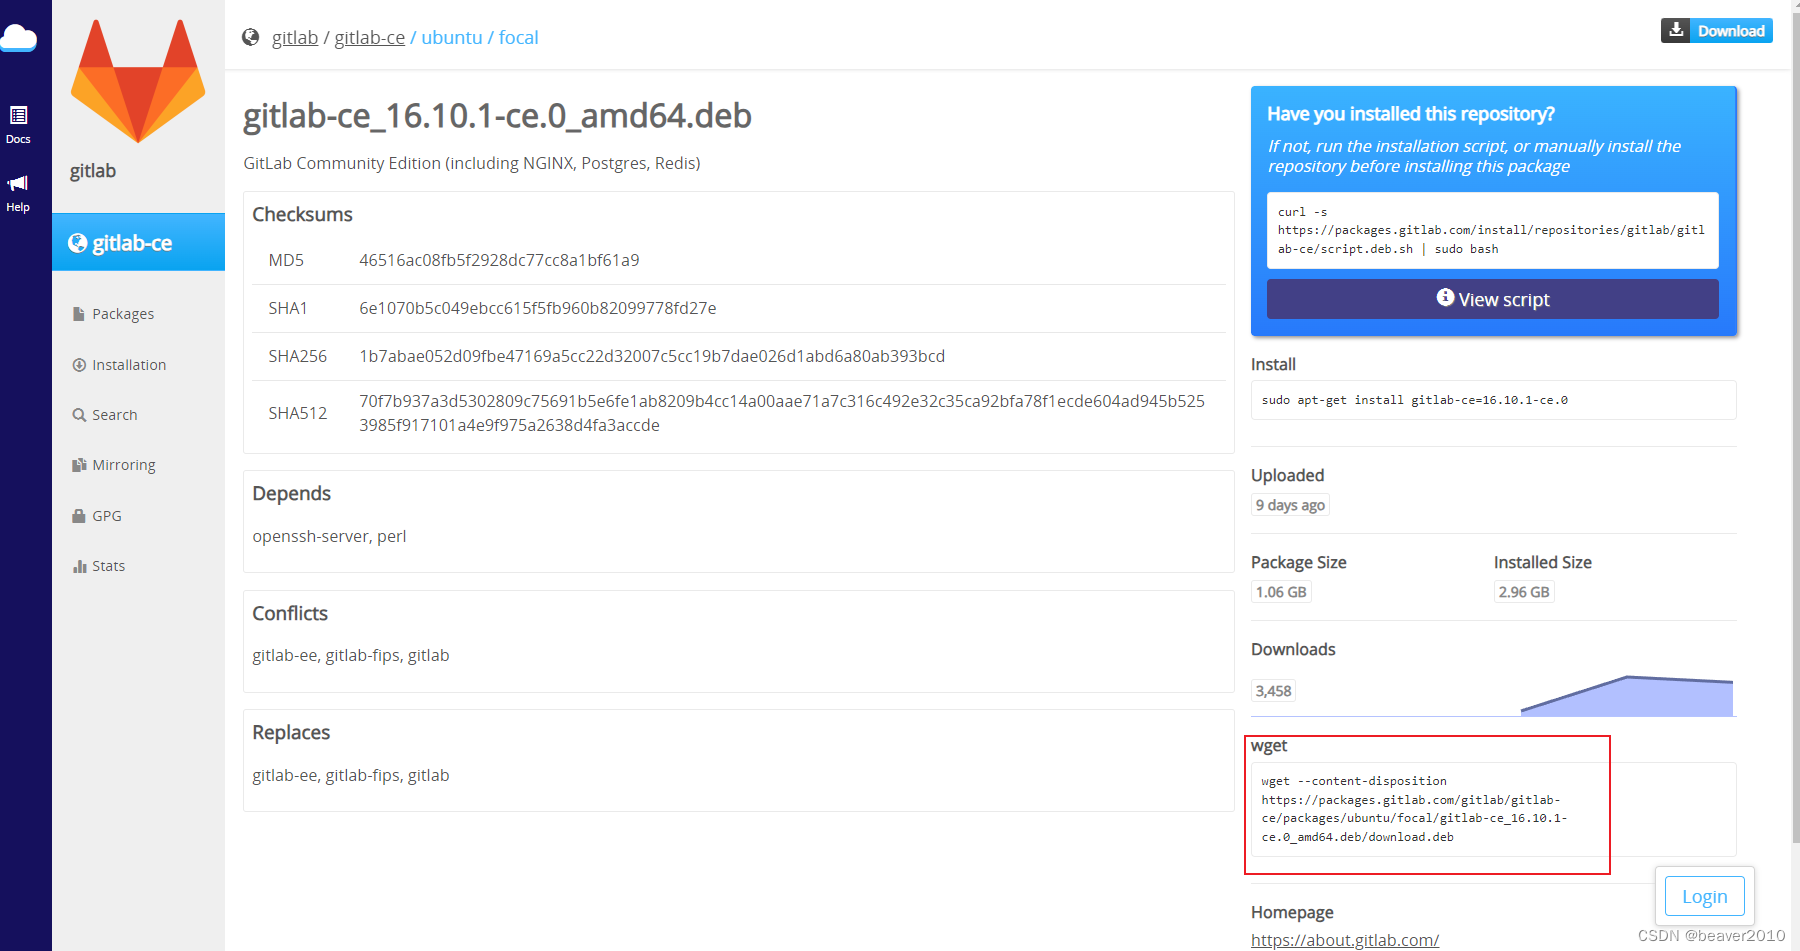
本次安装包的所有wget下载链接,一共11个安装包
wget --content-disposition https://packages.gitlab.com/gitlab/gitlab-ce/packages/ubuntu/focal/gitlab-ce_16.10.1-ce.0_amd64.deb/download.deb
wget --content-disposition https://packages.gitlab.com/gitlab/gitlab-ce/packages/ubuntu/focal/gitlab-ce_16.3.6-ce.0_amd64.deb/download.deb
wget --content-disposition https://packages.gitlab.com/gitlab/gitlab-ce/packages/ubuntu/focal/gitlab-ce_15.0.5-ce.0_amd64.deb/download.deb
wget --content-disposition https://packages.gitlab.com/gitlab/gitlab-ce/packages/ubuntu/focal/gitlab-ce_14.10.3-ce.0_amd64.deb/download.deb
wget --content-disposition https://packages.gitlab.com/gitlab/gitlab-ce/packages/ubuntu/focal/gitlab-ce_14.0.9-ce.0_amd64.deb/download.deb
wget --content-disposition https://packages.gitlab.com/gitlab/gitlab-ce/packages/ubuntu/focal/gitlab-ce_13.12.7-ce.0_amd64.deb/download.deb
wget --content-disposition https://packages.gitlab.com/gitlab/gitlab-ce/packages/ubuntu/bionic/gitlab-ce_13.0.6-ce.0_amd64.deb/download.deb
wget --content-disposition https://packages.gitlab.com/gitlab/gitlab-ce/packages/ubuntu/bionic/gitlab-ce_12.10.8-ce.0_amd64.deb/download.deb
wget --content-disposition https://packages.gitlab.com/gitlab/gitlab-ce/packages/ubuntu/bionic/gitlab-ce_12.0.4-ce.0_amd64.deb/download.deb
wget --content-disposition https://packages.gitlab.com/gitlab/gitlab-ce/packages/ubuntu/bionic/gitlab-ce_11.11.5-ce.0_amd64.deb/download.deb
wget --content-disposition https://packages.gitlab.com/gitlab/gitlab-ce/packages/ubuntu/bionic/gitlab-ce_10.8.7-ce.0_amd64.deb/download.deb
如果报证书错误,那就加个参数就可以解决了
wget --content-disposition --no-check-certificate https://packages.gitlab.com/gitlab/gitlab-ce/packages/ubuntu/focal/gitlab-ce_16.10.1-ce.0_amd64.deb/download.deb
wget --content-disposition --no-check-certificate https://packages.gitlab.com/gitlab/gitlab-ce/packages/ubuntu/focal/gitlab-ce_16.3.6-ce.0_amd64.deb/download.deb
wget --content-disposition --no-check-certificate https://packages.gitlab.com/gitlab/gitlab-ce/packages/ubuntu/focal/gitlab-ce_15.0.5-ce.0_amd64.deb/download.deb
wget --content-disposition --no-check-certificate https://packages.gitlab.com/gitlab/gitlab-ce/packages/ubuntu/focal/gitlab-ce_14.10.3-ce.0_amd64.deb/download.deb
wget --content-disposition --no-check-certificate https://packages.gitlab.com/gitlab/gitlab-ce/packages/ubuntu/focal/gitlab-ce_14.0.9-ce.0_amd64.deb/download.deb
wget --content-disposition --no-check-certificate https://packages.gitlab.com/gitlab/gitlab-ce/packages/ubuntu/focal/gitlab-ce_13.12.7-ce.0_amd64.deb/download.deb
wget --content-disposition --no-check-certificate https://packages.gitlab.com/gitlab/gitlab-ce/packages/ubuntu/bionic/gitlab-ce_13.0.6-ce.0_amd64.deb/download.deb
wget --content-disposition --no-check-certificate https://packages.gitlab.com/gitlab/gitlab-ce/packages/ubuntu/bionic/gitlab-ce_12.10.8-ce.0_amd64.deb/download.deb
wget --content-disposition --no-check-certificate https://packages.gitlab.com/gitlab/gitlab-ce/packages/ubuntu/bionic/gitlab-ce_12.0.4-ce.0_amd64.deb/download.deb
wget --content-disposition --no-check-certificate https://packages.gitlab.com/gitlab/gitlab-ce/packages/ubuntu/bionic/gitlab-ce_11.11.5-ce.0_amd64.deb/download.deb
wget --content-disposition --no-check-certificate https://packages.gitlab.com/gitlab/gitlab-ce/packages/ubuntu/bionic/gitlab-ce_10.8.7-ce.0_amd64.deb/download.deb
下载好所有的安装包
414M Jul 27 2018 gitlab-ce_10.8.7-ce.0_amd64.deb
638M Jul 3 2019 gitlab-ce_11.11.5-ce.0_amd64.deb
622M Jul 30 2019 gitlab-ce_12.0.4-ce.0_amd64.deb
772M May 29 2020 gitlab-ce_12.10.8-ce.0_amd64.deb
699M Jun 11 2020 gitlab-ce_13.0.6-ce.0_amd64.deb
877M Jul 6 2021 gitlab-ce_13.12.7-ce.0_amd64.deb
883M Sep 1 2021 gitlab-ce_14.0.9-ce.0_amd64.deb
1000M May 20 2022 gitlab-ce_14.10.3-ce.0_amd64.deb
1.1G Jul 28 2022 gitlab-ce_15.0.5-ce.0_amd64.deb
1.3G Jul 17 2023 gitlab-ce_15.11.12-ce.0_amd64.deb
1.1G Mar 28 00:08 gitlab-ce_16.10.1-ce.0_amd64.deb
1.3G Oct 31 22:53 gitlab-ce_16.3.6-ce.0_amd64.deb
1.1G Mar 7 03:22 gitlab-ce_16.7.7-ce.0_amd64.deb
正式安装
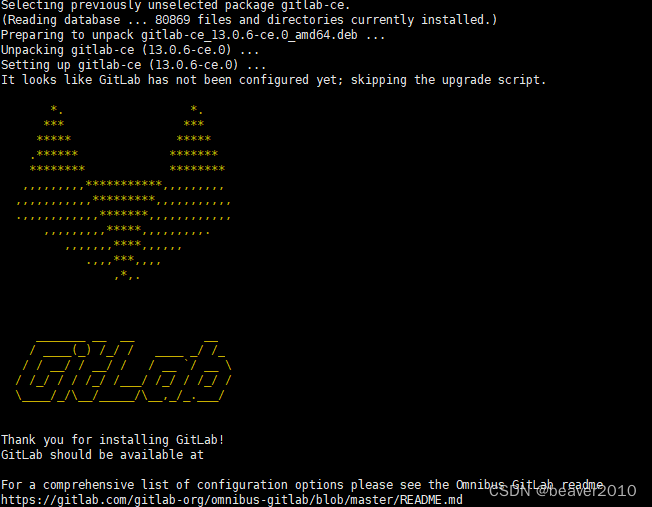
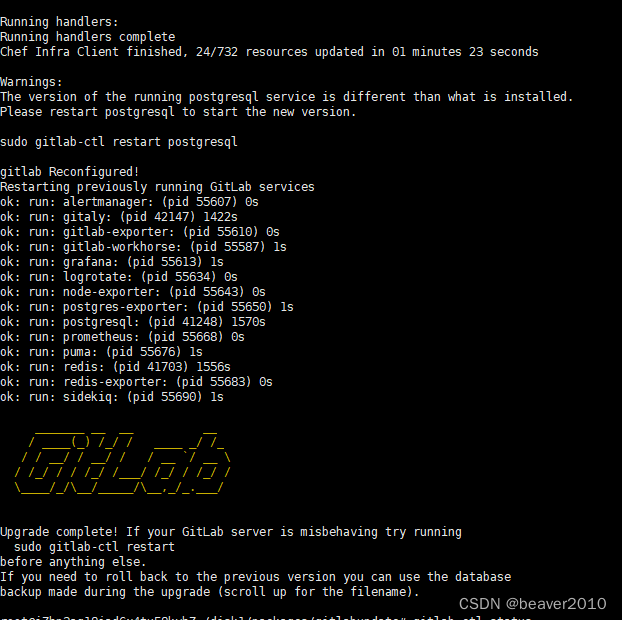
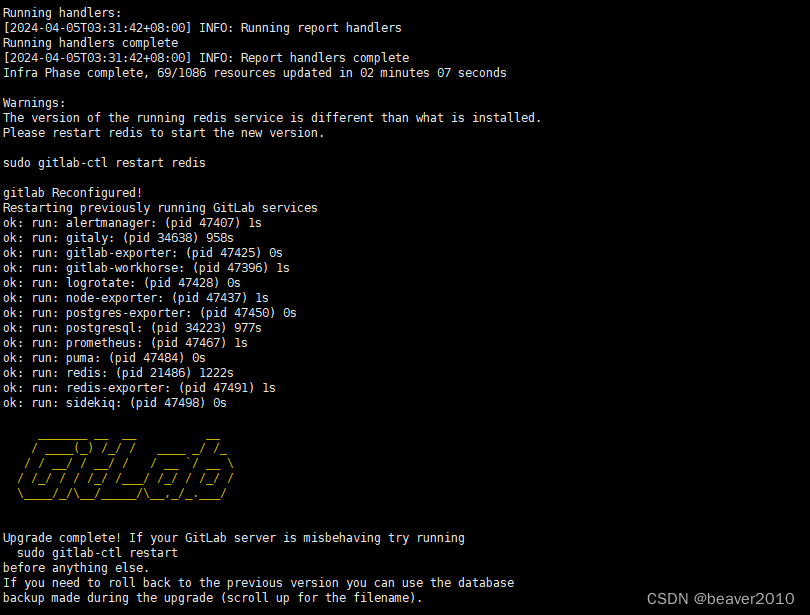
一定是从低版本到高版本逐步安装,每次安装前把GitLab备份,然后再开始安装,安装成功后会有提下面的图,安装成功不代表就一定能正常访问,后边我会去说不能访问的解决思路;
先备份数据,备份的文件存储在【/var/opt/gitlab/backups】目录下,记得把文件先移动走,避免安装时自动备份出现问题。
gitlab-rake gitlab:backup:create
备份配置文件,根据安装的提示,有2个文件【gitlab.rb】与这【gitlab-secrets.json】不会被备份,需要自己手动备份,安装日志一定要看,尤其是Warning级别的
Warning: Your gitlab.rb and gitlab-secrets.json files contain
sensitive data and are not included in this backup. You will need
these files to restore a backup. Please back them up manually.
这2个文件在/etc/gitlab目标下,一定要备份,因为你不确定升级一定能成功,这样即使失败了也能完全恢复。

安装10.8.7版本
从10.8.7版本开始,GitLab对GLIBC的版本就有一定要求 ,也就是要求系统足够新,这里我要说下,如果GitLab还能用且不需要一些新功能,就没必要升级,每个人、团队需求不一样,看实际需求再决定是否要升级;
系统版本太老,需要升级
安装时直接报错
dpkg -i gitlab-ce_10.8.7-ce.0_amd64.deb
(Reading database … 208693 files and directories currently installed.)
Preparing to unpack gitlab-ce_10.8.7-ce.0_amd64.deb …
gitlab preinstall: Automatically backing up only the GitLab SQL database (excluding everything else!)
Dumping database …
Dumping PostgreSQL database gitlabhq_production … [DONE]
done
Dumping repositories …
[SKIPPED]
Dumping uploads …
[SKIPPED]
Dumping builds …
[SKIPPED]
Dumping artifacts …
[SKIPPED]
Dumping pages …
[SKIPPED]
Dumping lfs objects …
[SKIPPED]
Dumping container registry images …
[DISABLED]
Creating backup archive: 1712071836_2024_04_02_10.0.0_gitlab_backup.tar … done
Uploading backup archive to remote storage … skipped
Deleting tmp directories … done
done
Deleting old backups … skipping
Unpacking gitlab-ce (10.8.7-ce.0) over (10.0.0-ce.0) …
Setting up gitlab-ce (10.8.7-ce.0) …
/opt/gitlab/embedded/bin/ruby: /lib/x86_64-linux-gnu/libc.so.6: version `GLIBC_2.25’ not found (required by /opt/gitlab/embedded/lib/libruby.so.2.3)
dpkg: error processing package gitlab-ce (–install):
subprocess installed post-installation script returned error exit status 1
Errors were encountered while processing:
gitlab-ce
看下上边加粗的部分,这就是报错内容,这个只能升级GLIBC或者直接升级操作系统,我的建议是升级操作系统,有两个原因:
1、单独升级GLIBC,即使成功系统可以起来,但不代表其它软件可以启动,原因就是依赖关系你不可能手动全部搞定;
2、系统直接干废,这也是我个人为什么选择ubuntu做系统,它的系统升级基本来说是稳的。
解决系统过老的方案
出现上边问题的就是升级到最新稳定版本,下边我指列出ubuntu的解决方案:
- 首先,更新你的包列表:sudo apt-get update
- 然后,升级现有的软件包:sudo apt-get upgrade
- 运行 sudo apt-get dist-upgrade 来处理升级中的依赖关系;
- 使用 sudo do-release-upgrade 开始系统升级过程,这个命令会指导你完成升级过程;
Docker、K8s环境升级大致也会遇到这些问题,解决思路一样,方法有一定的区别,可以自己根据自己的实际情况解决。
升级完系统后请确认系统版本及GLIBC版本,我的系统原来是16,这次升级到18,系统升级也是一样的,只能逐步升级,这也是我选择ubuntu的原因,升级不会出现太多问题。
lsb_release -a
ldd --version
root@test# lsb_release > -a
LSB Version: core-9.20170808ubuntu1-noarch:security-9.20170808ubuntu1-noarch
Distributor ID: Ubuntu Description: Ubuntu 18.04.6 LTS Release:
18.04 Codename: bionic
root@test# ldd --version
ldd (Ubuntu GLIBC 2.27-3ubuntu1.6) 2.27 Copyright © 2018 Free Software Foundation, Inc. This is free software; see the source
for copying conditions. There is NO warranty; not even for
MERCHANTABILITY or FITNESS FOR A PARTICULAR PURPOSE. Written by Roland
McGrath and Ulrich Drepper.
可以注意到GLBIC版本是2.27,而GitLab 10.8.7版本对GLBIC的要求是2.25,已经满足了,理论来说应该没问题了,事实证明也确实没问题。
重新安装gitlab 10.8.7 升级包【10.0.0->10.8.7】
重新配置 GitLab,并安装GitLab,什么时候需要执行重新配置命令,一种情况是配置有更改,另外一种是上一次安装因为各种原因没有成功,以上两种情况都需要重新配置。
gitlab-ctl reconfigure
dpkg -i gitlab-ce_10.8.7-ce.0_amd64.deb
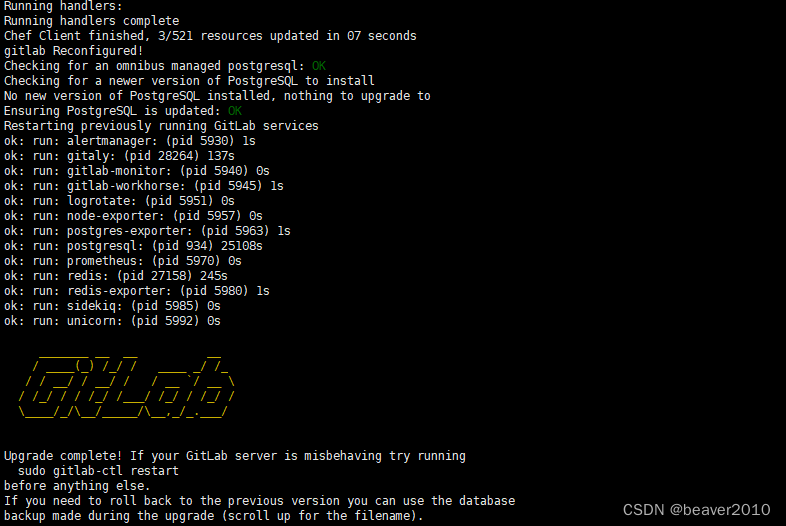
验证是否升级成功
每个版本升级后需要检查安装的版本是否正确
每个组件运行是否正常
Web端是否可以访问
数据是否有丢失
检查GitLab运行状态是否正常
gitlab-ctl status
ok: run: alertmanager: (pid 5930) 364s
ok: run: gitaly: (pid 28264) 500s
ok: run: gitlab-monitor: (pid 5940) 363s
ok: run: gitlab-workhorse: (pid 5945) 363s
ok: run: logrotate: (pid 5951) 362s
ok: run: node-exporter: (pid 5957) 362s
ok: run: postgres-exporter: (pid 5963) 362s
ok: run: postgresql: (pid 934) 25469s
ok: run: prometheus: (pid 5970) 361s
ok: run: redis: (pid 27158) 606s
ok: run: redis-exporter: (pid 5980) 361s
ok: run: sidekiq: (pid 5985) 360s
ok: run: unicorn: (pid 5992) 360s
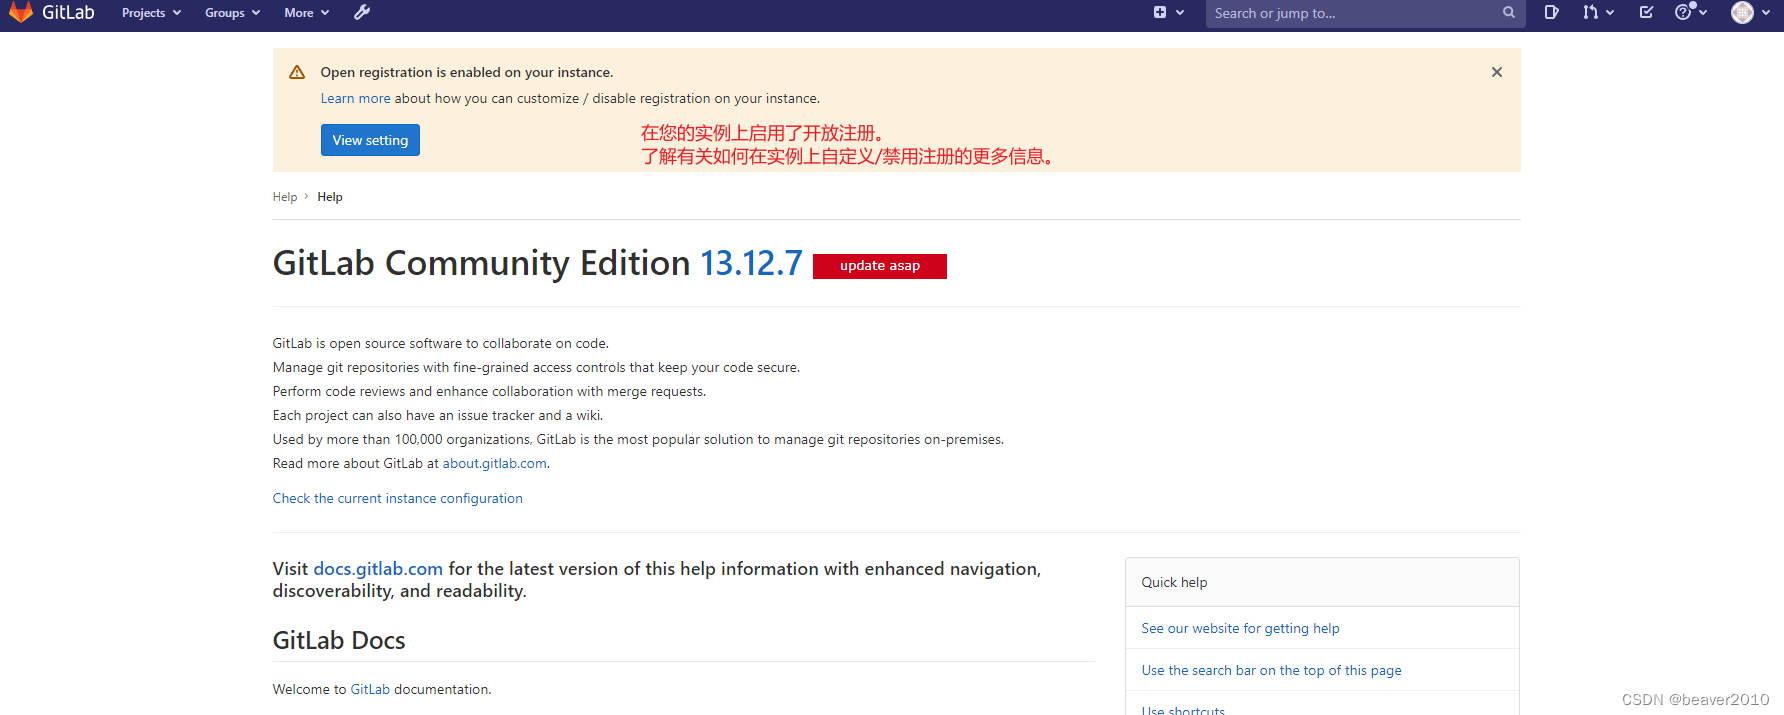
查看GitLab当前运行版本
cat /var/opt/gitlab/gitlab-rails/VERSION
cat /var/opt/gitlab/gitlab-rails/VERSION
10.8.7
验证Web端访问是否正常,并且检查数据是否有丢失

剩下的版本依次按照上述方法进行安装,先备份再安装,切记切记,因为后边出现了比较严重的问题,如果没有备份那数据基本就丢了。
安装完后端服务运行正常,前端不能访问的解决方案
提供两个解决思路:
1、后端服务有没完全起来的,不是说显示正常就正常,重启GitLab治百病;
2、像我一样Nginx是独立的,如果后端服务都正常,把Nginx重启一下,很大概率就解决问题了;
3、如果不是以上2个问题,那就是你配置太低了,升级配置就解决问题。
赶上大促买个2C8G或者4C8G一年的2000~3000之间,他可能是贵点,也可以几个关系好的朋友一起用,主打稳定可用性高,从没掉过链子,不用科学上网,也不用担心提交了不该提交东西,谁都会犯错,花钱消灾,干这行长了,积累的东西多了总得有个踏实的地方存东西,GitLab又不是只能存代码。
依次安装11.11.5【10.8.7–>11.11.5】

依次安装12.0.4【11.11.5–>12.0.4】
依次安装12.10.8【12.0.4–>12.10.8】

依次安装13.0.6【12.10.8–>13.0.6】
安装13.12.7【13.0.6–>13.12.7】失败
升级报错,需要再次升级系统,需要GLIBC_2.29的支持,这个问题还好说;
关键问题是GitLab安装失败处于挂起状态,随后的系统升级系统也会报错,从你升级系统的指令回车后,GLIBC的包可能也出现问题了,GitLab也不能正常卸载掉,只能强制卸载掉GitLab;
这里就出现了GitLab数据丢失问题,数据没了,配置文件也没了,如果之前没备份,就什么都没了,虽然你对Linux底层了解,即使可以恢复GLIBC,对其它软件运行及依赖包是否有影响,等等一系列问题都存在风险,不如直接恢复来的快,如果你有足够多的时间可以尝试解决这个问题。
下边是报错信息,注意加黑的部分。
root@test# dpkg -i gitlab-ce_13.12.7-ce.0_amd64.deb
(Reading database … 180520 files and directories currently installed.)
Preparing to unpack gitlab-ce_13.12.7-ce.0_amd64.deb …
gitlab preinstall: Automatically backing up only the GitLab SQL database (excluding everything else!)
2024-04-03 09:38:41 +0800 – Dumping database …
Dumping PostgreSQL database gitlabhq_production … [DONE]
2024-04-03 09:38:43 +0800 – done
2024-04-03 09:38:43 +0800 – Dumping repositories …
2024-04-03 09:38:43 +0800 – [SKIPPED]
2024-04-03 09:38:43 +0800 – Dumping uploads …
2024-04-03 09:38:43 +0800 – [SKIPPED]
2024-04-03 09:38:43 +0800 – Dumping builds …
2024-04-03 09:38:43 +0800 – [SKIPPED]
2024-04-03 09:38:43 +0800 – Dumping artifacts …
2024-04-03 09:38:43 +0800 – [SKIPPED]
2024-04-03 09:38:43 +0800 – Dumping pages …
2024-04-03 09:38:43 +0800 – [SKIPPED]
2024-04-03 09:38:43 +0800 – Dumping lfs objects …
2024-04-03 09:38:43 +0800 – [SKIPPED]
2024-04-03 09:38:43 +0800 – Dumping container registry images …
2024-04-03 09:38:43 +0800 – [DISABLED]
Creating backup archive: 1712108323_2024_04_03_13.0.6_gitlab_backup.tar … done
Uploading backup archive to remote storage … skipped
Deleting tmp directories … done
done
Deleting old backups … skipping
Warning: Your gitlab.rb and gitlab-secrets.json files contain sensitive data
and are not included in this backup. You will need these files to restore a backup.
Please back them up manually.
Backup task is done.
gitlab preinstall: Automatically backing up /etc/gitlab
Running configuration backup
Creating configuration backup archive: gitlab_config_1712108324_2024_04_03.tar
/etc/gitlab/
/etc/gitlab/gitlab-secrets.json
/etc/gitlab/gitlab.rb
/etc/gitlab/old.gitlab.rb/
/etc/gitlab/old.gitlab.rb/gitlab.rb.bak
/etc/gitlab/gitlab.rb.bak
/etc/gitlab/trusted-certs/
Configuration backup archive complete: /etc/gitlab/config_backup/gitlab_config_1712108324_2024_04_03.tar
Unpacking gitlab-ce (13.12.7-ce.0) over (13.0.6-ce.0) …
Setting up gitlab-ce (13.12.7-ce.0) …
/opt/gitlab/embedded/bin/ruby: /lib/x86_64-linux-gnu/libcrypt.so.1: version XCRYPT_2.0’ not found (required by /opt/gitlab/embedded/lib/libruby.so.2.7) /opt/gitlab/embedded/bin/ruby: /lib/x86_64-linux-gnu/libm.so.6: version GLIBC_2.29’ not found (required by /opt/gitlab/embedded/lib/libruby.so.2.7)
/opt/gitlab/embedded/bin/ruby: /lib/x86_64-linux-gnu/libc.so.6: version `GLIBC_2.28’ not found (required by /opt/gitlab/embedded/lib/libruby.so.2.7)
dpkg: error processing package gitlab-ce (–install):
installed gitlab-ce package post-installation script subprocess returned error exit status 1
Errors were encountered while processing:
gitlab-ce
重新安装并恢复【13.0.6】
对于这个时候GitLab所有组件可能都不能用了 ,需要强制卸载GitLab,并升级到最新系统,当然可以不升级到最新版,因为你知道解决方案后,这种问题是可以恢复的,但也存在部分操作系统升级失败,那就是另外一个问题了,而且是系统层级,所以我依然建议升级到最新系统。
移除 GitLab CE
dpkg --remove --force-remove-reinstreq gitlab-ce
升级到最新版系统,关于ubuntu的升级方法我前边有写,可以参考
升级系统后系统版本
root@test:~# ldd --version
ldd (Ubuntu GLIBC 2.35-0ubuntu3.6) 2.35 Copyright © 2022 Free
Software Foundation, Inc. This is free software; see the source for
copying conditions. There is NO warranty; not even for
MERCHANTABILITY or FITNESS FOR A PARTICULAR PURPOSE. Written by Roland
McGrath and Ulrich Drepper.
root@test:~# lsb_release -a
LSB Version:
core-11.1.0ubuntu4-noarch:security-11.1.0ubuntu4-noarch Distributor
ID: Ubuntu Description: Ubuntu 22.04.4 LTS Release: 22.04
Codename: jammy
可以看到GLIBC版本已经升级到了2.35,这个版本安装16.x版本的GitLab是没问题的。
现在开始全新安装【13.0.6】版本,因为【13.12.7】版本没有安装成功,但之前咱们有备份,正常安装,恢复备份,备份有两部分,一个是数据恢复,一个是配置恢复。
重新安装【13.0.6】
dpkg -i gitlab-ce_13.0.6-ce.0_amd64.deb
出现上述界面,就说明成功了,开始恢复数据,在恢复数据前需要将【runsvdir】服务启动,否则会报错不能恢复,具体原因我还没细查,总之先启动,下边命令挨个执行,不要着急
gitlab-ctl reconfigure
systemctl start gitlab-runsvdir.service
systemctl enable gitlab-runsvdir.service
恢复【13.0.6】数据,这个是出事之前备份的,肯定是能运行的最后版本,因为咱们手动有备份,在安装【13.12.7】时安装程序也自动备份了,理论上用哪个都可以,建议先用自己手动备份的,正常安装的备份没问题,但安装失败的备份不确定是否有问题。
【BACKUP】后边跟是文件名前缀,备份程序可以自动识别
1712108323_2024_04_03_13.0.6_gitlab_backup.tar
gitlab-rake gitlab:backup:restore BACKUP= 1712108323_2024_04_03_13.0.6
升级完成后进行验证
root@test# gitlab-ctl status
run: alertmanager: (pid 23178) 517s; run: log: (pid 20973) 1949s
run: gitaly: (pid 23189) 516s; run: log: (pid 20963) 1949s
run: gitlab-exporter: (pid 23198) 516s; run: log: (pid 20974) 1949s
run: gitlab-workhorse: (pid 23210) 515s; run: log: (pid 20984) 1949s
run: grafana: (pid 23226) 515s; run: log: (pid 20977) 1949s
run: logrotate: (pid 23246) 514s; run: log: (pid 20960) 1949s
run: node-exporter: (pid 23252) 514s; run: log: (pid 20967) 1949s
run: postgres-exporter: (pid 23261) 514s; run: log: (pid 20975) 1949s
run: postgresql: (pid 23275) 513s; run: log: (pid 20962) 1949s
run: prometheus: (pid 23284) 512s; run: log: (pid 20972) 1949s
run: puma: (pid 23297) 511s; run: log: (pid 20985) 1949s
run: redis: (pid 23302) 511s; run: log: (pid 20979) 1949s
run: redis-exporter: (pid 23308) 511s; run: log: (pid 20966) 1949s
run: sidekiq: (pid 23315) 510s; run: log: (pid 20986) 1949s
root@test# cat /var/opt/gitlab/gitlab-rails/VERSION
13.0.6
至此【13.0.6】正常恢复了,多个心眼检查一下GitLab中项目数据有没有问题。
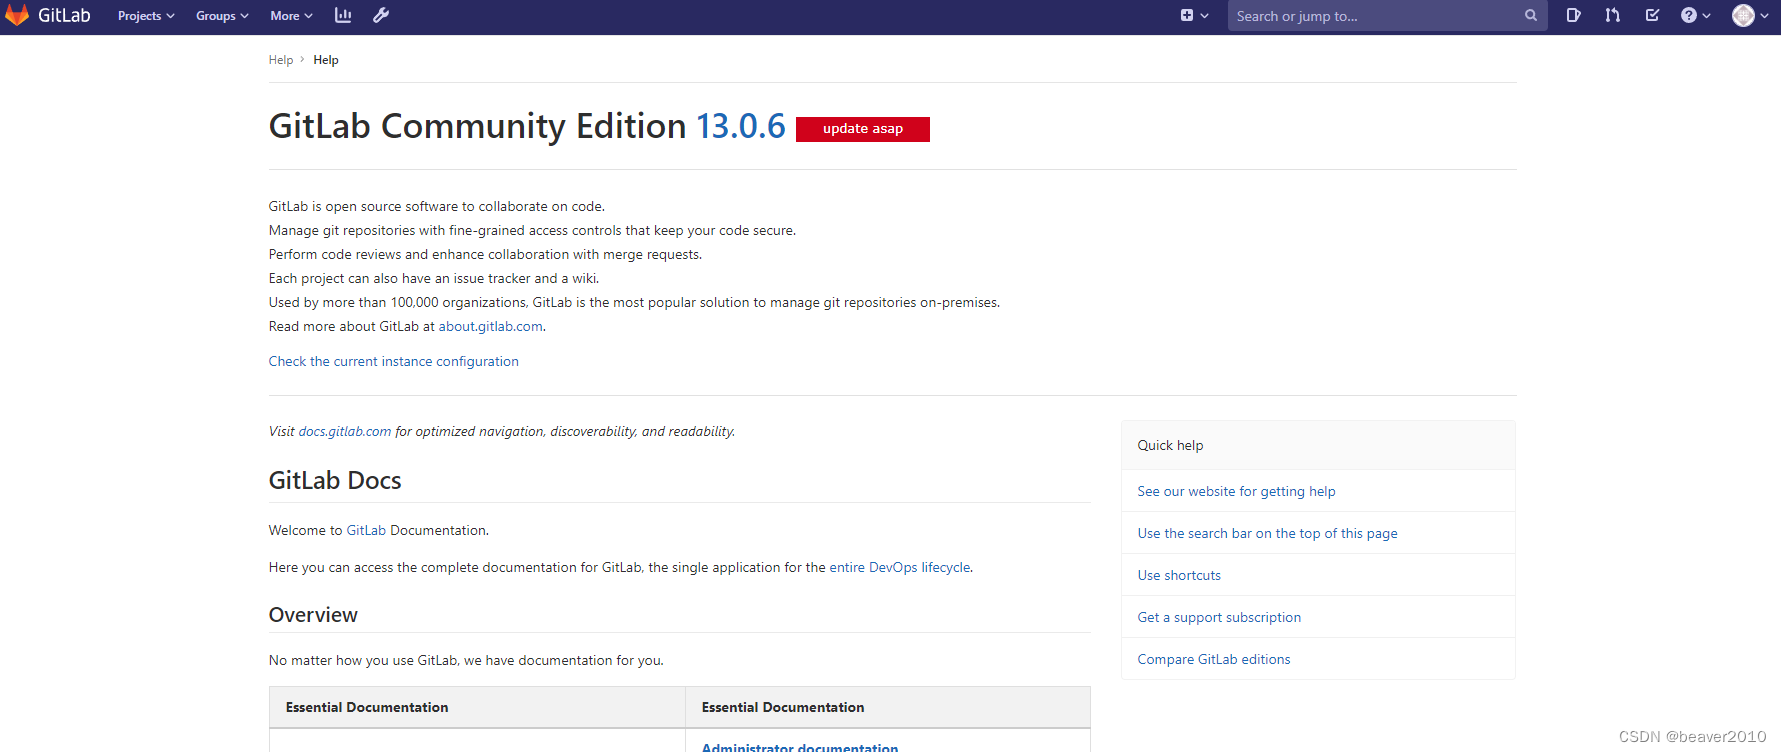
重新安装13.12.7【13.0.6–>13.12.7】
方法与之前说的一样,先备份再安装,安装后检查所有服务是否正常启动,Web端是否可以正常访问。
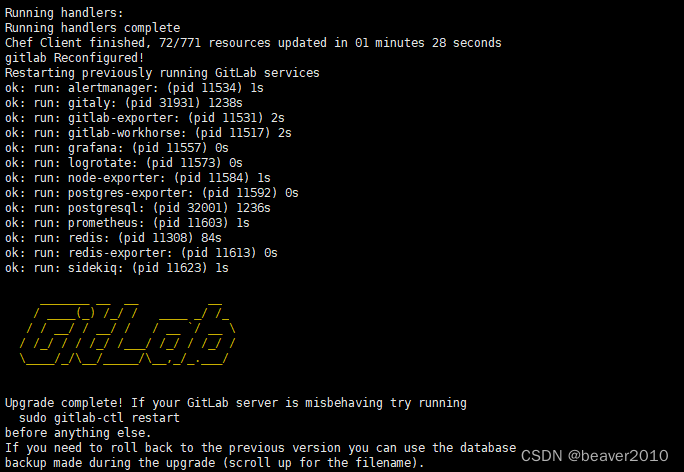
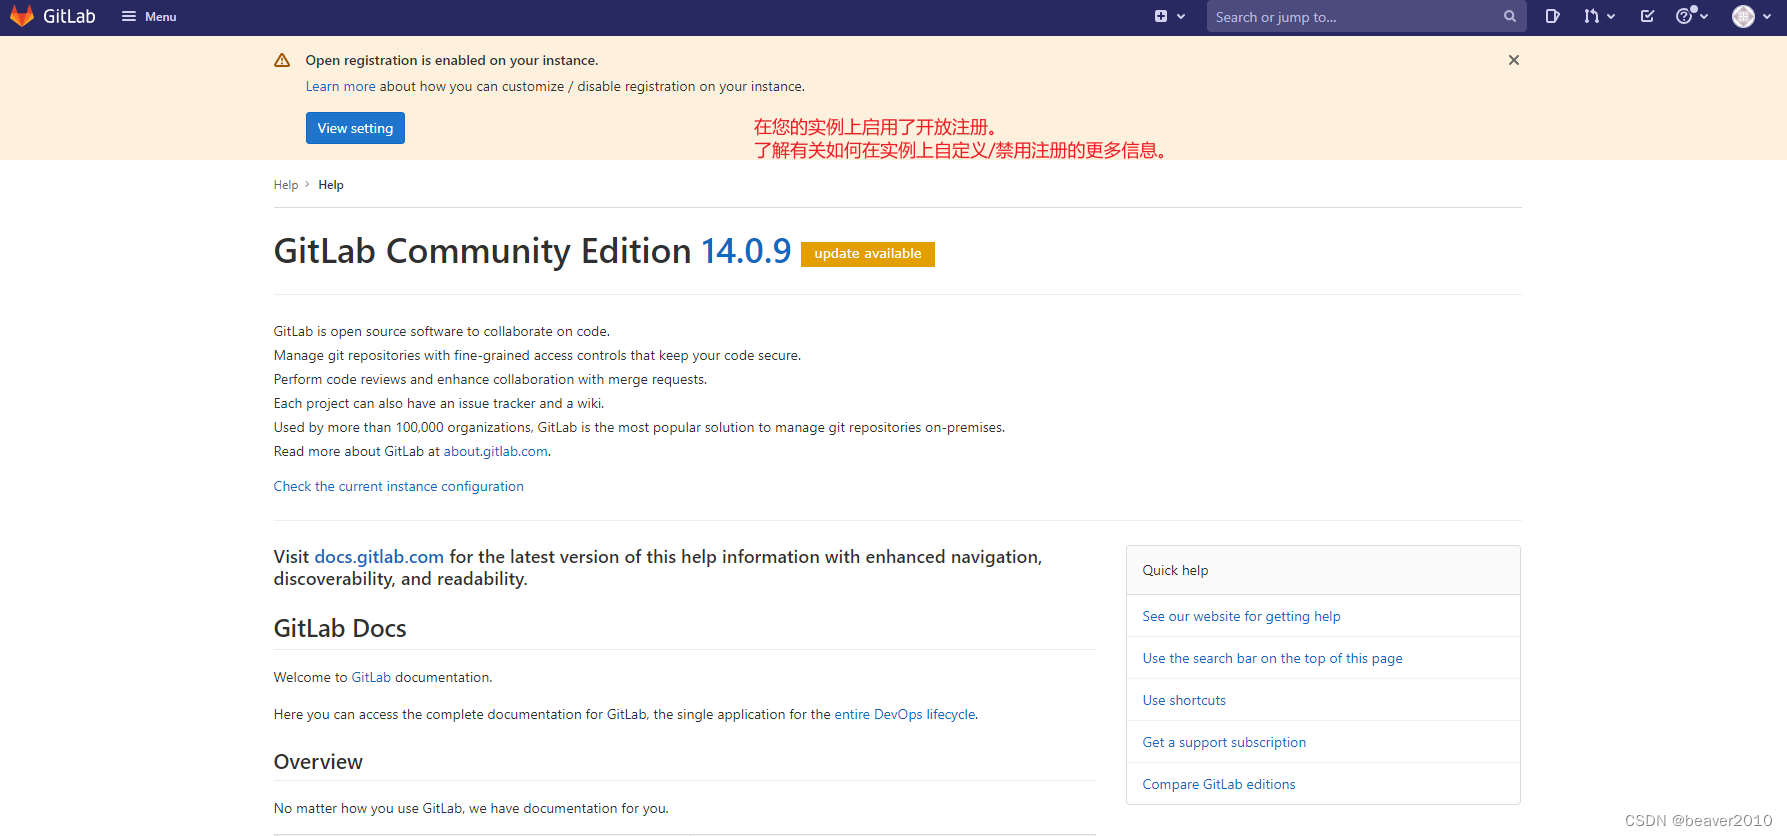
安装14.0.9【13.12.7–>14.0.9】
备份、安装、测试
如果运行不正常,根据提示,重启服务
gitlab-ctl restart
安装14.10.3【14.0.9–>14.10.3】
备份、安装、测试
安装15.0.5【14.10.3–>15.0.5】
备份、安装、测试

安装15.11.12【15.0.5–>15.11.12】报错
这个错误与之前的问题不一样,是我的一个配置有关系,应该是与10.0.0版本的配置文件定义有差异
RuntimeError
gitlab_rails[‘smtp_tls’] and gitlab_rails[‘smtp_enable_starttls_auto’] are mutually exclusive. Set one of them to false. SMTP providers usually use port 465 for TLS and port 587 for STARTTLS.
Cookbook Trace: (most recent call first)
/opt/gitlab/embedded/cookbooks/cache/cookbooks/gitlab/libraries/smtp_helper.rb:8:in
validate_smtp_settings!' /opt/gitlab/embedded/cookbooks/cache/cookbooks/gitlab/libraries/gitlab_rails.rb:366:invalidate_smtp_settings!’
/opt/gitlab/embedded/cookbooks/cache/cookbooks/gitlab/libraries/gitlab_rails.rb:37:inparse_variables' /opt/gitlab/embedded/cookbooks/cache/cookbooks/package/libraries/settings_dsl.rb:206:inblock in generate_config’
/opt/gitlab/embedded/cookbooks/cache/cookbooks/package/libraries/settings_dsl.rb:204:ineach' /opt/gitlab/embedded/cookbooks/cache/cookbooks/package/libraries/settings_dsl.rb:204:ingenerate_config’
/opt/gitlab/embedded/cookbooks/cache/cookbooks/gitlab/recipes/config.rb:24:in `from_file’
Relevant File Content:
/opt/gitlab/embedded/cookbooks/cache/cookbooks/gitlab/libraries/smtp_helper.rb:
1: # frozen_string_literal: true
2:
3: class SmtpHelper
4: def self.validate_smtp_settings!(rails_config)
5: return unless rails_config[‘smtp_enable’]
6: return unless rails_config[‘smtp_tls’] && rails_config[‘smtp_enable_starttls_auto’]
7:
8>> raise “gitlab_rails[‘smtp_tls’] and gitlab_rails[‘smtp_enable_starttls_auto’] are mutually exclusive.”
9: " Set one of them to false. SMTP providers usually use port 465 for TLS and port 587 for STARTTLS."
10: end
11: end
12:
System Info:
chef_version=17.10.0
platform=ubuntu
platform_version=22.04
ruby=ruby 3.0.6p216 (2023-03-30 revision 23a532679b) [x86_64-linux]
program_name=/opt/gitlab/embedded/bin/cinc-client
executable=/opt/gitlab/embedded/bin/cinc-client
Running handlers:
[2024-04-05T03:01:30+08:00] ERROR: Running exception handlers
Running handlers complete
[2024-04-05T03:01:30+08:00] ERROR: Exception handlers complete
Infra Phase failed. 0 resources updated in 05 seconds
[2024-04-05T03:01:30+08:00] FATAL: Stacktrace dumped to /opt/gitlab/embedded/cookbooks/cache/cinc-stacktrace.out
[2024-04-05T03:01:30+08:00] FATAL: ---------------------------------------------------------------------------------------
[2024-04-05T03:01:30+08:00] FATAL: PLEASE PROVIDE THE CONTENTS OF THE stacktrace.out FILE (above) IF YOU FILE A BUG REPORT
[2024-04-05T03:01:30+08:00] FATAL: ---------------------------------------------------------------------------------------
[2024-04-05T03:01:30+08:00] FATAL: RuntimeError: gitlab_rails[‘smtp_tls’] and gitlab_rails[‘smtp_enable_starttls_auto’] are mutually exclusive. Set one of them to false. SMTP providers usually use port 465 for TLS and port 587 for STARTTLS.
Checking PostgreSQL executables: NOT OK
Could not update PostgreSQL executables.
/opt/gitlab/embedded/service/omnibus-ctl/lib/gitlab_ctl/util.rb:50:inparse_json_file': Attributes not found in /opt/gitlab/embedded/nodes/iZhp3ag18jad6x4tu58kvhZ.json, has reconfigure been run yet? (GitlabCtl::Errors::NodeError) from /opt/gitlab/embedded/service/omnibus-ctl/lib/gitlab_ctl/util.rb:65:inget_node_attributes’
from /opt/gitlab/embedded/service/omnibus-ctl/lib/gitlab_ctl/util.rb:104:inroles' from /opt/gitlab/embedded/service/omnibus-ctl/upgrade.rb:337:ingeo_detected?’
from /opt/gitlab/embedded/service/omnibus-ctl/upgrade.rb:141:inrun_pg_upgrade' from /opt/gitlab/embedded/service/omnibus-ctl/upgrade.rb:65:inblock in load_file’
from /opt/gitlab/embedded/lib/ruby/gems/3.0.0/gems/omnibus-ctl-0.6.0/lib/omnibus-ctl.rb:197:inblock in add_command' from /opt/gitlab/embedded/lib/ruby/gems/3.0.0/gems/omnibus-ctl-0.6.0/lib/omnibus-ctl.rb:746:inrun’
from /opt/gitlab/embedded/lib/ruby/gems/3.0.0/gems/omnibus-ctl-0.6.0/bin/omnibus-ctl:31:in<top (required)>' from /opt/gitlab/embedded/bin/omnibus-ctl:25:inload’
from /opt/gitlab/embedded/bin/omnibus-ctl:25:in `’
dpkg: error processing package gitlab-ce (–install):
installed gitlab-ce package post-installation script subprocess returned error exit status 1
Errors were encountered while processing:
gitlab-ce
上述报错也说的比较明白
在 GitLab 的配置文件 gitlab.rb 中,gitlab_rails[‘smtp_tls’] 和 gitlab_rails[‘smtp_enable_starttls_auto’] 两个配置项被同时设置为 true,这是不允许的。这两个选项是相互排斥的,因为它们分别代表了两种不同的 SMTP 安全传输方式:TLS 和 STARTTLS。
- gitlab_rails[‘smtp_tls’] = true:这表示使用 SMTP 通过 TLS 直接连接。这通常使用端口 465。
- gitlab_rails[‘smtp_enable_starttls_auto’] = true:这表示 SMTP 连接开始时不加密,但如果服务器支持 STARTTLS,则自动升级到加密连接。这通常使用端口 587。
编辑配置文件 gitlab.rb
找到 gitlab_rails[‘smtp_tls’] 和 gitlab_rails[‘smtp_enable_starttls_auto’] 这两个配置项。根据你的 SMTP 服务器要求,将其中一个设置为 true,另一个设置为 false。
例如,如果你的 SMTP 服务器要求使用 TLS 连接(端口 465),则可以设置如下:
gitlab_rails[‘smtp_tls’] = true
gitlab_rails[‘smtp_enable_starttls_auto’] = false
或者,如果你的 SMTP 服务器使用 STARTTLS(端口 587),则设置为:
gitlab_rails[‘smtp_tls’] = false
gitlab_rails[‘smtp_enable_starttls_auto’] = true
gitlab.rb 文件修改后不会立刻生效,你需要重新配置 GitLab,并重启服务;
gitlab-ctl reconfigure
gitlab-ctl restart
确认所有服务都启动成功。
root@test# gitlab-ctl restart
ok: run: alertmanager: (pid 21294) 0s
ok: run: gitaly: (pid 21310) 0s
ok: run: gitlab-exporter: (pid 21330) 0s
ok: run: gitlab-kas: (pid 21373) 0s
ok: run: gitlab-workhorse: (pid 21381) 0s
ok: run: grafana: (pid 21391) 1s
ok: run: logrotate: (pid 21400) 0s
ok: run: node-exporter: (pid 21416) 1s
ok: run: postgres-exporter: (pid 21422) 0s
ok: run: postgresql: (pid 21443) 0s
ok: run: prometheus: (pid 21452) 0s
ok: run: puma: (pid 21479) 1s
ok: run: redis: (pid 21486) 0s
ok: run: redis-exporter: (pid 21493) 0s
ok: run: sidekiq: (pid 21605) 0s
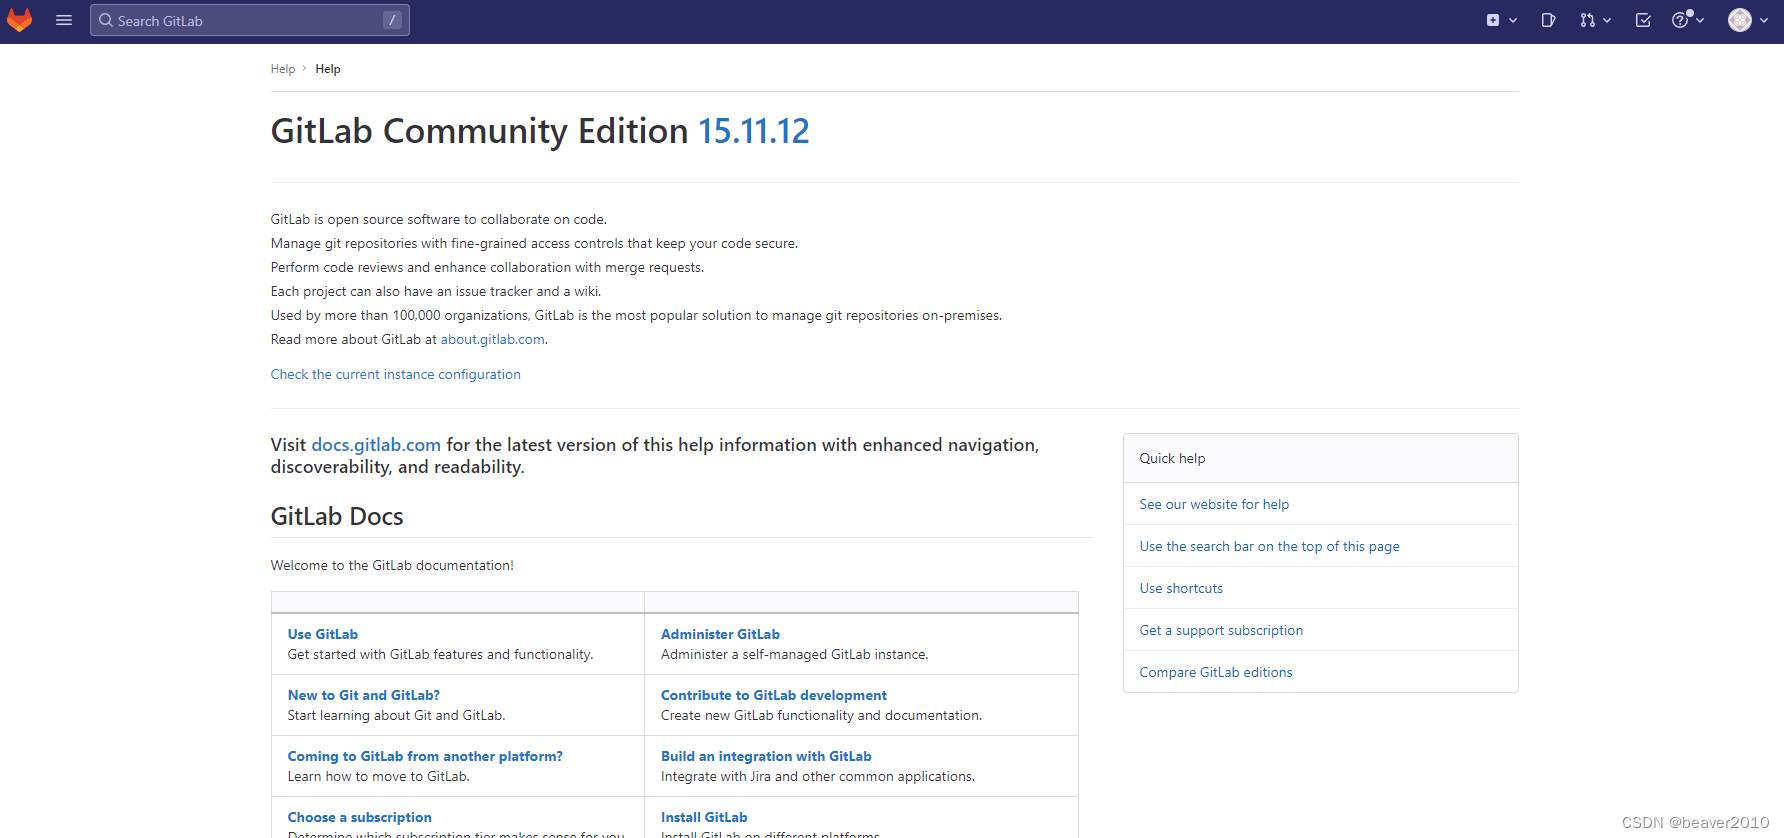
重新安装15.11.12【15.0.5–>15.11.12】
备份、安装、测试

安装16.3.6【15.11.12–>16.3.6】
备份、安装、测试,注意所gitlab.rb配置文件也备份一下,因为在升级上一个版本时我们有做修改,备份后再开始安装【16.3.6】
有个弹窗没事,是之前一个安全漏洞需要进行修复 ,可以忽略它,因为我们还要继续升级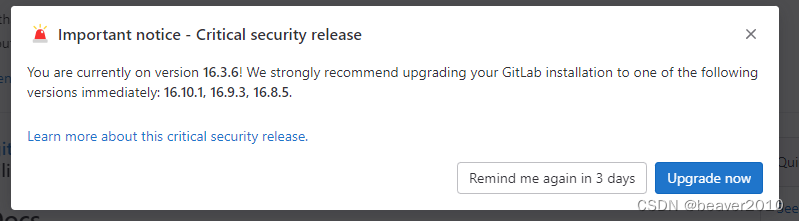
安装16.7.7【16.3.6–>16.7.7】
备份、安装、测试
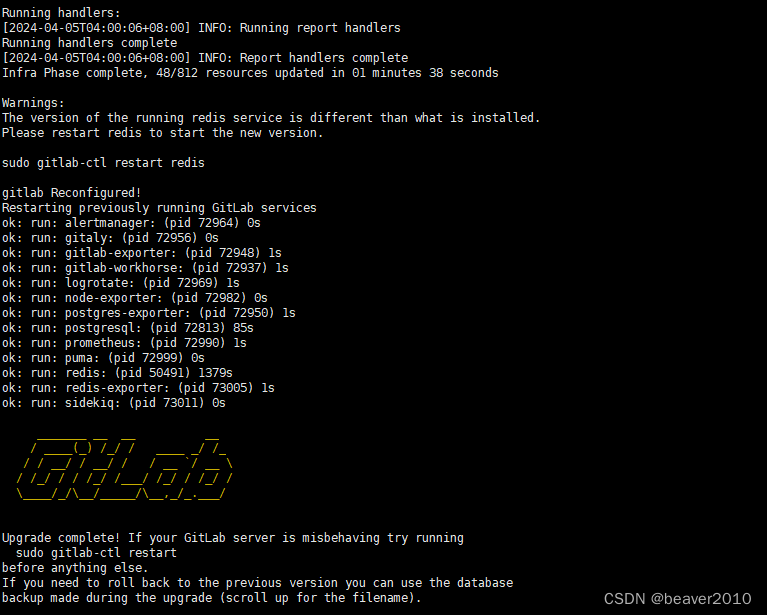
最后安装16.10.1【16.7.7–>16.10.1】
备份、安装、测试

到此为止【10.0.0】跨版本升级【16.10.1】成功,不是很顺利,网上也没有太详细解决问题方案,所以这次升级值得写出来,希望我的升级经历能给你一些帮助,感谢您的观看!


 321
321


 被折叠的 条评论
为什么被折叠?
被折叠的 条评论
为什么被折叠?
 到【灌水乐园】发言


