一 创建虚拟机
- 登录

- 配置ifcfg-ens33
| [root@localhost ~]# cd /etc/sysconfig/network-scripts/ |
| [root@localhost network-scripts]# ls ifcfg-ens33 ifdown-ppp ifup-eth ifup-sit ifcfg-lo ifdown-routes ifup-ippp ifup-Team ifdown ifdown-sit ifup-ipv6 ifup-TeamPort ifdown-bnep ifdown-Team ifup-isdn ifup-tunnel ifdown-eth ifdown-TeamPort ifup-plip ifup-wireless ifdown-ippp ifdown-tunnel ifup-plusb init.ipv6-global ifdown-ipv6 ifup ifup-post network-functions ifdown-isdn ifup-aliases ifup-ppp network-functions-ipv6 ifdown-post ifup-bnep ifup-routes |
| [root@localhost network-scripts]# vi ifcfg-ens33
|
|
|
(3)修改机器名
[root@localhost network-scripts]# hostname
localhost.localdomain
[root@localhost network-scripts]# hostnamectl set-hostname test1
[root@localhost network-scripts]# source
-bash: source: filename argument required
source: usage: source filename [arguments]
[root@localhost network-scripts]# bash
[root@test1 network-scripts]#
(4)配置机器映射
| [root@test1 ~]# vi /etc/hosts |
| 127.0.0.1 localhost localhost.localdomain localhost4 localhost4.localdomain4 ::1 localhost localhost.localdomain localhost6 localhost6.localdomain6 192.168.7.31 test1 |
|
|
(5)拼网
[root@localhost network-scripts]# service network restart

①ping www.baidu.com 连接外网

②连接内网 Windows/system32/drivers/etc/hosts-->192.168.7.31 test1
|
|
|
|
|
|
- 连接xshell
- 配置vim
[root@test1 ~]# yum install -v vim


- 暂停防火墙和禁用防火墙
systemctl stop firewalld
systemctl diable firewalld

- 配置时间同步器
yum install -y ntpdate

ntpdate time.windows.com

二 解压文件到/usr/local/下
(1)
[root@kb129 ~]# cd /opt/
[root@kb129 opt]# rm -rf ./kb23/
[root@kb129 opt]# mkdir -p ./kb23/shell/


(2)
①tar -xvf ./mysql-8.0.30-linux-glibc2.12-x86_64.tar.xz -C /usr/local/

②回车运行等待加载

三 更改原名字为mysql8
①进入安装目录
[root@localhost shell]# cd /usr/local/
②查看安装目录/usr/local/下是否存在安装文件mysql-8.0.30-linux-glibc2.12-x86_64
[root@localhost local]# ls
bin data etc games include lib lib64
libexec mysql-8.0.30-linux-glibc2.12-x86_64 sbin share src
③修改mysql-8.0.30-linux-glibc2.12-x86_64名字为mysql8
[root@localhost local]# mv mysql-8.0.30-linux-glibc2.12-x86_64 mysql8
④查看是否修改成功
[root@localhost local]# ls
bin data etc games include lib lib64 libexec mysql8 sbin share src
四 根目录etc/profile中添加全局变量
①进入根目录etc中查看文件
[root@localhost ~]# cd /etc/
[root@localhost etc]# ls

②添加全局变量
[root@localhost etc]# vim ./profile
export PATH=$PATH:/usr/local/mysql8/bin

五 创建组和对应的用户
①# 创建一个用户组:mysql
[root@localhost ~]# groupadd mysql #创建组
groupadd: group 'mysql' already exists #已经存在
[root@localhost ~]# vim /etc/group #查看

②# 创建一个系统用户:mysql,指定用户组为mysql
[root@localhost opt]# useradd -r -g mysql mysql #创建用户
useradd: user 'mysql' already exists #已经存在
六 在mysql8文件中创建数据目录
①[root@localhost opt]# cd /usr/local/ #进入安装目录
②[root@localhost local]# cd mysql8 #进入mysql8
③[root@localhost mysql8]# ls #查看,有没有datas
④[root@localhost mysql8]# mkdir -p ./datas #创建目录
⑤[root@localhost mysql8]# ls #创建成功

⑥[root@localhost datas]#
chown -R mysql:mysql /usr/local/mysql8/datas/ #修改属组和数组
⑦[root@localhost datas]#
chmod -R 750 /usr/local/mysql8/datas/ #赋权
七 在mysql8文件中创建my.cnf配置文件,
用于初始化MySQL数据库
[root@localhost mysql8]# vim ./my.cnf
★★★配置文件内容先复制粘贴至txt文件中,再复制粘贴至my.cnf中★★★
| [mysql]
|
八 初始化
[root@localhost mysql8]# mysqld --defaults-file=/usr/local/mysql8/my.cnf --basedir=/usr/local/mysql8/ --datadir=/usr/local/mysql8/datas/mysql --user=mysql --initialize-insecure
参数(重要)
- defaults-file:指定配置文件(要放在–initialize 前面)
- user: 指定用户
- basedir:指定安装目录
- datadir:指定初始化数据目录
- intialize-insecure:初始化无密码

九 启动mysql
①[root@localhost mysql8]# ls 查看mysql8中的文件有bin
bin datas docs include lib LICENSE man my.cnf README share support-files
②[root@localhost mysql8]# cd bin 进入bin文件
③[root@localhost bin]# ls 查看bin中的文件有mysqld_safe
ibd2sdi myisampack mysql_config mysqldump mysqlshow zlib_decompress
innochecksum my_print_defaults mysql_config_editor mysqldumpslow mysqlslap
lz4_decompress mysql mysqld mysqlimport mysql_ssl_rsa_setup
myisamchk mysqladmin mysqld-debug mysql_migrate_keyring mysql_tzinfo_to_sql
myisam_ftdump mysqlbinlog mysqld_multi mysqlpump mysql_upgrade
myisamlog mysqlcheck mysqld_safe mysql_secure_installation perror

④[root@localhost bin]#
mysqld_safe --defaults-file=/usr/local/mysql8/my.cnf & 启动服务
[1] 3153
[root@localhost bin]# 2023-08-21T11:39:25.871527Z mysqld_safe Logging to '/usr/local/mysql8/datas/mysql/mysql.log'.
2023-08-21T11:39:25.960035Z mysqld_safe Starting mysqld daemon with databases from /usr/local/mysql8/datas/mysql
⑤[root@localhost bin]# ps -ef | grep mysql 查看是否启动
root 3153 3063 0 19:39 pts/0 00:00:00 /bin/sh /usr/local/mysql8/bin/mysqld_safe --defaults-file=/usr/local/mysql8/my.cnf
mysql 3690 3153 33 19:39 pts/0 00:00:10 /usr/local/mysql8/bin/mysqld --defaults-file=/usr/local/mysql8/my.cnf --basedir=/usr/local/mysql8 --datadir=/usr/local/mysql8/datas/mysql --plugin-dir=/usr/local/mysql8/lib/plugin --user=mysql --log-error=/usr/local/mysql8/datas/mysql/mysql.log --open-files-limit=65535 --pid-file=/usr/local/mysql8/datas/mysql/mysql.pid --socket=/tmp/mysql.sock --port=3306
root 3745 3063 0 19:39 pts/0 00:00:00 grep --color=auto mysql

十 登录mysql
(1)无密码登录方式
[root@localhost bin]# ./mysql -uroot --skip-password
mysql: [Warning] Using a password on the command line interface can be insecure.
Welcome to the MySQL monitor. Commands end with ; or \g.
Your MySQL connection id is 8
Server version: 8.0.30 MySQL Community Server - GPL
Copyright (c) 2000, 2022, Oracle and/or its affiliates.
Oracle is a registered trademark of Oracle Corporation and/or its
affiliates. Other names may be trademarks of their respective
owners.
Type 'help;' or '\h' for help. Type '\c' to clear the current input statement.
(2)进入到MySQL中
①修改密码
mysql>ALTER USER ‘root’@’localhost’ IDENTIFIED WITH mysql_native_password BY ‘123456’;
②刷新权限
mysql>FLUSH PRIVILEGES;
③退出
mysql>quit;
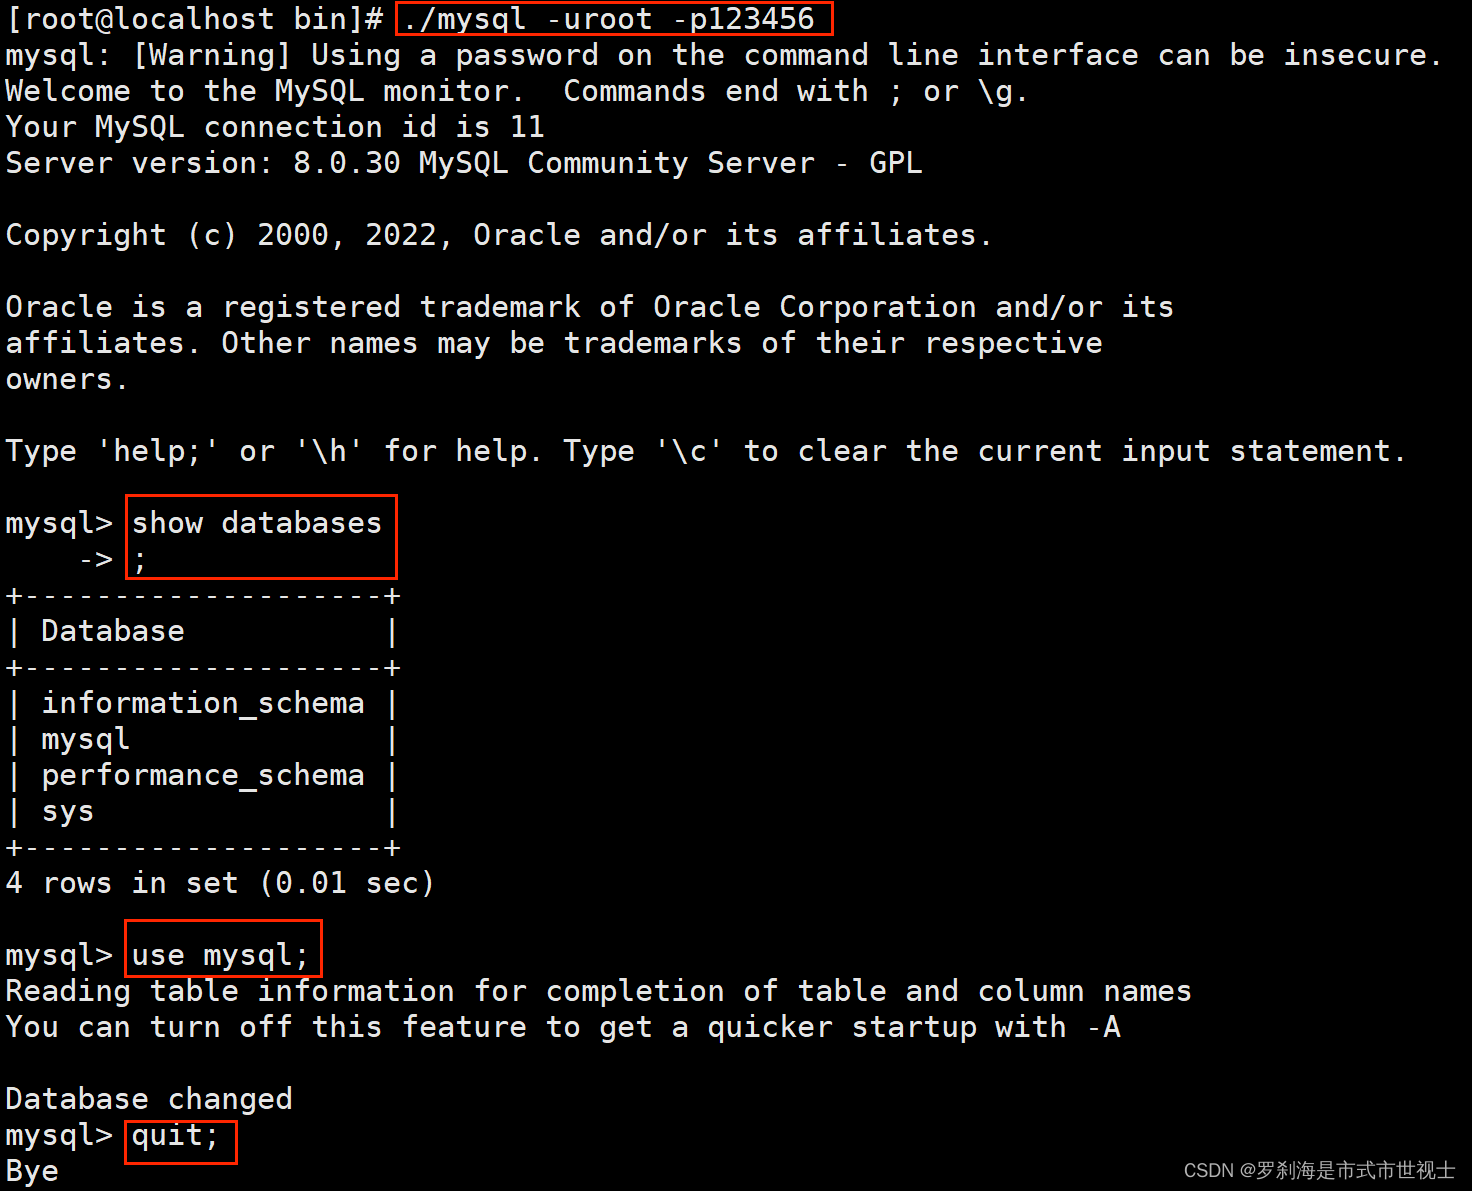
④有密码登录
[root@localhost bin]# ./mysql -uroot -p123456

⑤设置远程登录
mysql>use mysql;
mysql>update user set user.Host=’%’where user.User=’root’;
mysql>flush privileges;
mysql>quit

十一 登录navicat
连接失败
检查1 没有问题

检查2 没有添加地址!!!
[root@localhost bin]# vim /etc/hosts hosts没有添加地址

\[root@localhost bin]# hostname
[root@localhost bin]# hostnamectl set-hostname db23
[root@localhost bin]#source
[root@ localhost bin]#bash
[root@db23 bin]#
登录navicat

十二 补充:开机自启
(1)方式一
[root@db23 ~]#
cp /usr/local/mysql8/support-files/mysql.server /etc/init.d/mysqld
(2)方式二
[root@db23 ~]# cd /etc/rc.d/init.d/
[root@db23 init.d]# pwd
/etc/rc.d/init.d
[root@db23 init.d]# ls
functions mysqld netconsole network README

[root@db23 init.d]# vim ./autostartmysql.sh
| #!/bin/sh #chkconfig: 2345 10 90 #description: myservice... /usr/local/mysql8/bin/mysql_safe --defaults-file=/usr/local/mysql8/my.c nf & |
|
|
[root@db23 init.d]# chmod +x ./autostartmysql.sh

[root@db23 init.d]# chkconfig --add ./autostartmysql.sh

[root@db23 init.d]# chkconfig autostartmysql.sh on

[root@db23 init.d]# chkconfig --list

[root@db23 init.d]# shutdown -f now

[root@db23 ~]# ps -ef | grep mysql


 3295
3295


 被折叠的 条评论
为什么被折叠?


