


本人初学Electron,把学习的过程记录了下来,以免以后忘记:
Electron笔记一:安装
Electron笔记二:http与websock的实现
Electron笔记三:调用外部程序(子进程管理)
Electron笔记四:Dll的调用
Electron笔记五:无需控件,HTML5直接播放rtsp(摄像头)
Electron笔记六:打包成可执行程序(.exe)
接上笔记一
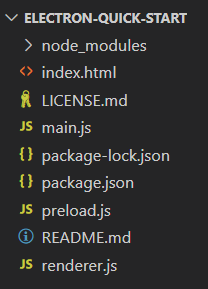
# 克隆示例项目的仓库
C:\Temp\demo1\> git clone https://github.com/electron/electron-quick-start
生成如下文件
1.改造main.js文件
const {app,electron,BrowserWindow} = require('electron')
const path = require('path')

function createWindow () {
  //创建新窗口
  const mainWindow = new BrowserWindow({
    width: 800,
    height: 740,
    autoHideMenuBar:true,//可以使用户在打开软件时隐藏菜单栏,但是如果用户按下alt按键,菜单栏又会弹出来
    webPreferences: {
	    //解决electron require未定义,以下两项
	    //是否注入nodeapi
	    nodeIntegration: true,//nodeIntegration设为false页面就不能使用nodejs和Electron APIs
        contextIsolation: false,
	    //渲染进程是否启用remote模块
        enableRemoteModule: true,//在渲染进程中使用主进程中的模块方法时,可以使用Electron Remote解决在渲染和主进程间的通讯,这么看 remote 模块可以说是非常好用啦,渲染进程就不用显式通过 ipcRenderer / ipcMain 与主进程通信。除此之外,可以通过 remote.getGlobal 获取主进程中 的全局变量, 通过 remote.process 拿到主进程的 process 对象信息
      preload: path.join(__dirname, 'preload.js')
    }
  })

  //启动时加载 index.html页面.
  mainWindow.loadFile('./index.html')

  //打开页面调试工具:DevTools.
  //mainWindow.webContents.openDevTools()
  // 永久隐藏菜单栏
  mainWindow.setMenu(null);
}

//当Electron加载完成时,这个方法被执行:初始化并创建浏览器窗口,一些APIs在这之后才能被调用
app.whenReady().then(() => {
  createWindow();
    app.on('activate', function () {
    //在macOS上,当应用程序已单击停靠图标,并且没有其他窗口打开。
    if (BrowserWindow.getAllWindows().length === 0) createWindow()
  })

})

//关闭所有窗口时退出,macOS上除外,使应用程序及其菜单栏保持活动状态,直到用户退出(Cmd+Q)
app.on('window-all-closed', function () {
  if (process.platform !== 'darwin') app.quit()
})
//-------
说明一下,
为解决渲染页面调用api提示“electron require未定义 ”,我们把
nodeIntegration: true,
contextIsolation: false,
为解决 Electron Remote解决在渲染和主进程间的通讯
enableRemoteModule: true
过 remote.getGlobal 获取主进程中 的全局变量, 通过 remote.process 拿到主进程的 process 对象信息
2.实现http
在当前文件目录下 npm install http-server --save
const http = require('http-server');//这个会返回目录下的所有,不支持on,且连接后关闭不了连接
httpServer = http.createServer();
httpServer.listen(parseInt(8001));
在这段代码中:
我们创建了一个httpServer对象
const httpServer = require('http-server');
这个对象是通过http-server模块创建出来的.
使用httpServer对象, 创建一个http服务器, 并且监听了8001端口.
服务器启动后, 用户就可以通过浏览器来访问我们的服务器了.
npm start 运行后,直接在浏览器中输入http://localhost:8001,即可以看到

3. 实现websocket
在当前文件目录下安装 npm install ws --save
// ws-服务器
const WebSocketServer = require('ws').Server;
wss = new WebSocketServer({port: 8002});
wss.on('connection', (ws) => {
  // 有客户端连接时, 打印一条日志
  console.log('client connected');
  // 并且创建'message'监听
  ws.on('message', (message) => {
    // 直接将消息打印出来
    console.log(message);
  });
});
在这段代码中:
我们创建了一个WebSocketServer对象
const WebSocketServer = require('ws').Server;
这个对象是通过ws模块创建出来的.
使用WebSocketServer对象, 创建一个ws服务器叫做wss对象, 并且监听了8002端口.
为wss对象的两个事件分别绑定了回调:
connection事件, 有客户端连接时, 打印一条日志.
message事件, 直接将消息打印出来.
直接上index.html代码, 添加一个输入框和按钮
<!DOCTYPE html>
<html>
  <head>
    <meta charset="UTF-8">
    <title>Hello World!</title>
  </head>
  <body>
    <div class="form-group">
      <input class="form-control" type="text" name="message" id="message"
             placeholder="Type text to echo in here" value="" />
    </div>
    <button type="button" id="send" class="btn btn-primary"
                    onclick="sendWsMessage();">
                Send!
            </button>
    <script src="./renderer.js"></script>
  </body>
  <script type="text/javascript">
    const ws = new WebSocket("ws://localhost:8002");
    function sendWsMessage() {
     ws.send(document.getElementById('message').value);
   }
  </script>
</html>
运行起来看效果

3.把http与websocket结合起来
把main.js中的代码改一下
//----------------------------------------
// http-server
//const http = require('http');  //支持On 自定义html
const http = require('http-server');//这个会返回目录下的所有,不支持on,且连接后关闭不了连接
var httpServer = null;
var sockets = {};
// ws-服务器
const WebSocketServer = require('ws').Server;
const wss = new WebSocketServer({port: 12122});
wss.on('connection', (ws) => {
  console.log('client connected');
  // 并且创建'message'监听
  ws.on('message', (message) => {
    var recmsg = message.split('|');
    if (recmsg[0] === 'httpopen'&&recmsg.length==2)
    {
      if (httpServer === null) {
        //创建Http服务
        httpServer = http.createServer();
        httpServer.listen(parseInt(recmsg[1]));
        ws.send('http 已打开,访问:http://localhost:' + recmsg[1]);
      } else {
        ws.send('http 已是打开状态!');
      }
    }
    else if (recmsg[0] === 'httpclose'&&recmsg.length==2)
    {
      if (httpServer != null) {
        //关闭Http服务
        //httpServer.close();
        httpServer.close(function () {console.log('http closed!'); });
        // 销毁所有打开套接:sockets
        for (var socketId in sockets) {
           console.log('socket', socketId, 'destroyed');
           sockets[socketId].destroy();
        }
        httpServer = null;
        ws.send('关闭http ');
      } else {
        ws.send('http 已是关闭状态!');
      }
    }
    else {
      // 有客户端连接时, 打印一条日志
      ws.send('收到:' + message);
    }
    // 直接将消息打印出来
    console.log('收到:' + message);
  });
});
把代码放入renderer.js中
var ws;
var wsIsOk=false;
//ws连接
function wsConnect() {
    try {
        if (ws != null) {
            ws.close();
            wsIsOk = false;
        }
        ws = new WebSocket("ws://localhost:12122"); //连接服务器
        ws.onopen = function(event) {
            wsIsOk = true;
            document.getElementById('spwsMsg').innerHTML="ws连接<span style='color:green'>成功</span>!";
        };
        ws.onmessage = function(event) {
            var s = event.data;
            document.getElementById('spwsMsg').innerHTML="ws收到:<span style='color:red'>"+s+"</span>";
        };
        ws.onclose = function(event) {
            ws = null;
            wsIsOk = false;
            document.getElementById('spwsMsg').innerHTML="ws连接<span style='color:red'>关闭</span>!";
        };
        ws.onerror = function(event) {
            document.getElementById('spwsMsg').innerHTML="ws连接<span style='color:red'>异常</span>!";
            ws.close();
        };
    } catch (ex) {
        ws = null;
        wsIsOk = false;
        document.getElementById('spwsMsg').innerHTML="js出错<span style='color:red'>"+ex.message+"</span>!";
    }
}
function sendWsMessage(ishttp) {
    var val = document.getElementById('txtwsMsg').value;//$('#txtwsMsg').val();
    var httport= document.getElementById('txt_http').value;
    if (ishttp!=null){
      if (ishttp)
      {val='httpopen|'+httport;}
      else{val='httpclose|'+httport;}
    }
    ws.send(val);
  }
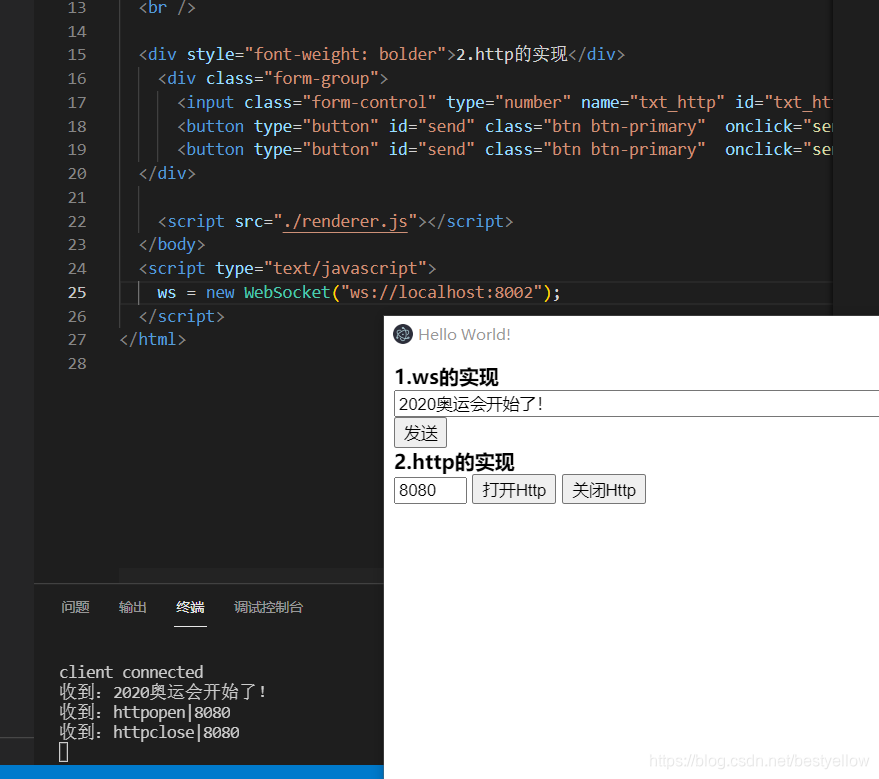
html页面变为
<!DOCTYPE html>
<html>
  <head>
    <meta charset="UTF-8">
    <title>Hello World!</title>
  </head>
  <body>
    <div style="font-weight: bolder">1.ws的实现</div>
    <div class="form-group">
        <input class="form-control" type="text" name="txtwsMsg" id="txtwsMsg" style="width:600px" placeholder="输入要发送到main.js中的内容" value="" />
    </div>
  <button type="button" id="send" class="btn btn-primary"  onclick="sendWsMessage();"> 发送 </button> <span id="spwsMsg"></span>
  <br />

  <div style="font-weight: bolder">2.http的实现</div>
    <div class="form-group">
      <input class="form-control" type="number" name="txt_http" id="txt_http" style="width:50px" placeholder="请输入数字1-6556的数字" value="8080" />
      <button type="button" id="send" class="btn btn-primary"  onclick="sendWsMessage(true);"> 打开Http </button>
      <button type="button" id="send" class="btn btn-primary"  onclick="sendWsMessage(false);"> 关闭Http </button>
  </div>

    <script src="./renderer.js"></script>
  </body>
  <script type="text/javascript">
    ws = new WebSocket("ws://localhost:8002");
  </script>
</html>
注意jquery的引用要变为
<script>window.$ = window.jQuery = require('./lib/jquery.js');</script>运行看结果
这个地方关闭Http如果没有访问过,是可以正常关闭的,否则关闭不了,暂时没有好的解决办法。


 2755
2755


 被折叠的 条评论
为什么被折叠?
被折叠的 条评论
为什么被折叠?
 到【灌水乐园】发言


