


问题背景:
Spring Cloud Alibaba的项目启动,Nacos报错:java.util.concurrent.ExecutionException: com.alibaba.nacos.shaded.io.grpc.StatusRuntimeException: UNAVAILABLE: io exception
com.alibaba.nacos.api.exception.NacosException: Client not connected, current status:STARTING

解决办法:
先说结论,主要原因是由于pom引入Nacos的配置文件重复,一般使用spring-cloud-starter-alibaba-nacos-discovery即可,不需要引入config:
<dependency>
	<groupId>com.alibaba.cloud</groupId>
	<artifactId>spring-cloud-starter-alibaba-nacos-discovery</artifactId>
</dependency>
<!--<dependency>-->
<!--<groupId>com.alibaba.cloud</groupId>-->
<!--<artifactId>spring-cloud-starter-alibaba-nacos-config</artifactId>-->
<!--</dependency>-->
另外yml配置如下,不需要配置spring.cloud.nacos.config前缀下的属性:
spring.application.name=service-gateway
spring.cloud.nacos.discovery.server-addr=192.168.7.11:8848

spring.cloud.nacos.username=nacos
spring.cloud.nacos.password=nacos
原理:
经过作者排查,发现是由于Springboot项目启动过程中,在容器中注入了2份Nacos的配置文件,更神奇的是,两份配置文件同时生效了。
说下怎么排查的,根据日志的一句info信息:
com.alibaba.nacos.common.remote.client : [89ee5c0e-e593-40ff-a8c5-89836770cc62_config-0] Fail to connect server, after trying 200 times, last try server is {serverIp = '127.0.0.1', server main port = 8848}, error = unknown
笔者找到了client包下,类RpcClient的报错,然后断点定位到了报错的原因。
LoggerUtils.printIfInfoEnabled(LOGGER, "[{}] Fail to connect server, after trying {} times, last try server is {}, error = {}", new Object[]{this.rpcClientConfig.name(), reConnectTimes, serverInfo, lastException == null ? "unknown" : lastException});其中的serverInfo就是 {serverIp = '127.0.0.1', server main port = 8848},明显与我们配置的不一样。
那么它是如何获取的呢?
ServerInfo serverInfo = null;
Exception lastException;
  try {
     serverInfo = recommendServer.get() == null ? this.nextRpcServer() :
     (ServerInfo)recommendServer.get();
     ......
通过this.nextRpcServer(),我们继续看:
protected ServerInfo nextRpcServer() {
   String serverAddress = this.getServerListFactory().genNextServer();
   return this.resolveServerInfo(serverAddress);
}
通过断点我们看到重点在serverAddress,注意它的获取方式:
this.getServerListFactory().genNextServer()
先看this.getServerListFactory():
public ServerListFactory getServerListFactory() {
        return this.serverListFactory;
    }
注意以上的代码都在类com.alibaba.nacos.common.remote.client.RpcClient种。
从上面的代码,很清晰的看到,主要是通过serverListFactory的genNextServer()方法来获取Nacos的ip信息。
那么什么是serverListFactory?
public abstract class RpcClient implements Closeable {
    private static final Logger LOGGER = LoggerFactory.getLogger("com.alibaba.nacos.common.remote.client");
    private ServerListFactory serverListFactory;
    .......
它是RpcClient的一个私有属性,具体是什么呢?
public interface ServerListFactory {
    String genNextServer();
    String getCurrentServer();
    List<String> getServerList();
}
主要是获取服务器信息,看样子可以获取多个。再看一下它的继承类图:

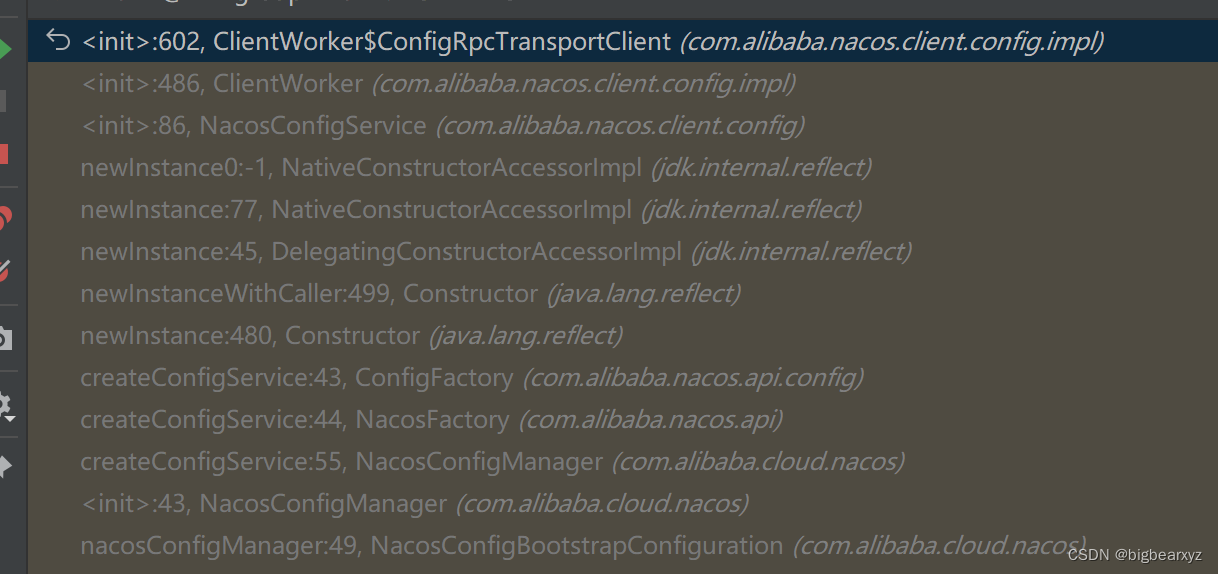
发现其有两种实现方式,一种是ServerListManager,一种是ClientWorker的内部类ConfigRpcTransportClient的匿名内部类实现。
然后笔者就发现,报错的原因是由于ServerListManager和ConfigRpcTransportClient的匿名内部类都进行了实例化,导致ServerListFactory的genNextServer()方法被调用了两次,这样我真正想要访问的Nacos其实已经注册访问上了,但是由于ConfigRpcTransportClient的匿名内部类的实例化也调用了genNextServer(),导致注册了一个127.0.0.1的nacos。最终会导致程序一直报错。
下面通过代码来演示,首先是拿到我们想要的serverList 信息,是这样加载的:
public ServerListManager(NacosClientProperties properties, String namespace) {
        ......
        this.namespace = namespace;
        this.initServerAddr(properties);
        if (this.getServerList().isEmpty()) {
            throw new NacosLoadException("serverList is empty,please check configuration");
        } else {
            this.currentIndex.set((new Random()).nextInt(this.getServerList().size()));
        }
    }
重点在initServerAddr:
private void initServerAddr(NacosClientProperties properties) {
        this.endpoint = InitUtils.initEndpoint(properties);
        String serverListFromProps;
        if (StringUtils.isNotEmpty(this.endpoint)) {
            ........
        } else {
            //通过配置文件夹获取指定nacos信息
            serverListFromProps = properties.getProperty("serverAddr");
            if (StringUtils.isNotEmpty(serverListFromProps)) {
                //获取多个nacos配置
                this.serverList.addAll(Arrays.asList(serverListFromProps.split(",")));
                if (this.serverList.size() == 1) {
                    this.nacosDomain = serverListFromProps;
                }
            }
        }

    }
然后根据前面的配置文件信息,是可以正常获取到想要的nacos信息的。
这里简要交代下ServerListManager是如何初始化的,在Springboot容器的启动过程中,调用到onRefresh方法的时候,通过多播器调用了nacos的监听器,然后在监听器的onApplicationEvent方法中调用register方法把本项目注册到nacos的配置中心去,在注册的过程中初始化了ServerListManager。
有问题的是在ConfigRpcTransportClient里面。
可以看到它是如何获取127开头的nacos配置的:
rpcClientInner.serverListFactory(new ServerListFactory() {
     public String genNextServer() {
             return ClientWorker.ConfigRpcTransportClient.access$401(ConfigRpcTransportClient.this).getNextServerAddr();
     }
那么具体的配置信息怎么获取的呢?在ConfigRpcTransportClient的初始化中:
public class ConfigRpcTransportClient extends ConfigTransportClient {
        ......
        public ConfigRpcTransportClient(NacosClientProperties properties, ServerListManager serverListManager) {
            super(properties, serverListManager);
        }
通过断点,启动后可以看到它的配置到底是哪里取的:
进入最后一行:
@Configuration(
    proxyBeanMethods = false
)
@ConditionalOnProperty(
    name = {"spring.cloud.nacos.config.enabled"},
    matchIfMissing = true
)
public class NacosConfigBootstrapConfiguration {
    public NacosConfigBootstrapConfiguration() {
    }

    @Bean
    @ConditionalOnMissingBean
    public NacosConfigProperties nacosConfigProperties() {
        return new NacosConfigProperties();
    }

    @Bean
    @ConditionalOnMissingBean
    public NacosConfigManager nacosConfigManager(NacosConfigProperties nacosConfigProperties) {
        return new NacosConfigManager(nacosConfigProperties);
    }
......
然后看到NacosConfigProperties:
@ConfigurationProperties("spring.cloud.nacos.config")
public class NacosConfigProperties {
    public static final String PREFIX = "spring.cloud.nacos.config";
    public static final String COMMAS = ",";
    public static final String SEPARATOR = "[,]";
    public static final String DEFAULT_NAMESPACE = "public";
    public static final String DEFAULT_ADDRESS = "127.0.0.1:8848";
    private static final Pattern PATTERN = Pattern.compile("-(\\w)");
    private static final Logger log = LoggerFactory.getLogger(NacosConfigProperties.class);
至此,一切都清晰了,这就是 spring.cloud.nacos.config配置以及127.0.0.1的由来,因为没有配置以spring.cloud.nacos.config为前缀的信息,然而又引入了NacosConfigBootstrapConfiguration,使得NacosConfigProperties使用了代码配置的默认ip信息,从而导致报错。
所以文章一开始就说了的解决办法去掉spring-cloud-starter-alibaba-nacos-config的pom依赖。
为什么要这样呢?
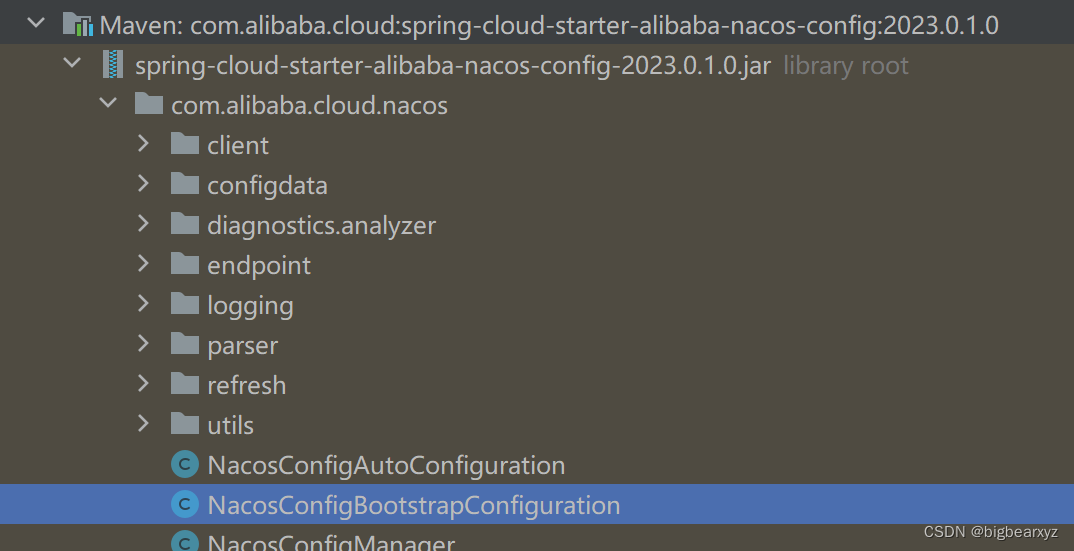
因为NacosConfigBootstrapConfiguration就在这个starter中,所以去掉config依赖才可以解决这个问题。
小结
最后,这里呼吁下大家,很多工程官方都有标准示例,可以直接参考,可以节省很多的排错时间。


 8963
8963

 被折叠的 条评论
为什么被折叠?
被折叠的 条评论
为什么被折叠?
 到【灌水乐园】发言


