


Maven创建聚合工程

在父工程中设置
<packaging>pom</packaging>
其他子工程中设置(api中不用设置)
<packaging>jar</packaging>
有Spring boot依赖的工程中包括:Maven build
    <build>
        <plugins>
            <plugin>
                <groupId>org.springframework.boot</groupId>
                <artifactId>spring-boot-maven-plugin</artifactId>
                <configuration>
                    <excludes>
                        <exclude>
                            <groupId>org.projectlombok</groupId>
                            <artifactId>lombok</artifactId>
                        </exclude>
                    </excludes>
                </configuration>
            </plugin>
        </plugins>
    </build>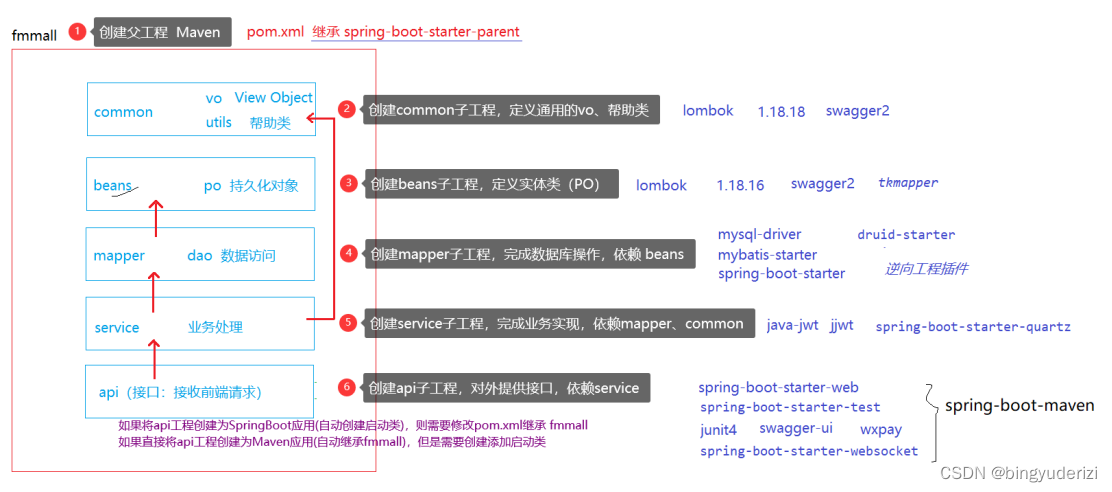
后端项目部署:
1. 搭建云服务器环境(jdk, MySQL)
2. Maven聚合工程打包:
fmmall ---》 install
api ----》 package
生成的api.jar为最终的jar包
3. 上传到云服务器
4. 启动项目: java -jar api.jar & (后台)
Nginx在Window下的安装,配置,启动
1. Nginx安装
Nginx可以作为静态资源服务器;也可以作为代理服务器,负责负载均衡。
解压即可 ,运⾏nginx.exe。
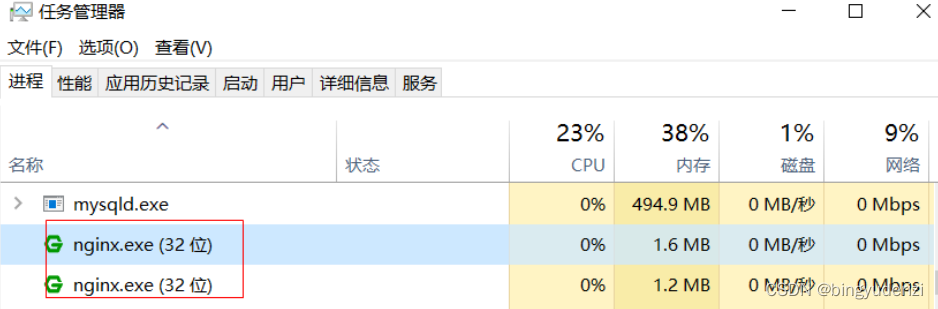
nginx 默认端⼝ 80,所以直接访问 : http://localhost
2. Nginx配置
nginx.conf

#user nobody;
# 配置处理器个数(应不⼤于cpu核⼼数)
worker_processes 1;
# 配置nginx运⾏⽇志⽂件
error_log logs/error.log;
# 配置Nginx进程的进程号的存储⽂件
# pid logs/nginx.pid;
# 配置nginx连接数,数值越⼤并发能⼒越强
四、锋迷商城—前端部署
安装Nginx
将前端项⽬fmall-static拷⻉到nginx的根⽬录
修改nginx.conf:
events {
 worker_connections 2000;
}
http {
 include mime.types;
 default_type application/octet-stream;
 sendfile on;
 keepalive_timeout 65;
 server {
 # 配置nginx端⼝号
 listen 80;
 server_name localhost;
 # 地址映射
 #location / {
 # root html;
 # index index.html index.htm;
 #}
 location / {
 root fmall-static;
 index index.html index.htm;
 }
 # 指定错误⻚⾯
 error_page 500 502 503 504 /50x.html;
 location = /50x.html {
 root html;
 }

 }
}
Nginx在Linux下的安装,配置,启动
1. 安装编译⼯具(nginx安装之前需要编译)
# apt-get install -y gcc gcc-c++
2. 安装PCRE
# 1.下载
# wget http://downloads.sourceforge.net/project/pcre/pcre/8.35/pcre8.35.tar.gz
# 2.解压
# tar -zxvf pcre-8.35.tar.gz
# 3.进⼊pcre⽬录
# cd pcre-8.35
# 4.配置
#./configure
# 5.编译安装
# make && make instal
3. 安装SSL库
# cd /usr/local
# wget http://www.openssl.org/source/openssl-1.0.1j.tar.gz
# tar -zxvf openssl-1.0.1j.tar.gz
# cd openssl-1.0.1j
# ./config
# make && make install
4. 安装zlib库
# cd /usr/local
# wget http://zlib.net/zlib-1.2.11.tar.gz
# tar -zxvf zlib-1.2.11.tar.gz
# cd zlib-1.2.11
# ./configure
# make && make install
5. 安装Nginx
# cd /usr/local
# wget http://nginx.org/download/nginx-1.16.1.tar.gz
# tar -zxvf nginx-1.16.1.tar.gz
# mkdir -p server/nginx
# cd nginx-1.16.1
# ./configure --prefix=/usr/local/server/nginx --withhttp_stub_status_module --with-http_ssl_module --with-pcre=/usr/local/pcre-8.35
# make && make install
# 如果在配置过程中出现了以下错误:
./configure: error: SSL modules require the OpenSSL library.
You can either do not enable the modules, or install the OpenSSL library
into the system, or build the OpenSSL library statically from the source
with nginx by using --with-openssl=<path> option.
# 执⾏:apt-get -y install openssl openssl-deve
6. 配置Nginx
vim /usr/local/server/nginx/conf/nginx.conf
7. 启动Nginx
在nginx目录下,执行sbin/nginx

前端项目部署(Nginx)
打包
# npm run build
所有的.vue文件都被打包编译成了dist/static目录下,其中包括js, css, map和index.html。将其放到nginx服务器上。使用scp或ftp的方式,将代码上传到服务器。配置nginx的访问路径(地址映射)。
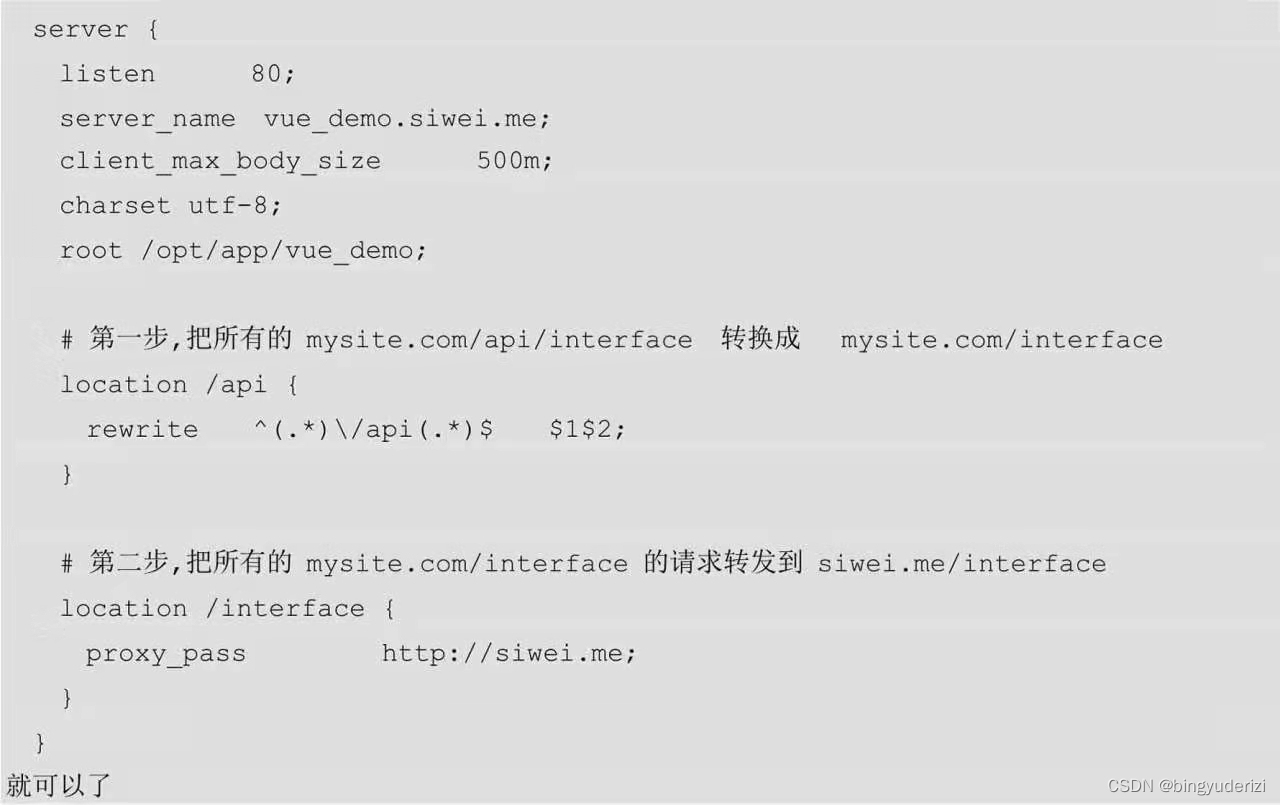
跨域请求的3种方式:
1. 后端设置响应数据允许跨域。(@CrossOrigin)
2. 前端采用JSONP的方式。该技术底层是基于script标签实现的,因为script标签是可以跨域的
3. 前端在build/config/index.js中,
proxyTable: {
  '/api': {
    target: 'http://siwei.me',
    changeOrigin: true,
    pathRewrite: {
      '^/api': ''
    }
  }
},


 86
86


 被折叠的 条评论
为什么被折叠?
被折叠的 条评论
为什么被折叠?
 到【灌水乐园】发言


