


假期生活肯定要一些乐趣
安装2233娘
第一次玩这个。。。。。。
因为是本地搭建,所以说只能自己看,但以后搭建网站可以玩玩这个
老二刺猿


玩这个也就图一乐
官网上下载phpstudy,安装phpstudy,默认安装即可。

启动phpstudy的这两项,默认数据库和密码都是root。
下载phpmyadmin

随后安装wordpress,在官网上下载源码

下载好后解压到安装的phpstudy下的www目录下

然后先安装wordpress,过程简单,参考链接本地搭建wordpress

和前文有一点不一样,不需要新建文件夹,用root,root登录数据库,新建数据库创建即可。wordpress和数据库连接。

搭建好后就是找live2d面板娘了,过程还是有点小累的,直接放链接
2233娘
在码云创建账号后下载会快很多
下好后解压放到插件一栏
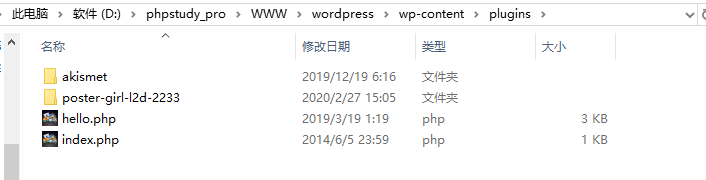
随后在插件即可看到

最要命的就是JQuery的安装,其实非常简单,就一步搞定。我却搞到重新安装wordpress,弄了好半天
在themes(主题)目录下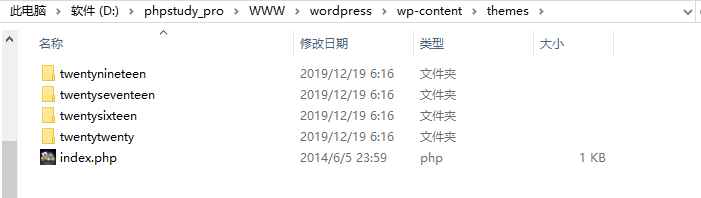
找到当前使用的主题,现在都是2020(twentytwenty)
选择记事本打开,编辑header.php文件
在两个head头之间加入代码
<script src="http://libs.baidu.com/jquery/2.0.0/jquery.js"></script>

ctrl+s保存退出,大功告成,最后点击已安装插件选择启用
就可以在站点看到22or33娘了
参考文章有大佬博客
说实话我想搞这个能陪聊的Live2d版伊斯特瓦尔
有时间再研究研究,做了一下午,图个乐就行,以后搭建服务器的时候可以用这个玩玩。
在博客园安装看板娘
最近闲的无聊,玩一玩博客qaq,成品如下

首先选择皮肤为:darkgreentrip

博客背景
在页面定制CSS代码下加入:
#home {
    margin: 0 auto;
    width: 80%;/*原始65*/
    min-width: 980px;/*页面顶部的宽度*/
    background-color: rgba(245, 245, 245, 0.7);
    padding: 30px;
    margin-top: 50px;
    margin-bottom: 50px;
    box-shadow: 0 2px 6px rgba(100, 100, 100, 0.3);
}
body {
    background: rgba(12, 100, 129, 1) url('https://images.cnblogs.com/cnblogs_com/bmth/1686658/o_200401071533timg%20(5).jpg') fixed no-repeat;   //修改背景图片
    background-position: 50% 5%;
    background-size: cover;
}
#blogTitle {
    height: 100px;  /*高度*/
    clear: both;
    background-color: rgba(240,255,255,0.5);   //博客标题的背景
}
#blogTitle h1 {
    font-size: 36px;
    font-weight: bold;
    line-height: 1.8em;/*原始 1.6em*/
    margin-top: 10px;/*原始 15px */
    color: #FF1493;
}
#blogTitle h2 {
    font-weight: normal;
    font-size: 17px;/*原始 16px ;font-size: 1.0rem;*/
    line-height: 1.8;
    color: #FF1493;
    font-weight: bold;
    text-align: right;
    float: right;
}
#navigator{
    background-color:rgba(135,206,205, 0.5);          //标题栏下的颜色
}
#navList a:link, #navList a:visited, #navList a:active{
    color: #FFFFFF;
    font-size: 18px;
    font-weight: bold;
}
.blogStats{
    color: #eee;
}
.postTitle {
    border-left: 8px solid rgba(132,112,255, 0);
    margin-left: 10px;
    margin-bottom: 10px;
    font-size: 20px;
    float: right;
    width: 100%;
    clear: both;
}
.postTitle a:link, .postTitle a:visited, .postTitle a:active {
    color:     #FF6A6A;
    transition: all 0.4s linear 0s;
}
.postTitle a:hover {
    margin-left: 30px;
    color: #EE6363;
    text-decoration: none;
}
.postCon {
    float: right;
    line-height: 1.5em;
    width: 100%;
    clear: both;
    padding: 10px 0;
}
.day .postTitle a {
    padding-left: 10px;
}
.day {
    background: rgba(255, 255, 255, 0.5);
}
/*文章附加信息*/
.postDesc {
    background: url(images/posted_time.png) no-repeat 0 1px;
    color: #757575;
    float: left;
    width: 100%;
    clear: both;
    text-align: left;
    font-family: "微软雅黑" , "宋体" , "黑体" ,Arial;
    font-size: 13px;
    padding-right: 20px;/*5px  padding-left: 90px;posted 发表时间左边距离*/
    margin-top: 20px;
    line-height: 1.8;
    padding-bottom: 35px;
}
.newsItem, .catListEssay, .catListLink, .catListNoteBook, .catListTag, .catListPostCategory,
.catListPostArchive, .catListImageCategory, .catListArticleArchive, .catListView,
.catListFeedback, .mySearch, .catListComment, .catListBlogRank, .catList, .catListArticleCategory ,#blog-calendar
{
    background: rgba(255, 255, 255, 0.5);
    margin-bottom: 35px;
    word-wrap: break-word;
}
.CalTitle{
    background: rgba(255, 255, 255, 0);
}
.catListTitle{
    background-color: rgba(255,110,180,0.6);   //栏目的条纹颜色
}
#topics{
    background: rgba(255, 255, 255, 0.5);
}
.c_ad_block{
    display: none;
}
#tbCommentBody{
    width: 100%;
    height: 200px;
    background: rgba(255, 255, 255, 0.5);
}
#q{background: rgba(255, 255, 255, 0);}

.CalNextPrev{background: rgba(255, 255, 255, 0);}

.cnblogs_code{
    background: rgba(255, 255, 255, 0);
}
.cnblogs_code div{
    background: rgba(255, 255, 255, 0);
}
.cnblogs_code_toolbar{
    background: rgba(255, 255, 255, 0);
}
#main{min-width: 640px;}
.entrylist{
    background: rgba(255, 255, 255, 0.5);
}
中间各个栏目的颜色和字体颜色可自由更换,自行调节。
rgba针对图片,前三个是颜色调节,最后一个数字是透明度调节。color主要针对字体。
要更改背景图片,可以在下面body{}代码块中修改background属性中的url地址,你可以先将图片上传到你的相册中,然后复制图片地址到这里粘贴,将原来的地址换掉就行了。

加入看板娘
首先申请使用js的权限,几个小时即可,完成后
加入代码如下:
<html xmlns="http://www.w3.org/1999/xhtml">
<head>
<meta http-equiv="Content-Type" content="text/html; charset=UTF-8" />
<title>Live2D</title>

<link rel="stylesheet" type="text/css" href="https://blog-static.cnblogs.com/files/bmth/waifu.css"/>
<script src="https://cdn.bootcss.com/jquery/3.2.1/jquery.min.js"></script>
</head>
<body>
<div class="waifu" id="waifu">
<div class="waifu-tips" style="opacity: 1;"></div>
<canvas id="live2d" width="280" height="250" class="live2d"></canvas>
<div class="waifu-tool">
<span class="fui-home"></span>
<span class="fui-chat"></span>
<span class="fui-eye"></span>
<span class="fui-user"></span>
<span class="fui-photo"></span>
<span class="fui-info-circle"></span>
<span class="fui-cross"></span>
</div>
</div>
<script src="https://blog-static.cnblogs.com/files/bmth/live2d.min.js"></script>
<script src="https://blog-static.cnblogs.com/files/bmth/waifu-tips.js"></script>
<script type="text/javascript">initModel()</script>
</body>
</html>
<link rel="stylesheet" type="text/css" href="https://blog-static.cnblogs.com/files/bmth/flat-ui.min.css"/>
下载看板娘文件的地址:https://files-cdn.cnblogs.com/files/kousak/live2d.zip

得到文件,并上传至博客园
- waifu.css
- lived2d.js
- waifu-tips.js
- flat-ui.min.css
然后获取四个文件的链接地址(选中资源,直接右击,复制链接地址),替换代码中的四个文件的地址即可。(大功告成)
增加网易云音乐链接
首先进入网易云选择喜欢的歌或者歌单

选择iframe插件,并使用合适的大小,复制生成的HTML代码到我们的页首 HTML 代码内

其中auto=1为自动播放,0为不自动播放,可自行修改大小为合适即可
参考文章:
博客园 页面定制CSS代码
如何在博客园搭建自己的博客
等等一系列文章,在此感谢大佬的帮助


 被折叠的 条评论
为什么被折叠?
被折叠的 条评论
为什么被折叠?
 到【灌水乐园】发言


