


1.概述
1.1 简介
-
java中条件变量都实现了java.util.concurrent.locks.Condition接口,条件变量的实例化是通过一个Lock对象上调用newCondition()方法来获取的,这样条件就和一个锁对象绑定起来了。Java中的条件变量只能和锁配合使用,来控制并发程序访问竞争资源的安全。[条件变量和锁需配合使用]
-
Condition是在java 1.5中才出现的,它用来替代传统的Object的wait()、notify()实现线程间的协作(wait和notify处理不够精细),相比使用Object的wait()、notify(),使用Condition的await()、signal()这种方式实现线程间协作更加安全和高效。因此通常来说比较推荐使用Condition,阻塞队列实际上是使用了Condition来模拟线程间协作。
-
Condition是一个多线程间协调通信的工具类,使得某个,或者某些线程一起等待某个条件(Condition),只有当该条件具备( signal 或者 signalAll方法被带调用)时 ,这些等待线程才会被唤醒,从而重新争夺锁。
-
Condition是个接口,基本的方法就是await()和signal()方法;
-
- Condition依赖于Lock接口,生成一个Condition的基本代码是lock.newCondition()
调用Condition的await()和signal()方法,都必须在lock保护之内,就是说必须在lock.lock()和lock.unlock之间才可以使用
- Condition依赖于Lock接口,生成一个Condition的基本代码是lock.newCondition()
-
- Conditon中的await()对应Object的wait();
-
- Condition中的signal()对应Object的notify();
-
- Condition中的signalAll()对应Object的notifyAll()。
2.示例
2.1 自己通过信号来实现按顺序循环执行方法
自己实现通过信号方式来:按照 执行完a(),然后执行b(),然后执行c() 的顺序执行.
//自己实现通过信号方式来:按照 执行完first(),然后执行second(),然后执行third() 的顺序执行.
public class SignalThread {

    private int mySignal;

    public synchronized void first() {
        while (mySignal != 0) {
            try {
                wait();
            } catch (InterruptedException e) {
                e.printStackTrace();
            }
        }
        System.out.println("first");
        mySignal++;
        notifyAll();
    }

    public synchronized void second() {
        while (mySignal != 1) {
            try {
                wait();
            } catch (InterruptedException e) {
                e.printStackTrace();
            }
        }
        System.out.println("second");
        mySignal++;
        notifyAll();
    }

    public synchronized void third() {
        while (mySignal != 2) {
            try {
                wait();
            } catch (InterruptedException e) {
                e.printStackTrace();
            }
        }
        System.out.println("third");
        mySignal = 0;
        notifyAll();
    }

    public static void main(String[] args) {

        SignalThread d = new SignalThread();
        A a = new A(d);
        B b = new B(d);
        C c = new C(d);

        new Thread(a).start();
        new Thread(b).start();
        new Thread(c).start();

    }
}

class A implements Runnable {

    private SignalThread signalThread;

    public A(SignalThread signalThread) {
        this.signalThread = signalThread;
    }

    @Override
    public void run() {
        while (true) {
            signalThread.first();
            try {
                Thread.sleep(1000);
            } catch (InterruptedException e) {
                e.printStackTrace();
            }
        }
    }

}

class B implements Runnable {

    private SignalThread signalThread;

    public B(SignalThread signalThread) {
        this.signalThread = signalThread;
    }

    @Override
    public void run() {
        while (true) {
            signalThread.second();
            try {
                Thread.sleep(1000);
            } catch (InterruptedException e) {
                e.printStackTrace();
            }
        }
    }

}

class C implements Runnable {

    private SignalThread signalThread;

    public C(SignalThread signalThread) {
        this.signalThread = signalThread;
    }

    @Override
    public void run() {
        while (true) {
            signalThread.third();
            try {
                Thread.sleep(1000);
            } catch (InterruptedException e) {
                e.printStackTrace();
            }
        }
    }

}
2.2 Condition按顺序循环执行方法
通过Condition来实现多个方法按照顺序执行.
public class ConditionThread {


	Lock lock = new ReentrantLock();
	Condition firstCondition = lock.newCondition();
	Condition secondCondition = lock.newCondition();
	Condition thirdCondition = lock.newCondition();


	public void first() {
		lock.lock();
			try {
				firstCondition.await();
			} catch (InterruptedException e) {
				e.printStackTrace();
			}
		System.out.println("firstCondition");
		secondCondition.signal();
		lock.unlock();
	}

	public  void second() {
		lock.lock();
			try {
				secondCondition.await();
			} catch (InterruptedException e) {
				e.printStackTrace();
			}
		System.out.println("secondCondition");
		thirdCondition.signal();
		lock.unlock();
	}

	public  void third() {
		lock.lock();
			try {
				thirdCondition.await();
			} catch (InterruptedException e) {
				e.printStackTrace();
			}
		System.out.println("thirdCondition");
		firstCondition.signal();
		lock.unlock();
	}

	public static void main(String[] args) {

		ConditionThread conditionThread = new ConditionThread();
		A a = new A(conditionThread);
		B b = new B(conditionThread);
		C c = new C(conditionThread);

		new Thread(a).start();
		new Thread(b).start();
		new Thread(c).start();

	}
}

class A implements Runnable {

	private ConditionThread conditionThread;

	public A(ConditionThread conditionThread) {
		this.conditionThread = conditionThread;
	}

	@Override
	public void run() {
		while(true) {
			conditionThread.first();
			try {
				Thread.sleep(1000);
			} catch (InterruptedException e) {
				e.printStackTrace();
			}
		}
	}

}
class B implements Runnable {

	private ConditionThread conditionThread;

	public B(ConditionThread conditionThread) {
		this.conditionThread = conditionThread;
	}

	@Override
	public void run() {
		while(true) {
			conditionThread.second();
			try {
				Thread.sleep(1000);
			} catch (InterruptedException e) {
				e.printStackTrace();
			}
		}
	}

}
class C implements Runnable {

	private ConditionThread conditionThread;

	public C(ConditionThread conditionThread) {
		this.conditionThread = conditionThread;
	}

	@Override
	public void run() {
		while(true) {
			conditionThread.third();
			try {
				Thread.sleep(1000);
			} catch (InterruptedException e) {
				e.printStackTrace();
			}
		}
	}

}
3. 源码分析
-
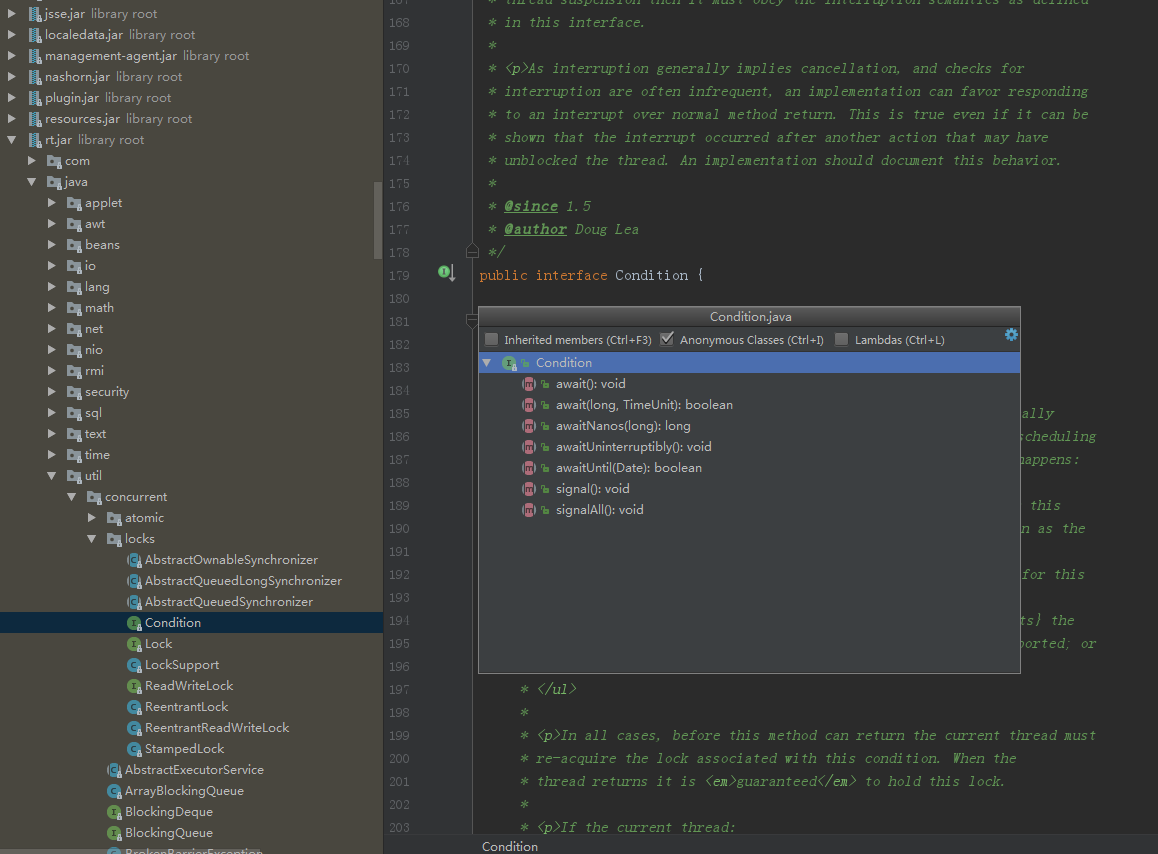
Condition接口包含了多种await方式和两个通知方法,由于wait是Object方法,所以新取名叫await.
-
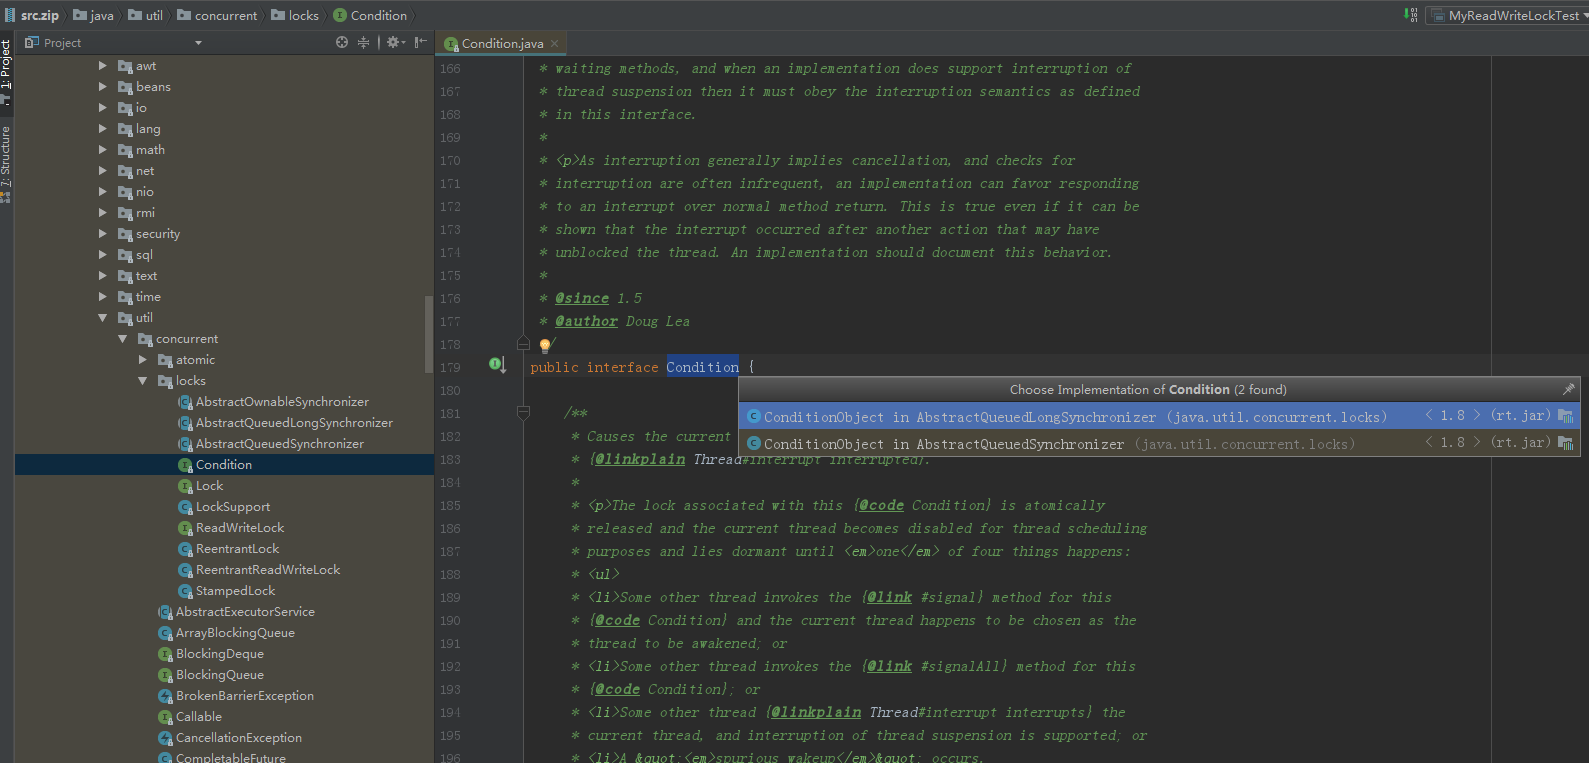
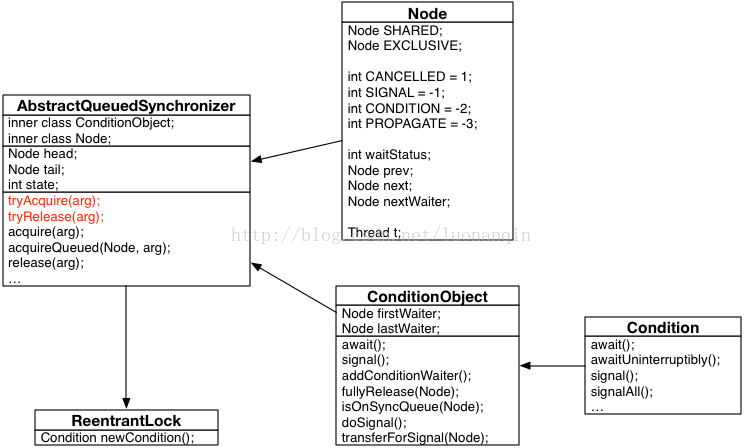
ConditionObject实现了Condition接口,是AbstractQueuedSynchronizer的内部类
-
Reentrantlock的newCondition方法返回与某个lock实例相关的Condition对象
-
我们看到condition实现是依赖于AQS,而AQS是个抽象类。里面定义了同步器的基本框架,实现了基本的结构功能。只留有状态条件的维护由具体同步器根据具体场景来定制,如常见的 ReentrantLock 、 RetrantReadWriteLock和CountDownLatch 等
下面查看部分源码:
- Condition
public interface Condition {
    void await() throws InterruptedException;
    void signal();
    void signalAll();
....
}
- ReentrantLock
public class ReentrantLock implements Lock, java.io.Serializable {

    private final Sync sync;

    public Condition newCondition() {
            return sync.newCondition();
    }

    abstract static class Sync extends AbstractQueuedSynchronizer {
      final ConditionObject newCondition() {
            return new ConditionObject();
        }
    }
}
- AbstractQueuedSynchronizer中内部类ConditionObject
public abstract class AbstractQueuedSynchronizer
    extends AbstractOwnableSynchronizer
    implements java.io.Serializable {

    public class ConditionObject implements Condition, java.io.Serializable {

        private static final long serialVersionUID = 1173984872572414699L;
        /** First node of condition queue. */
        private transient Node firstWaiter;
        /** Last node of condition queue. */
        private transient Node lastWaiter;

        public ConditionObject() { }

        //一.await方法
        public final void await() throws InterruptedException {
         //1.0 如果线程已经被中断了,则不用等待了
          if (Thread.interrupted())
                throw new InterruptedException();
            //1.1.将当前线程包装下后,添加到Condition自己维护的一个链表(等待队列)中。 [每个线程单独的]
            Node node = addConditionWaiter();
            //1.2. 释放当前线程占有的锁,调用await前,当前线程是占有锁(lock.lock())的,需要释放
            int savedState = fullyRelease(node);
            int interruptMode = 0;
            /*
            1.3 释放完毕后,遍历AQS的队列,看当前节点是否在同步队列中,刚添加的时候在等待对列中,所以isOnSyncQueue为false.不在说明它还没有竞争锁的资格,所以继续将自己沉睡。singal的时候会加入到同步队列中.
            */
            while (!isOnSyncQueue(node)) {
                LockSupport.park(this);
                if ((interruptMode = checkInterruptWhileWaiting(node)) != 0)
                    break;
            }
            //1.4 isOnSyncQueue=true(同步队列)被唤醒后,重新开始正式竞争锁,同样,如果竞争不到还是会将自己沉睡,等待唤醒重新开始竞争。尝试唤醒,唤醒后interruptMode = 1
            if (acquireQueued(node, savedState) && interruptMode != THROW_IE)
                interruptMode = REINTERRUPT;
            //1.5 唤醒之后,如果当前创建的节点next不为空则清空后面的.
            if (node.nextWaiter != null) // clean up if cancelled
                unlinkCancelledWaiters();
            //1.6 如果中断
            if (interruptMode != 0)
                reportInterruptAfterWait(interruptMode);
        }

        //1.1 将Condition添加到队列维度(单向链表Node)
         private Node addConditionWaiter() {
            Node t = lastWaiter;    //创建一个t等于最后一个.
            // If lastWaiter is cancelled, clean out.
            //确保t为lastWaiter
            if (t != null && t.waitStatus != Node.CONDITION) {
            //把之前的节点清空.
                unlinkCancelledWaiters();
                t = lastWaiter;
            }
            //创建Node.CONDITION类型的节点
            Node node = new Node(Thread.currentThread(), Node.CONDITION);
            //如果last(最后一个)为空,则说明为空
            if (t == null)
                firstWaiter = node;
            else
                t.nextWaiter = node;
            //新增加的刚才这个节点为最后一个节点
            lastWaiter = node;
            return node;
        }

        //1.2 释放锁,前面的lock.lock产生的锁
        final int fullyRelease(Node node) {
            boolean failed = true;
            try {
                int savedState = getState();
                if (release(savedState)) {
                    failed = false;
                    return savedState;
                } else {
                    throw new IllegalMonitorStateException();
                }
            } finally {
                if (failed)
                    node.waitStatus = Node.CANCELLED;
            }
        }

        //二.signal唤醒
         public final void signal() {
            //2.1 如果不是独占锁
            if (!isHeldExclusively())
                throw new IllegalMonitorStateException();
            //firstWaiter为condition自己维护的一个链表的头结点,取出第一个节点后开始唤醒操作
            Node first = firstWaiter;
            //2.2 唤醒第1个节点
            if (first != null)
                doSignal(first);
        }

        //2.2 唤醒第2个节点
         private void doSignal(Node first) {
            do {
                //2.2.1 将firstWaiter指针指到当前的next,指到了则不为空,则不执行(lastWaiter = null;)
                //如果指到则说明为最后一个了.
                if ( (firstWaiter = first.nextWaiter) == null)
                    lastWaiter = null;
                //2.2.2 first准备取走了,将first的next指为空
                first.nextWaiter = null;
                //2.2.3 将该节点放到同步队列中,如果成功则do while结束
                //如果放到同步队列失败,则再继续下一个节点,递归进行,一直保证有叫醒的节点放到同步队列中
            } while (!transferForSignal(first) &&
                     (first = firstWaiter) != null);
        }

        //2.2.3 将该节点放到同步队列中
        final boolean transferForSignal(Node node) {
        /*
         * If cannot change waitStatus, the node has been cancelled.
         */
         //设置为0,开始竞争资源
        if (!compareAndSetWaitStatus(node, Node.CONDITION, 0))
            return false;

        /*
         * Splice onto queue and try to set waitStatus of predecessor to
         * indicate that thread is (probably) waiting. If cancelled or
         * attempt to set waitStatus fails, wake up to resync (in which
         * case the waitStatus can be transiently and harmlessly wrong).
         */
         //enq轮循尝试,添加放到同步队列中
        Node p = enq(node);
        int ws = p.waitStatus;
        if (ws > 0 || !compareAndSetWaitStatus(p, ws, Node.SIGNAL))
            LockSupport.unpark(node.thread);
        return true;
    }
    }
}
- Condition都有等待队列和同步队列.里面有firstwaiter(指向first)和lastwaiter(指向last).
- 每个Condition都是有自己的链表队列(Node).是单向链表,通过Node来保存.如果值await()则往尾部追加节点,如果叫醒则将头部节点移除放到同步队列中.
- 如果唤醒,则唤醒队列中的第1个.
4.wait,notify和Condition的区别
- notify是随机叫醒线程.Condition是指定线程.
- Condition一个线程中可以有多个队列(每个Condition一个队列),而wait和notify只能实现一个队列.


 7258
7258

 被折叠的 条评论
为什么被折叠?
被折叠的 条评论
为什么被折叠?
 到【灌水乐园】发言


