


 本文介绍了SpringBoot2.2.0开始使用JUnit5作为默认单元测试库的情况,详细讲解了JUnit5的构成,包括JUnitPlatform、JUnitJupiter和JUnitVintager。同时展示了如何利用JUnit5的注解如@Autowired和@Transactional进行Spring环境下的测试。文章通过具体的代码示例,演示了@BeforeEach、@AfterEach、@BeforeAll、@AfterAll、@RepeatedTest、@Timeout等生命周期方法,以及断言机制、前置条件(Assumptions)、嵌套测试和参数化测试的用法。
springboot 2.2.0开始引入Junit5作为单元测试的默认库
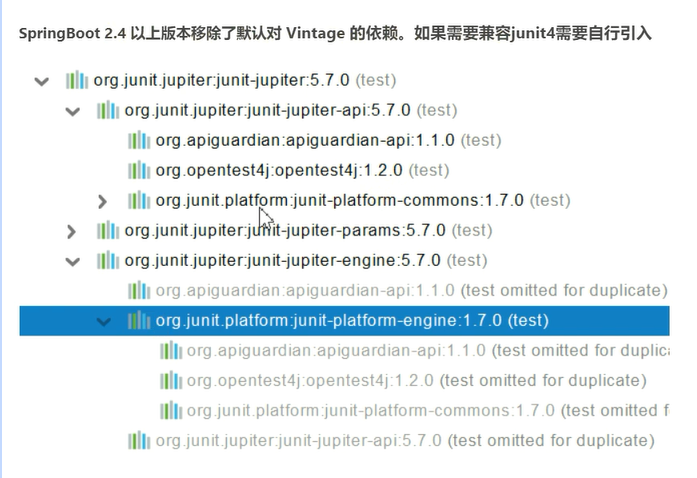
JUnit5和之前的版本有很大的不同,由单个子项目的几个不同模块组成
JUnit Platform ,是在JVM上启动测试框架的技术,不仅支持Junit自己的测试引擎,其他的测试引擎也可以
JUnit Jupiter,提供了Junit5的最新的编程模型,是Junit5 的核心,内部包含了一个测试引擎,用于在Junit Platform上运行
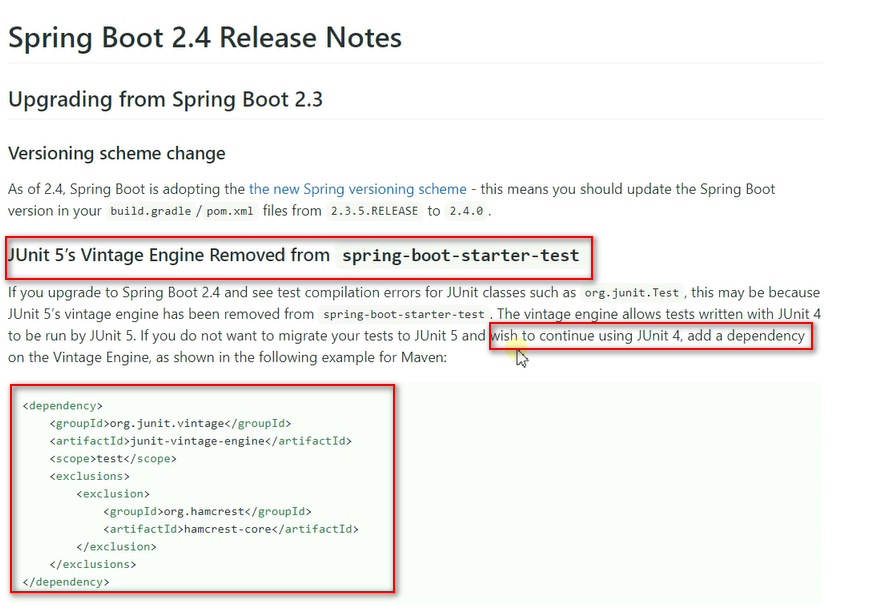
JUnit Vintager: 提供了兼容Junit4/3 的测试引擎
Junit5 = JUnit Platform+ JUnit Jupiter+JUnit Vintager
Junit支持Spring中的注解,测试起来比较方便, @Autowired @Transactional 等

package com.msb;
import com.baomidou.mybatisplus.core.conditions.query.QueryWrapper;
import com.baomidou.mybatisplus.extension.plugins.pagination.Page;
import com.msb.mapper.DeptMapper;
import com.msb.pojo.Dept;
import com.msb.service.DeptService;
import org.junit.jupiter.api.*;
import org.junit.jupiter.api.extension.ExtendWith;
import org.junit.platform.commons.annotation.Testable;
import org.springframework.beans.factory.annotation.Autowired;
import org.springframework.boot.test.context.SpringBootTest;
import org.springframework.boot.test.context.SpringBootTestContextBootstrapper;
import org.springframework.test.context.BootstrapWith;
import org.springframework.test.context.junit.jupiter.SpringExtension;
import java.util.List;
import java.util.concurrent.TimeUnit;
@SpringBootTest // 使用springboot的容器功能
/*@BootstrapWith(SpringBootTestContextBootstrapper.class)
@ExtendWith({SpringExtension.class})*/
@DisplayName("Junit5测试类")// 测试类描述
class SpringbootMybatisplusApplicationTests2 {
    @Autowired
    private DeptMapper deptMapper;
    @BeforeEach
    public void testForeach(){
        System.out.println("beforeach");
    }
    @AfterEach
    public void testAftereach(){
        System.out.println("aferEach");
    }
    @BeforeAll
    public static void beforeAll(){
        System.out.println("beforall");
    }
    @AfterAll
    public static void aferAll(){
        System.out.println("afterAll");
    }
    @RepeatedTest(3)// 重复测试3次
    @Timeout(value = 10000,unit = TimeUnit.MILLISECONDS)// 超时时间设置
    @DisplayName("Junit测试方法1")
    @Test
    public void test1(){
        System.out.println("a");
        System.out.println(deptMapper);
    }
    @Disabled// 设置不可用
    @DisplayName("Junit测试方法2") // 方法描述
    @Test
    public void test2(){
        System.out.println("b");
    }
}
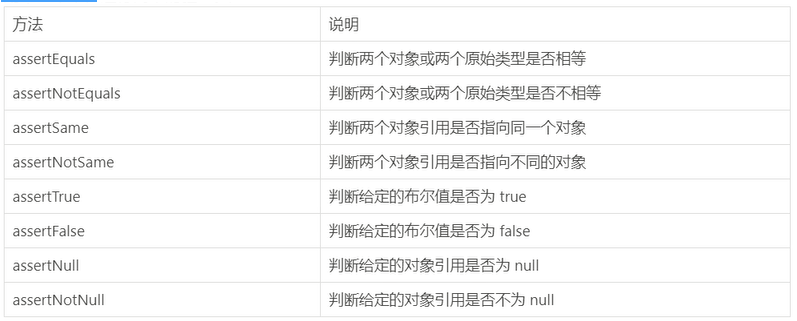
断言机制
断定某件事情,一定会发生,如果没有发生,那就是出现了问题,所欲的测试运行结束后,会有一个详细的断言报告
用来对测试需要满足的条件进行验证,这些断言方法都是org.junit.jupiter.api.Assertions中的静态方法,
简单断言
package com.msb;
import org.junit.jupiter.api.Assertions;
import org.junit.jupiter.api.DisplayName;
import org.junit.jupiter.api.Test;
import org.springframework.boot.test.context.SpringBootTest;
import java.time.Duration;
import java.util.concurrent.TimeUnit;
@SpringBootTest
@DisplayName("Junit5断言测试类")
class SpringbootMybatisplusApplicationTests3 {
    @DisplayName("简单断言1")
    @Test
    public void testAssertions1(){
        int add = add(1, 2);
        Assertions.assertEquals(6,add,"add结果计算错误");
    }
    public int add(int a,int b){
        return a+b;
    }
    @DisplayName("简单断言2")
    @Test
    public void testAssertions2(){
        String s =new String("xxx");
        String s2=new String("abc");
        Assertions.assertEquals(s,s2,"String对象不一样");
    }
    // 组合断言
    @DisplayName("组合断言")
    @Test
    public void testAssertAll(){
        Assertions.assertAll("AssertAll",
                ()-> Assertions.assertTrue(true&& false),
                ()-> Assertions.assertEquals(1,2));
    }
    // 异常断言 认为应该会出现异常
    @DisplayName("异常断言")
    @Test
    public void testAssertException(){
        Assertions.assertThrows(ArithmeticException.class, ()->{ int i=1/0;}, "没有抛出异常");
    }
    // 超时断言 判断有没有超时
    @DisplayName("超时断言")
    @Test
    public void testAssertTimeOut(){
        Assertions.assertTimeout(Duration.ofMillis(1000),()-> Thread.sleep(5000));
    }
    // 快速失败
    @DisplayName("快速失败")
    @Test
    public void testFail(){
        if(true){
            Assertions.fail("测试 失败");
        }
    }
}
前置条件(assumptions假设)
类似于断言,不同在于,不满足断言回事方法测试失败,而不满足的前置条件会使得的是方法的执行中止,前置条件可以看成是测试方法执行的前提,当条件不满足时,就没有继续执行的必要
package com.msb;
import org.junit.jupiter.api.Assertions;
import org.junit.jupiter.api.Assumptions;
import org.junit.jupiter.api.DisplayName;
import org.junit.jupiter.api.Test;
import org.springframework.boot.test.context.SpringBootTest;
import java.time.Duration;
@SpringBootTest
@DisplayName("Junit5测试前置条件")
class SpringbootMybatisplusApplicationTests4 {
    @DisplayName("测试前提条件")
    @Test
    public void testAssumptions(){
        // 假设为true,才会执行
        Assumptions.assumeTrue(false,"结果不是true");
        System.out.println("后面的测试代码前提条件");
    }
    @DisplayName("简单断言1")
    @Test
    public void testAssertions1(){
        int add =10;
        Assertions.assertEquals(6,add,"add结果计算错误");
        System.out.println("后面的测试代码简单断言");
    }
}
嵌套测试
package com.msb;
import org.junit.jupiter.api.*;
import static org.junit.jupiter.api.Assertions.*;
import java.util.EmptyStackException;
import java.util.Stack;
@DisplayName("嵌套测试")
class SpringbootMybatisplusApplicationTests5 {
    Stack<Object> stack;
    @Test
    @DisplayName("is instantiated with new Stack()")
    void isInstantiatedWithNew() {
        new Stack<>();
        // 外层的测试不能驱动内层的测试方法
        assertNull(stack);
    }
    @Nested
    @DisplayName("when new")
    class WhenNew {
        @BeforeEach
        void createNewStack() {
            stack = new Stack<>();
        }
        @Test
        @DisplayName("is empty")
        void isEmpty() {
            assertTrue(stack.isEmpty());
        }
        @Test
        @DisplayName("throws EmptyStackException when popped")
        void throwsExceptionWhenPopped() {
            assertThrows(EmptyStackException.class, stack::pop);
        }
        @Test
        @DisplayName("throws EmptyStackException when peeked")
        void throwsExceptionWhenPeeked() {
            assertThrows(EmptyStackException.class, stack::peek);
        }
        @Nested
        @DisplayName("after pushing an element")
        class AfterPushing {
            String anElement = "an element";
            @BeforeEach // 内层Test可以驱动外层的BeforeEach
            void pushAnElement() {
                stack.push(anElement);
            }
            @Test
            @DisplayName("it is no longer empty")
            void isNotEmpty() {
                assertFalse(stack.isEmpty());
            }
            @Test
            @DisplayName("returns the element when popped and is empty")
            void returnElementWhenPopped() {
                assertEquals(anElement, stack.pop());
                assertTrue(stack.isEmpty());
            }
            @Test
            @DisplayName("returns the element when peeked but remains not empty")
            void returnElementWhenPeeked() {
                assertEquals(anElement, stack.peek());
                assertFalse(stack.isEmpty());
            }
        }
    }
}
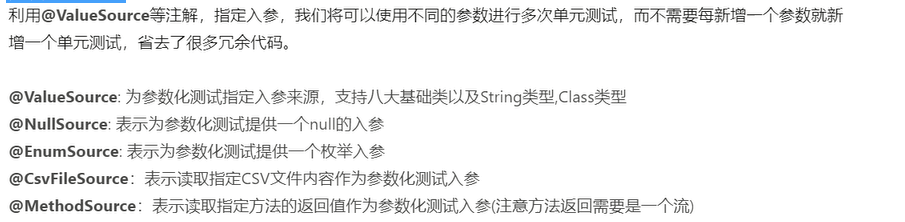
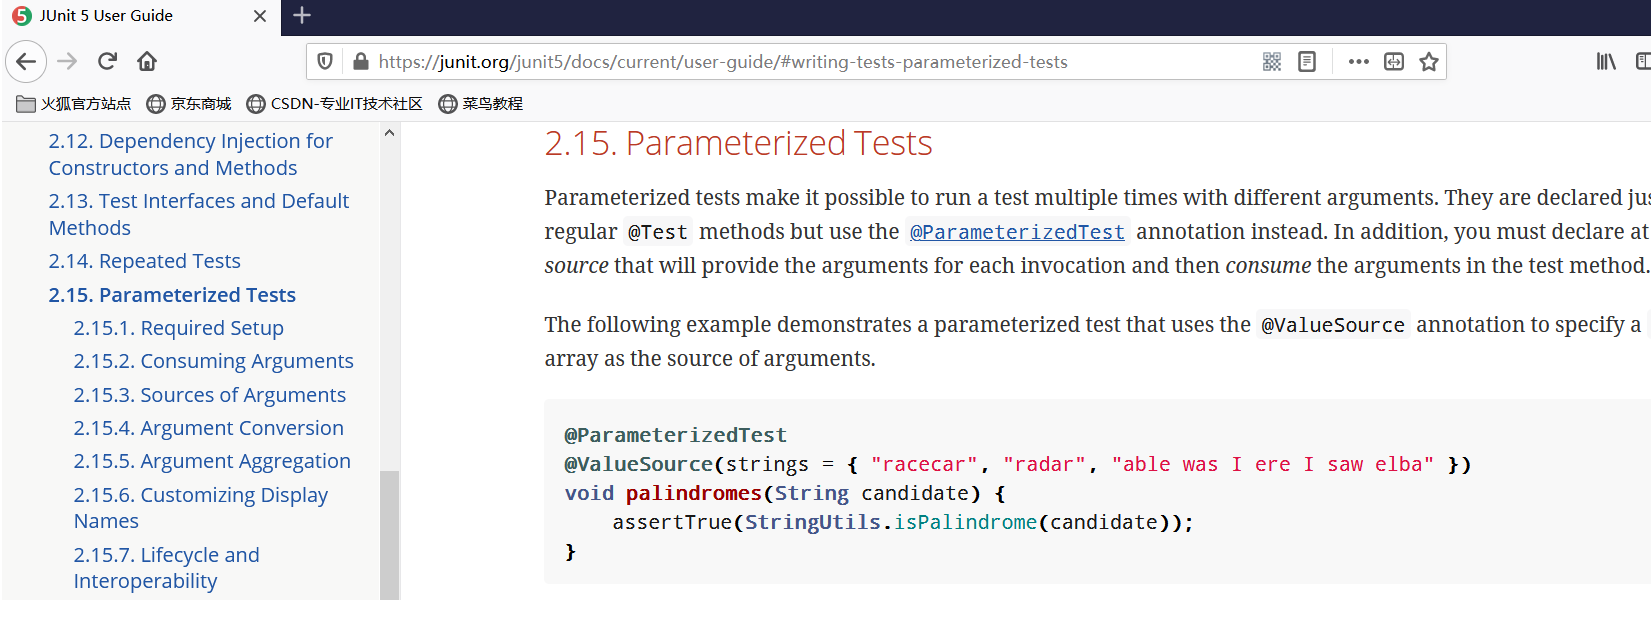
参数化测试
package com.msb;
import org.junit.jupiter.api.BeforeEach;
import org.junit.jupiter.api.DisplayName;
import org.junit.jupiter.api.Nested;
import org.junit.jupiter.api.Test;
import org.junit.jupiter.params.ParameterizedTest;
import org.junit.jupiter.params.provider.MethodSource;
import org.junit.jupiter.params.provider.ValueSource;
import java.util.EmptyStackException;
import java.util.Stack;
import java.util.stream.Stream;
import static org.junit.jupiter.api.Assertions.*;
@DisplayName("参数化测试")
class SpringbootMybatisplusApplicationTests6 {
    @ParameterizedTest
    @ValueSource(ints = { 1, 2, 3 })
    void testWithValueSource(int argument) {
        System.out.println(argument);
        assertTrue(argument > 0 && argument < 4);
    }
    @ParameterizedTest
    @MethodSource("stringProvider")
    void testWithExplicitLocalMethodSource(String argument) {
        assertNotNull(argument);
    }
    static Stream<String> stringProvider() {
        return Stream.of("apple", "banana");
    }
}


 被折叠的 条评论
为什么被折叠?
被折叠的 条评论
为什么被折叠?
 到【灌水乐园】发言


