


项目源码地址:
GitHub - brianxiadong/llm-langchain-project: llm-langchain-project
路过的朋友请帮忙点个star
一、什么是 Spring AI
Spring AI (https://spring.io/projects/spring-ai)]是 Spring 官方于 2023 年推出的 AI 应用开发框架,它如同 AI 世界的"Spring 生态连接器",致力于简化开发集成了 AI 功能的应用程序。它主要解决两大核心问题:
- 统一接口:消除不同 AI 服务(如 OpenAI、智谱 AI、DeepSeek 等)的 API 差异,允许用户灵活地在多个模型之间切换。
- 生态整合:将 AI 能力无缝融入 Spring 技术栈(如 Spring Boot、Spring MVC)。
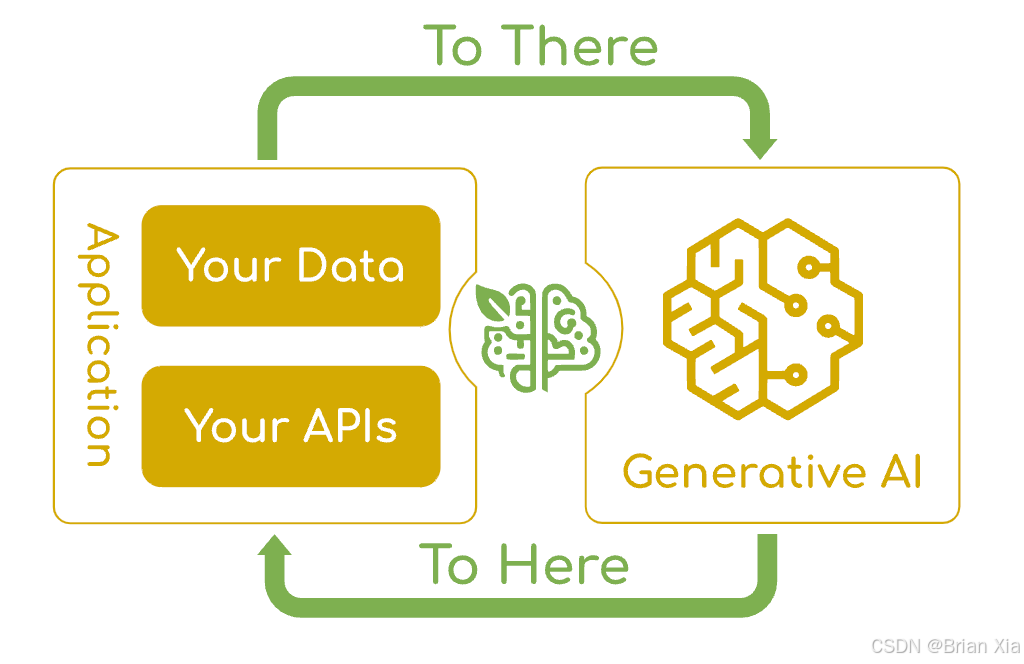
如上图所示,Spring AI 成为了连接企业数据以及 API 和生成式 AI 的桥梁。
🛠️ 核心功能矩阵
Spring AI 具备的能力如下:
它具备以下特点:
- 即插即用:通过更换
application.yml配置即可切换大模型供应商。 - 响应式支持:原生集成
Reactor Streams,支持背压控制的流式响应。 - 扩展性强:自定义
ChatClient实现可接入任意 AI 服务。
😎Spring AI 能做什么?
那么 Spring AI 到底能做什么呢?这里我给出几个常见案例,在咱们这套课程中也会带着大家完成这些案例:
案例 1:智能客服系统
-
场景:集成自然语言处理的客服机器人,处理用户咨询、订单查询和售后问题。
-
AI 价值:
- 减少人工客服成本,24/7 响应客户需求。
- 通过意图识别提升问题解决效率(准确率可达 85%+)。
-
Spring AI 实现:
使用 Spring AI 的对话模型接口(如 OpenAI 或 智谱 AI),快速构建企业级对话流。
案例 2:智能数据分析平台
-
场景:自动分析企业销售数据、用户行为日志,生成可视化报告和预测建议。
-
AI 价值:
- 通过时间序列预测优化库存管理(降低 20%-30% 滞销风险)。
- 实时异常检测(如金融反欺诈)。
-
Spring AI 实现:
结合 Spring AI 和 MCP 组件,对数据库进行访问,实现数据预处理与预测 API。
案例 3:自动化文档处理
-
场景:合同、发票的自动分类、关键词提取和合规性审查。
-
AI 价值:
- 节省 90% 人工文档处理时间。
- 通过 OCR 实现非结构化数据标准化。
-
Spring AI 实现:
调用 Spring AI 的多模态接口,实现文档解析流水线。
案例 4:智能营销内容生成
-
场景:自动化生成广告文案、社交媒体推文、邮件营销内容,支持多语言适配。
-
AI 价值:
- 缩短 70% 的创意内容生产周期。
- 通过 A/B 测试数据反馈优化生成策略(点击率提升 15%-25%)。
-
Spring AI 实现:
调用 大模型接口,结合企业品牌风格指南定制生成规则。
案例 5:语音客服系统
-
场景:通过语音交互处理用户来电(如银行催收、快递查询、政务热线),支持多语言、方言识别和情感分析。
-
AI 价值:
- 成本降低:替代 60% 以上重复性语音服务(如账单查询)。
- 效率提升:语音响应速度 <1 秒(传统 IVR 需 5-10 秒菜单导航)。
-
Spring AI 实现:
- 语音识别
- 集成 Whisper 模型,将用户语音转为文本。
- 支持实时流式传输(降低延迟)。
- 自然语言处理(NLP)
- 使用 Spring AI 的对话模型解析用户意图,生成响应文本。
- 情感分析:识别用户情绪(愤怒/焦虑),触发人工坐席接管。
- 语音合成(TTS)
- 调用 AI 模型生成拟人化语音反馈。
- 语音识别
二、MCP的三种类型
1. stdio(标准输入输出)
工作原理:
基于进程间通信,客户端启动 MCP Server 子进程,通过标准输入(stdin)接收请求,标准输出(stdout)返回响应,消息格式为 JSON-RPC 2.0。
技术特点:
- 低延迟:无需网络开销,适合实时性要求高的本地场景(如 IDE 插件与进程交互)。
- 强耦合性:客户端与服务器需运行在同一主机,呈 1:1 绑定关系。
- 安全性高:数据不经过网络传输,可避免中间人攻击等风险。
适用场景:
主要用于本地或容器化环境下的进程间通信,简化部署流程,实现跨平台轻量高效部署。
2. sse(Server-Sent Events)
工作原理:
基于 HTTP 请求,服务器到客户端的通信使用 SSE,客户端到服务器的通信使用 POST 请求,消息格式为 JSON-RPC 2.0。
技术特点:
- 适合远程连接:是 MCP 在网络环境中的主要实现技术,适用于云服务和远程 API 调用。
- 长连接特性:依赖长连接维持通信,服务器需保持连接不中断,属于有状态连接。
- 并发处理需求:HTTP 服务器需具备并发能力(如通过进程池提升并行处理能力)。
适用场景:
适用于服务器向客户端实时推送消息的远程场景(如实时数据更新、服务器状态通知),但并发管理较复杂。
3. streamable http
工作原理:
扩展的 HTTP 协议,允许服务器生成数据时逐步发送给客户端,可动态将普通 HTTP 请求升级为 SSE 流(用于通知或请求)。所有客户端到服务器的消息通过统一的 /message 端点传输,客户端通过头部提供 session id。
技术特点:
- 灵活性高:服务器可自主决定是否支持流式传输,无需单独的 /sse 端点。
- 支持无状态服务器:消除持久连接需求,资源在请求处理后释放,适合高并发场景。
- 兼容性强:基于标准 HTTP,可无缝集成 CDN、API 网关、负载均衡器等,支持在 Vercel、Cloudflare、AWS Lambda 等云平台部署。
适用场景:
适用于各种网络环境,尤其适合对服务器灵活性、可扩展性和兼容性要求高的场景,适配现代分布式系统和高并发应用。
三、使用Spring AI搭建stdio的MCP服务端程序
官方文档:
https://docs.spring.io/spring-ai/reference/1.1-SNAPSHOT/api/mcp/mcp-server-boot-starter-docs.html
官方案例:
https://github.com/spring-projects/spring-ai-examples/tree/main/model-context-protocol/weather/starter-stdio-server
环境要求
- Java 17 或更高版本
- Maven 3.6 或更高版本
- Spring Boot 3.4.5
- Spring AI 1.1.0-SNAPSHOT
项目结构
spring-ai-mcp-weather/
├── pom.xml
├── src/
│   └── main/
│       ├── java/
│       │   └── org/springframework/ai/mcp/saample/server/
│       │       ├── McpServerApplication.java
│       │       └── WeatherService.java
│       └── resources/
│           └── application.properties
├── start-mcp-server.sh
└── mcp-config-example.json
步骤1:创建Maven项目
pom.xml 配置
<?xml version="1.0" encoding="UTF-8"?>
<project xmlns="http://maven.apache.org/POM/4.0.0"
    xmlns:xsi="http://www.w3.org/2001/XMLSchema-instance"
    xsi:schemaLocation="http://maven.apache.org/POM/4.0.0 http://maven.apache.org/xsd/maven-4.0.0.xsd">
    <modelVersion>4.0.0</modelVersion>

    <parent>
        <groupId>org.springframework.boot</groupId>
        <artifactId>spring-boot-starter-parent</artifactId>
        <version>3.4.5</version>
        <relativePath />
    </parent>

    <groupId>com.example</groupId>
    <artifactId>spring-ai-mcp-weather</artifactId>
    <version>0.0.1-SNAPSHOT</version>
    <name>Spring AI MCP Weather Server</name>
    <description>Spring AI MCP Weather STDIO Server</description>

    <dependencyManagement>
        <dependencies>
            <dependency>
                <groupId>org.springframework.ai</groupId>
                <artifactId>spring-ai-bom</artifactId>
                <version>1.1.0-SNAPSHOT</version>
                <type>pom</type>
                <scope>import</scope>
            </dependency>
        </dependencies>
    </dependencyManagement>

    <dependencies>
        <!-- Spring AI MCP Server Starter -->
        <dependency>
            <groupId>org.springframework.ai</groupId>
            <artifactId>spring-ai-starter-mcp-server</artifactId>
        </dependency>

        <!-- Spring Web for RestClient -->
        <dependency>
            <groupId>org.springframework</groupId>
            <artifactId>spring-web</artifactId>
        </dependency>

        <!-- Test Dependencies -->
        <dependency>
            <groupId>org.springframework.boot</groupId>
            <artifactId>spring-boot-starter-test</artifactId>
            <scope>test</scope>
        </dependency>
    </dependencies>

    <build>
        <plugins>
            <plugin>
                <groupId>org.springframework.boot</groupId>
                <artifactId>spring-boot-maven-plugin</artifactId>
            </plugin>
        </plugins>
    </build>

    <repositories>
        <repository>
            <id>spring-milestones</id>
            <name>Spring Milestones</name>
            <url>https://repo.spring.io/milestone</url>
            <snapshots>
                <enabled>false</enabled>
            </snapshots>
        </repository>
        <repository>
            <id>spring-snapshots</id>
            <name>Spring Snapshots</name>
            <url>https://repo.spring.io/snapshot</url>
            <releases>
                <enabled>false</enabled>
            </releases>
        </repository>
    </repositories>
</project>
步骤2:配置应用属性
application.properties
# 禁用Web应用类型,使用STDIO传输
spring.main.web-application-type=none

# 重要:必须禁用banner和控制台日志以使STDIO传输正常工作
spring.main.banner-mode=off
logging.pattern.console=

# MCP服务器配置
spring.ai.mcp.server.name=weather-mcp
spring.ai.mcp.server.version=0.0.1

# 日志配置
logging.file.name=./logs/mcp-weather-server.log
logging.level.org.springframework.ai.mcp=DEBUG
步骤3:创建主应用类
McpServerApplication.java
package org.springframework.ai.mcp.sample.server;

import org.springframework.ai.tool.ToolCallbackProvider;
import org.springframework.ai.tool.method.MethodToolCallbackProvider;
import org.springframework.boot.SpringApplication;
import org.springframework.boot.autoconfigure.SpringBootApplication;
import org.springframework.context.annotation.Bean;

@SpringBootApplication
public class McpServerApplication {

    public static void main(String[] args) {
        SpringApplication.run(McpServerApplication.class, args);
    }

    @Bean
    public ToolCallbackProvider weatherTools(WeatherService weatherService) {
        return MethodToolCallbackProvider.builder()
            .toolObjects(weatherService)
            .build();
    }
}
步骤4:实现天气服务
WeatherService.java
package org.springframework.ai.mcp.sample.server;

import java.util.List;
import java.util.Map;
import java.util.stream.Collectors;

import com.fasterxml.jackson.annotation.JsonIgnoreProperties;
import com.fasterxml.jackson.annotation.JsonProperty;

import org.springframework.ai.tool.annotation.Tool;
import org.springframework.ai.tool.annotation.ToolParam;
import org.springframework.stereotype.Service;
import org.springframework.web.client.RestClient;
import org.springframework.web.client.RestClientException;

@Service
public class WeatherService {

    private static final String BASE_URL = "https://api.weather.gov";
    private final RestClient restClient;

    public WeatherService() {
        this.restClient = RestClient.builder()
                .baseUrl(BASE_URL)
                .defaultHeader("Accept", "application/geo+json")
                .defaultHeader("User-Agent", "WeatherApiClient/1.0 (your@email.com)")
                .build();
    }

    // 数据传输对象
    @JsonIgnoreProperties(ignoreUnknown = true)
    public record Points(@JsonProperty("properties") Props properties) {
        @JsonIgnoreProperties(ignoreUnknown = true)
        public record Props(@JsonProperty("forecast") String forecast) {
        }
    }

    @JsonIgnoreProperties(ignoreUnknown = true)
    public record Forecast(@JsonProperty("properties") Props properties) {
        @JsonIgnoreProperties(ignoreUnknown = true)
        public record Props(@JsonProperty("periods") List<Period> periods) {
        }

        @JsonIgnoreProperties(ignoreUnknown = true)
        public record Period(
                @JsonProperty("number") Integer number,
                @JsonProperty("name") String name,
                @JsonProperty("startTime") String startTime,
                @JsonProperty("endTime") String endTime,
                @JsonProperty("isDaytime") Boolean isDayTime,
                @JsonProperty("temperature") Integer temperature,
                @JsonProperty("temperatureUnit") String temperatureUnit,
                @JsonProperty("temperatureTrend") String temperatureTrend,
                @JsonProperty("probabilityOfPrecipitation") Map probabilityOfPrecipitation,
                @JsonProperty("windSpeed") String windSpeed,
                @JsonProperty("windDirection") String windDirection,
                @JsonProperty("icon") String icon,
                @JsonProperty("shortForecast") String shortForecast,
                @JsonProperty("detailedForecast") String detailedForecast) {
        }
    }

    @JsonIgnoreProperties(ignoreUnknown = true)
    public record Alert(@JsonProperty("features") List<Feature> features) {
        @JsonIgnoreProperties(ignoreUnknown = true)
        public record Feature(@JsonProperty("properties") Properties properties) {
        }

        @JsonIgnoreProperties(ignoreUnknown = true)
        public record Properties(
                @JsonProperty("event") String event,
                @JsonProperty("areaDesc") String areaDesc,
                @JsonProperty("severity") String severity,
                @JsonProperty("description") String description,
                @JsonProperty("instruction") String instruction) {
        }
    }

    /**
     * 获取指定经纬度的天气预报
     */
    @Tool(description = "Get weather forecast for a specific latitude/longitude")
    public String getWeatherForecastByLocation(double latitude, double longitude) {
        var points = restClient.get()
                .uri("/points/{latitude},{longitude}", latitude, longitude)
                .retrieve()
                .body(Points.class);

        var forecast = restClient.get()
                .uri(points.properties().forecast())
                .retrieve()
                .body(Forecast.class);

        String forecastText = forecast.properties().periods().stream().map(p -> {
            return String.format("""
                    %s:
                    Temperature: %s %s
                    Wind: %s %s
                    Forecast: %s
                    """, p.name(), p.temperature(), p.temperatureUnit(),
                    p.windSpeed(), p.windDirection(), p.detailedForecast());
        }).collect(Collectors.joining());

        return forecastText;
    }

    /**
     * 获取美国各州的天气警报
     */
    @Tool(description = "Get weather alerts for a US state. Input is Two-letter US state code (e.g. CA, NY)")
    public String getAlerts(@ToolParam(description = "Two-letter US state code (e.g. CA, NY") String state) {
        Alert alert = restClient.get()
                .uri("/alerts/active/area/{state}", state)
                .retrieve()
                .body(Alert.class);

        return alert.features()
                .stream()
                .map(f -> String.format("""
                        Event: %s
                        Area: %s
                        Severity: %s
                        Description: %s
                        Instructions: %s
                        """, f.properties().event(), f.properties().areaDesc(),
                        f.properties().severity(), f.properties().description(),
                        f.properties().instruction()))
                .collect(Collectors.joining("\n"));
    }
}
步骤5:构建和运行
构建项目
mvn clean package
创建启动脚本
创建 start-mcp-server.sh 文件:
#!/bin/bash

# JAR文件路径
JAR_FILE="target/spring-ai-mcp-weather-0.0.1-SNAPSHOT.jar"

# 检查JAR文件是否存在
if [ ! -f "$JAR_FILE" ]; then
    echo "错误: JAR文件不存在: $JAR_FILE"
    echo "请先运行: mvn clean package"
    exit 1
fi

# 检查Java是否安装
if ! command -v java &> /dev/null; then
    echo "错误: 未找到Java运行环境"
    echo "请安装Java 17或更高版本"
    exit 1
fi

echo "正在启动MCP服务器..."
java -jar "$JAR_FILE"
运行服务器
chmod +x start-mcp-server.sh
./start-mcp-server.sh
步骤6:MCP客户端配置
Claude Desktop配置
创建 mcp-config.json 文件:
{
    "mcpServers": {
        "weather": {
            "command": "java",
            "args": [
                "-jar",
                "全路径/spring-ai-mcp-weather-0.0.1-SNAPSHOT.jar"
            ],
            "env": {
                "JAVA_OPTS": "-Xmx512m"
            }
        }
    }
}
关键配置说明
1. STDIO传输配置
MCP使用STDIO进行通信,因此必须:
- 设置
spring.main.web-application-type=none - 禁用banner:
spring.main.banner-mode=off - 清空控制台日志格式:
logging.pattern.console=
2. Tool注解
@Tool:标记方法为可调用的工具@ToolParam:为参数提供描述信息- 方法必须是public且返回String类型
3. 依赖管理
- 使用Spring AI BOM管理版本
- 核心依赖:
spring-ai-starter-mcp-server - Web客户端:
spring-web
测试工具
可以通过以下方式测试MCP服务器:
- 直接调用:在WeatherService中添加main方法进行测试
- MCP客户端:配置Claude Desktop或其他MCP客户端
- 单元测试:编写Spring Boot测试用例
扩展功能
添加新工具
- 在服务类中添加带
@Tool注解的方法 - 在主应用类中注册ToolCallbackProvider
- 重新构建和部署
错误处理
@Tool(description = "Safe weather forecast with error handling")
public String getSafeWeatherForecast(double latitude, double longitude) {
    try {
        return getWeatherForecastByLocation(latitude, longitude);
    } catch (RestClientException e) {
        return "Weather service temporarily unavailable: " + e.getMessage();
    }
}
常见问题
- STDIO通信失败:检查是否正确禁用了banner和控制台日志
- 工具未注册:确保在主应用类中正确配置了ToolCallbackProvider
- API调用失败:检查网络连接和API密钥配置
总结
通过以上步骤,您已经成功创建了一个完整的Spring AI MCP服务端程序。该服务器提供了天气预报和天气警报两个工具,可以被任何支持MCP协议的AI助手调用。


 被折叠的 条评论
为什么被折叠?
被折叠的 条评论
为什么被折叠?
 到【灌水乐园】发言


