


SpringMvc用来代替展示层Servlet,均属于Web层开发技术
Servlet是如何工作的
1、导入Servlet依赖坐标
2、创建一个Servlet接口实现类,重写其中的所有方法
3、在Servlet实现类上加上@WebServlet注解,用来配置Servlet访问路径
4、启动Tomcat,浏览器输入Url访问该Servlet
SpringMvc是如何做的呢
1、导入相关依赖
<?xml version="1.0" encoding="UTF-8"?>
<project xmlns="http://maven.apache.org/POM/4.0.0"
         xmlns:xsi="http://www.w3.org/2001/XMLSchema-instance"
         xsi:schemaLocation="http://maven.apache.org/POM/4.0.0 http://maven.apache.org/xsd/maven-4.0.0.xsd">
    <modelVersion>4.0.0</modelVersion>

    <groupId>org.example</groupId>
    <artifactId>SpringMvc</artifactId>
    <version>1.0-SNAPSHOT</version>

    <packaging>
        war
    </packaging>
    <dependencies>
        <dependency>
            <groupId>javax.servlet</groupId>
            <artifactId>javax.servlet-api</artifactId>
            <version>3.1.0</version>
            <!--这里的范围是为了防止和Tomcat服务器产生冲突-->
            <scope>provided</scope>
        </dependency>
        <dependency>
            <groupId>org.springframework</groupId>
            <artifactId>spring-webmvc</artifactId>
            <version>5.3.0</version>
        </dependency>
    </dependencies>

    <properties>
        <maven.compiler.source>1.8</maven.compiler.source>
        <maven.compiler.target>1.8</maven.compiler.target>
    </properties>

    <build>
        <plugins>
            <plugin>
                <groupId>org.apache.tomcat.maven</groupId>
                <artifactId>tomcat7-maven-plugin</artifactId>
                <version>2.1</version>
                <configuration>
                    <path>/</path>
                </configuration>
            </plugin>
        </plugins>
    </build>

</project>
2、创建controller包,创建Usercontroller类
//声明控制层的bean的注解
@Controller
public class UserController {

    //设置当前操作的访问路径
    @RequestMapping("/save")
    //设置当前注解的返回值类型,将返回的内容整体作为响应给到外面
    @ResponseBody
    public String save(){
        System.out.println("springMvc is running");
        return "{'moudle':'springmvc'}";
    }
}
3、创建config包,加载SpringMvcConfig
//创建SpringMvc的配置文件,加载controller对应的baen
@Configuration
@ComponentScan("com.tsj.controller")
public class SpringMvcConfig {

}
4、在config包下,加载ServletContainerConfig
//定义一个Servlet容器启动的配置类,在里面加载Spring配置
public class ServletContainerInitConfig extends AbstractDispatcherServletInitializer {
    //加载SpringMvc容器配置的
    @Override
    protected WebApplicationContext createServletApplicationContext() {
        AnnotationConfigWebApplicationContext acac=new AnnotationConfigWebApplicationContext();
        acac.register(SpringMvcConfig.class);
        return acac;
    }
    //设置哪些请求归属于SpringMvc处理
    @Override
    protected String[] getServletMappings() {
        return new String[]{"/"};//这里表示所有的请求都归其进行处理
    }
    //加载Spring容器配置
    @Override
    protected WebApplicationContext createRootApplicationContext() {
        return null;
    }
}
5、配置Tomcat运行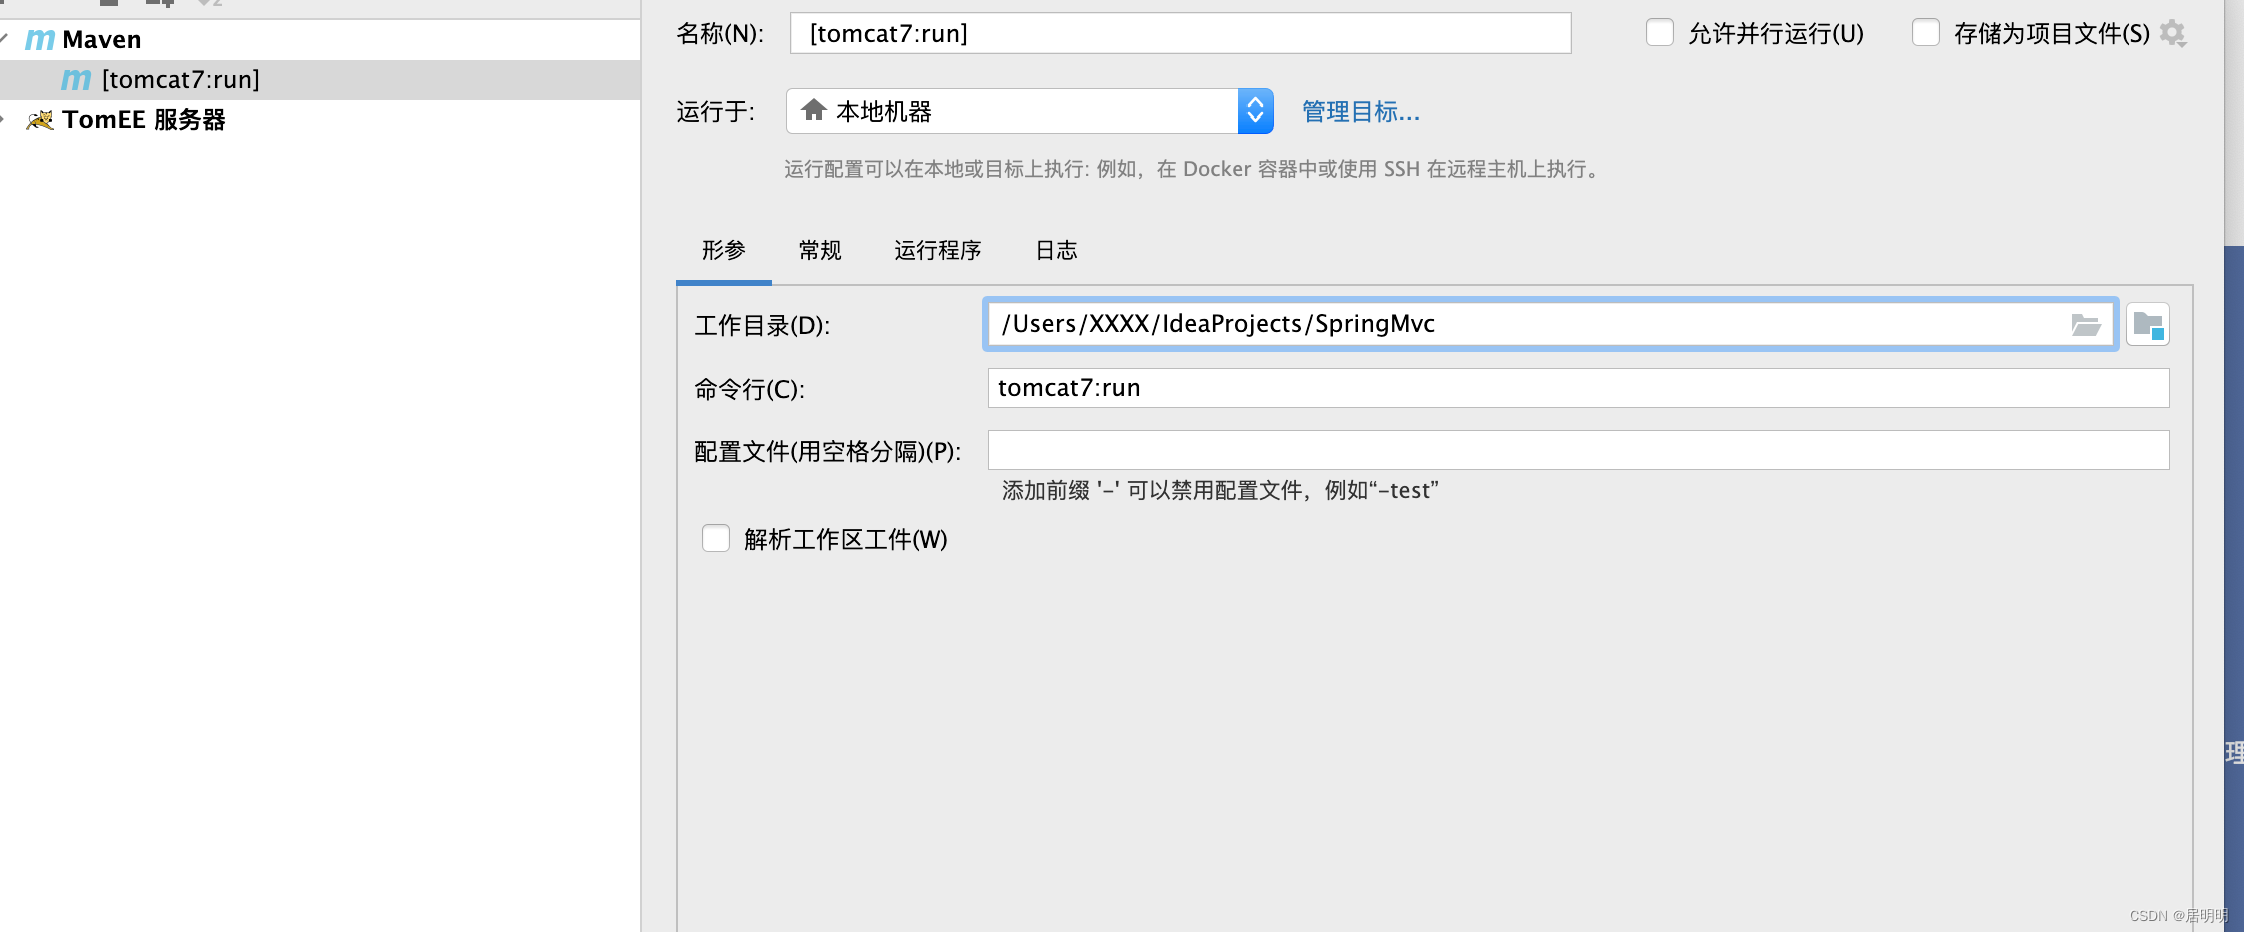
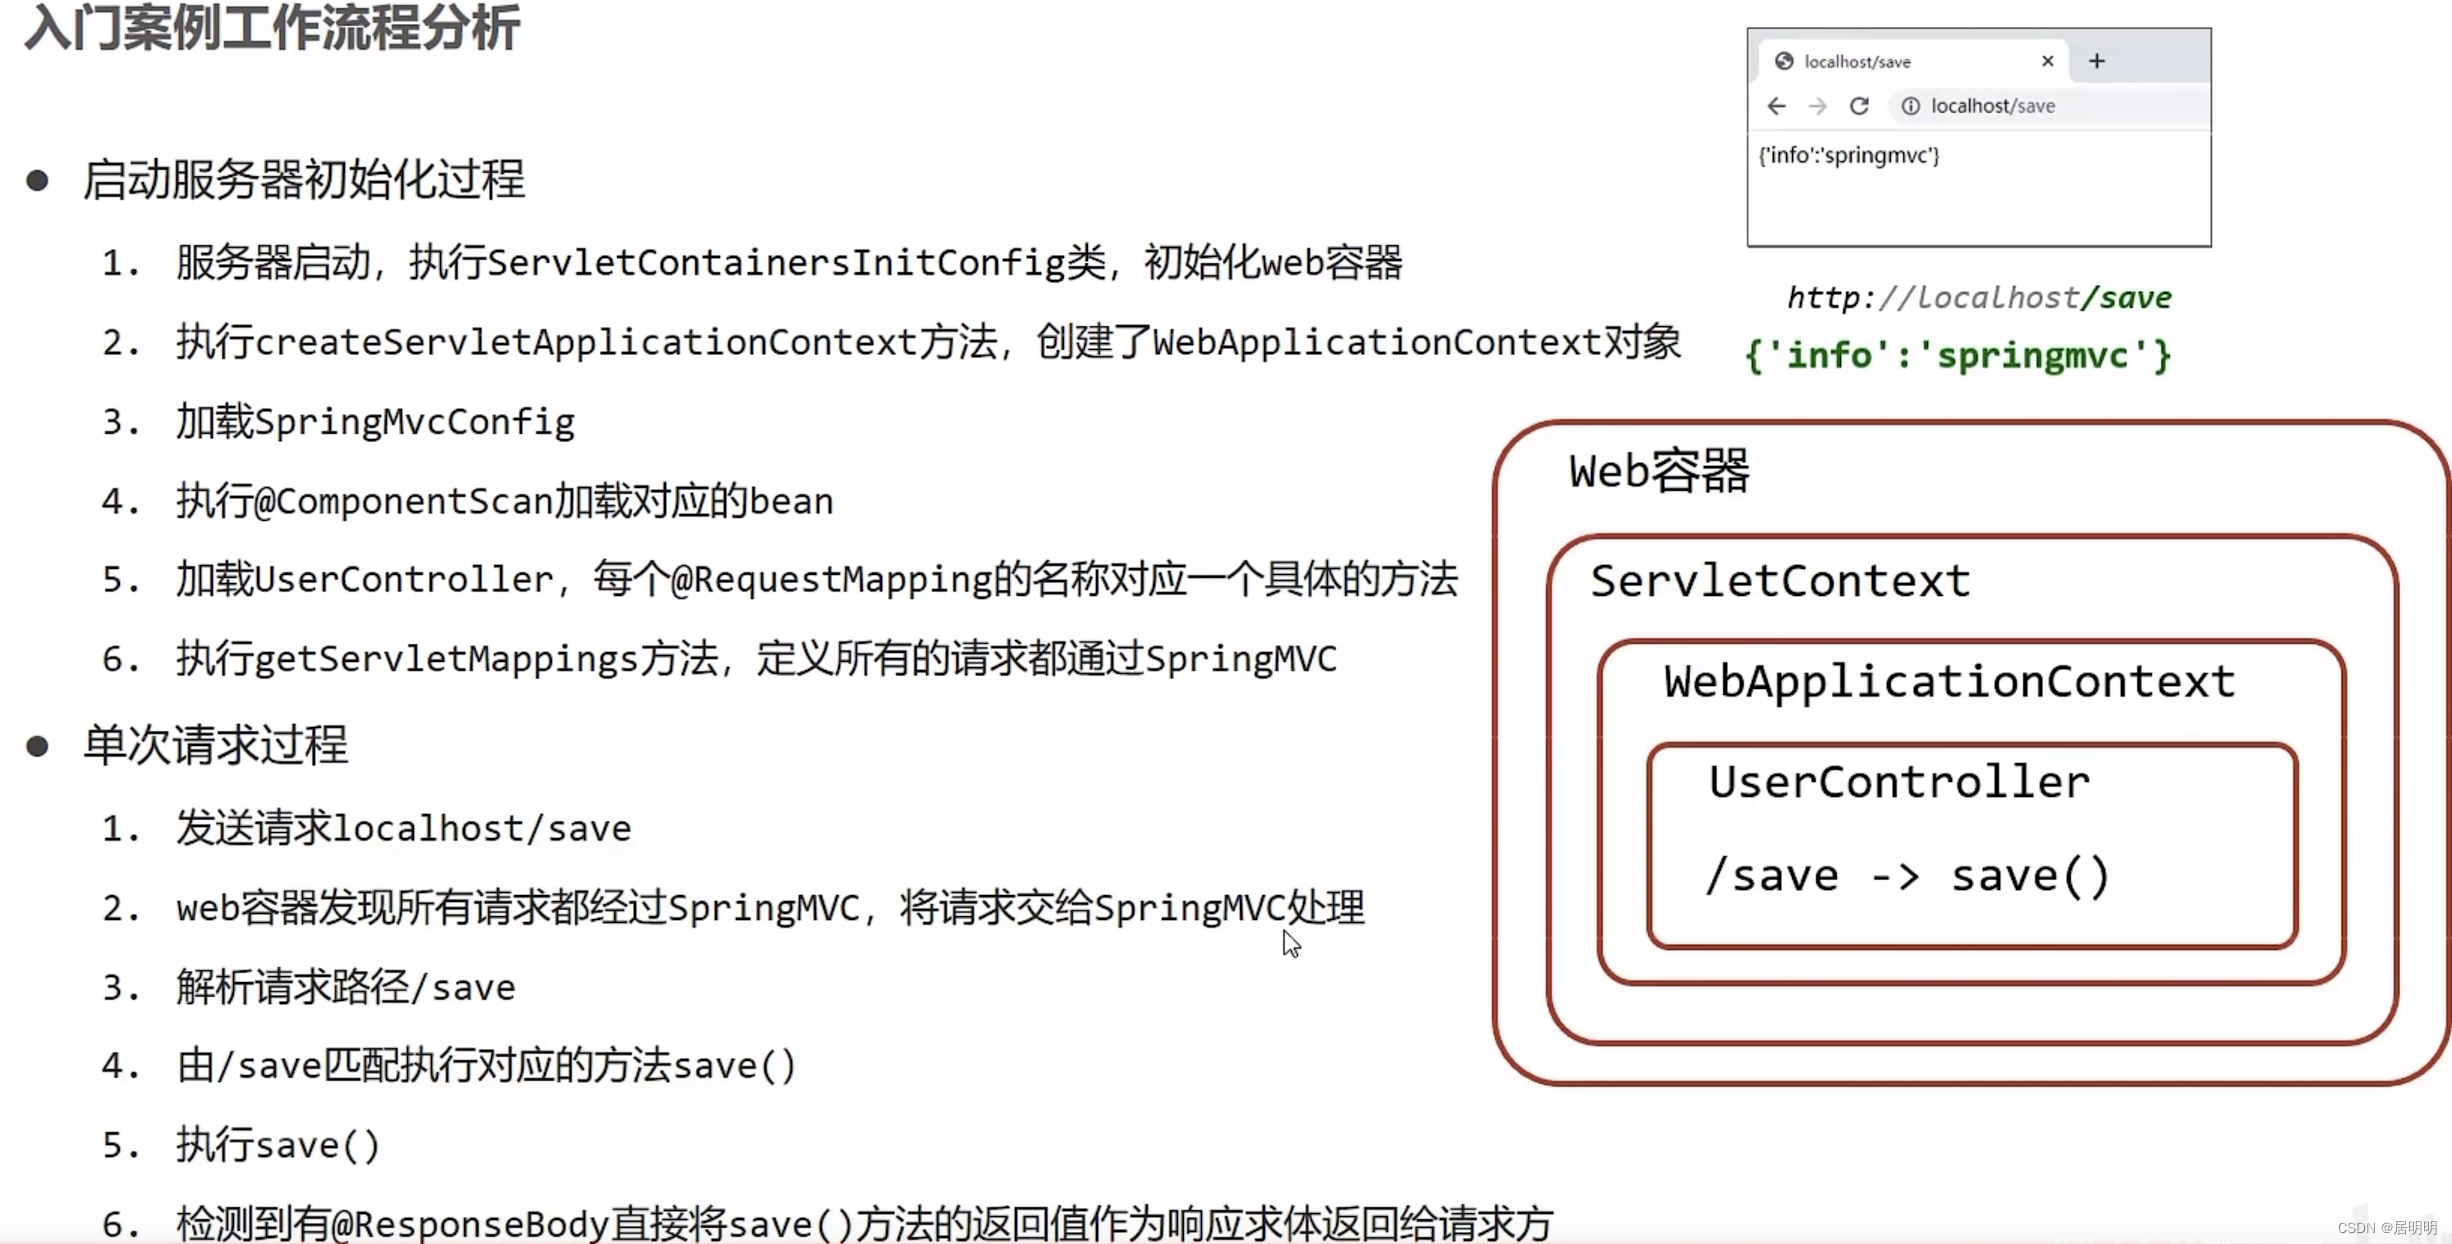
6、打开浏览器尝试输入
入门案例流程分析
Controller加载控制和业务bean加载控制
SpringMvc相关bean(表现层bean)
Spring控制的bean
业务bean(Service)
功能bean(DataSource等)
SpringMvc相关bean加载控制
SpringMvc加载的bean对应的包均在com.tsj.controller包内
Spring相关bean加载控制
方式一:Spring设置加载范围为com.tsj,并排除掉controller在内的bean
@ComponentScan(value = "com.tsj",
    excludeFilters = @ComponentScan.Filter(
            //按照注解进行过滤
            type = FilterType.ANNOTATION,
            classes = Controller.class
    )
)
方式二:Spring设置加载范围更加精准,例如Service包,Dao包等
@ComponentScan({"com.tsj.service","com.tsj.dao"})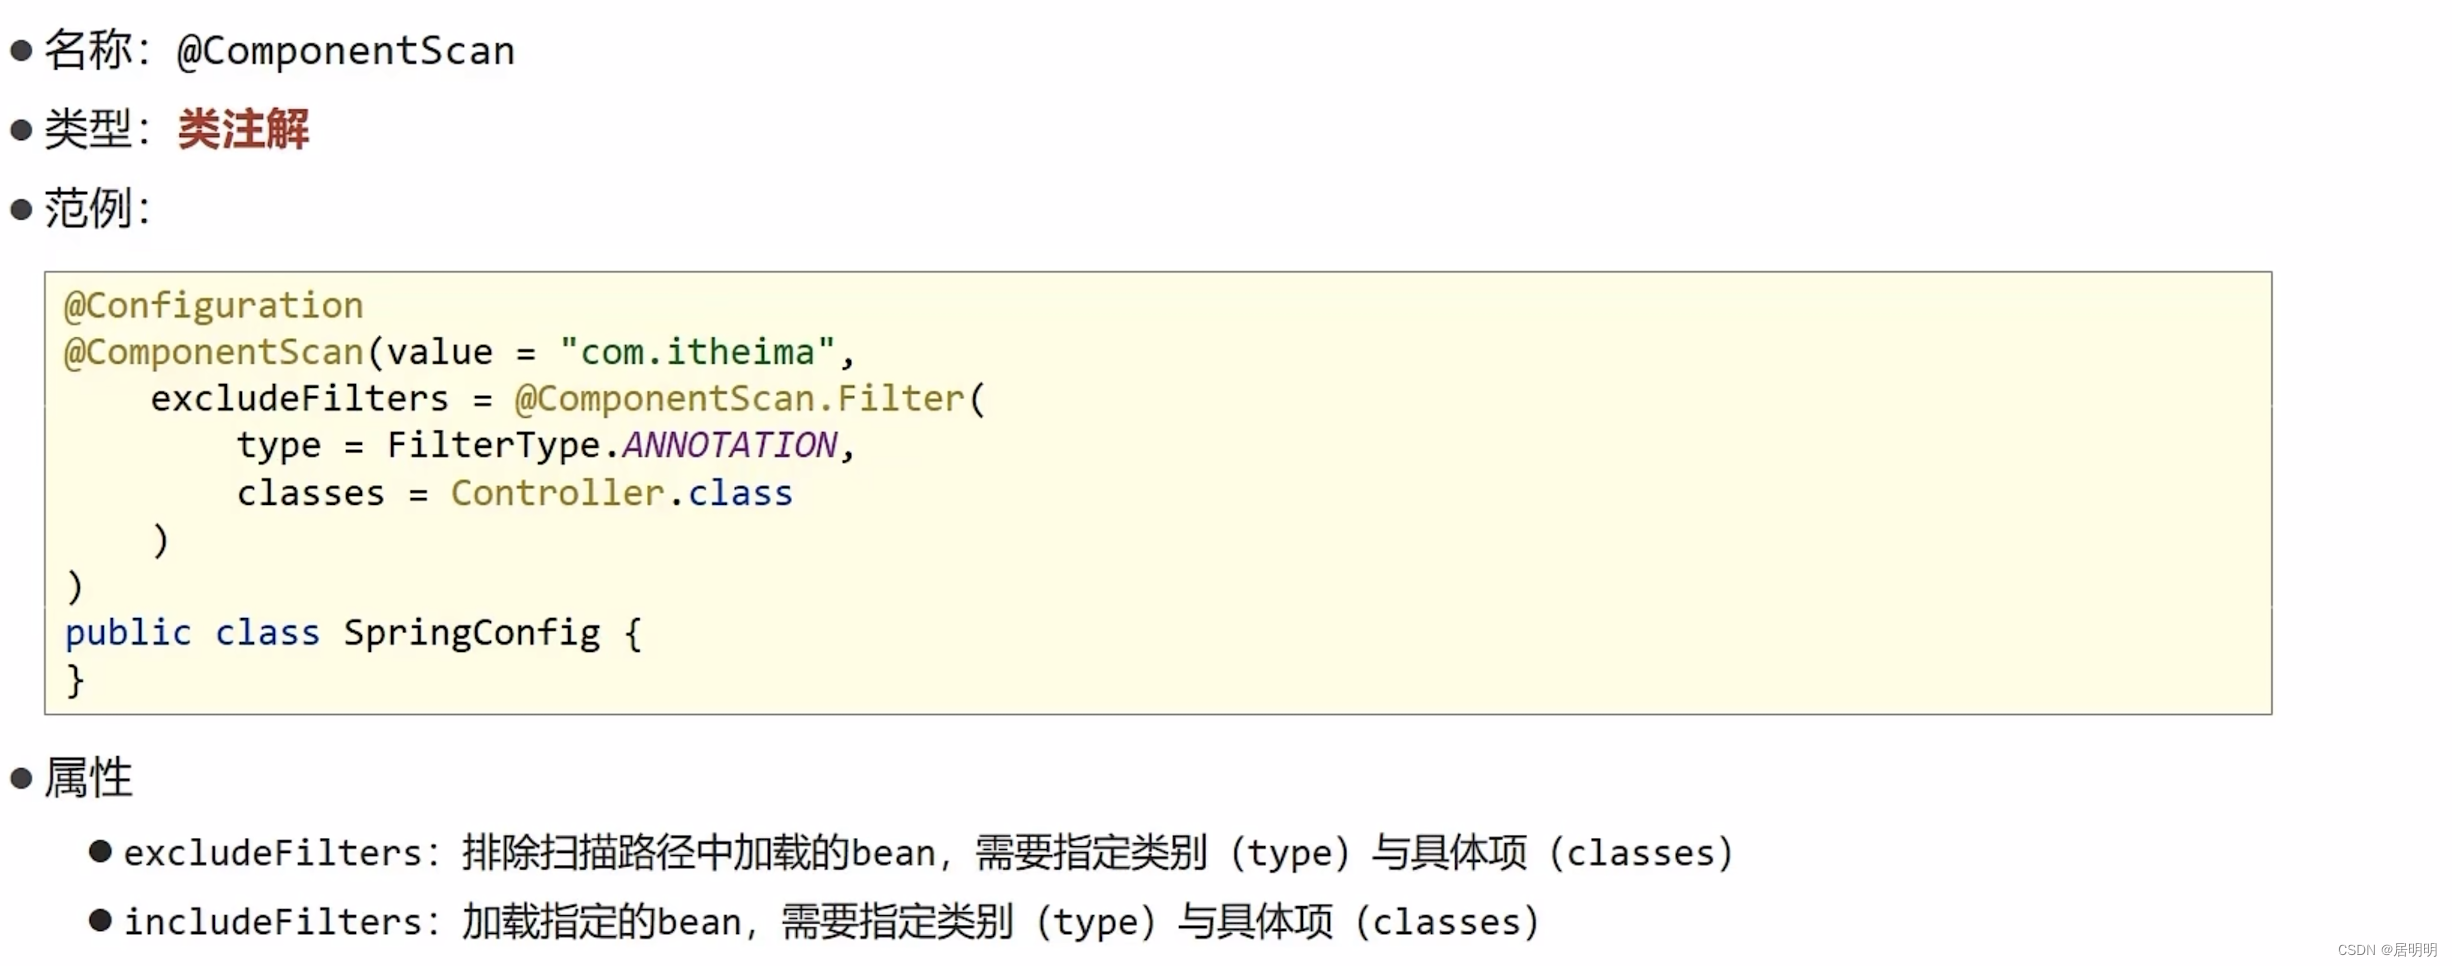
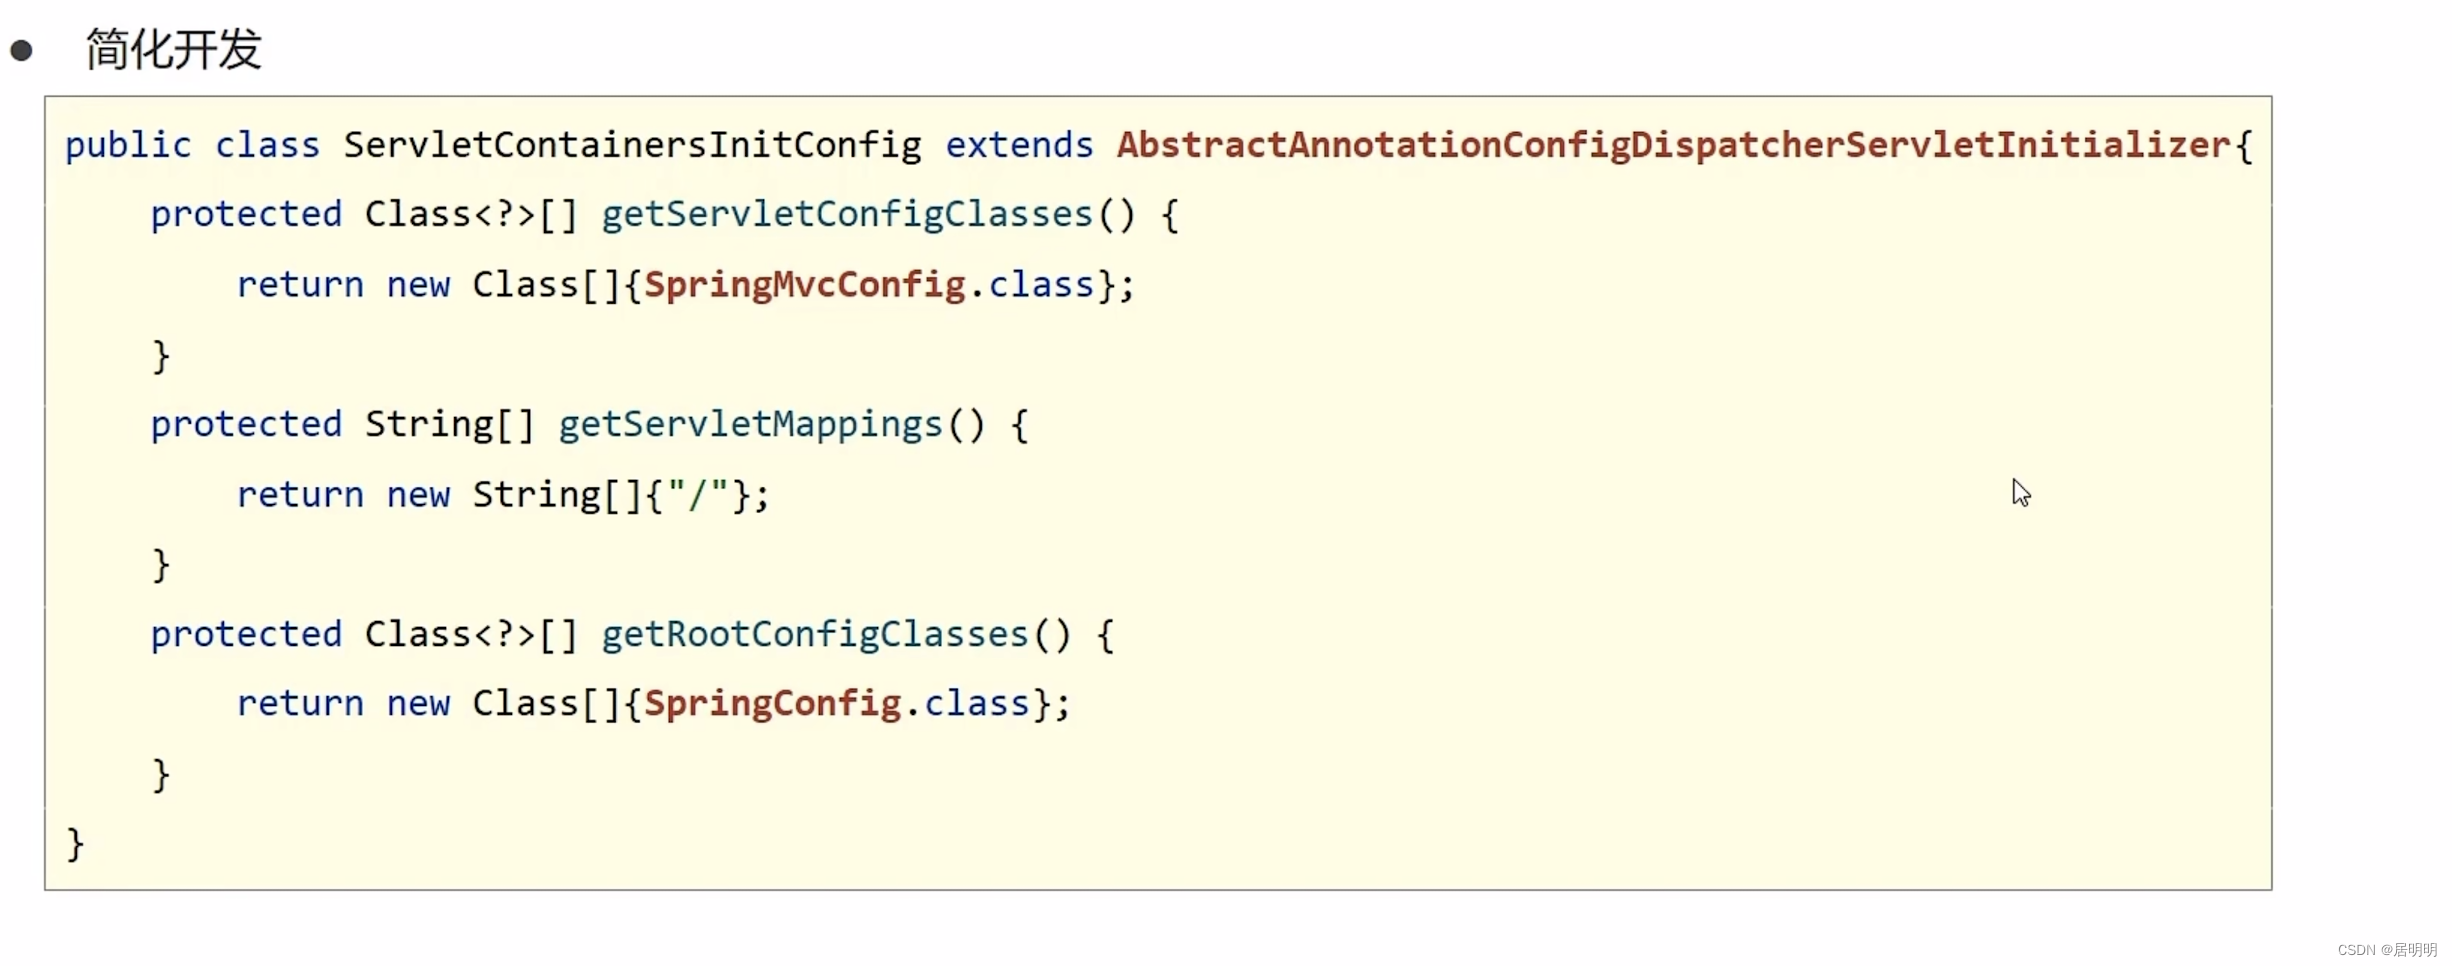
简化开发格式


 480
480


 被折叠的 条评论
为什么被折叠?
被折叠的 条评论
为什么被折叠?
 到【灌水乐园】发言


